How To Make A 3D Heart Framed Artwork
Make the cutest 3D heart framed artwork that will look so cute on a wall or bookshelf with this easy step-by-step tutorial. From drawing and cutting to making the hearts and patterns, I’ll teach you a simple and easy way to do this fun and artistic project you’ll love.
I’ve wanted to share this project with you guys for a while now and I’m finally putting this guide together.
This small, cute, and delightful project is great for anyone who wants to be a little bit more creative and decorate their space or you could even gift it to a friend or loved one.
This framed artwork is also so easy to make and you only need a few supplies to get started.
I’ve chosen a red, yellow, blue, and orange color palette but you can go with any colored paper you want or have on hand.
Ready? Let’s begin.
Supplies
- Art Frame
- Scissors
- Paper
- Glue
Instructions
Remove The Glass
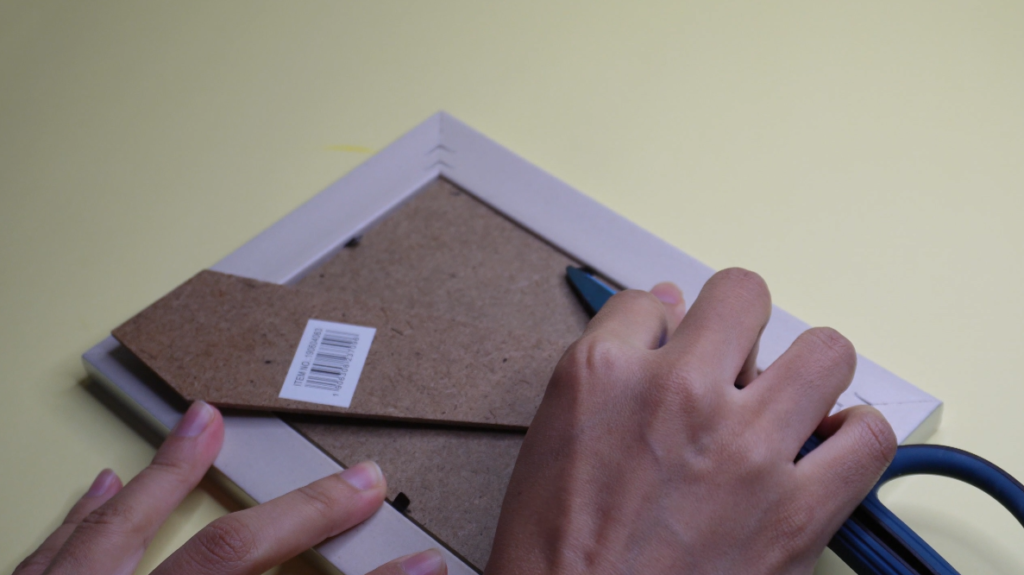
Carefully open the back of the art frame using a nail file or scissors.
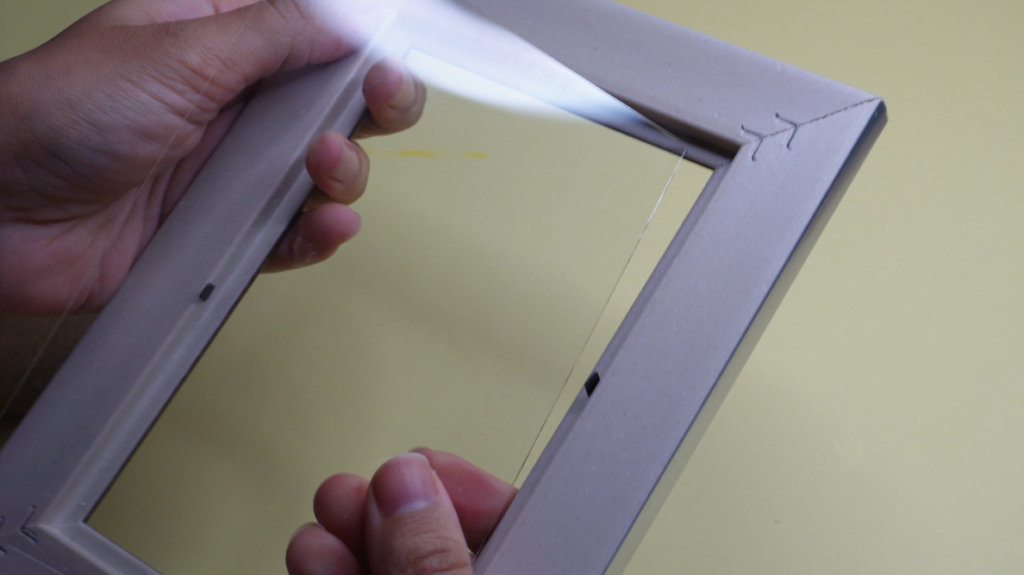
For this tutorial, we won’t need the glass frame. Remove the glass from the frame and set it aside somewhere.
Create The Hearts
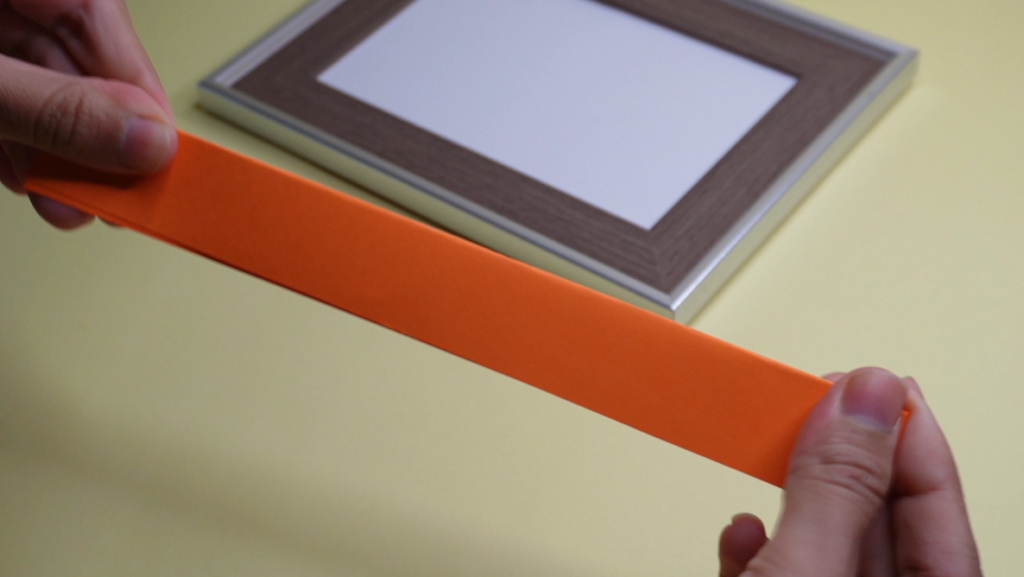
Cut a thin strip of orange-colored paper and fold it into half.
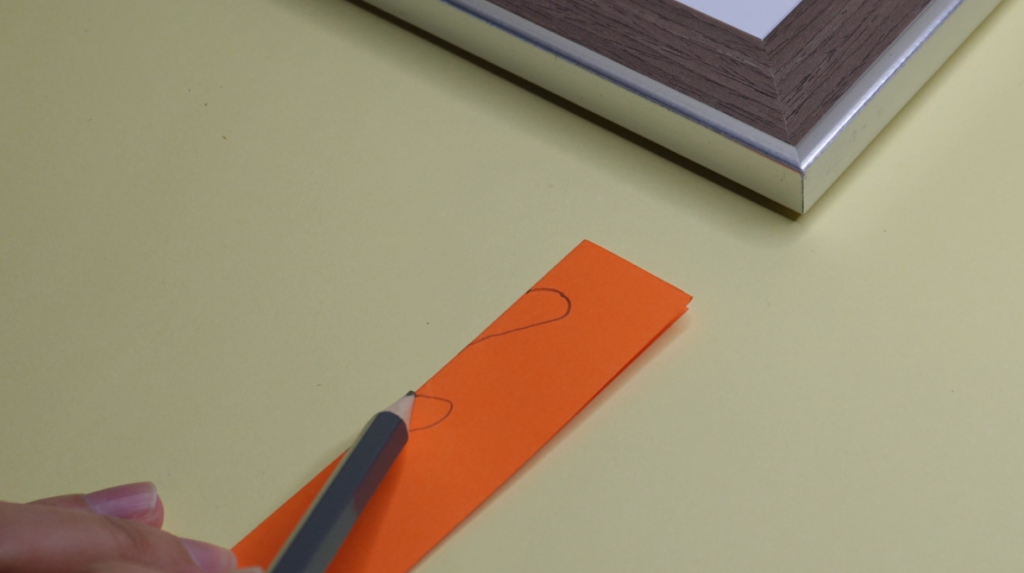
Draw half a heart on the folded side of the strip. Depending on the size of the strip, you should be able to fit at least 4 heart shapes.

Cut the strip into individual pieces and then cut along the line you just drew.
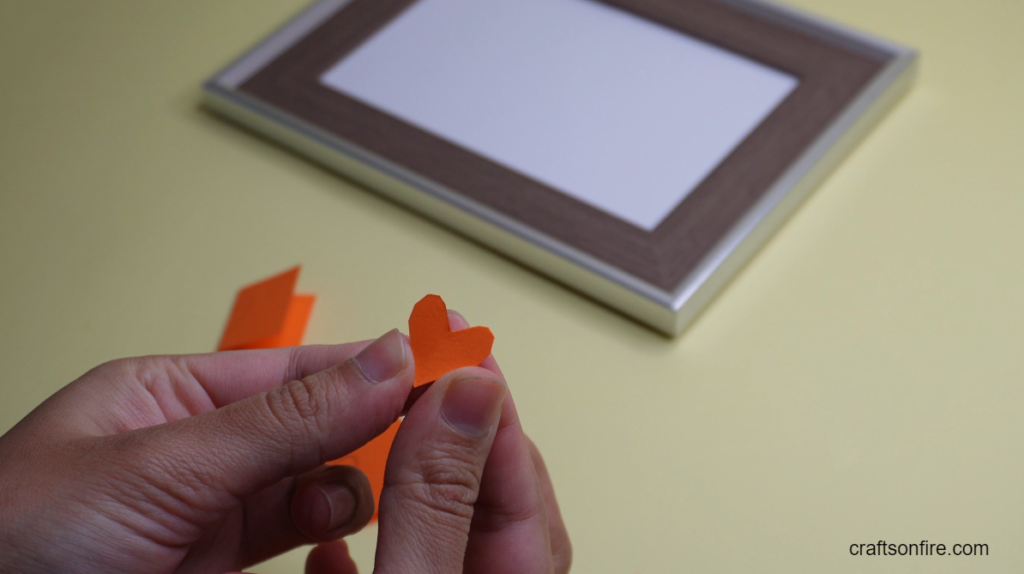
Unfold the paper and should get a lovely heart shape. Repeat this process as many times as needed to create more hearts on different colored paper.
Glue The Hearts
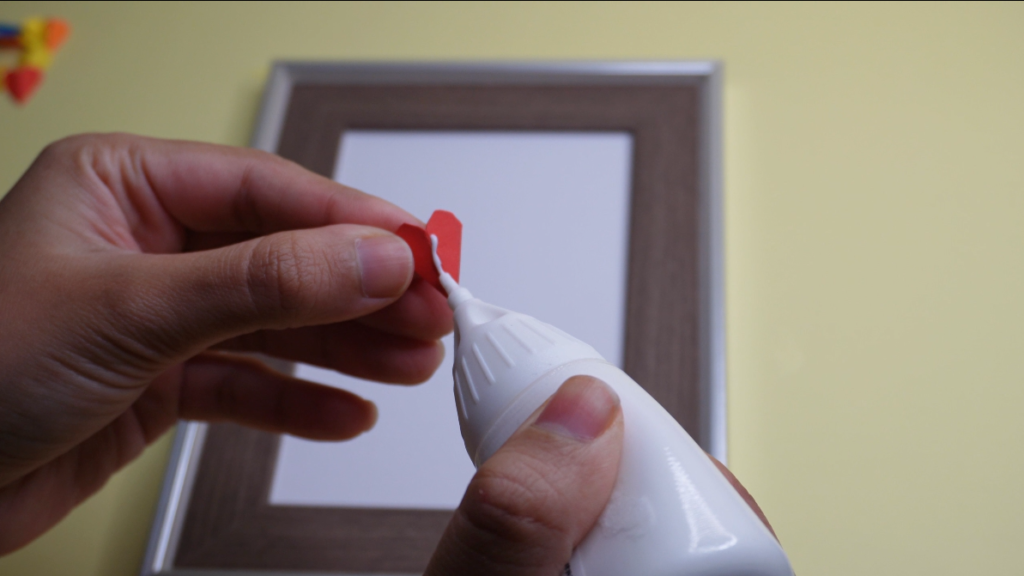
Apply a thin line of white glue to the back of the heart on the fold line.
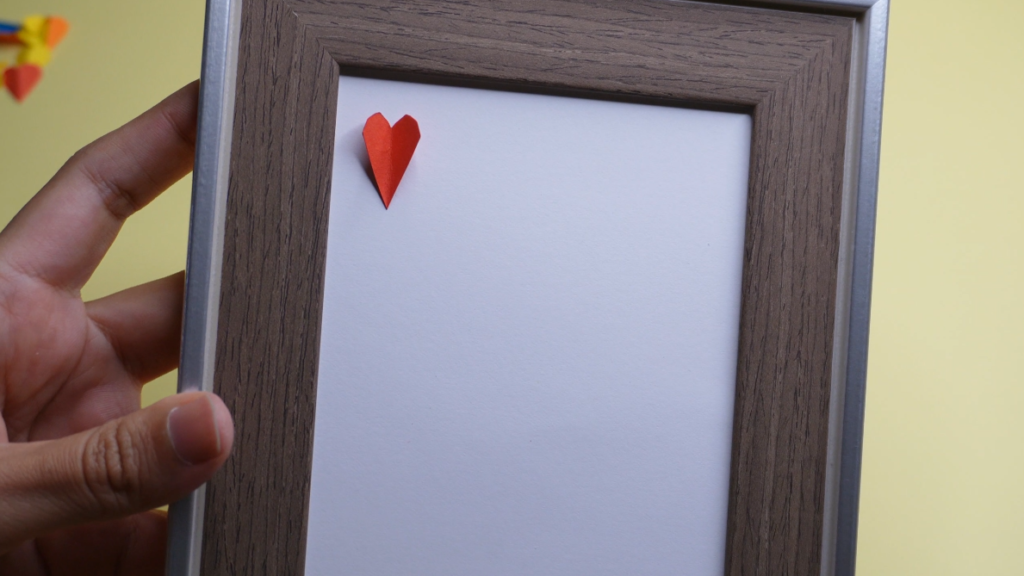
Paste the heart at the top of the art frame. Be sure that the sides of the heart stick out slightly and are not glued flat to the paper.
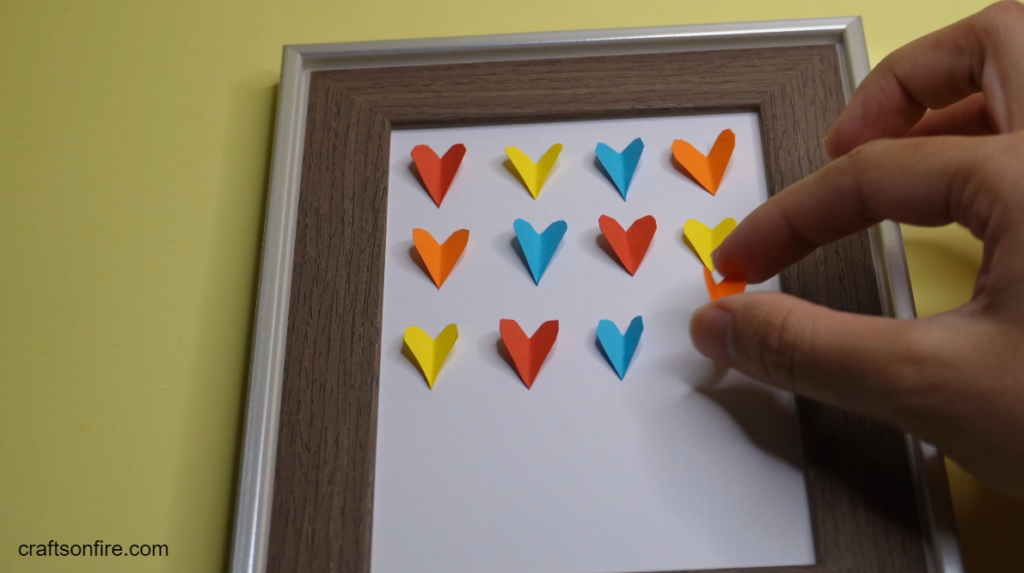
Continue gluing all the heart pieces into a neat row, alternating the colors, as shown above, to create this seamless and pretty pattern.
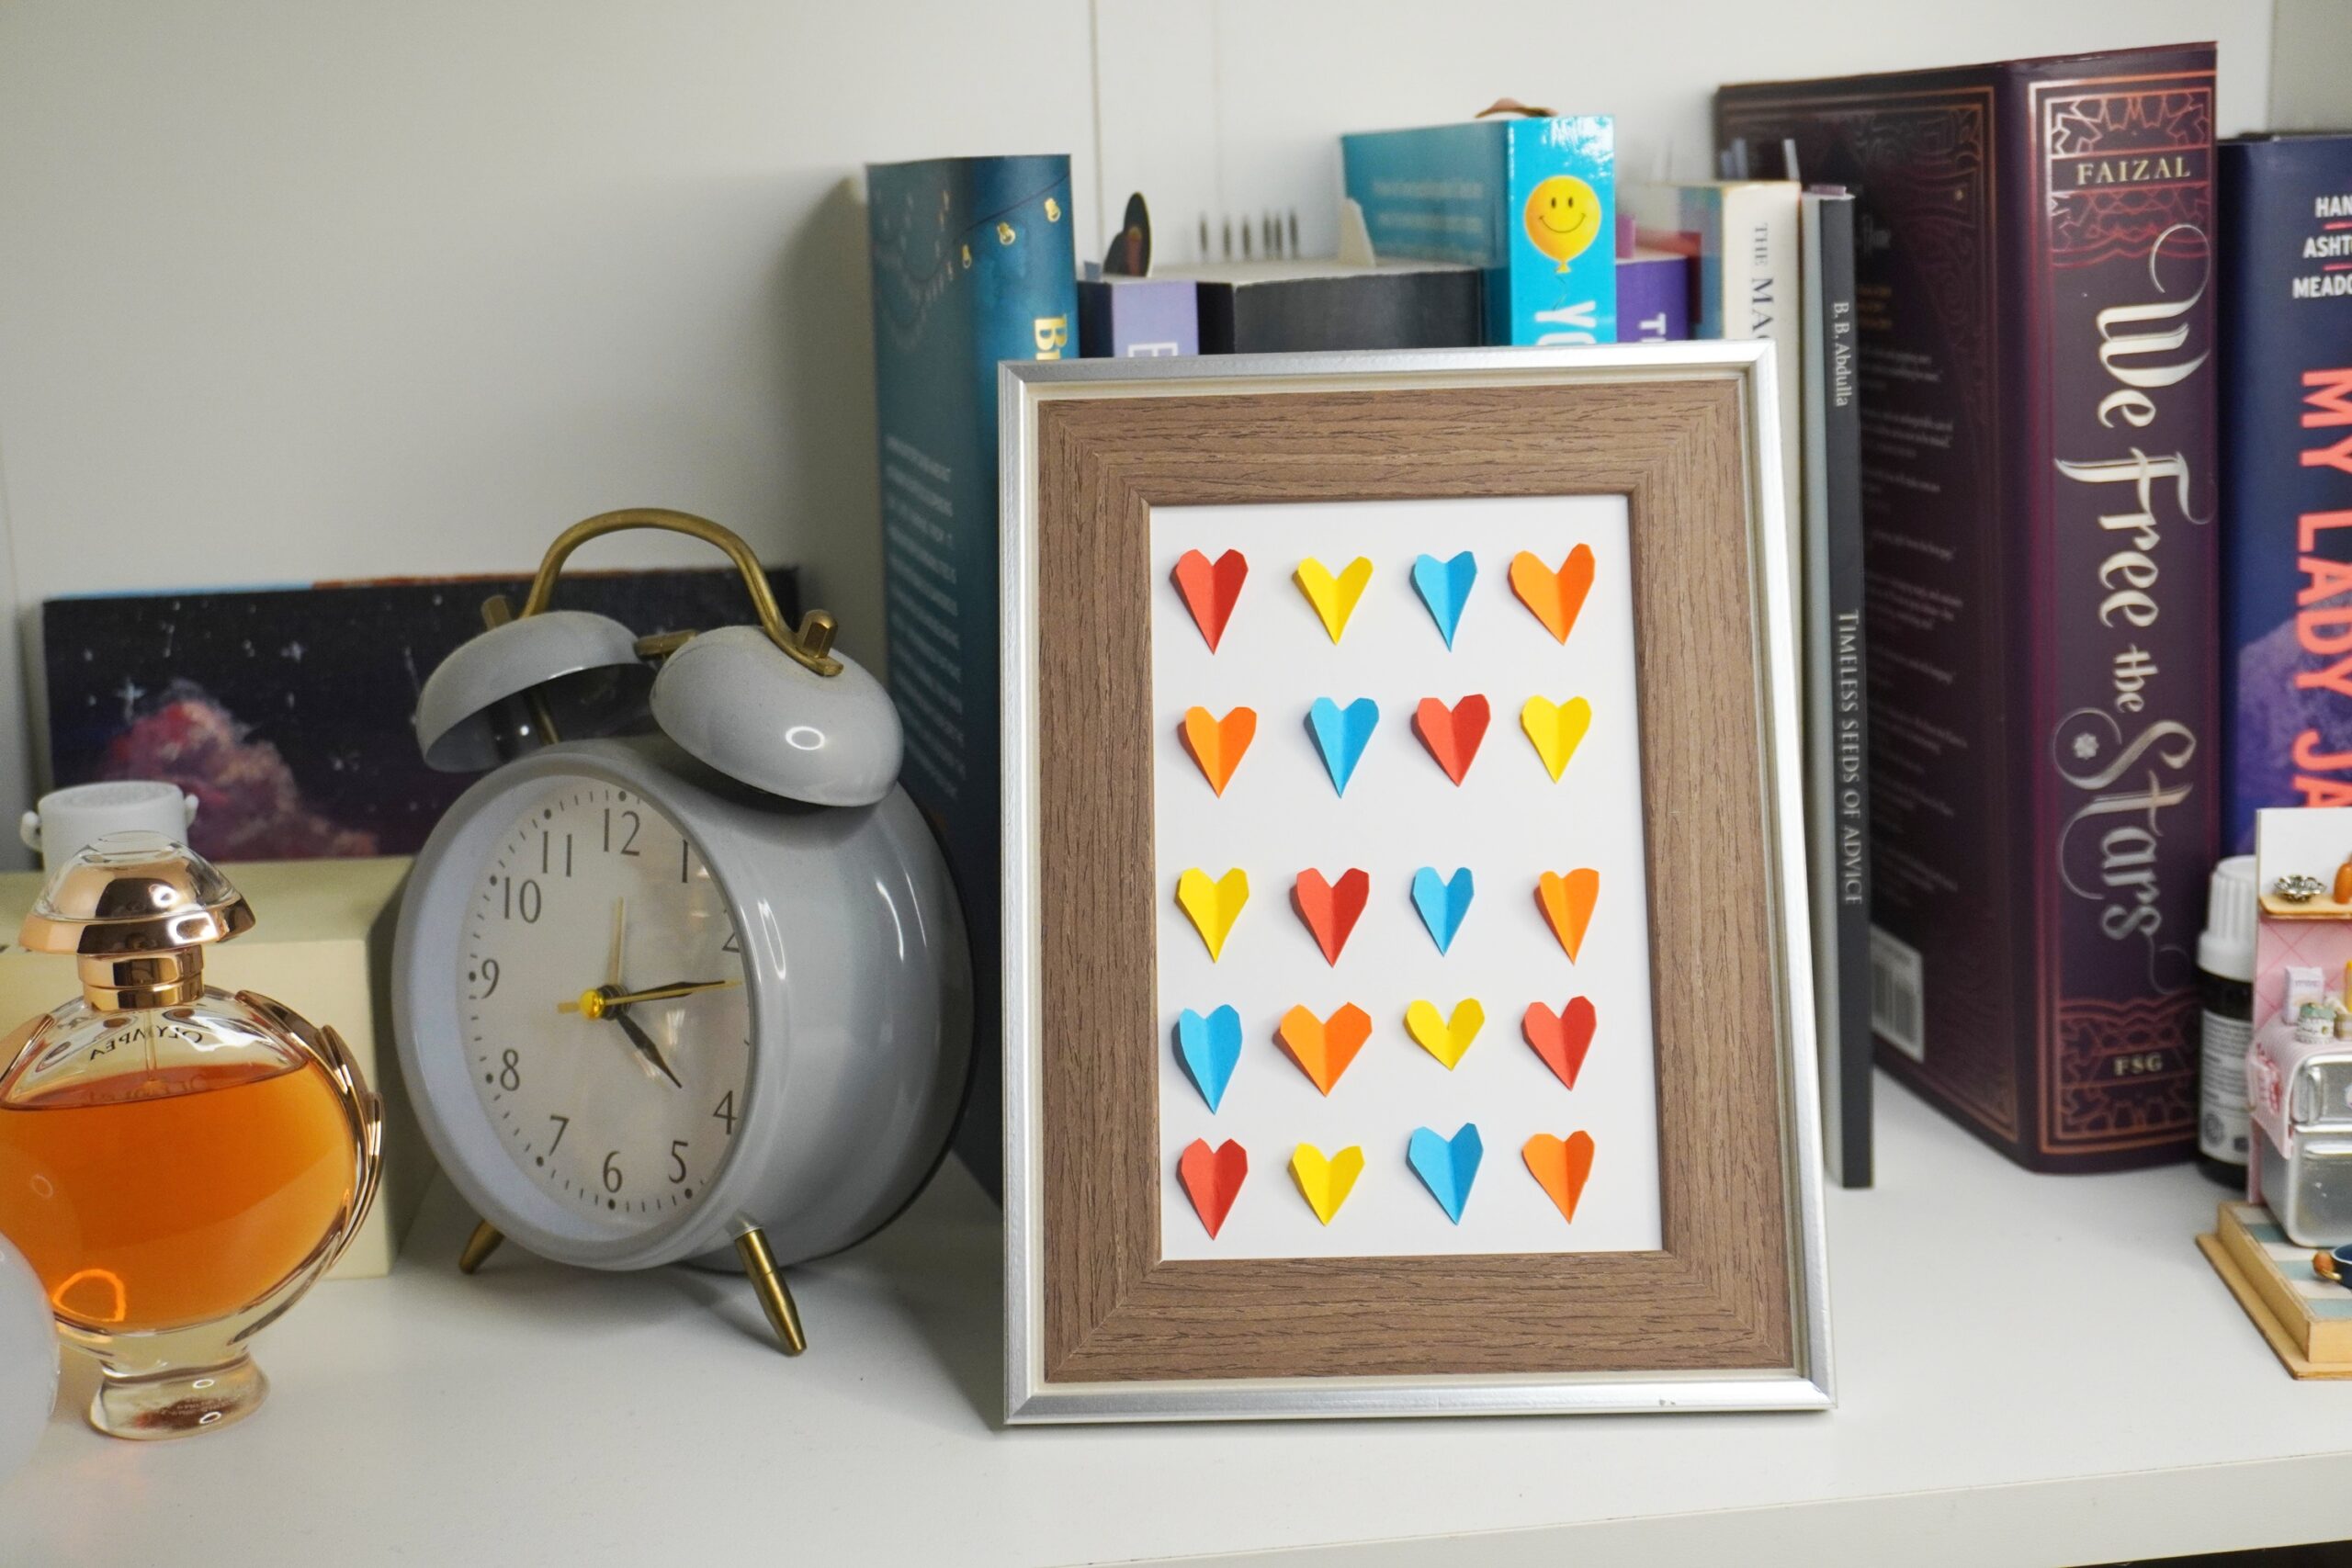
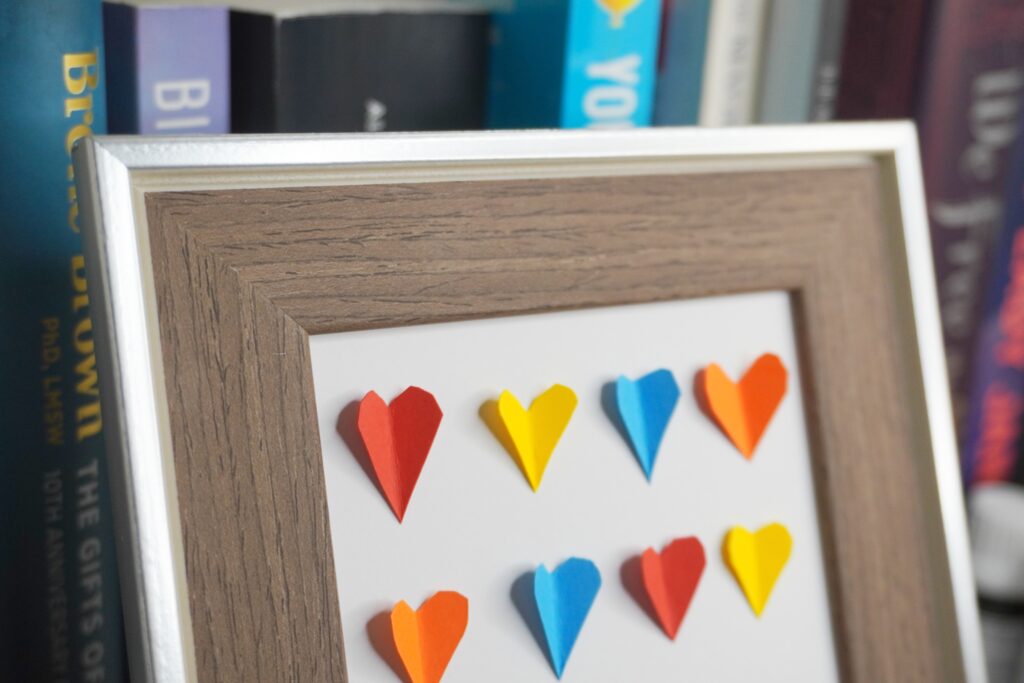
Completed Project
Here’s what the completed art frame looks like:
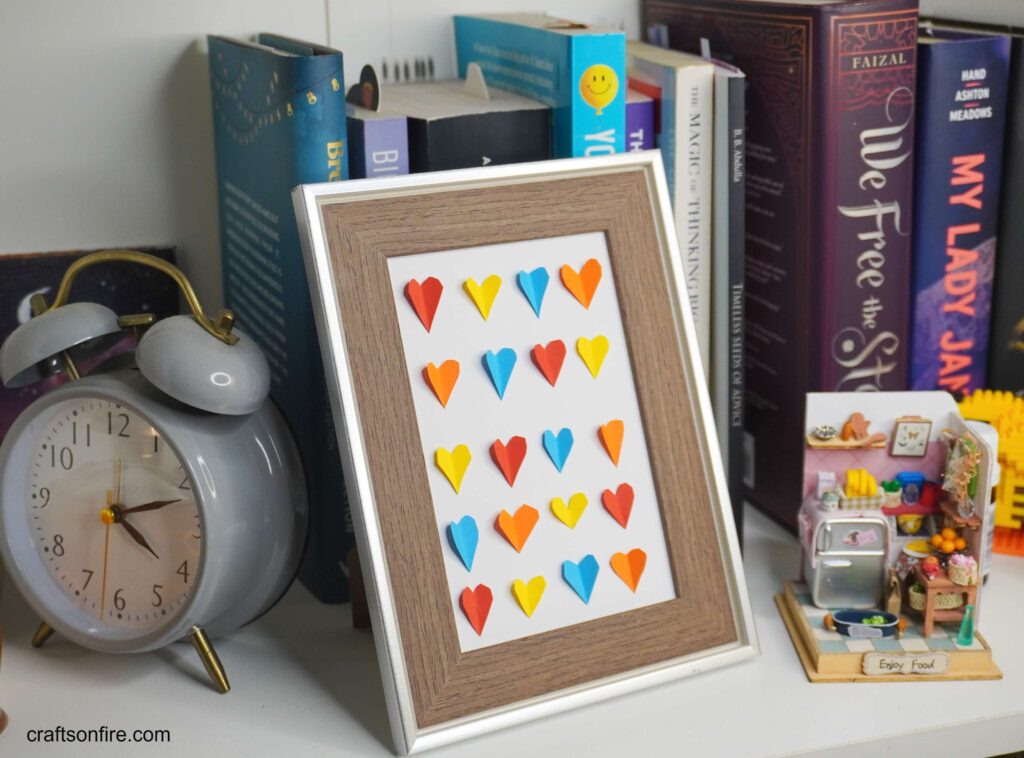
As you can see, this heart art pops out quite nicely and immediately grabs your attention.
It’s just a cute little piece to add to your bookshelf or wall decor but makes a huge difference to the space.
All in all, I absolutely LOVED this project.
I had a lot of fun making this 3D Heart Framed Artwork and I look forward to creating a different version of this art frame soon.
Possibly in a new pattern or color scheme in a larger frame!
You can use any color frame but perhaps a white frame will help the hearts stand out more. It’s totally up to you.
Watch The Video Tutorial
I’ve also done a complete video version of this tutorial if you’d like to see me make this heart framed artwork from start to finish. You can watch the process below:
Since this project is so easy and cute, I do recommend giving this one a try. I promise it will be so worth spending every minute on this craft.
Here are a few more cute craft ideas you can try next:
- DIY Pom Pom Rope Basket
- 3 Easy DIY Popsicle Stick Bookmarks
- How I Decorated A Glass Jar With Clay Flowers
See you in the next one!