DIY Patchwork Bookmark Using Half Square Triangles

This may be one of my favorite fabric bookmarks that I have sewn so far. The colors, design, and final result have definitely exceeded my expectations!
If you enjoy making fabric bookmarks, then you’ll love this patchwork design featuring half square triangles.
In this tutorial, I’ll first show you how to join the plain and patterned squares to create this patchwork design, and then you’ll learn how to put it all together.
I also added a small, cute label at the top of the bookmark, but feel free to customize it with your own choice of embellishments—or skip the label entirely if you prefer!

This patchwork bookmark is the perfect sewing project if you’re looking for something quick and easy to make. Plus, you can whip up several of these fabric bookmarks in one go—it’s that simple!
So, follow this sewing guide, and you’ll have your very own patchwork fabric bookmark ready in no time!
Gather your supplies, and let’s get started.
how To Sew A Patchwork Bookmark
Supplies
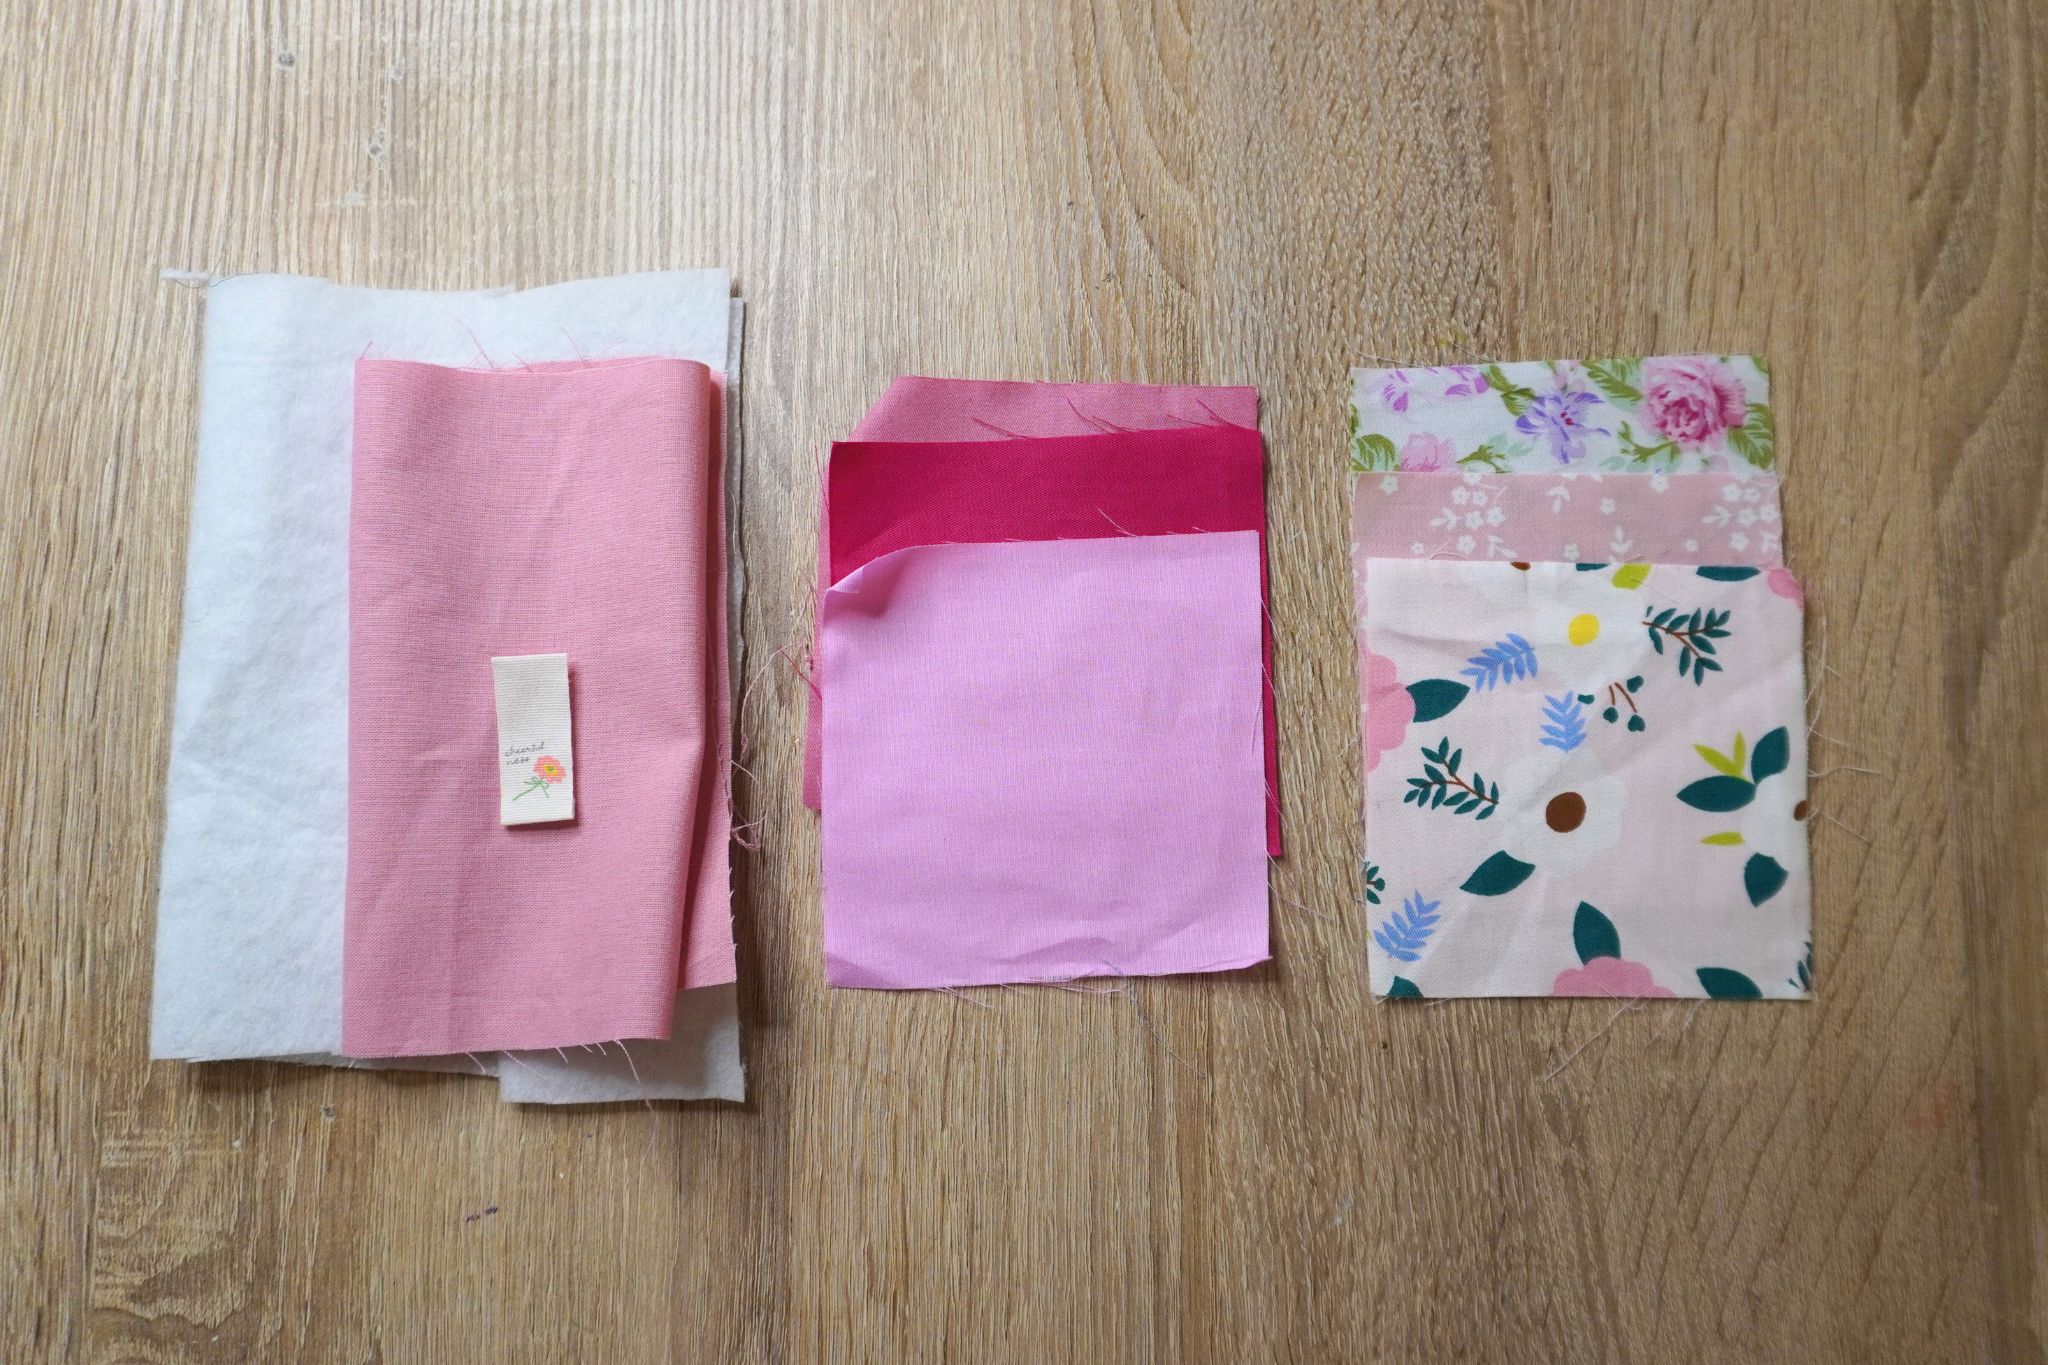
- 6 Fabric Squares (3 Patterned + 3 Plain) – 10 cm x 10 cm / 3.94 inches x 3.94 inches
- Cotton Fabric
- Fabric Batting/Interfacing
- Rotary cutter or scissors
- Sewing machine
- Iron and ironing board
(For smaller sized bookmarks, use 7 cm x 7 cm / 2.76″ x 2.76″ squares instead and a 0.5 cm seam allowance when stitching.)
Video Tutorial
Instructions
Step 1
Begin by drawing a diagonal line from one corner to the opposite corner on each of the 3 patterned squares. Then, measure 0.5 cm from the first line and draw a second line parallel to it.
Next, pair each patterned square with one of the plain fabric squares, placing the right sides together.
Sew along the second marked line.

Step 2
Cut along the unstitched marked line (diagonal), and trim off any excess fabric from the sides.
Carefully press the sewn piece with an iron to flatten the seams.
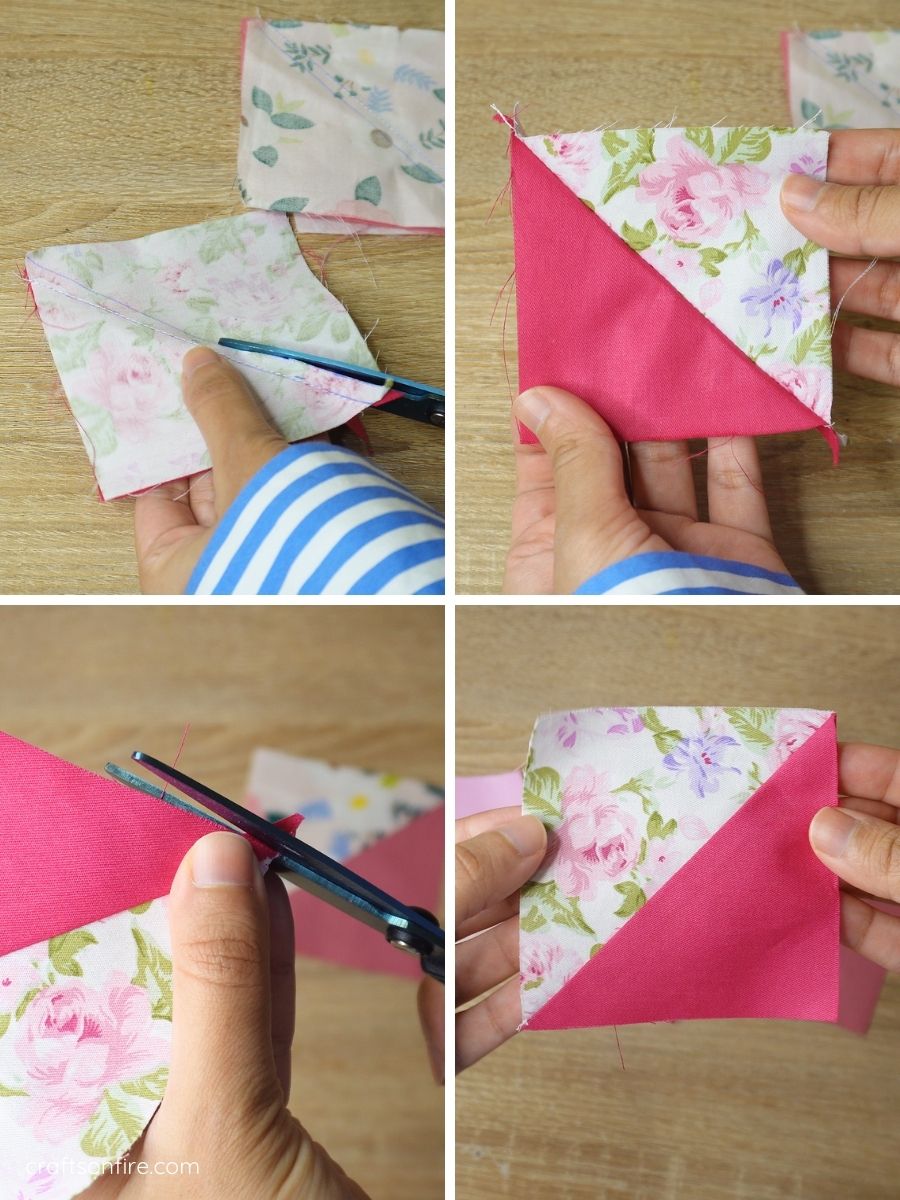
You should now have a vibrant patchwork square with one solid piece and one patterned piece.
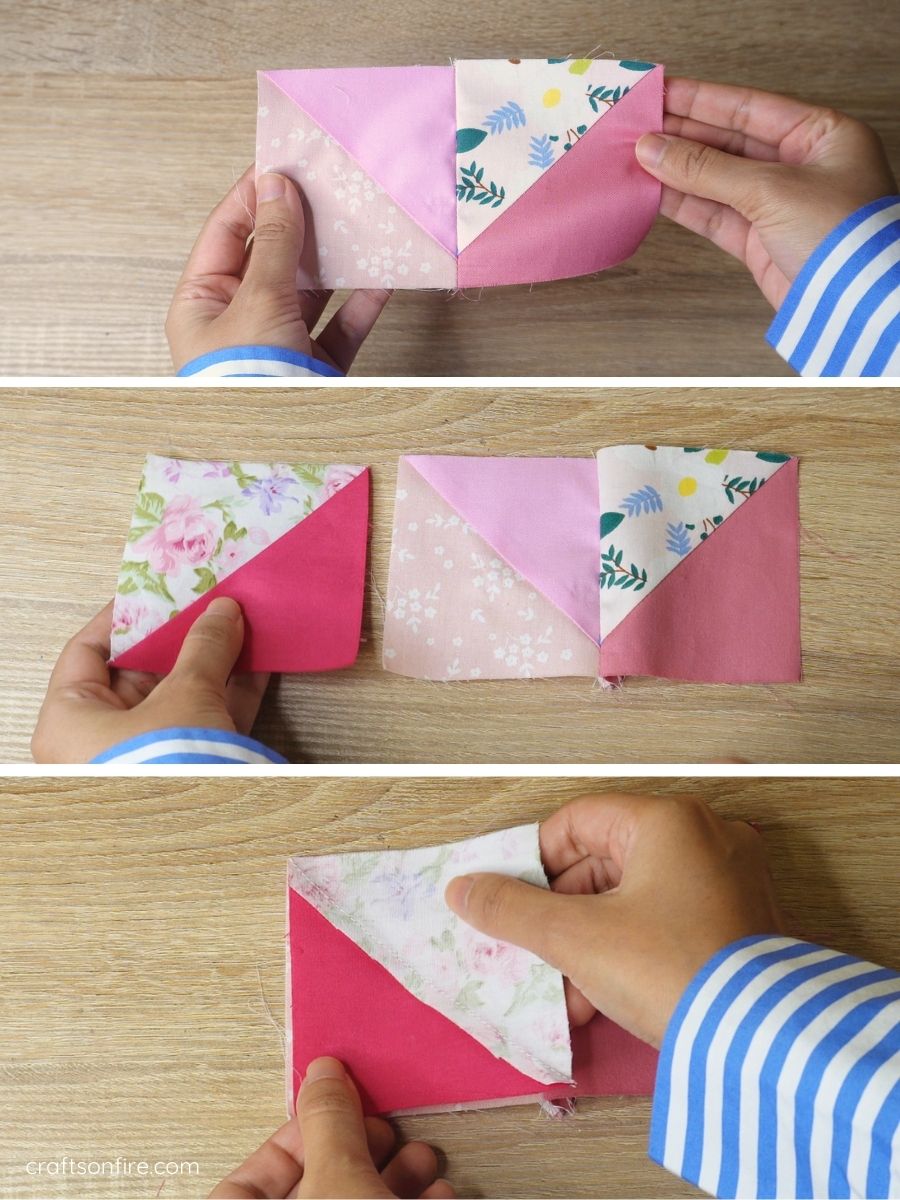
Step 3
Continue with the remaining two patterned and plain squares to complete a total of three patchwork squares.
Lay out the 3 patchwork squares as shown below.
Then, pair the first two patchwork squares together (right sides facing in) and sew them with a 1 cm seam allowance.

Step 4
Open the first two pieces and then add the third patchwork square to complete the patchwork piece.
Step 5
Iron the patchwork piece, flattening the seams as you go.
Place the patchwork piece onto the interfacing or batting.
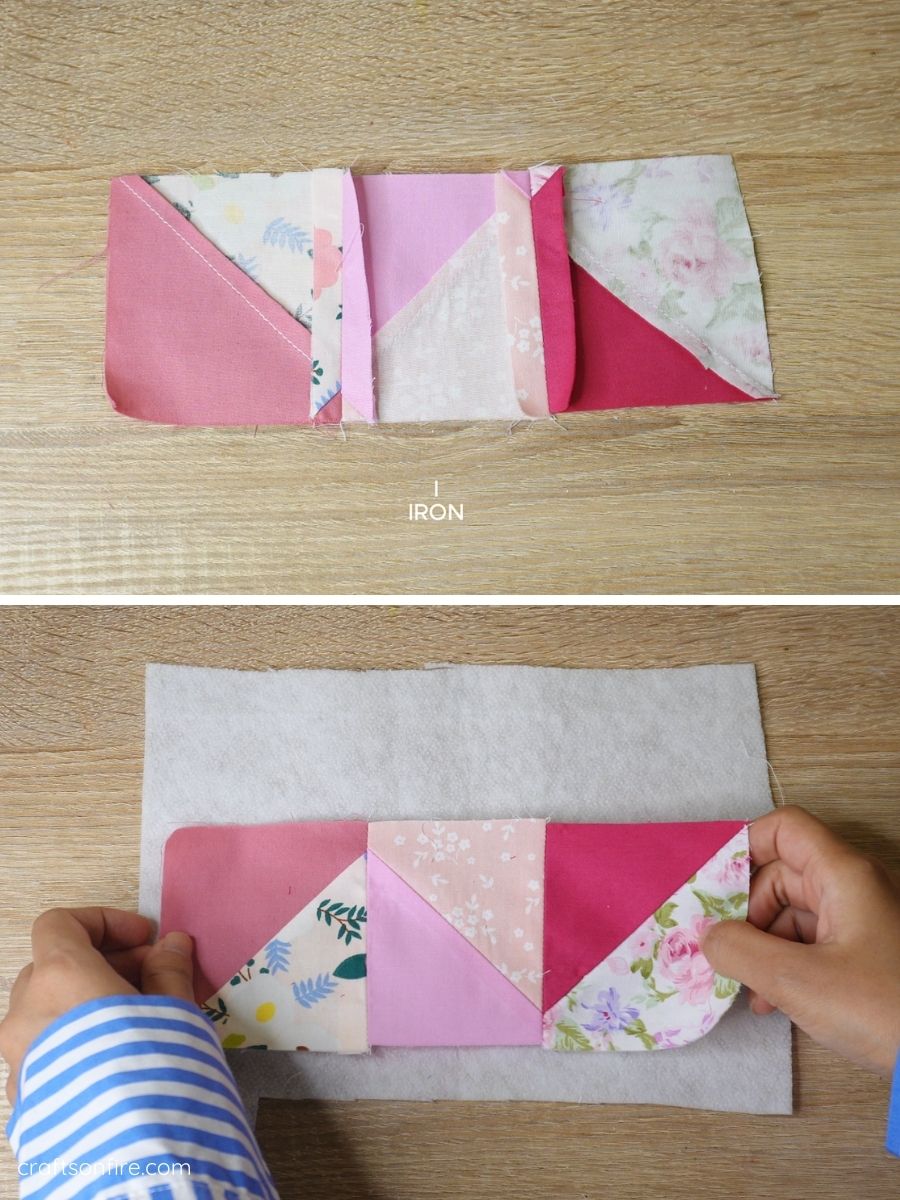
Step 6
Cut the interfacing or batting to match the size of your patchwork piece.
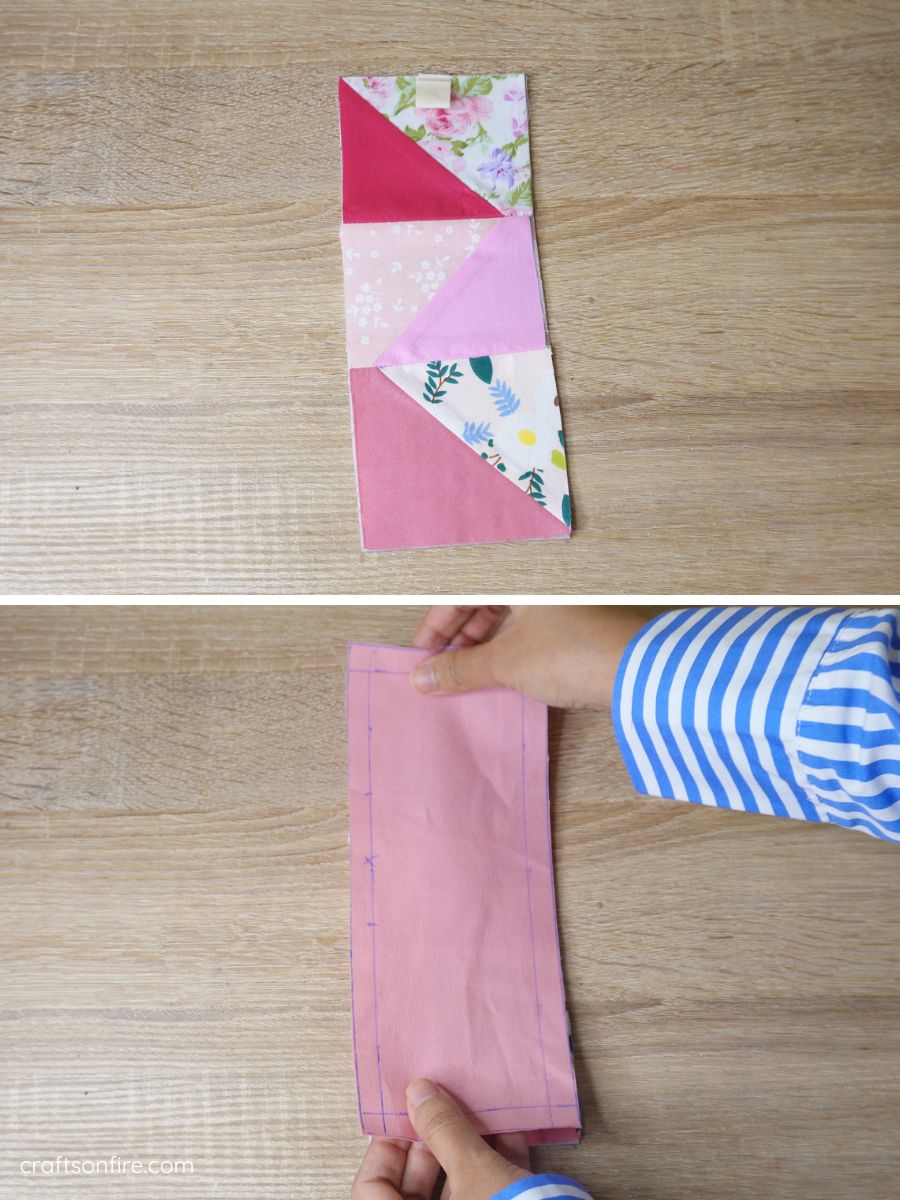
If you’d like to add a label to your bookmark, fold it in half and place it at the top of the patchwork piece with the right sides facing inward.

Step 7
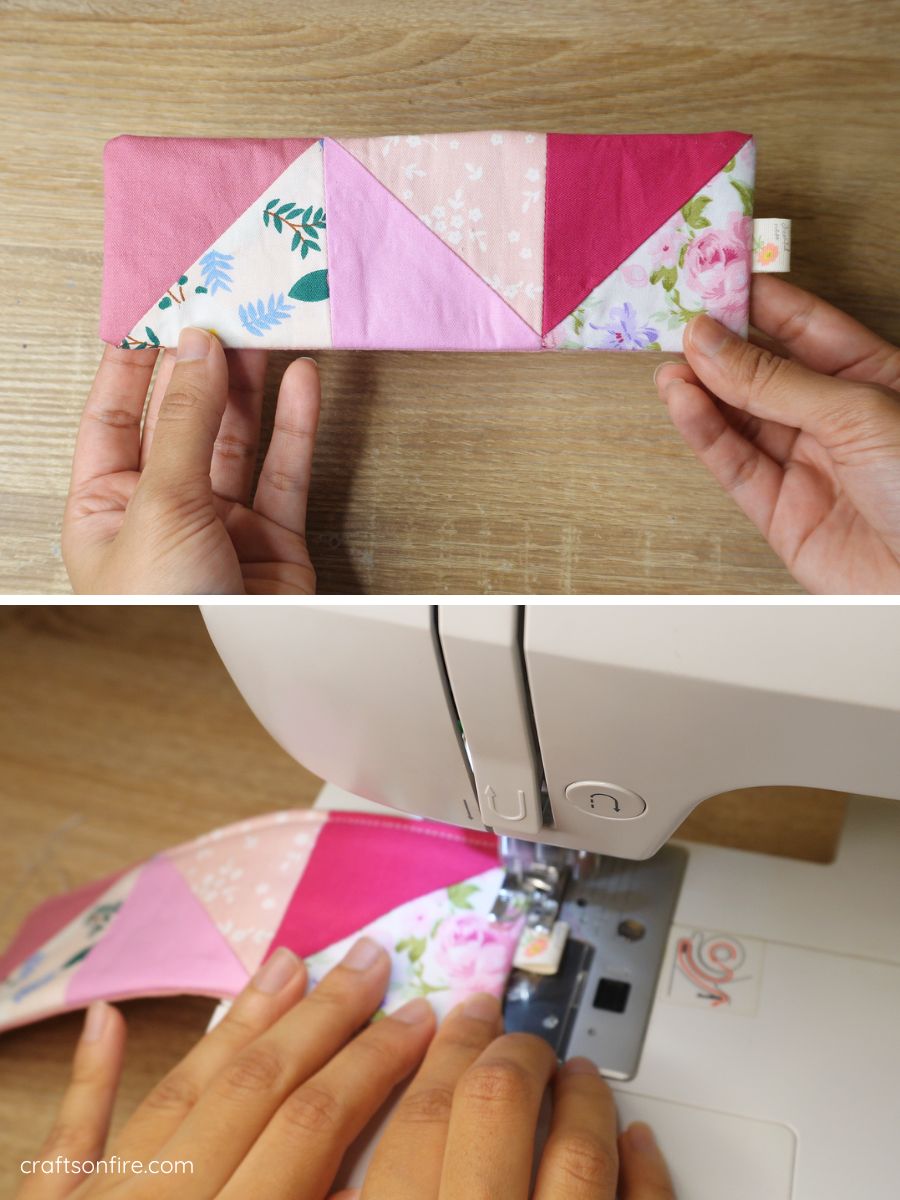
Stitch along the edge to secure the label.
Place the patchwork piece onto the back fabric, aligning the edges.
Use a ruler to mark the size of the bookmark on the back fabric, then draw a 1 cm border inside the rectangle.

Step 8
Leave a small opening (around 6-8 cm) to allow for turning out. Then, cut the fabric.

Step 9
Place the back fabric on top of the patchwork piece with right sides facing in.
Step 10
Pin the layers together to keep them in place while sewing.

Step 11
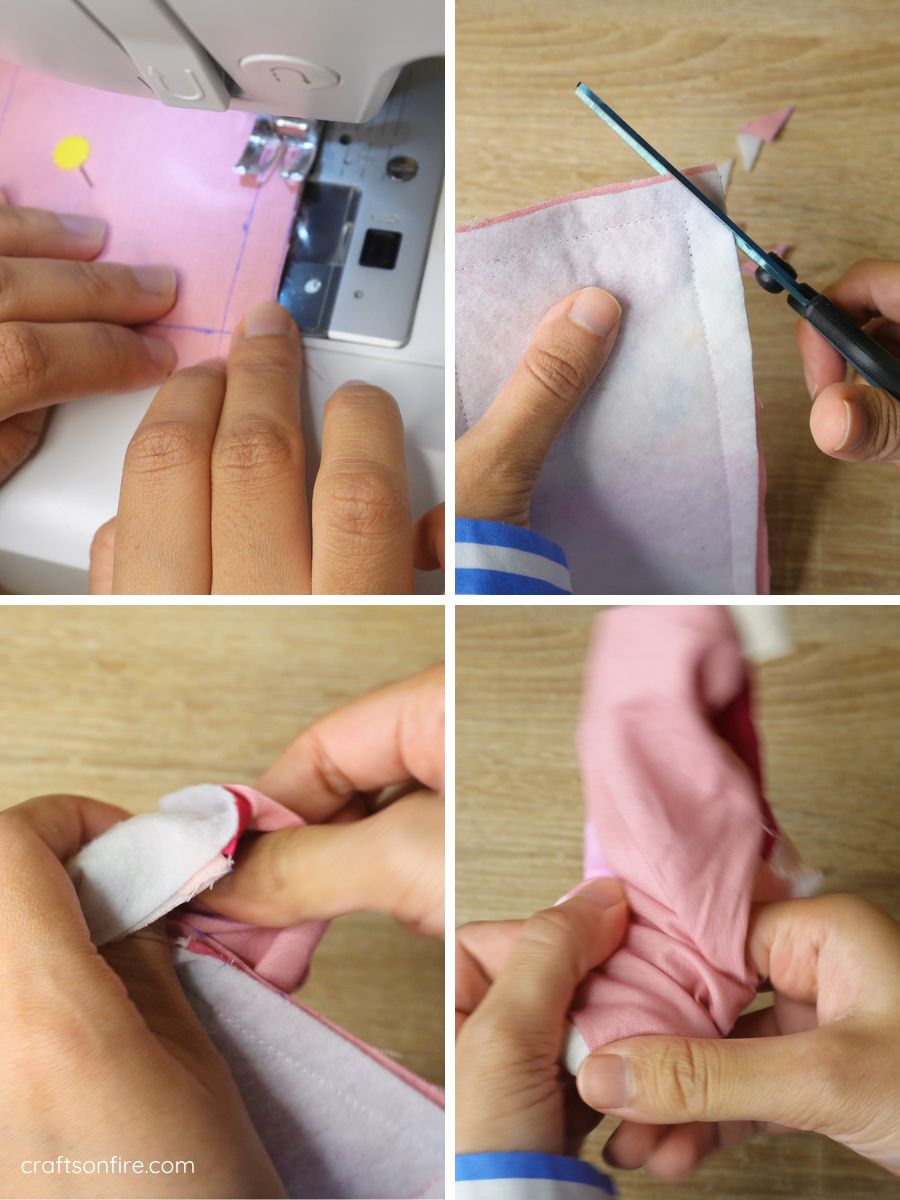
Sew along the marked line. Backstitch at the beginning and end of stitching and don’t forget the 6-8 cm opening for turning out!
Then, remove the bookmark from the machine and trim off the corners of the bookmark for pointed edges.
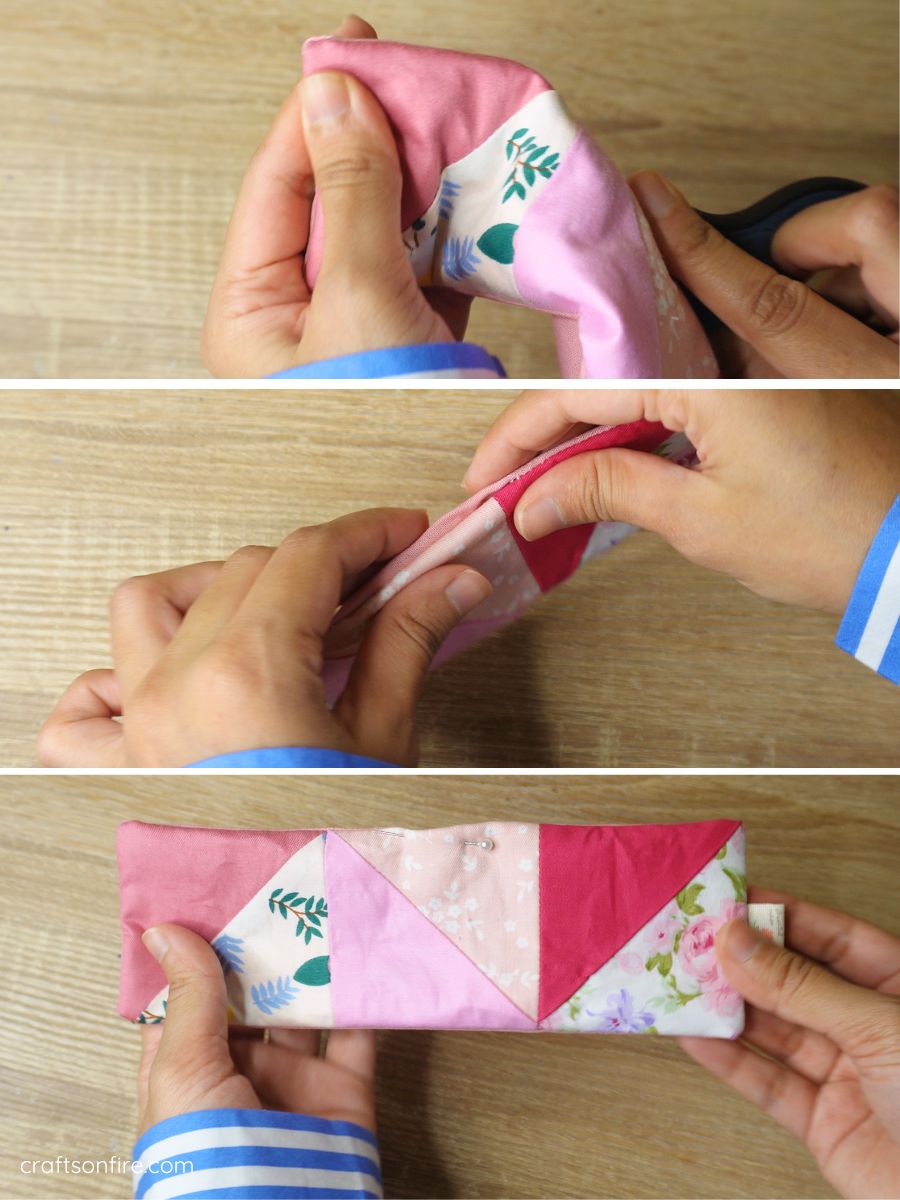
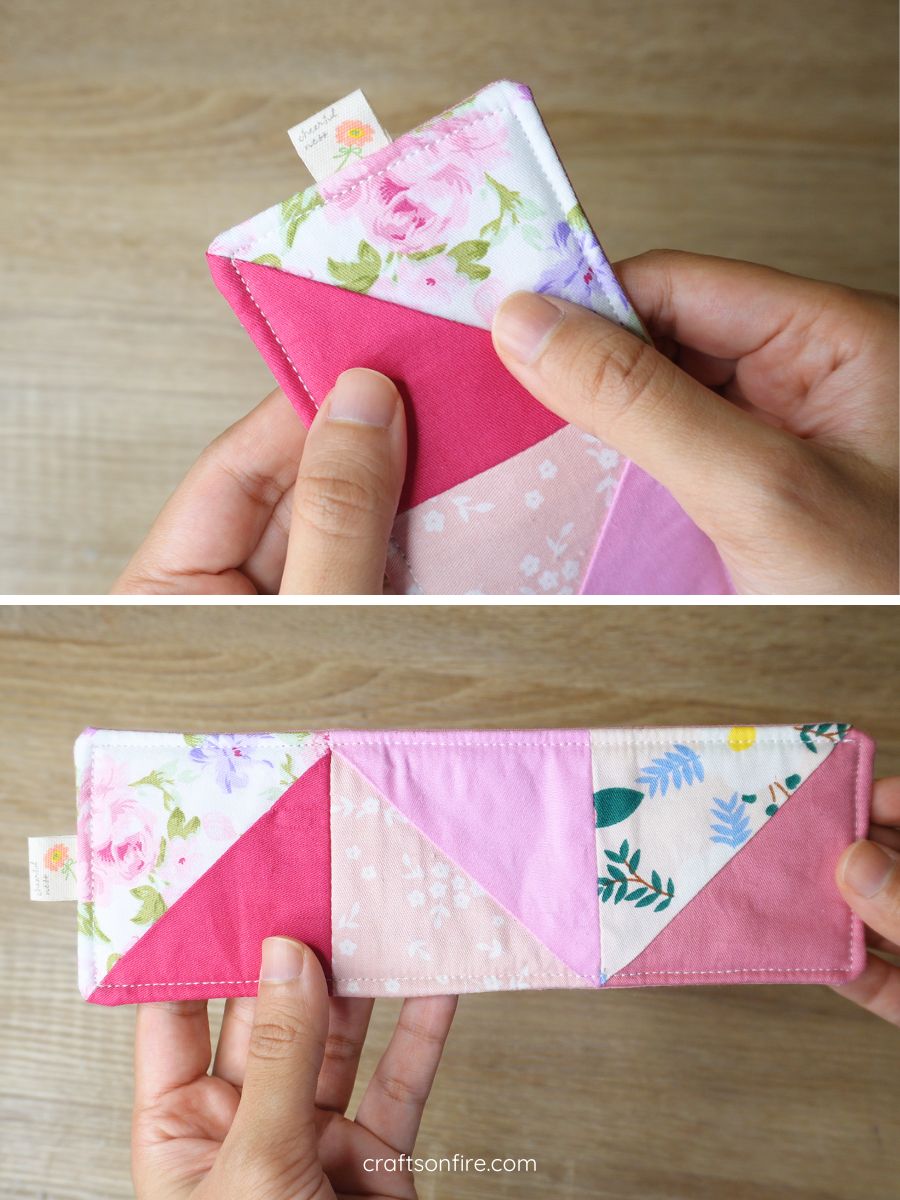
Next, turn the bookmark right-side out through the opening.
Step 12
Carefully use a pen or scissors to push out the corners and make them sharp and then fold the raw edges of the opening inwards and pin them in place.
Give the bookmark a quick press with the iron to smooth out any creases.
Step 13
As the final step, topstitch along the edges of the bookmark to secure the opening and give it a neat finish.
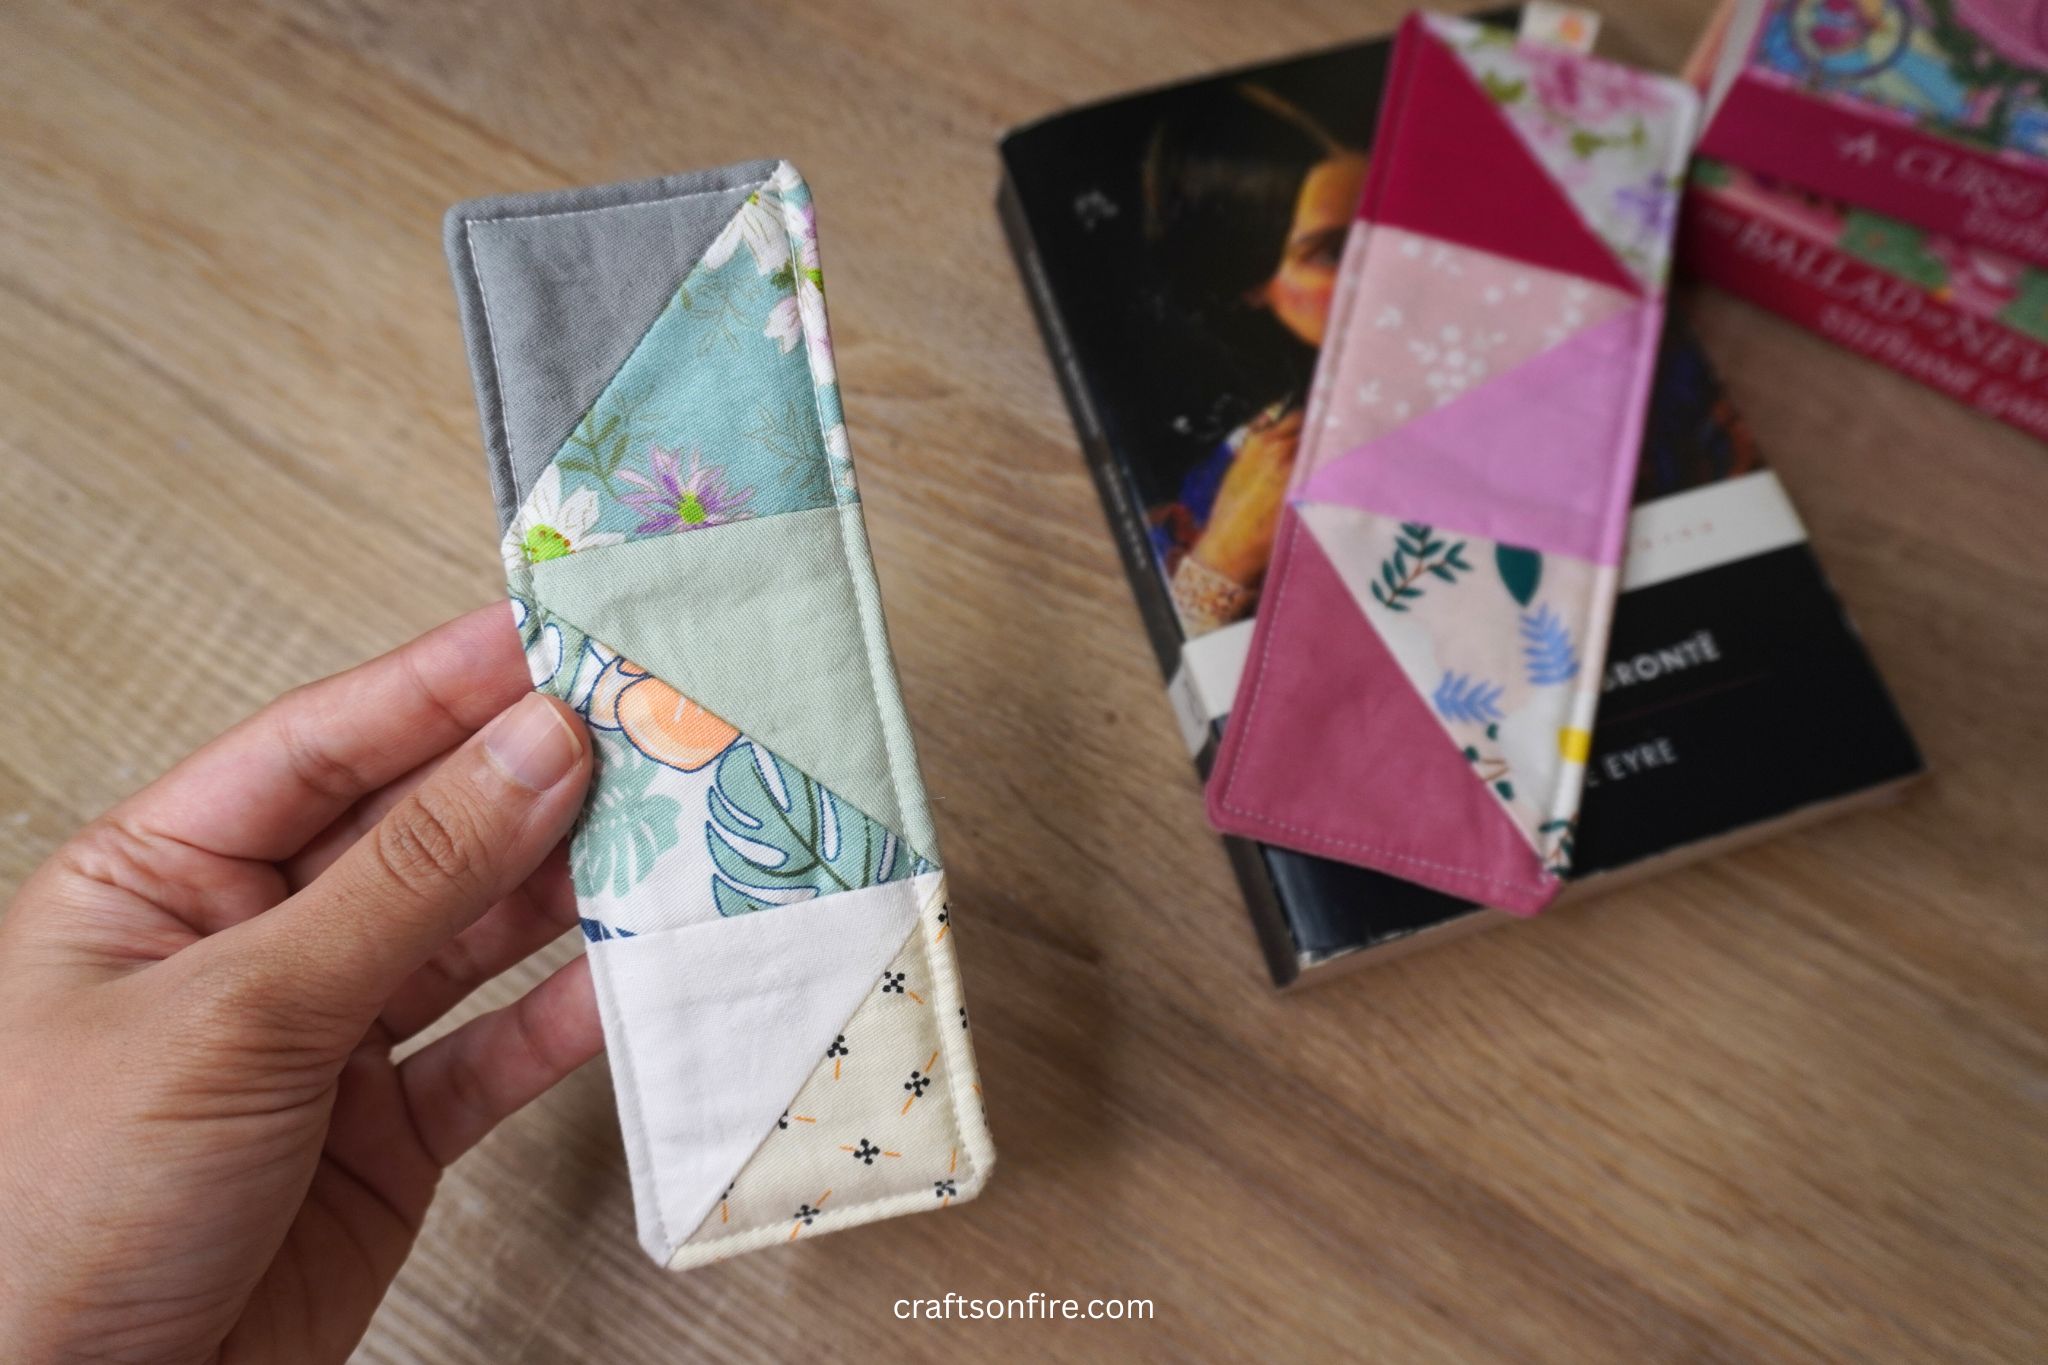
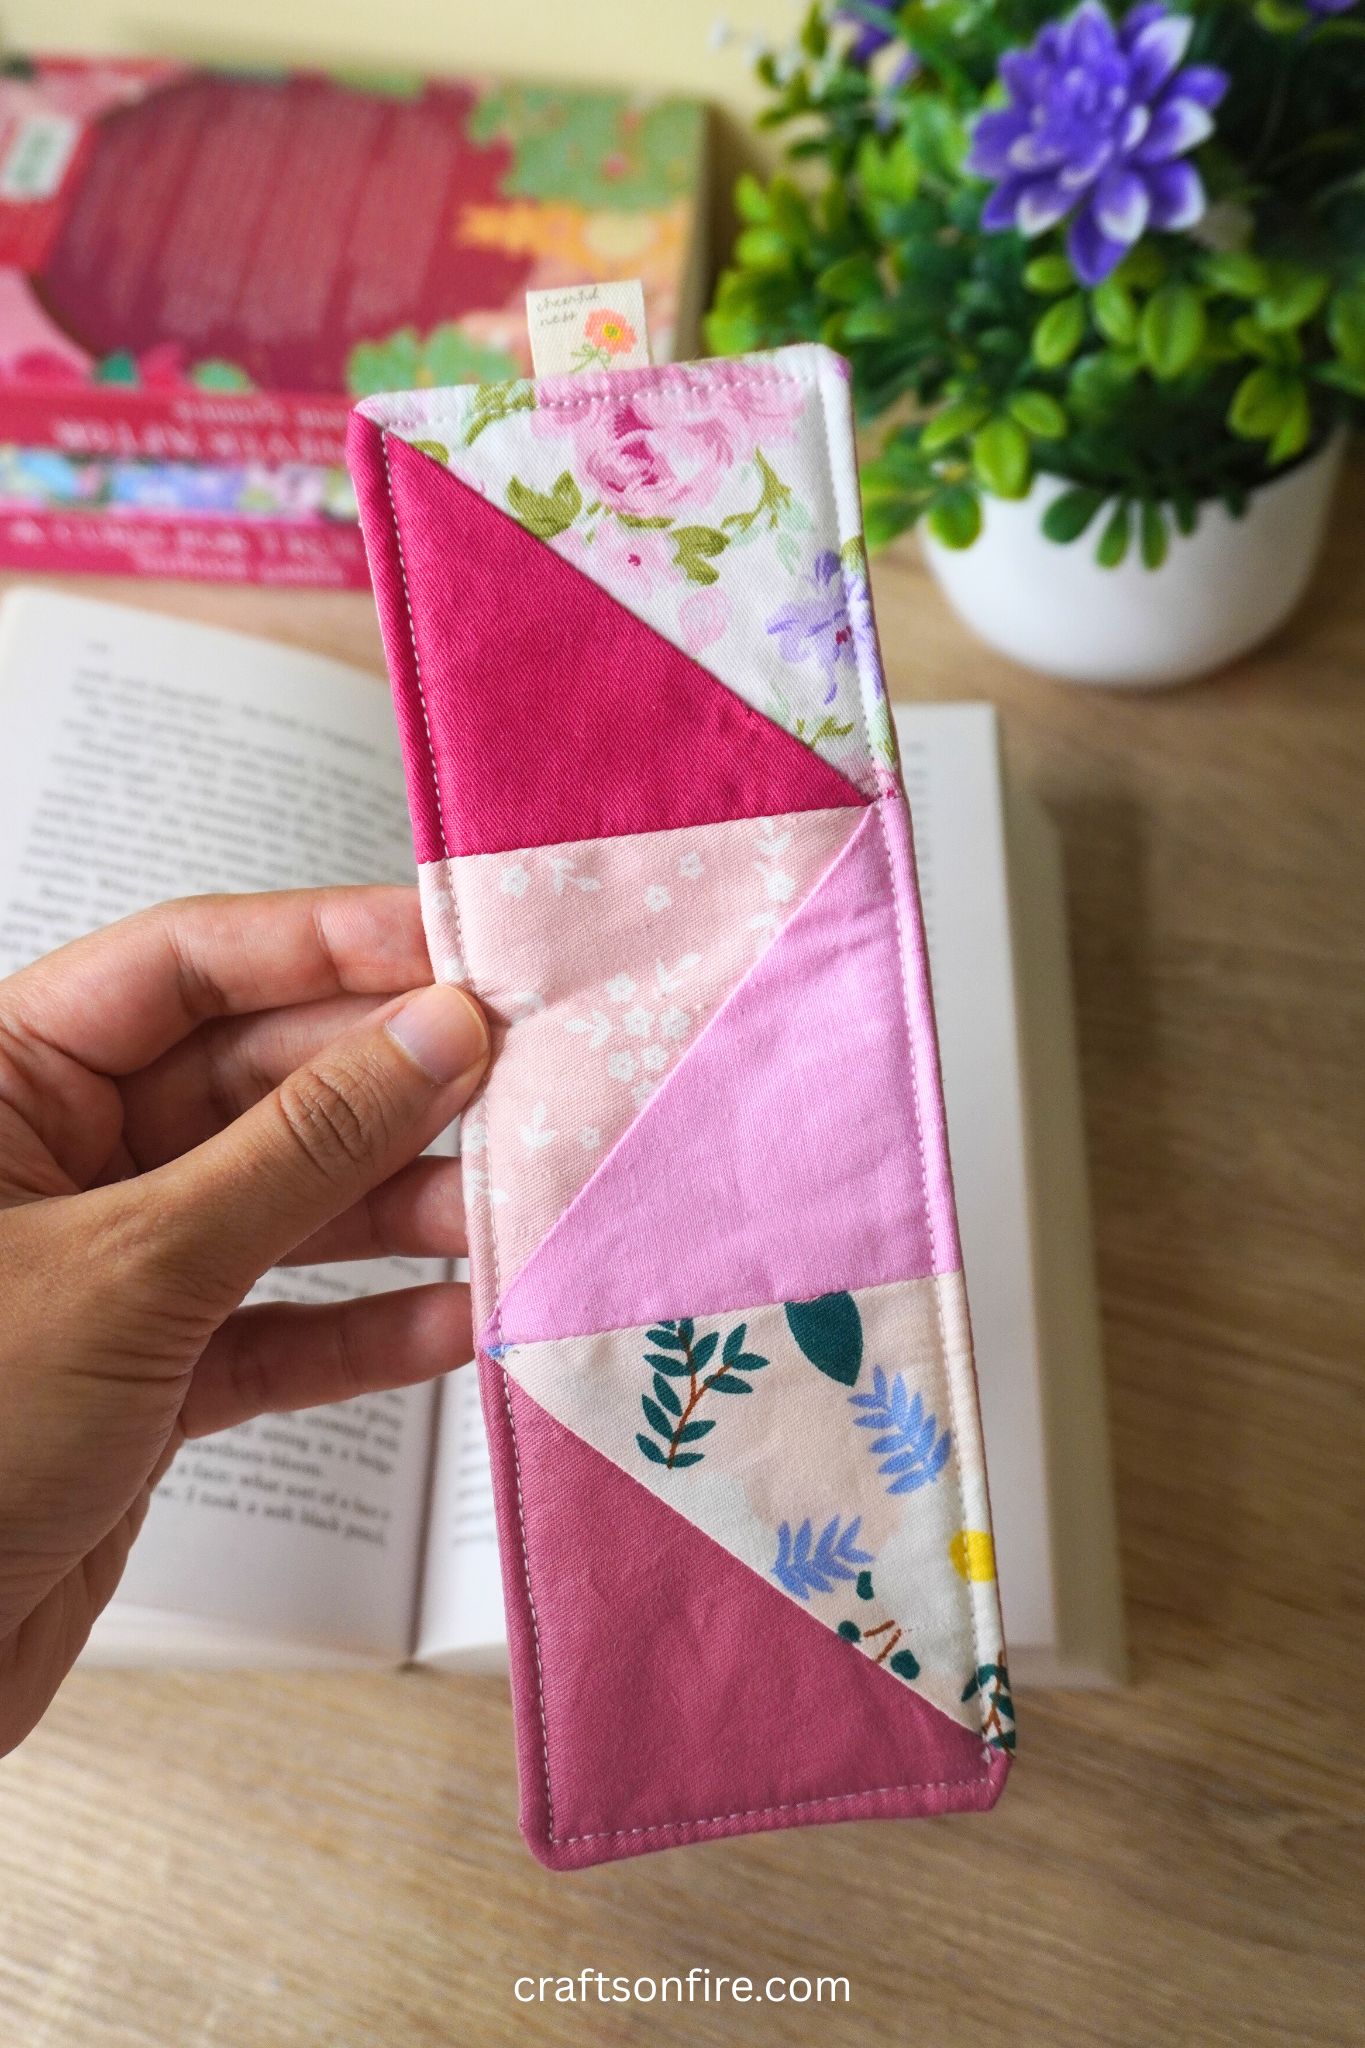
Final Result
Your DIY patchwork bookmark is now complete!
You can experiment with any color combinations for this project—there are endless possibilities to create something unique!
While this bookmark is a standard size, you can easily make it smaller. I’ve included the measurements in the supplies section at the beginning of this guide if you need them!
This fabric bookmark was so enjoyable! I loved creating the half-square triangle patchwork piece.
This is also a great project if you’re a beginner at sewing.
There’s no complicated stitching involved—it’s all about arranging the fabric correctly and paying attention to the right and wrong sides when necessary.
With that said, I hope you found this tutorial helpful. If you did, please drop a comment or share this guide with family and friends!
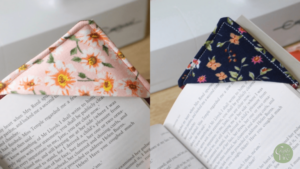
Before you go, here are a few more exciting sewing tutorials you can try next:
How To Sew A Tassel Bookmark (Step-By-Step)


I am SO glad i found your sight. Ive been looking for a pattern to make patchwork bookmarks for a craft show. Instead of using the batting have you tried using a bookmark cardstock for stiffness?