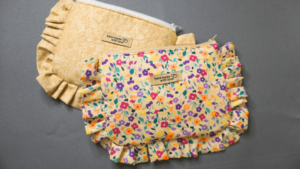
DIY Zipper Pouch With Zipper Tabs
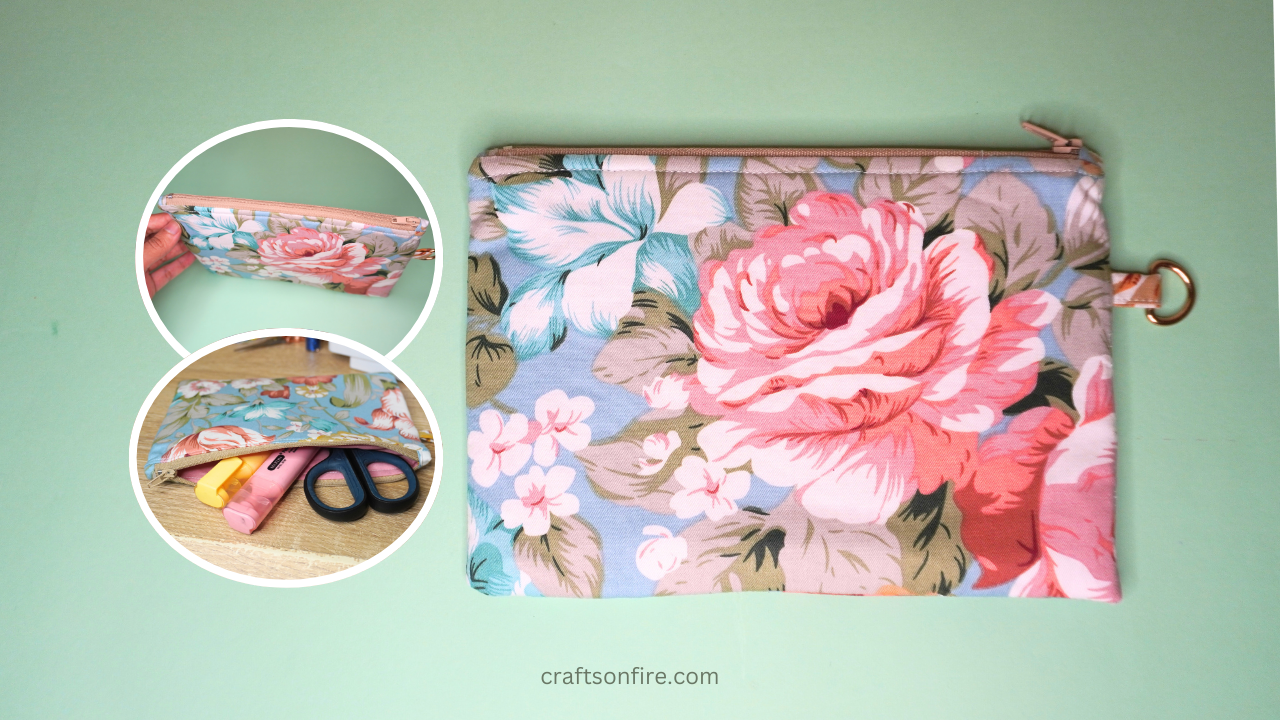
This zipper pouch with zipper tabs is such a joy to make! If you’re tired of dealing with zipper pouches that have indents, this is the perfect solution for you!
Adding zipper tabs to any pouch or bag is a quick and simple fix.
In this guide, I’ll walk you through every step, and you can use this sewing technique for all your future projects.
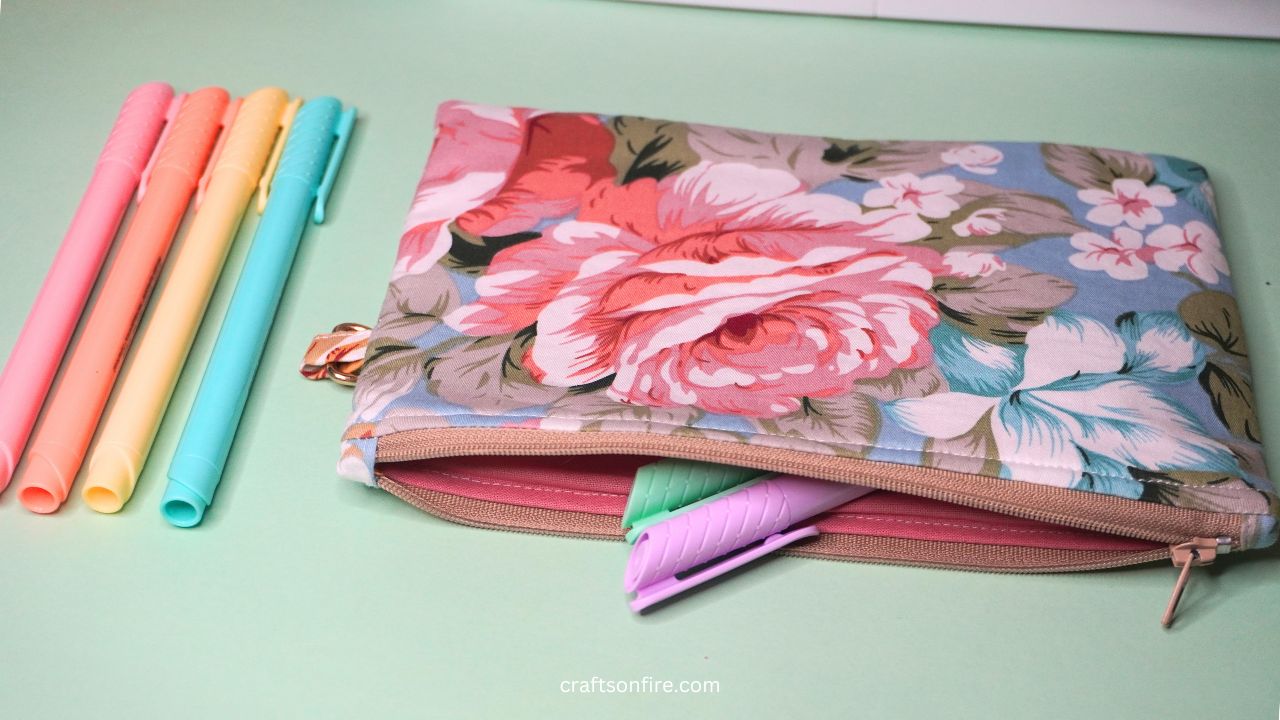
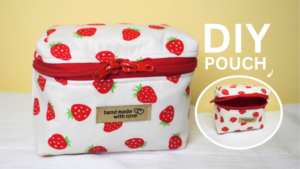
This zipper pouch is both lovely and sleek. It’s slim, compact design makes it perfect for storing and carrying wherever you go.
The finished size of the pouch is 20.5 cm x 14 cm (8.07 inches x 5.51 inches).
The pattern is simple and versatile, so if you’d like to make a larger or smaller version, all you need to do is adjust the measurements for the fabric and lining.
This project is also a quick and easy one. It should take about 10-15 minutes to complete.

Once you’ve sewn this pouch, you’ll be pleased with the final result!
By now you’re probably eager to start so I won’t take up too much of your time.
However, take a moment to read through the entire guide first, then gather all your materials.
Once you’re ready, come back and then let’s dive into the actual sewing!
how To Sew a Zipper Pouch With Zipper Tabs
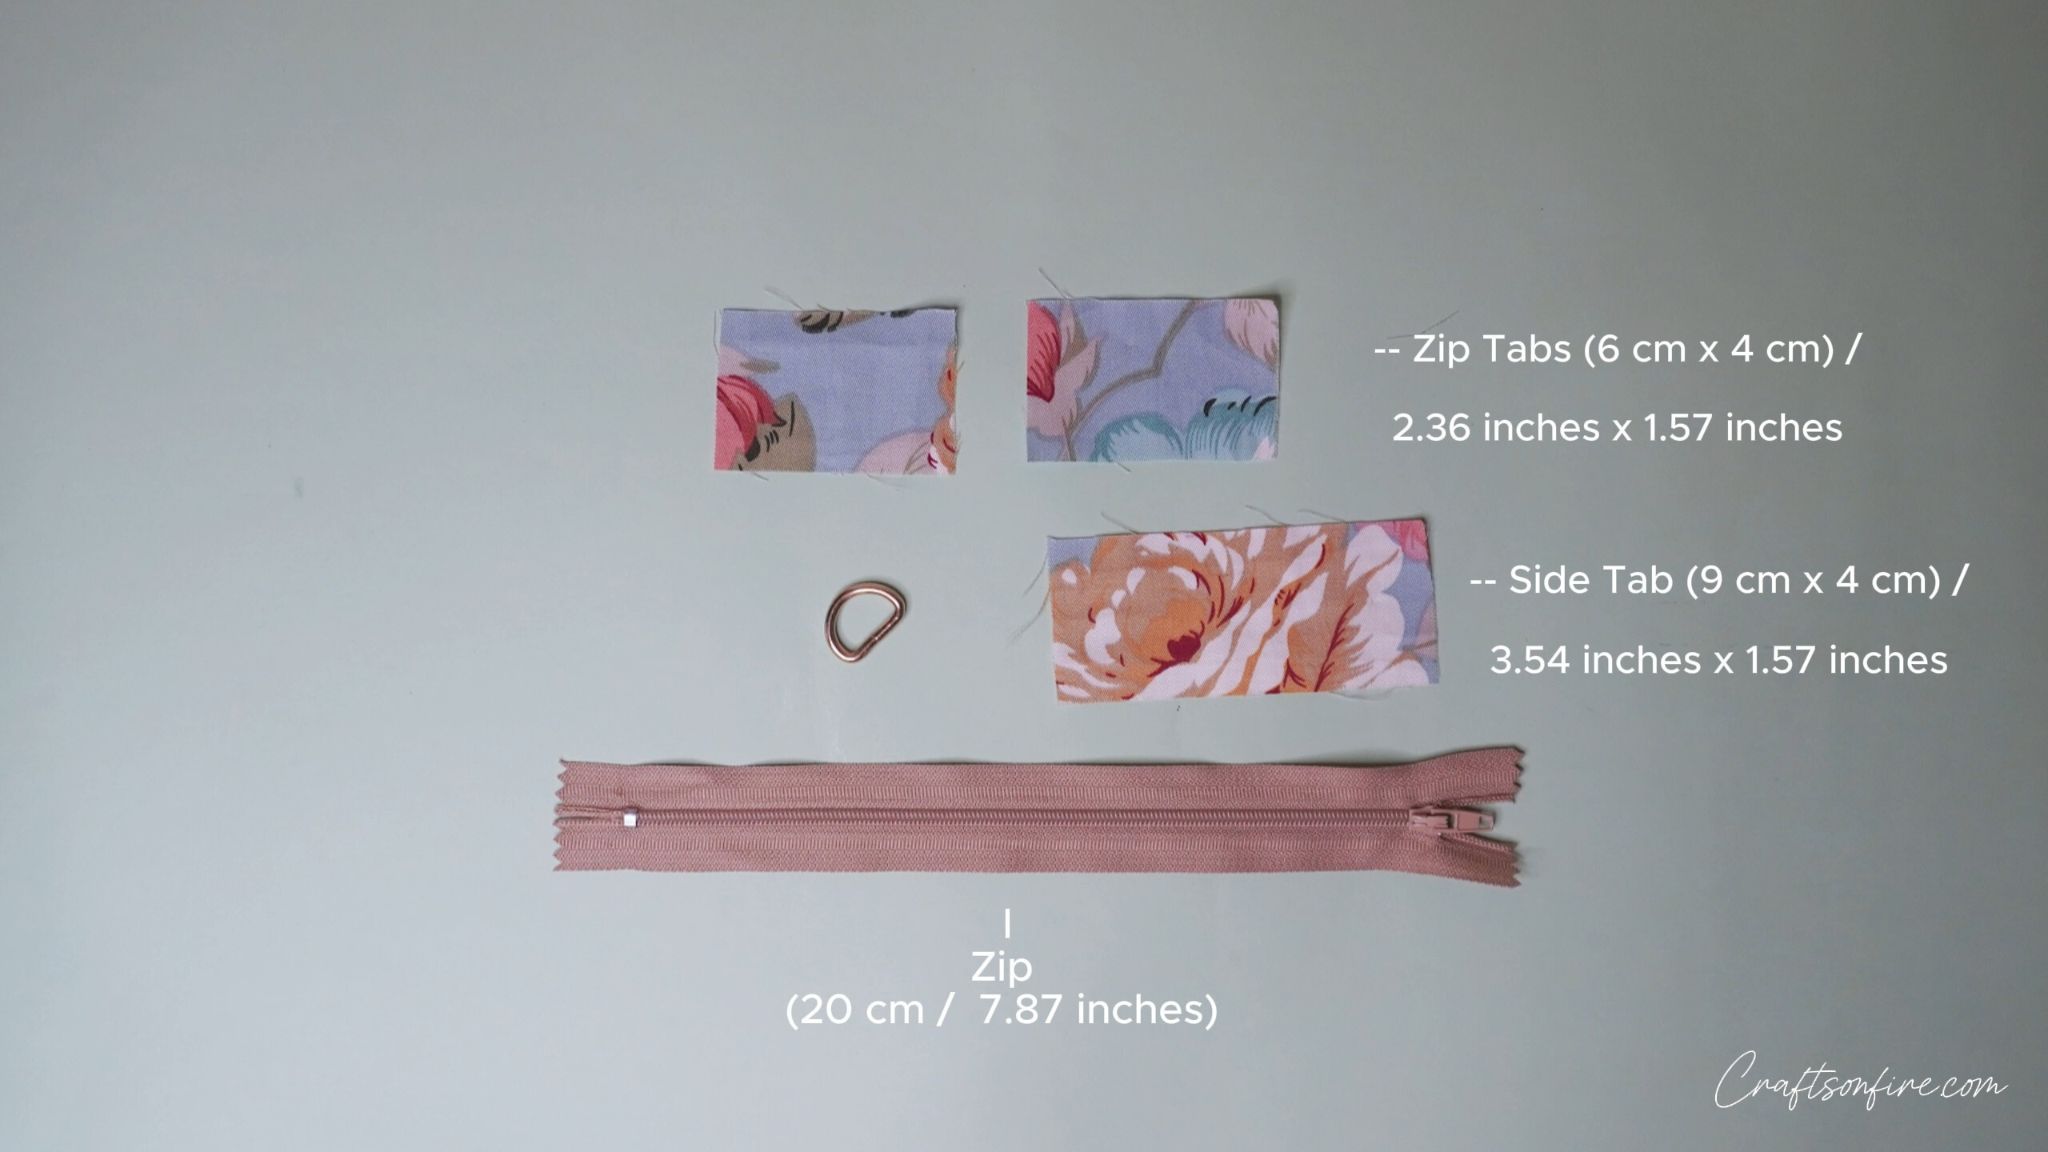
Supplies
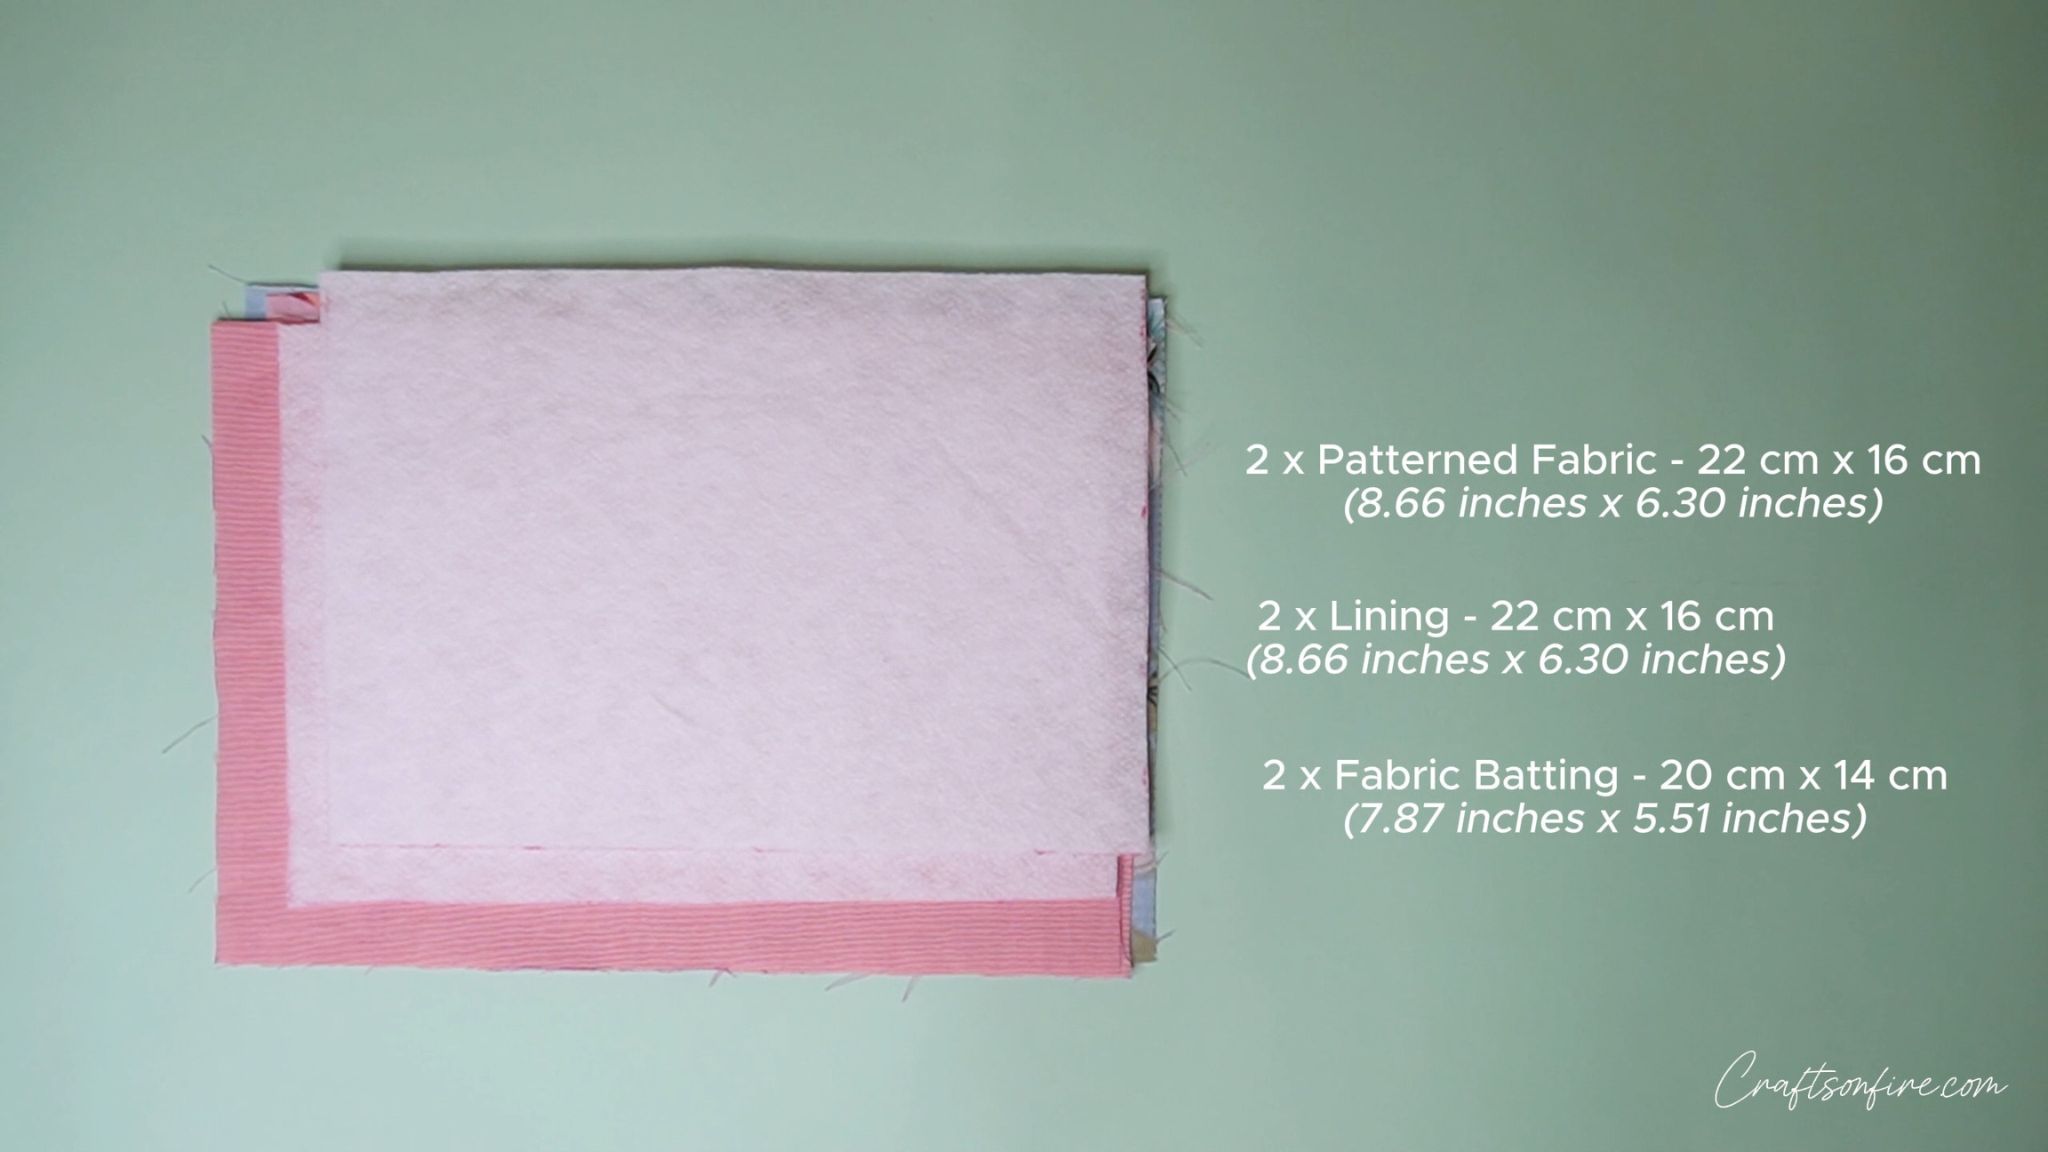
- 2 x Patterned Fabric – 22 cm x 16 cm (8.66″ x 6.30″)
- 2 x Lining – 22 cm x 16 cm (8.66″ x 6.30″)
- 2 x Fabric Batting/Interfacing – 20 cm x 14 cm (7.87″ x 5.51″)
- Zipper Tabs – 6 cm x 4 cm (2.36″ x 1.57″)
- Side Tab – 9 cm x 4 cm (3.54″ x 1.57″)
- Zip – 20 cm (7.87″)
- Keyring
- Sewing Machine
- Scissors
- Fabric Pen/Pencil
- Ruler/Tape Measure
Video Tutorial
Instructions
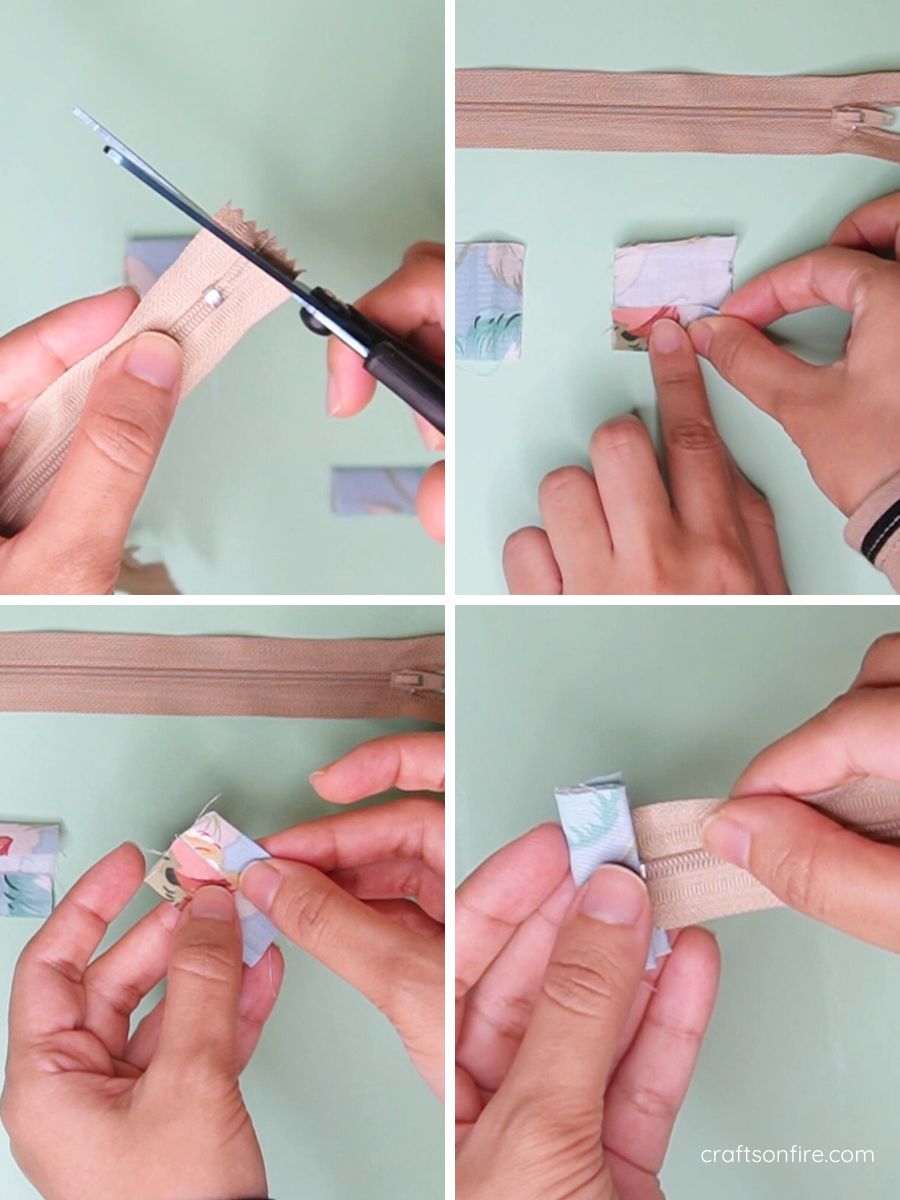
Step 1
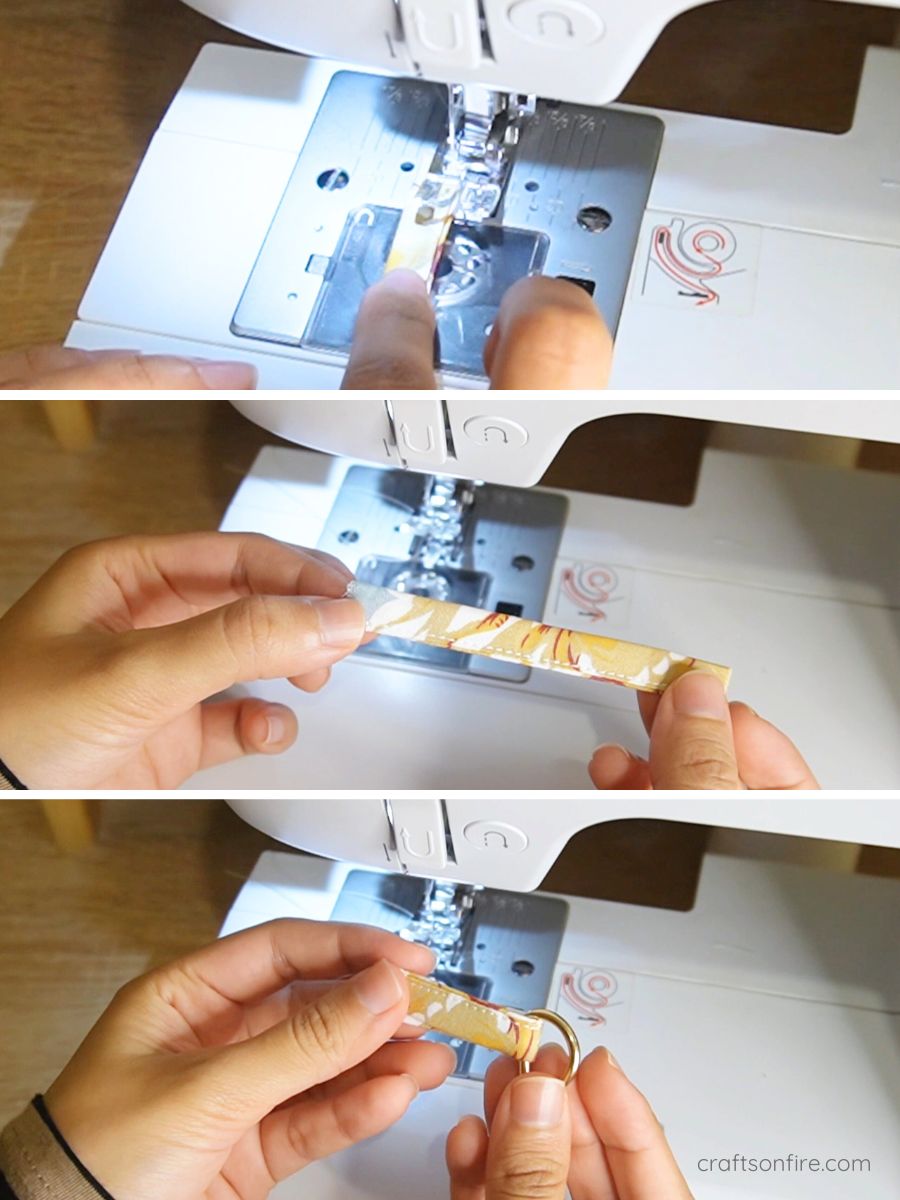
Begin by trimming the zigzag edges off the zipper. Then, take the first zipper tab, fold it in half, and then fold the top and bottom to meet the middle.
Then, fold both sides together.
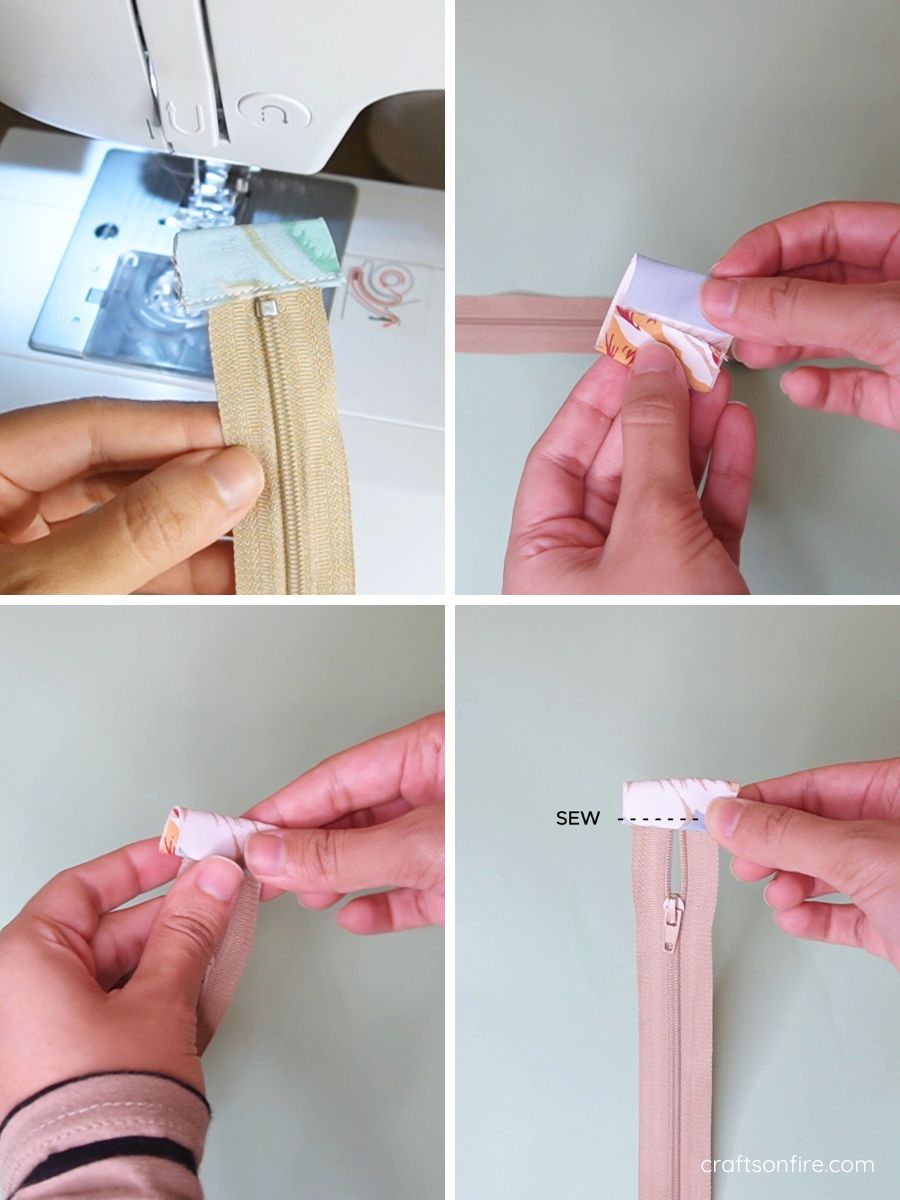
Slide the zipper tab onto one end of the zipper and stitch the tab to the zipper.
Step 2
Repeat the same process for the other side of the zipper. Once attached, trim any excess fabric from the sides.
Step 3
For the side tab, fold the strip in half (right side up).
Open the piece and fold the top and bottom edges toward the center. Fold the strip one more time.
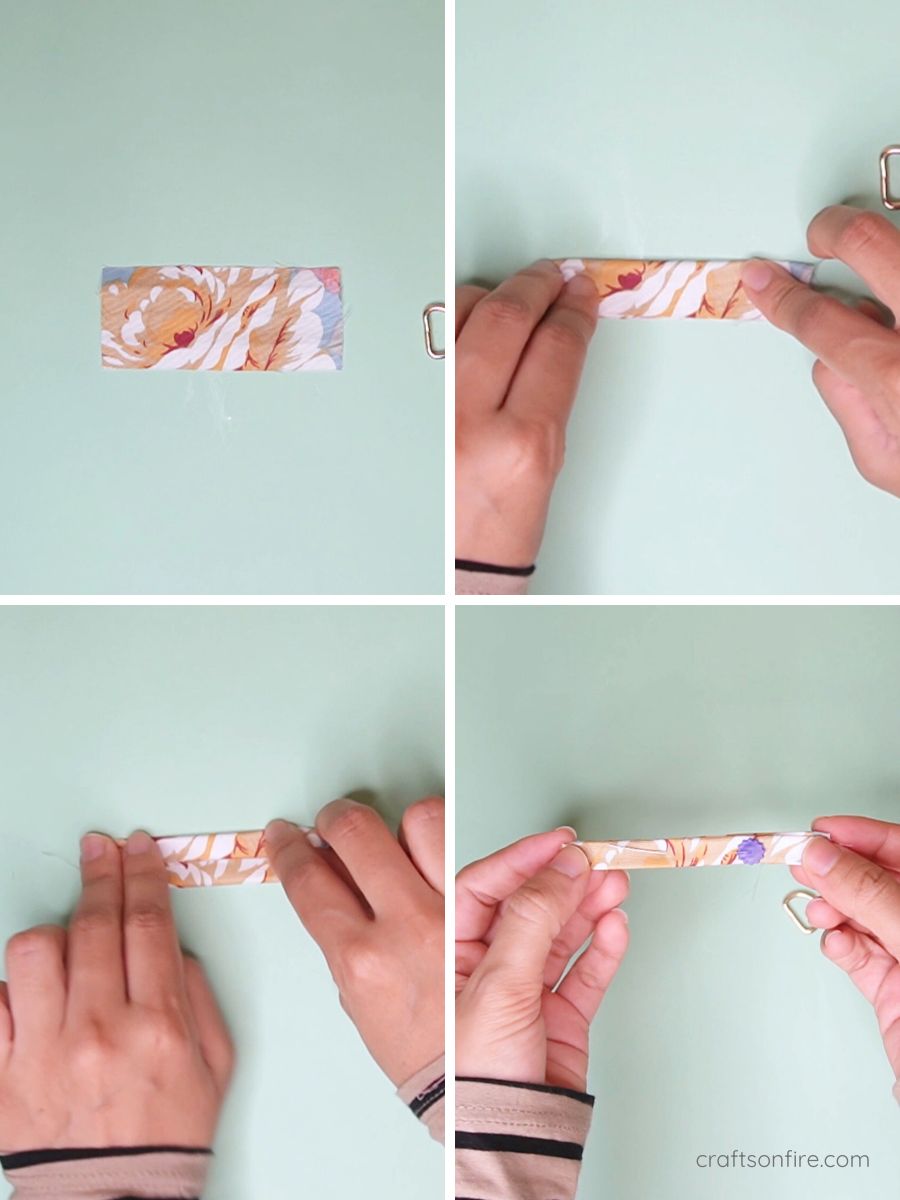
Step 4
Stitch the strip as close to the edge.
Slide the keyring through the tab and fold the strip in half. Stitch it in place to secure the keyring.
Step 5
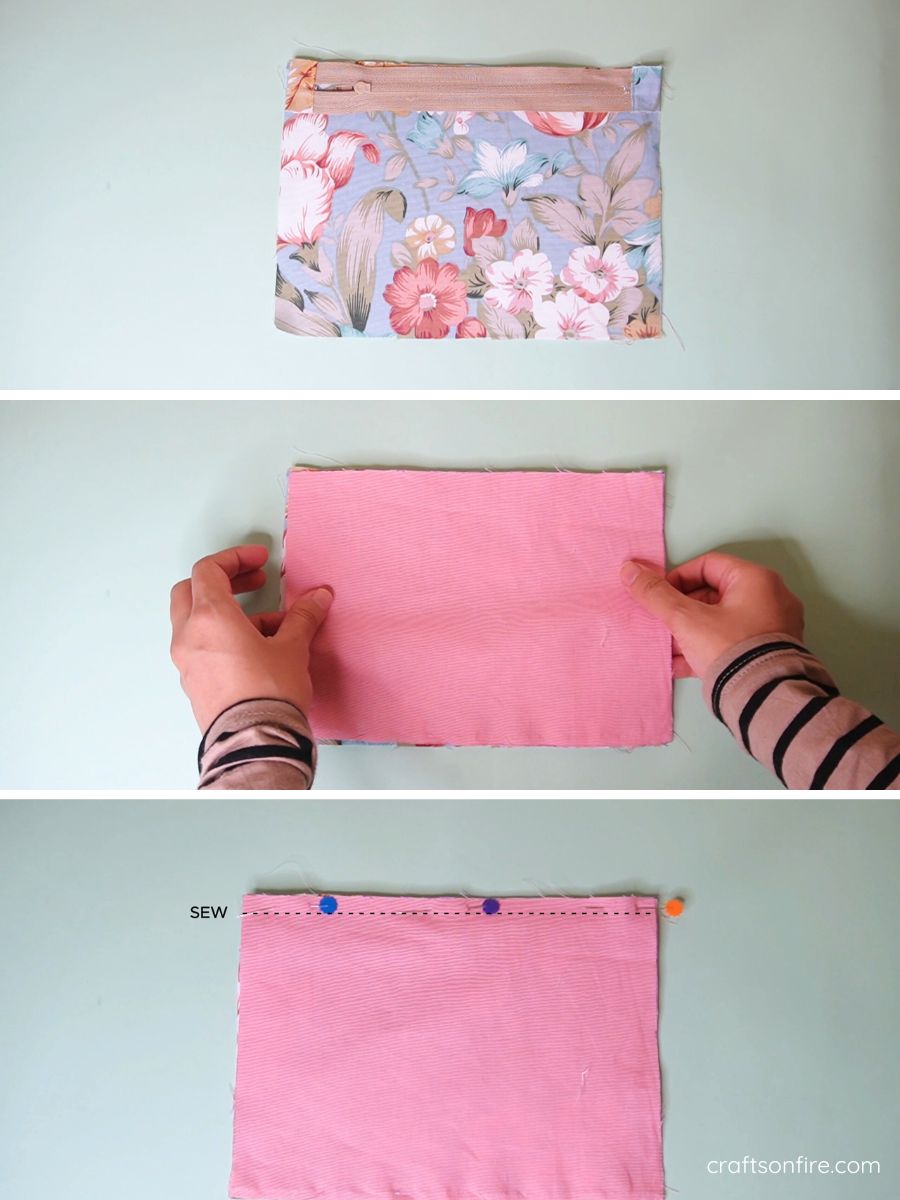
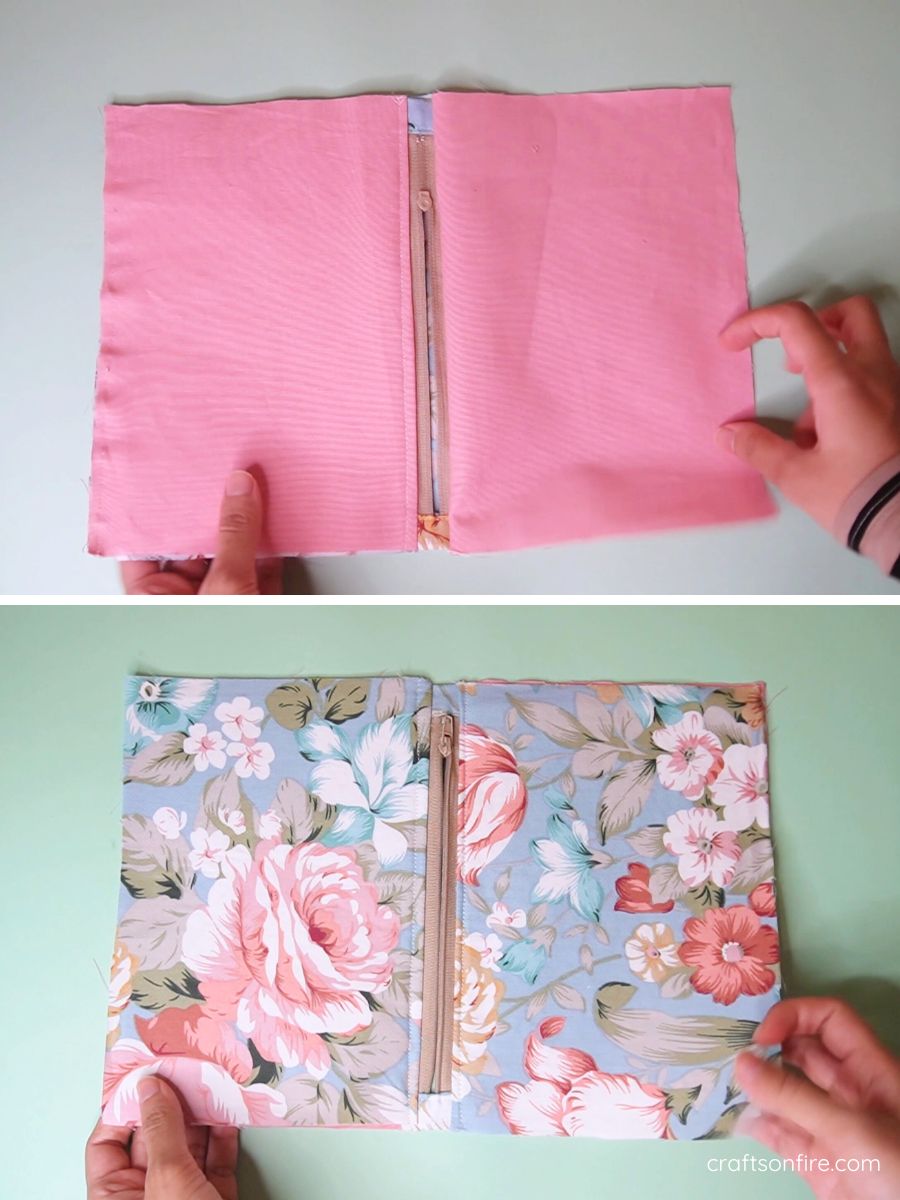
Place the zipper on one of the patterned fabric pieces, with the right sides facing inward.
Lay the lining fabric on top of the zipper, aligning the top edges.
The right sides of the fabrics must face inward.
Stitch all three layers together using a 1 cm seam allowance.
Step 6
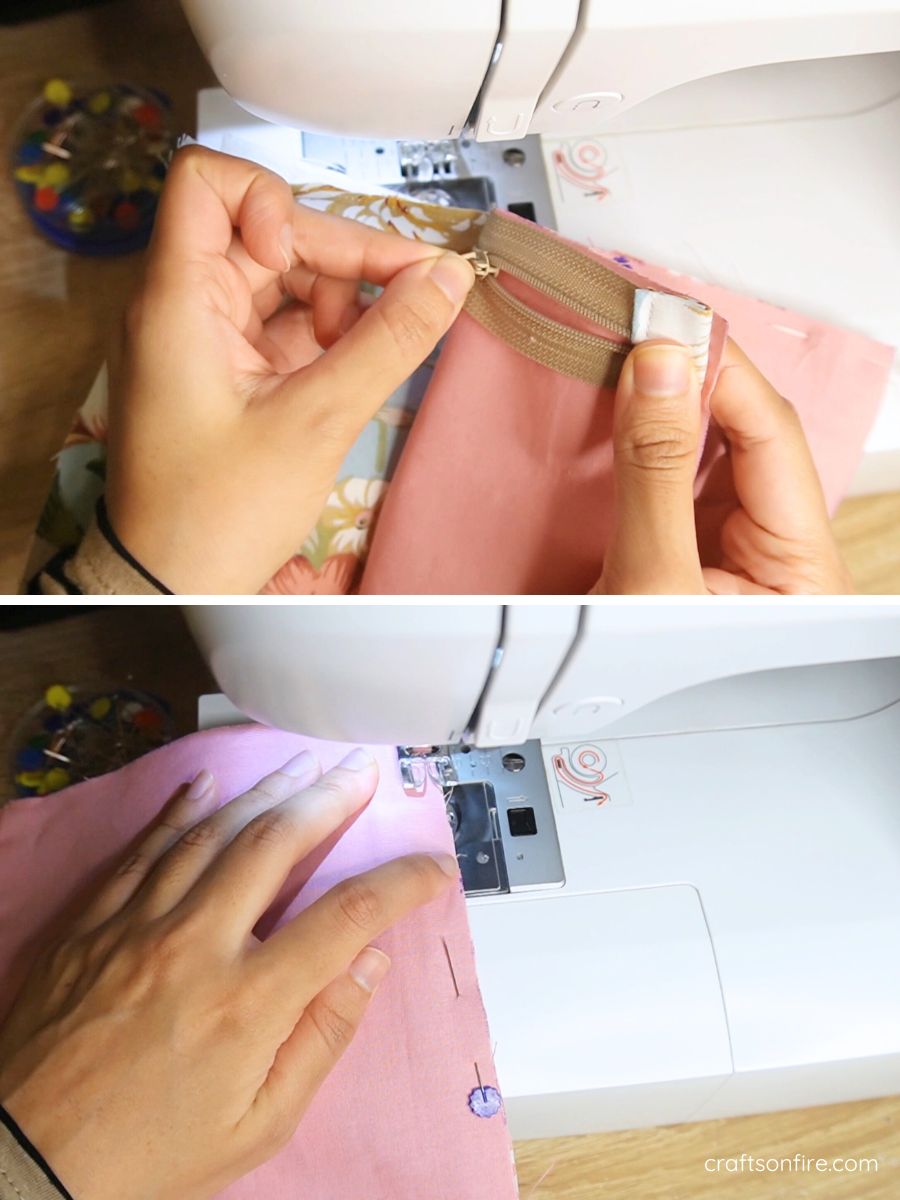
Before you begin sewing, make sure the zipper is open. As you sew, when you reach the zipper pull, pause and take the fabric out of the machine. Close the zip and then continue sewing.
Step 7
Once the zipper is attached, open up the fabric pieces and fold the lining over and then add a topstitch.

Step 8
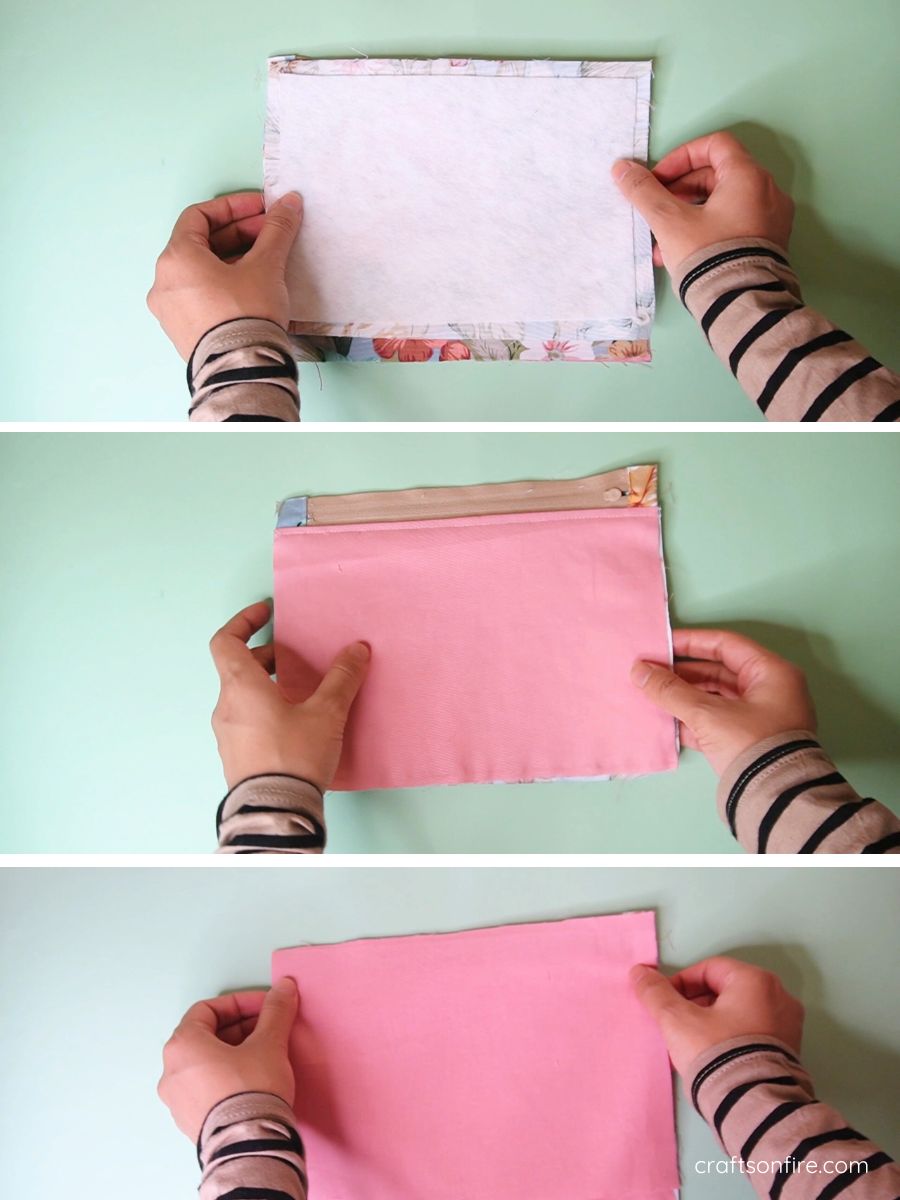
For the second patterned fabric piece, place it face down on top of the zipper, aligning the top edge.

Step 9
Turn the piece over, and place the second lining piece on top of the zipper, aligning the top edges again.
Pin or clip the layers together and sew all three pieces together along the edge.
Step 10
Once the pieces are sewn together, open them up and add a topstitch along the edge of the newly attached fabric, just as you did previously.
Step 11
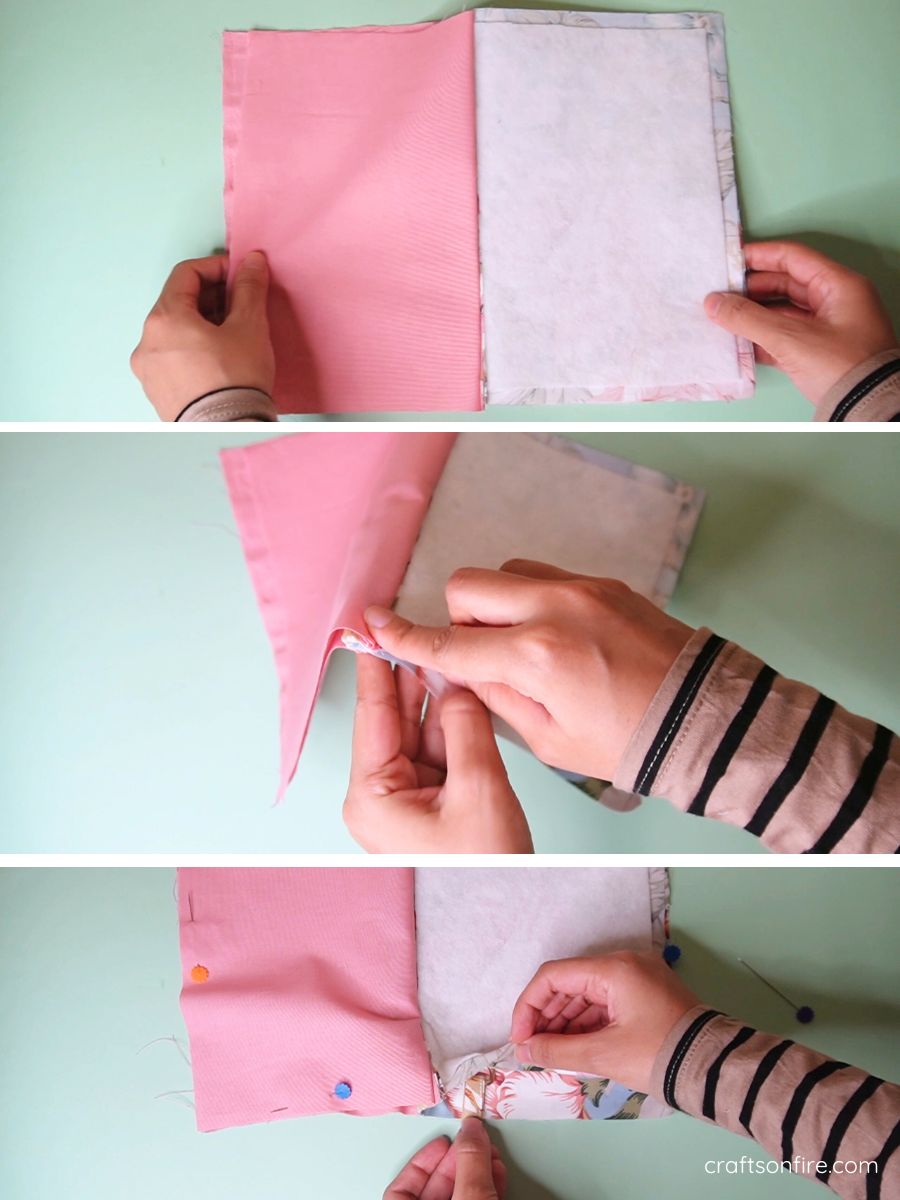
Fold the two patterned fabric pieces together and then fold the lining pieces. Ensure that the side seams are aligned. Pin the fabrics in place.
Next, open up the fabric pieces on one side and insert the side tab inside. Ensure the tab is positioned correctly.
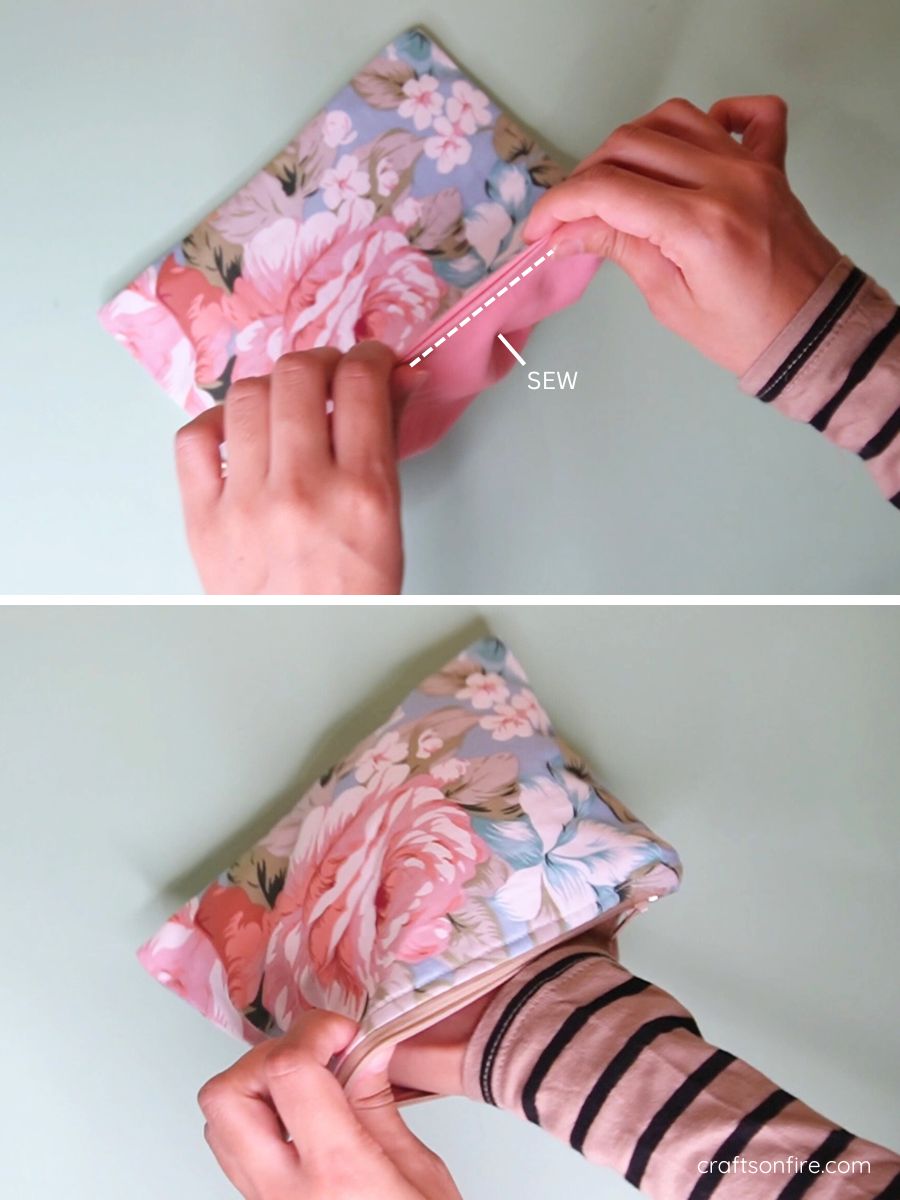
Sew around the entire pouch, leaving a small gap at the bottom of the lining for turning the pouch right side out.
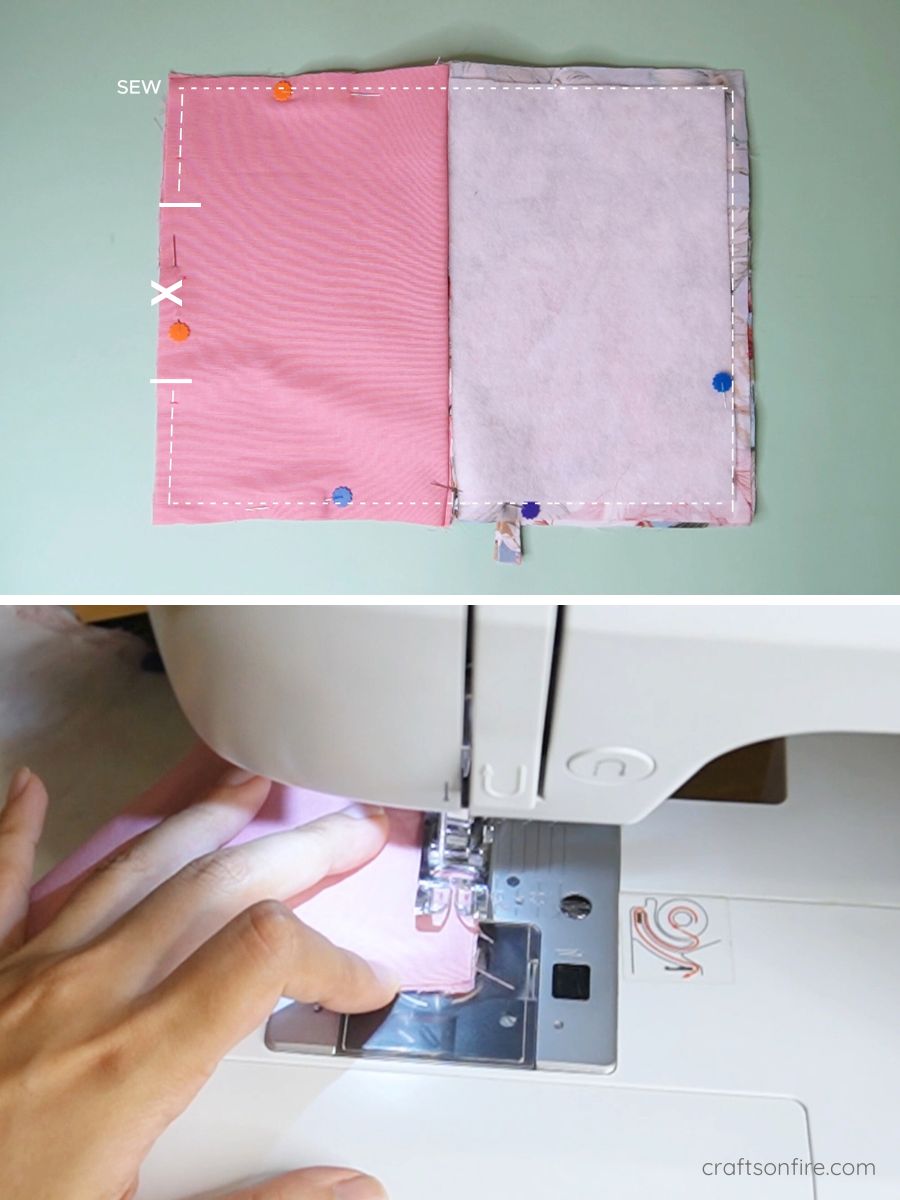
Step 12
Stitch the pouch using a 1 cm seam allowance.
Step 13
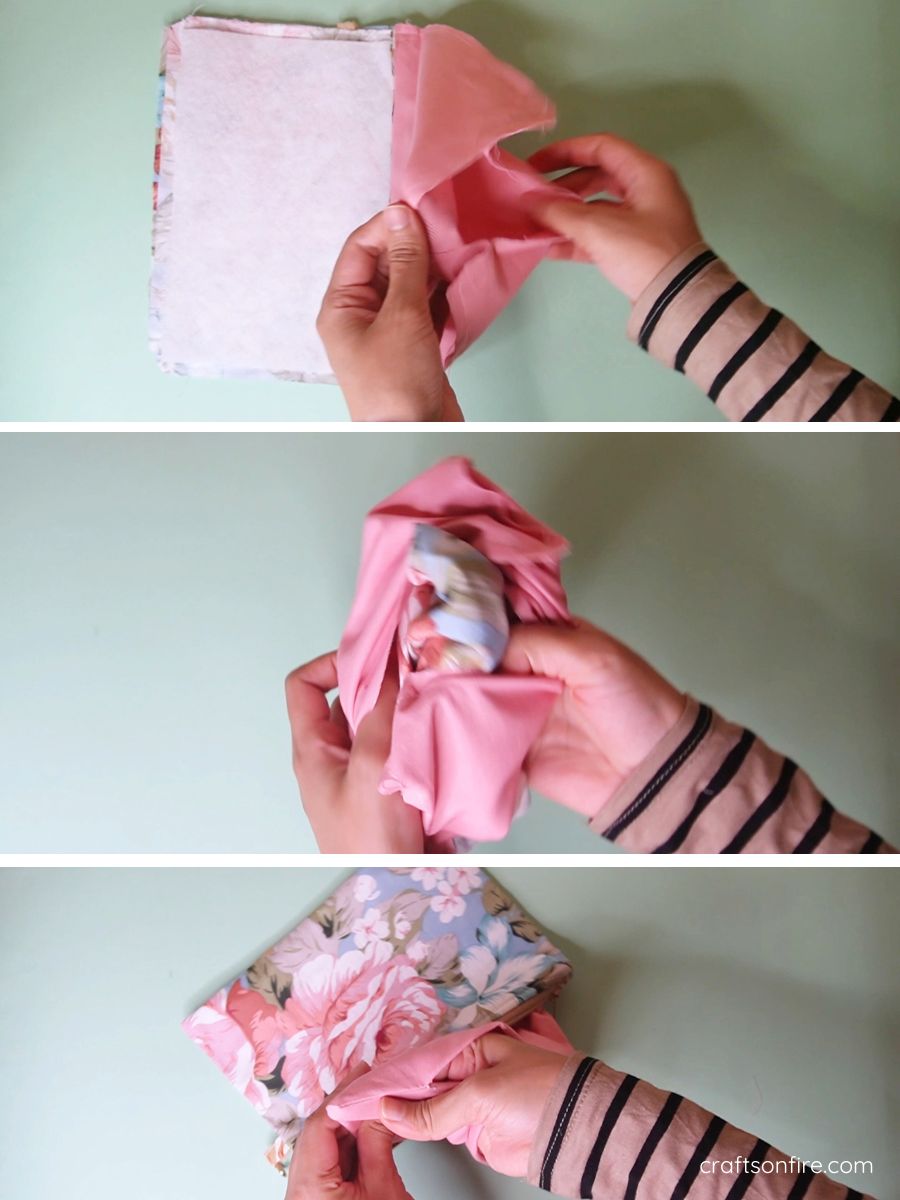
Once the pouch is stitched, use the opening at the bottom of the lining to carefully turn the pouch right side out.
Gently push out the corners using a pen or your fingers to create sharp, neat corners.
Step 14
Fold the raw edges of the opening in and sew it shut to close the lining.
Place the lining back inside the pouch.
Finally, press the pouch lightly with an iron to smooth out any creases.
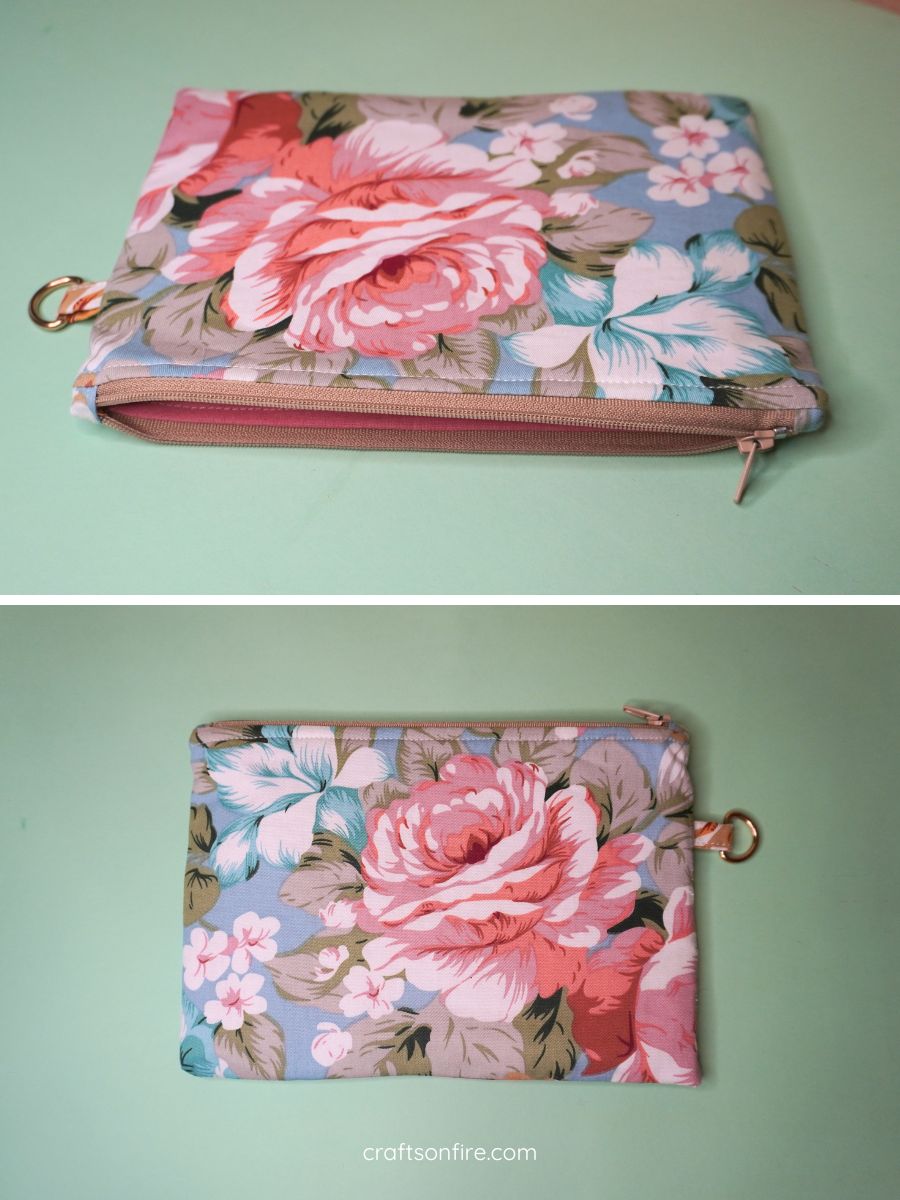
Congrats! Your zipper pouch is now complete!
Wrapping Up
This zipper pouch looks so much better with zipper tabs! There’s no more indents on the sides, and I’m definitely planning to use this method again in the future.
I’m thrilled with how this pouch turned out, especially with the beautiful floral fabric and pink lining. I think this is a wonderful combination but you can choose any fabric you like!
The keyring on the side can be used to attach a wristlet keychain, a cute tassel or a charm if you’d like to customize this pouch further.
This pouch is perfect for storing your makeup or stationery, and there’s even enough space for a few sticky note pads or your phone!
Its slim design makes it easy to slip into a backpack or bag, but you could also carry it on its own if you prefer.
I truly hope you love your zipper pouch as much as I did.
With that said, I’d love to hear your thoughts on this project!
Feel free to leave a comment or tag me on Pinterest/Instagram. Don’t forget to share this sewing tutorial with your friends and family!
More Sewing Tutorials: