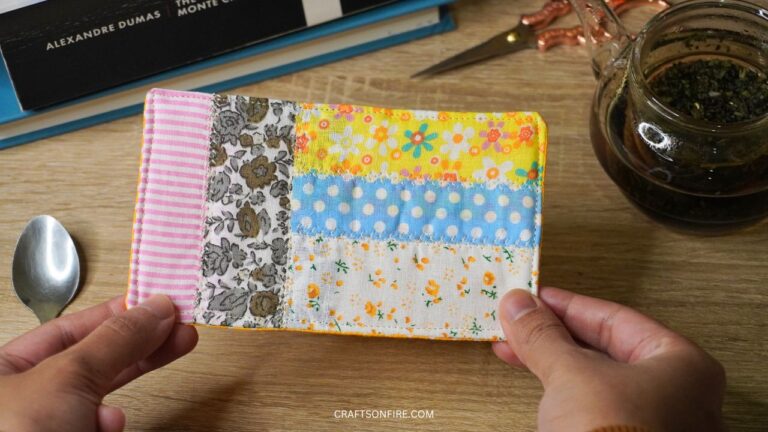
How To Sew A Book Sleeve (easiest Method)

Do you want to protect your beloved paperbacks from getting damaged while you’re on the go? Well, all you need is a book sleeve, and I’m here to show you how to make one from scratch!
Sewing a book sleeve is incredibly simple and easy – anyone can do it using this pattern.
This project is not only quick but also fun. If you want to sew something simple and satisfying —without stressing about whether it’ll turn out right — this is the perfect option!

I’m honestly in love with my book sleeve. It’s the perfect fit for a standard paperback, but if you need one for larger paperbacks or hardcovers, just adjust the size of the fabric!
The process is straightforward: we’ll quilt the patterned fabric onto the batting and then attach the lining. Trust me, everything comes together smoothly, and you’ll be so proud once you’ve made your book sleeve.
With that said, if you’re ready to learn how to sew a book sleeve, let’s get started!
Table of Contents
DIY Book Sleeve Sewing Guide
Supplies
- Fabric (2 Pieces) – 24.5 cm x 18.5 cm (9.65 inches x 7.28 inches)
- Batting/Interfacing (2 Pieces) – 30 cm x 26.5 cm (11.81 inches x 10.43 inches)
- Sewing Machine
- Pins/Sewing Clips
- Scissors
- Tape Measure/Ruler

Video Tutorial
Instructions
Step 1
Begin by ironing or pinning the patterned fabric to the interfacing. Then, quilt the fabric as desired using a zig-zag stitch.

Step 2
Continue quilting the fabric until both pieces are complete. Then, cut off the excess batting/interfacing from the sides of the fabric.

Step 3
Cut the lining using the measurement of the fabric piece. You’ll need to cut 2 pieces.
Then, place the lining on top of the patterned piece with the right sides facing in.
Sew these two pieces together using a 1 cm seam allowance.

Step 4
Once stitched, open up the fabric. You should have a nice joined piece.

Step 5
Repeat this process for the second piece. Then, iron the seam flat for both pieces.
To assemble the book cover, place the pieces together with the right sides facing in.
Match the seams and pin.

Here’s the pattern we’ll be following to create the book sleeve:

We’ll sew all around but leave a small opening for turning out.
Head to the machine again and sew as indicated using a 1 cm seam allowance.
Step 6

Backstitch before you reach the opening to close the seam. Then, pull the right side of the book sleeve through the opening.
Step 7

Step 8
Use your fingers or a pen to open out the corners. Then, fold the raw edges of the opening and pin it.

Step 9
Sew the opening as close to the edge as possible. Then, insert the lining back into the book sleeve and finish by adding a topstitch.

And it’s done!

Here’s what the book sleeve looks like with a paperback inside:

How amazing does this look? The batting adds extra cushioning and protection, keeping your book safe from spills and damage or potential damage.
You also never have to worry about the front cover or pages getting smashed again with this book sleeve.
Just pop it in your tote bag, and you’re all set!
As promised, this book sleeve is a quick and easy sewing project! I hope you had fun making it with me.
And since you’re a fan of all bookish things, I also sewed a few adorable bookmarks. If you’re up for it, I’d love for you to try making those next! They’re just as fun and simple as this project.
Here’s the link:

How To Sew A Pen Holder Bookmark For Any Journal

How To Sew A Tassel Bookmark (Step-By-Step)

Happy sewing and happy reading!


