3 Easy DIY Popsicle Stick Bookmarks
I recently fell back into my love for reading fictional books even though it’s been a while since I last picked up one to read.
So, I’m sure it comes as no surprise when I was left hanging having to use a Post-it note as a placeholder after failing to remember where my bookmarks actually were.
And that’s how these cute popsicle stick bookmarks came about!
Making these 3 bookmarks was so much fun and I got to explore my creative side by playing around with color schemes and patterns while designing them.
I can proudly say that these bookmarks are honestly my favorite thing to use right now!
I think they add a cute aesthetic to the whole reading experience.
They also took roughly around 5 minutes or so for each one which is another great reason as to why you should make these popsicle stick bookmarks!
I hope that’s convincing enough.
With that said, here’s the full step-by-step tutorial to make these cute bookmarks:
How To Make Popsicle Stick Bookmarks
Supplies
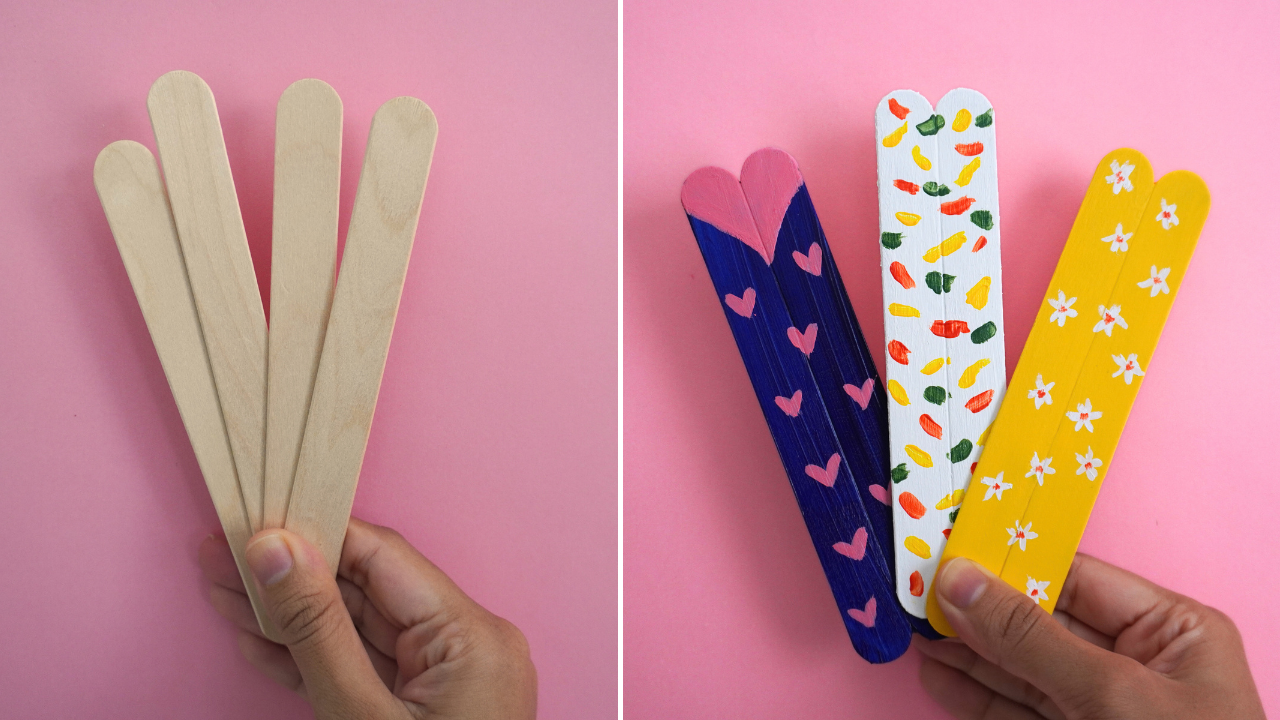
- Popsicle Sticks (6)
- Glue
- Acrylic Paint
Instructions
Bookmark #1
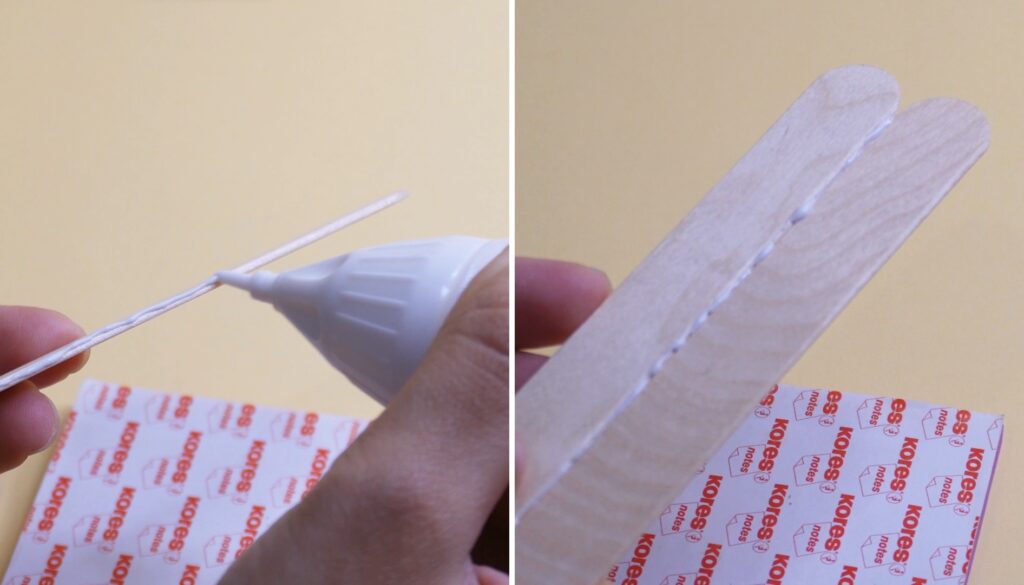
To make these bookmarks, begin by gluing two popsicle sticks together. Apply a thin layer of craft or white/clear glue to one edge of a stick.
Attach the other popsicle stick to the glued end. Clean up any excess glue from the center of the joined sticks and set them to dry.
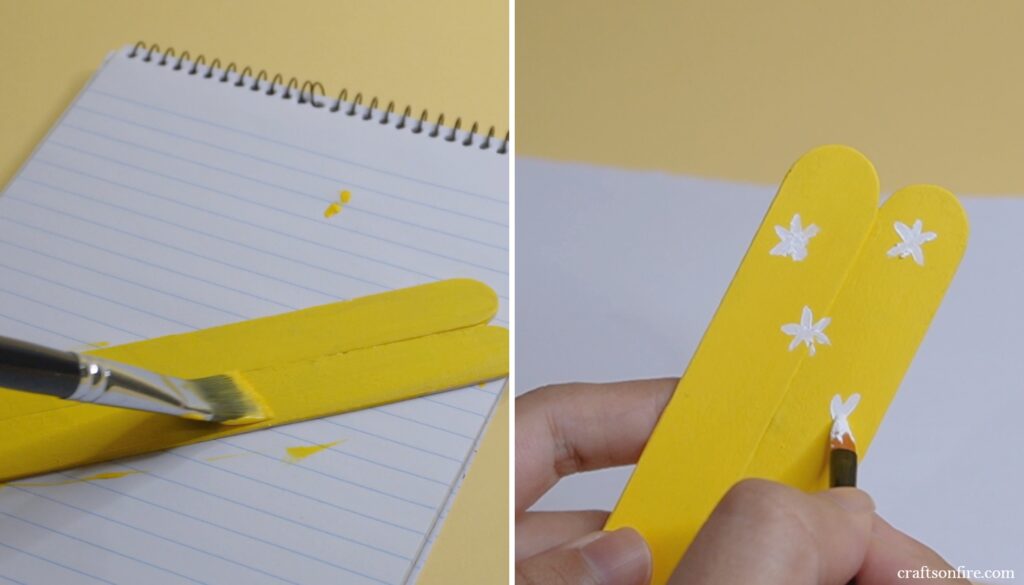
Then, grab yellow acrylic or craft paint and paint one side of the popsicle bookmark. At this point, you can choose any color you wish – it doesn’t have to be yellow!
Once you’ve completed this step, you’ll now have to play the waiting game (again) and allow the paint to dry before you can decorate it.
You’ll then want to take white acrylic paint and use a small paint brush to paint the flowers in a random pattern starting from the top of the bookmark.
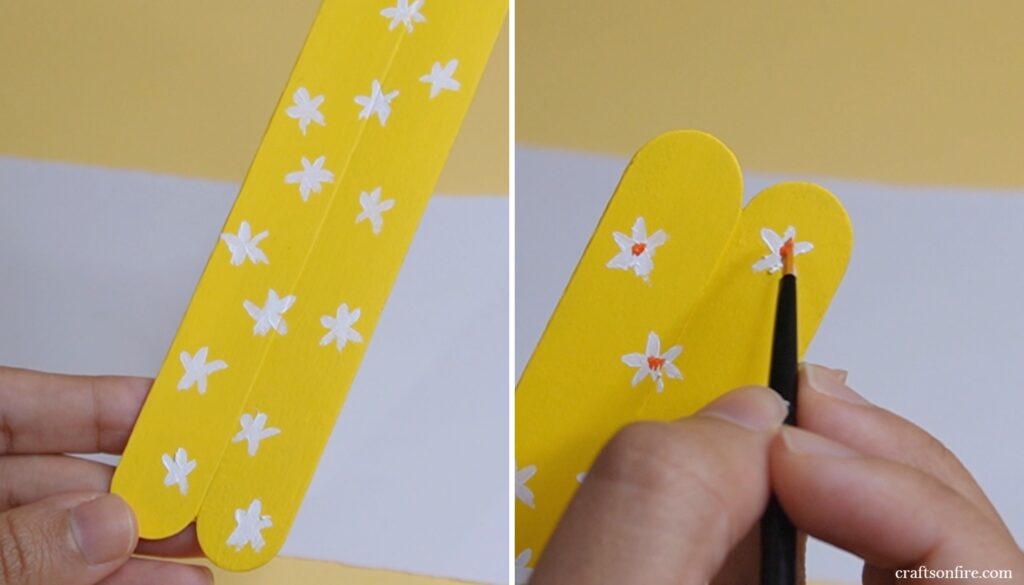
Continue painting the white flowers until you reach the end of the popsicle bookmark. If you’re using acrylic paint, this should dry quickly.
Then, paint a small orange dot in the center of the flower for added color and texture.
Bookmark #2
This heart-shaped bookmark is just as easy as the first one. Mix white and red acrylic paint to create this pink shade. Paint a heart shape at the very top of the two popsicle sticks.
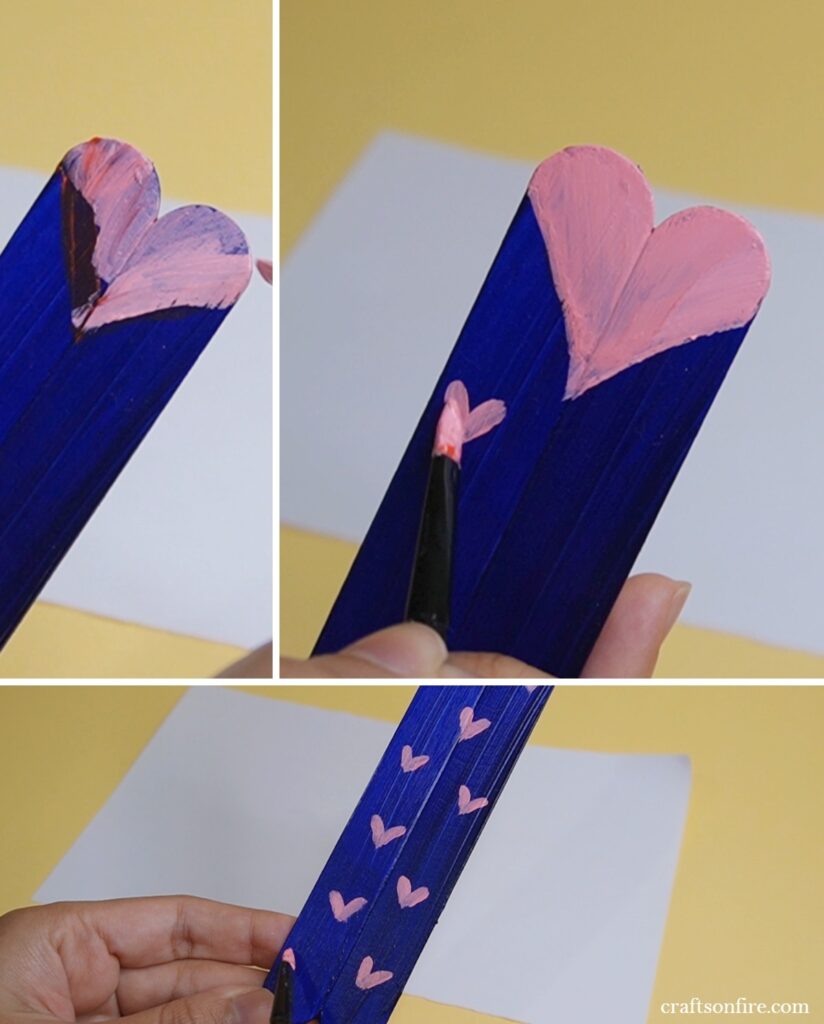
Then paint smaller hearts below that by making a small angled brush stroke followed by a second one on the other side to create these tiny hearts.
Fill up the rest of the bookmark with this heart pattern.
Bookmark #3
To create this bright and colorful bookmark, apply a quick and loose yellow brush stroke in random places from the top to the bottom of the stick.
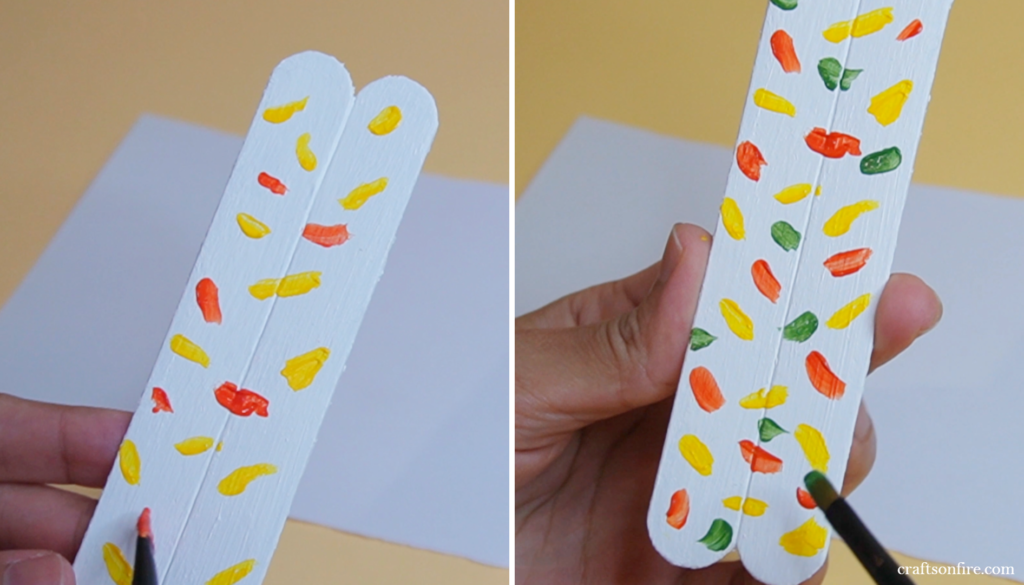
Follow up with red or orange brush strokes. You’ll then want to fill up any empty spots with a few more brush strokes in a green shade.
Allow the paint to dry and you’re done.
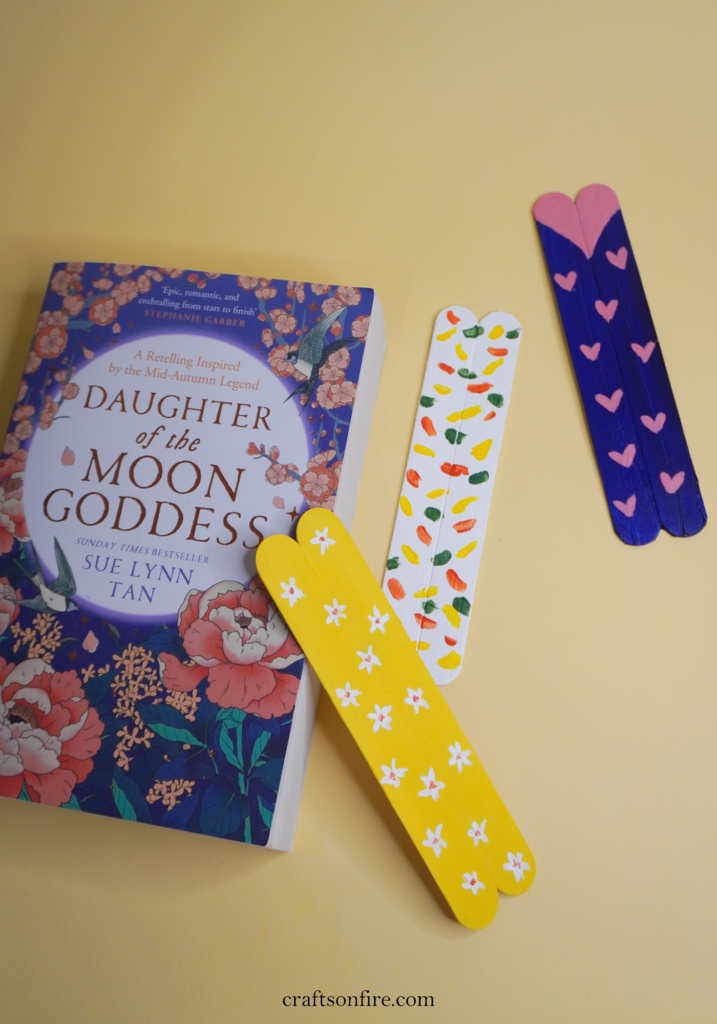
Final Results
Here is the final product of these decorated popsicle stick bookmarks:
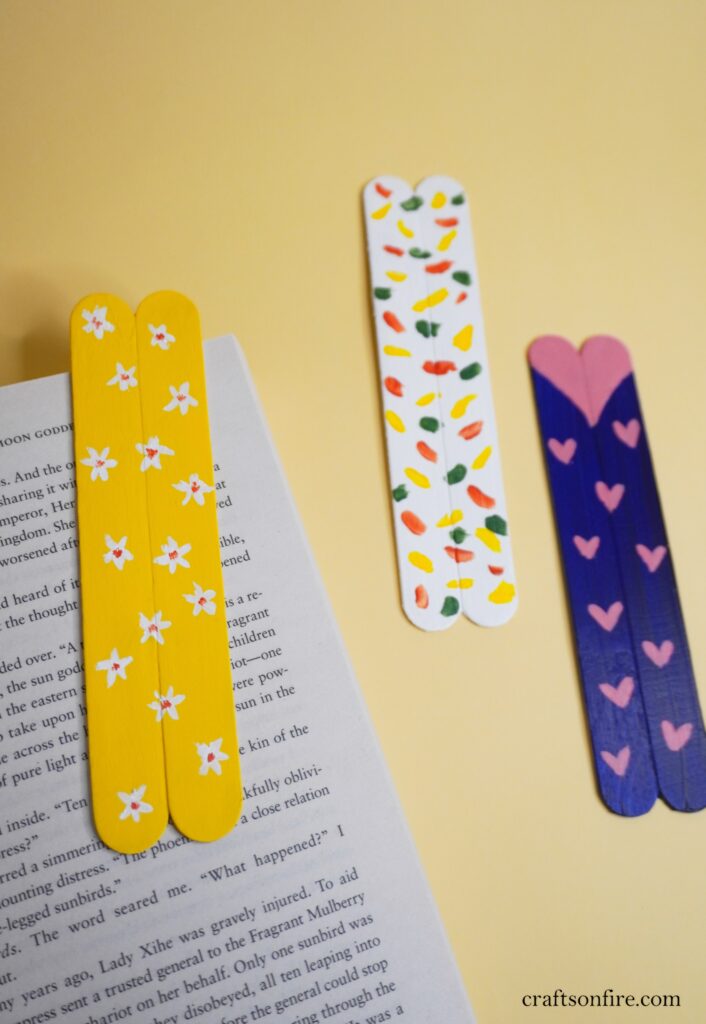
It looks cute, right? I had this idea in mind for quite some time and I finally got done with making them.
What I love the most about these popsicle bookmarks is that you can use any pattern, color scheme, or image to decorate them and they fit perfectly in a book.
With the blue bookmark, you can see the heart popping up from the top of the closed book which is quite adorable!
Overall, this is a fun, simple, and quick project you can do if you’re bored or looking to make something nice.
You can make tons of these bookmarks in one sitting, and painting them is definitely a therapeutic and relaxing activity.
If you’re looking for more fun and cute craft ideas, check out my other tutorials: