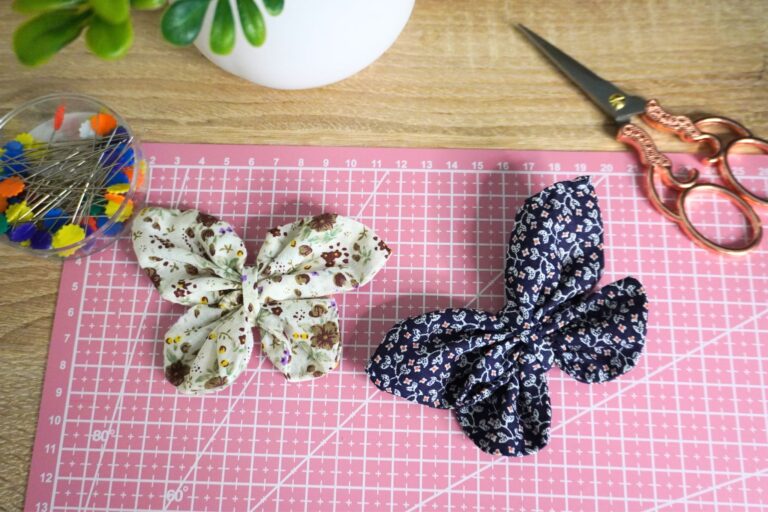
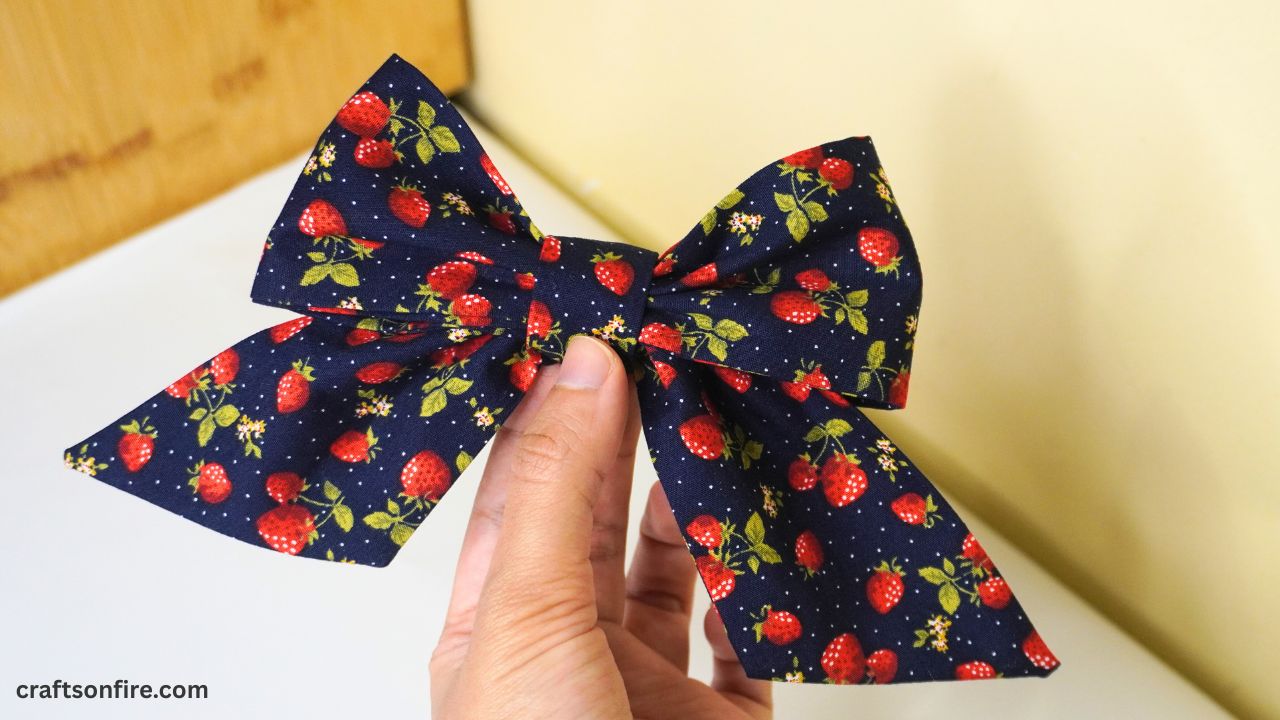
DIY Fabric Bow (Beginner Sewing Tutorial)

Making a fabric bow is easier than you might think! In this step-by-step sewing guide, I’ll walk you through a simple pattern to create a bow in any size you like.
Once you learn this technique, you won’t need to buy another fabric bow again.
This is an excellent sewing project for beginners and I’m certain you’re going to love every minute of this!
The final size for this bow is 13 cm x 12 cm / 5.12″ x 4.72″
So, if you’d like to get started, grab your supplies and let’s begin.
How To Make A Fabric Bow
Supplies
- Fabric Strip 1 – 12 cm X 6 cm / 4.72 inches x 2.36 inches
- Fabric Strip 2 – 14 cm X 55 cm / 5.51 inches x 21.65 inches
- Matching Cotton
- Needle
- Sewing Machine
- Ruler/Tape Measure
- Scissor
Video Tutorial
Printable PDF:
A quick heads up: I also created an A4 Printable PDF version of this sewing guide. If you’d like to follow along without ads getting in the way, grab your copy over here!
Instructions
Step 1
Start by folding the first piece of fabric in half, with the wrong side facing up. Then, fold the top and bottom edges over, as shown in the image below. Sew the strip.
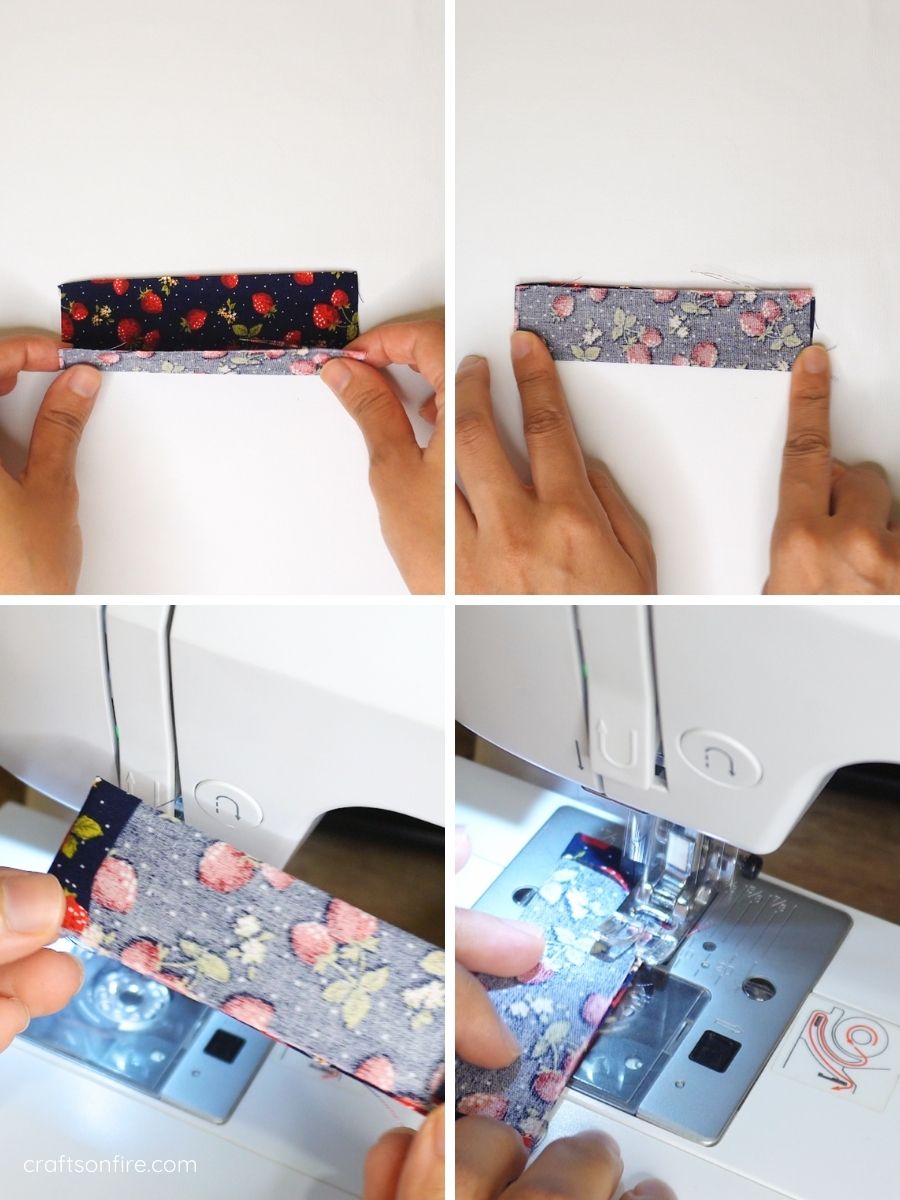
Step 2
Next, attach a safety pin to the side of the piece. Use the pin to thread the fabric through the opening, turning it right side out.
Your first piece is now complete.
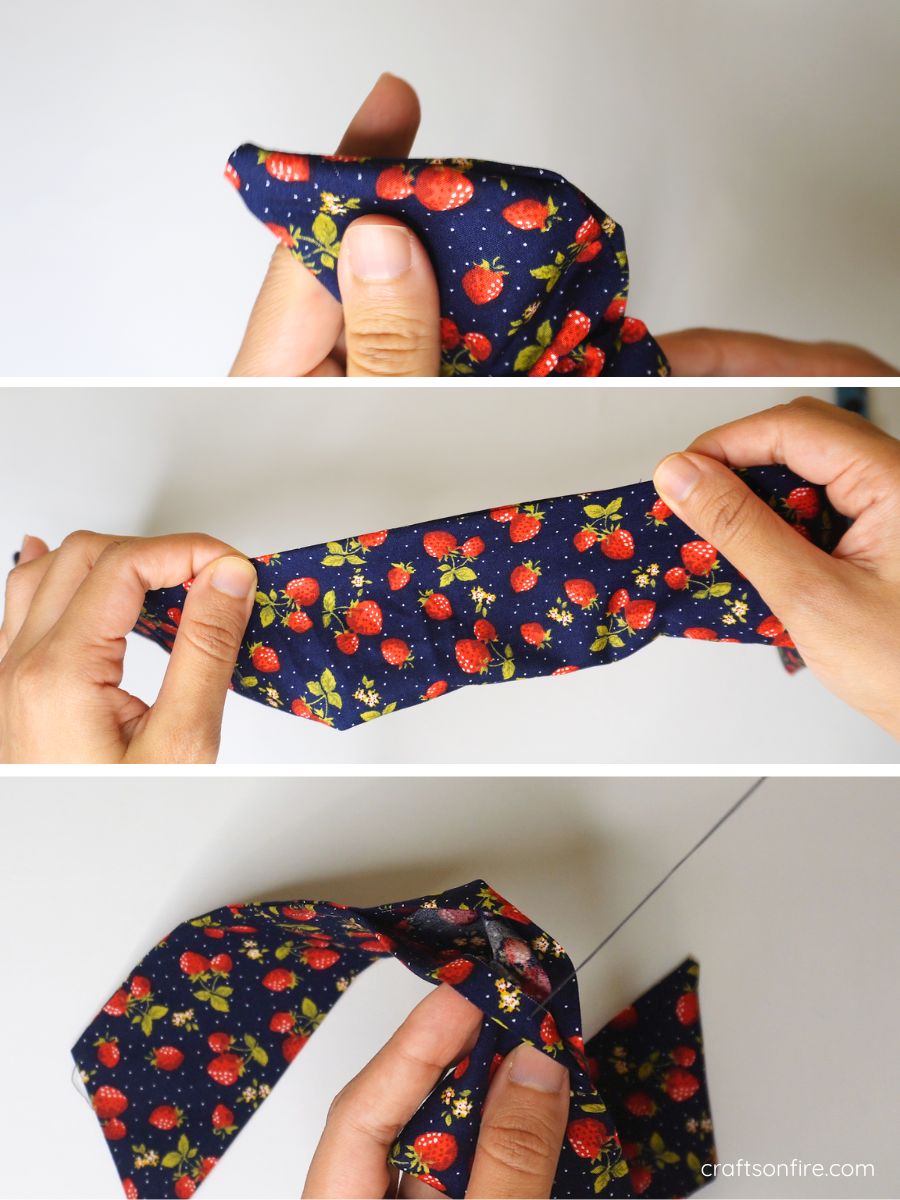
Step 3
Take the second piece of fabric and turn it to the wrong side. Fold the strip in half, then measure 8 cm from the corner at an angle. Trim the corner off.
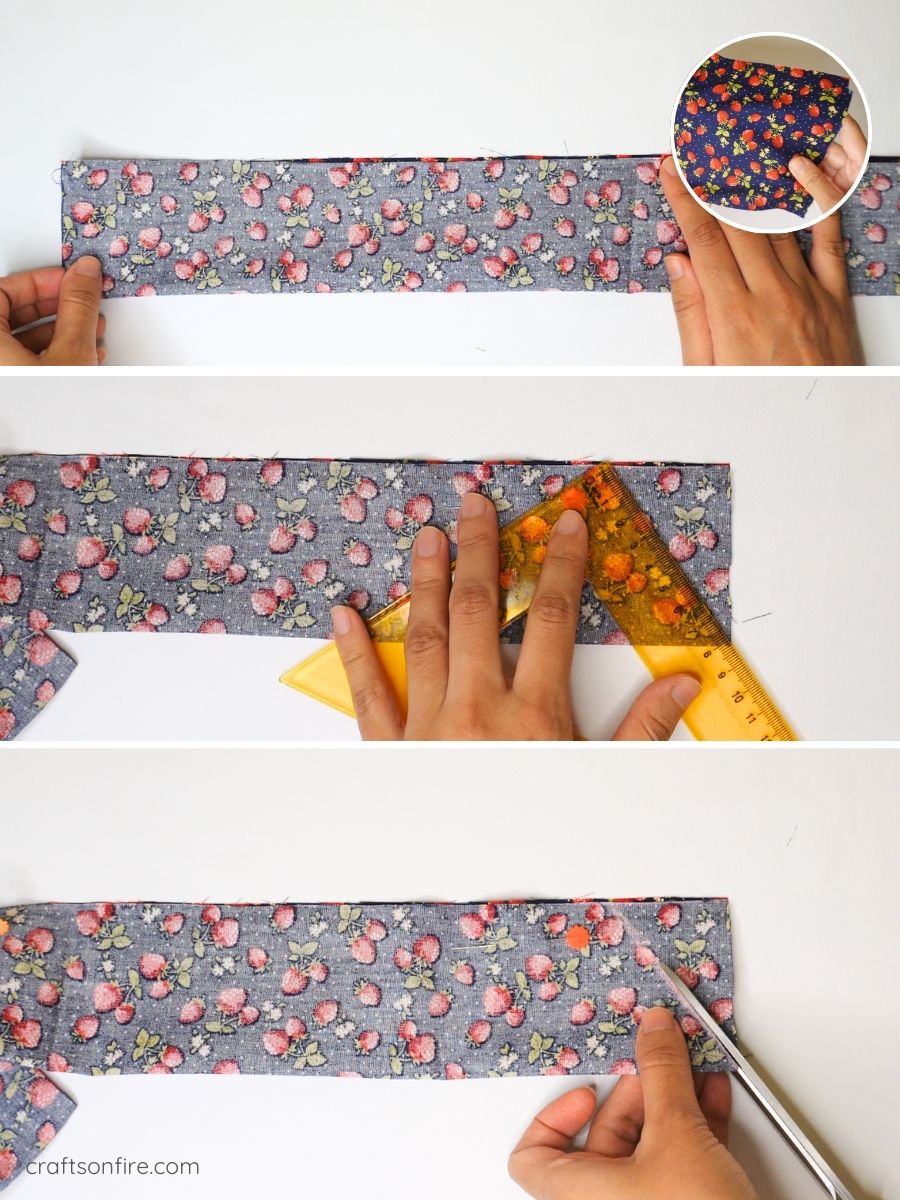
Step 4
Next, fold the fabric in half. Use the cut side as a guide to trim the opposite corner to match the angle of the first.
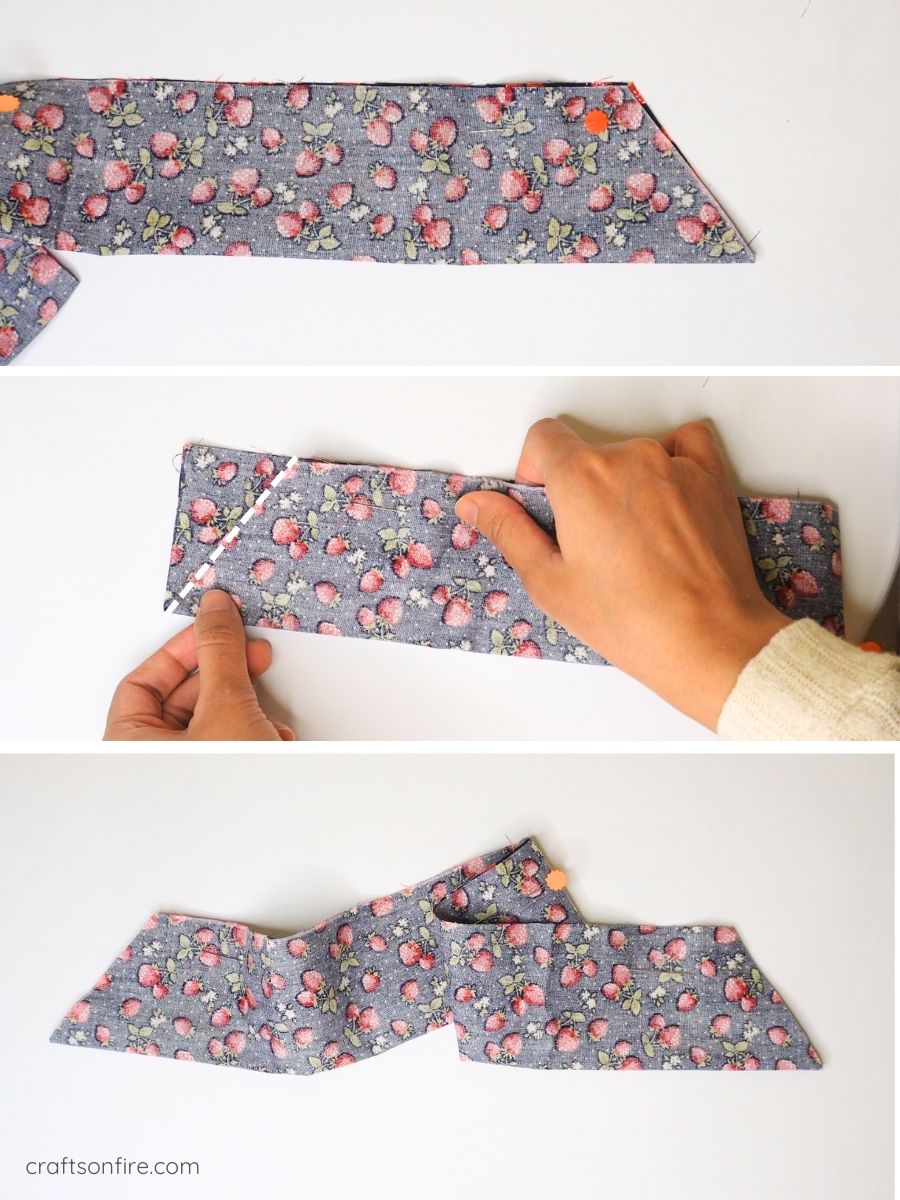
Step 5
Pin the top edge of the fabric together, then sew along the strip, leaving an opening in the middle for turning.
Step 6
When sewing the strip, use a 1 cm seam allowance.
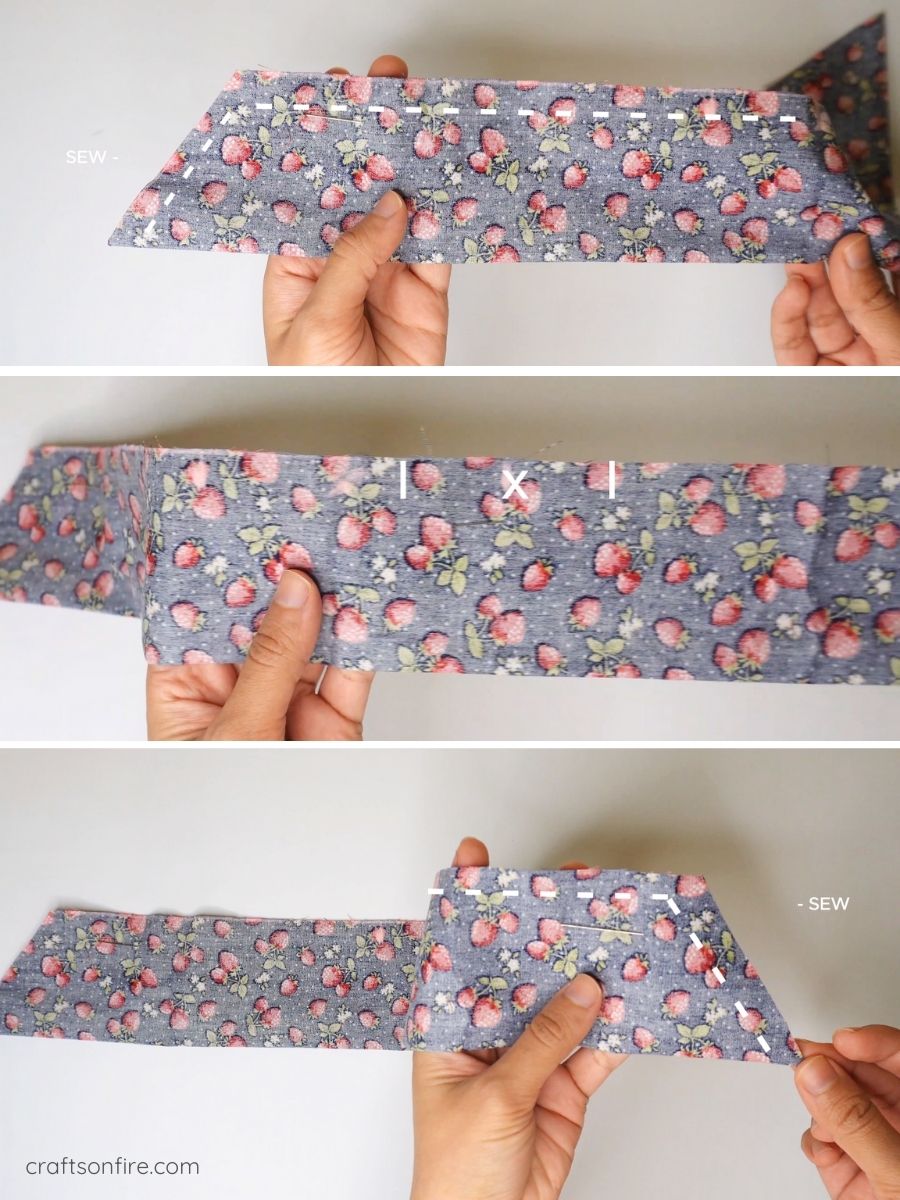
Carefully snip the edges of the fabric to reduce bulk. Then, go to the opening and gently pull the fabric through to turn it right side out.
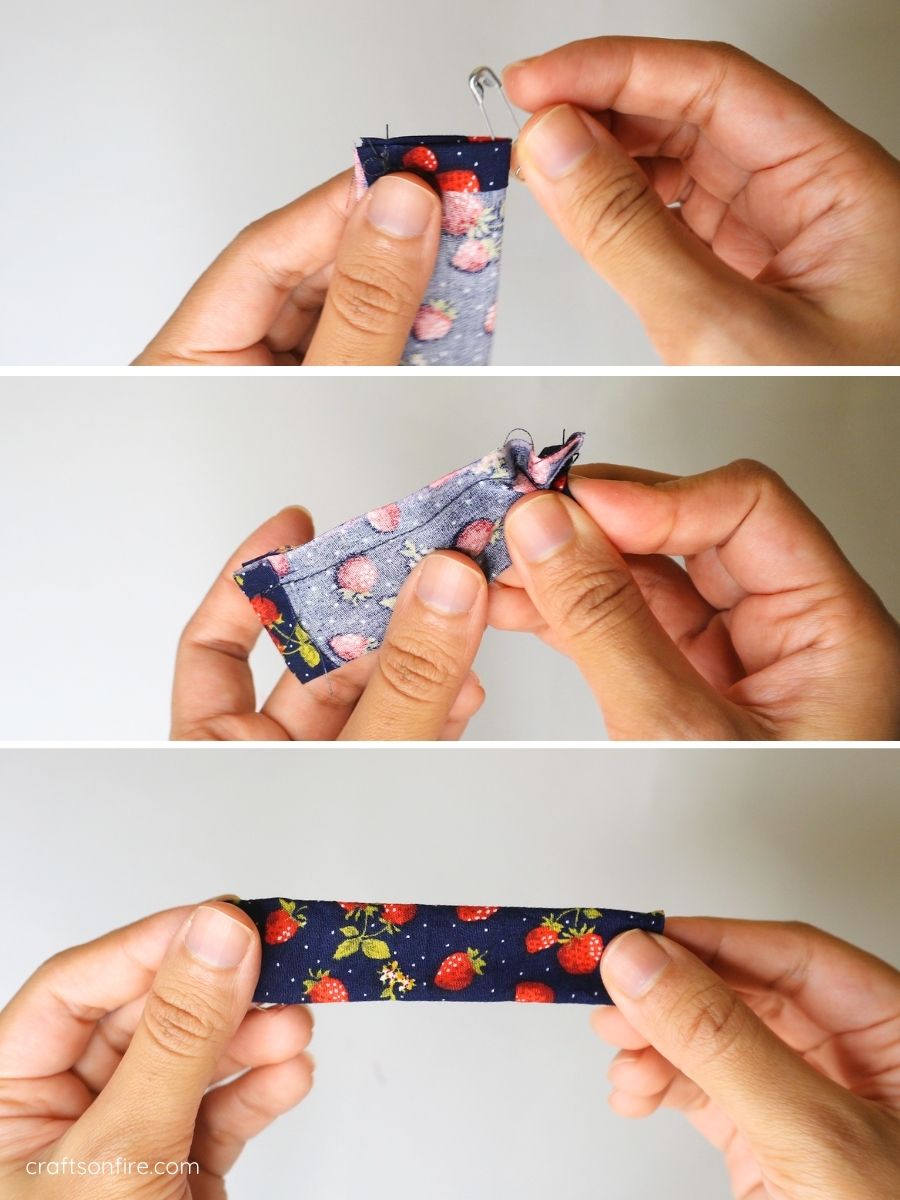
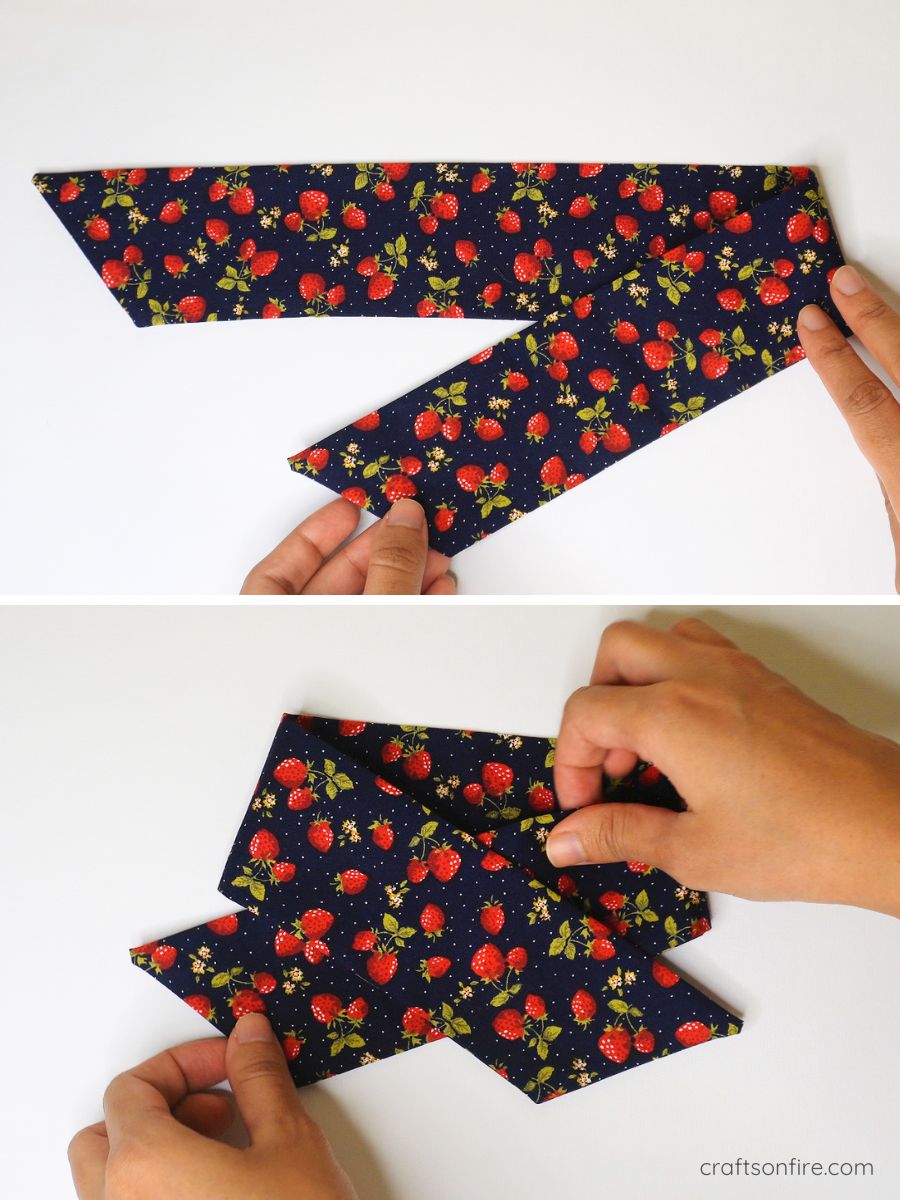
Step 7
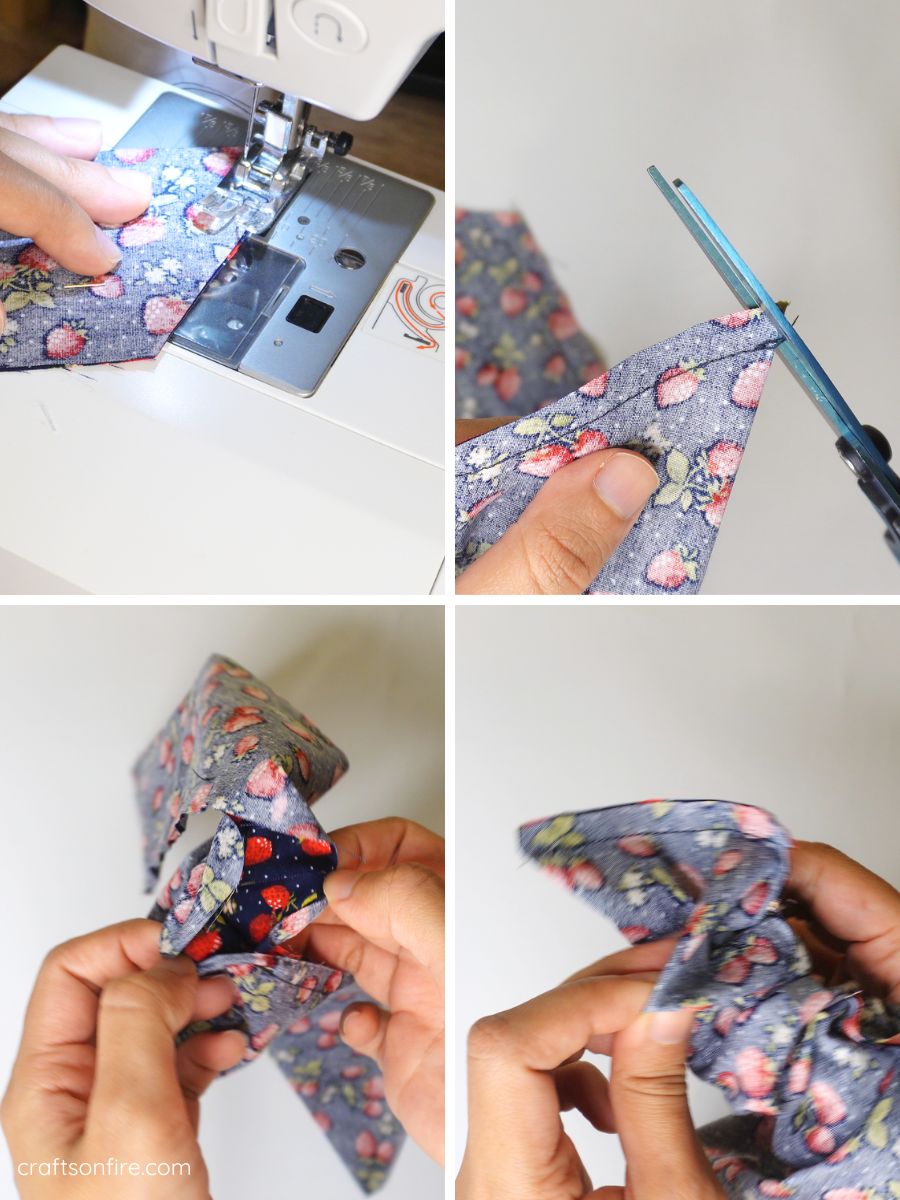
Use a pen or tool to push out the corners of the fabric, ensuring they are sharp. Then, fold the raw edges of the opening inward and sew it shut.
Press the fabric with an iron to smooth it out, then hand-stitch the opening closed with needle and thread.
Step 8
Lay the fabric strip flat on a surface. Fold the right end down toward the center. Then, fold the left end over the first fold to create a cross shape.
Step 9
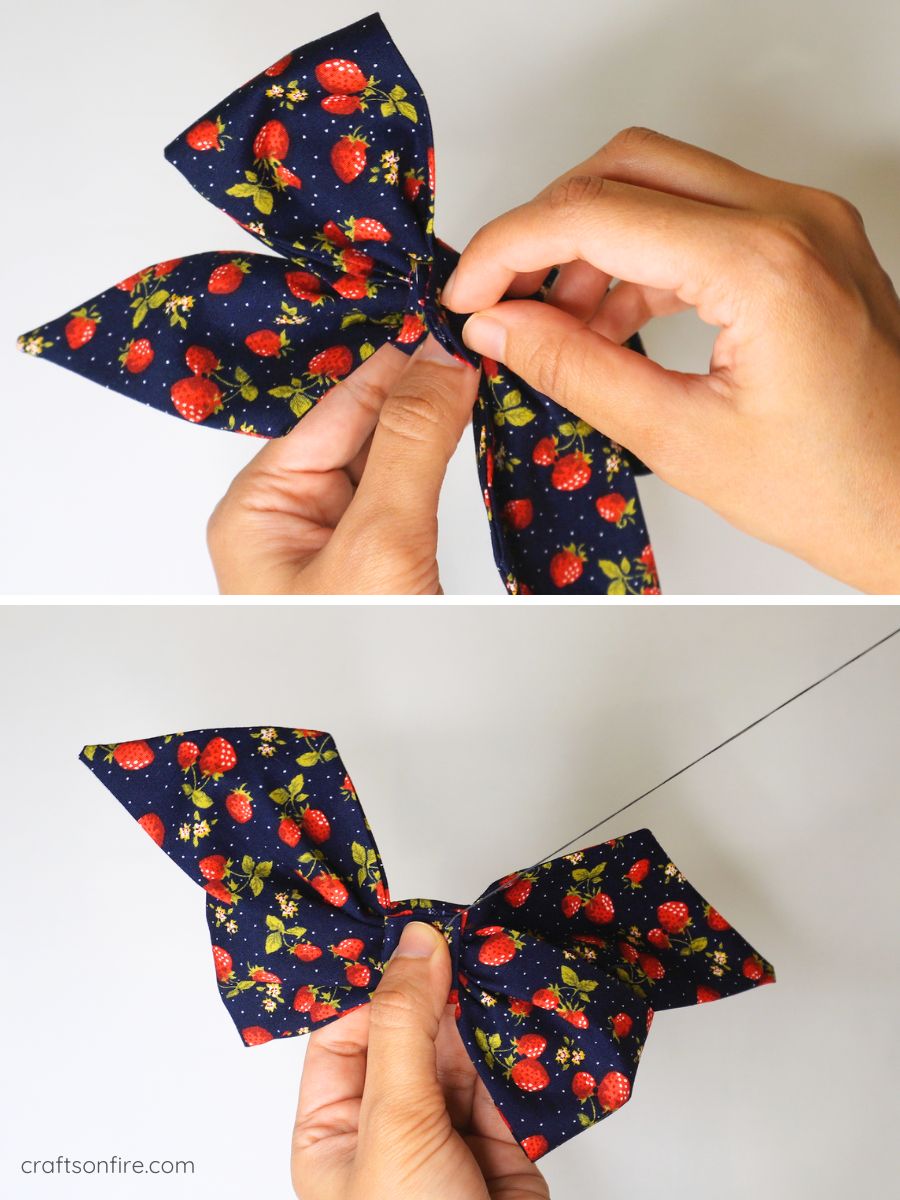
Before moving further, adjust the fabric to your desired bow shape, ensuring the folds are even.
To form the bow, pinch the fabric together at the center, from top to bottom.
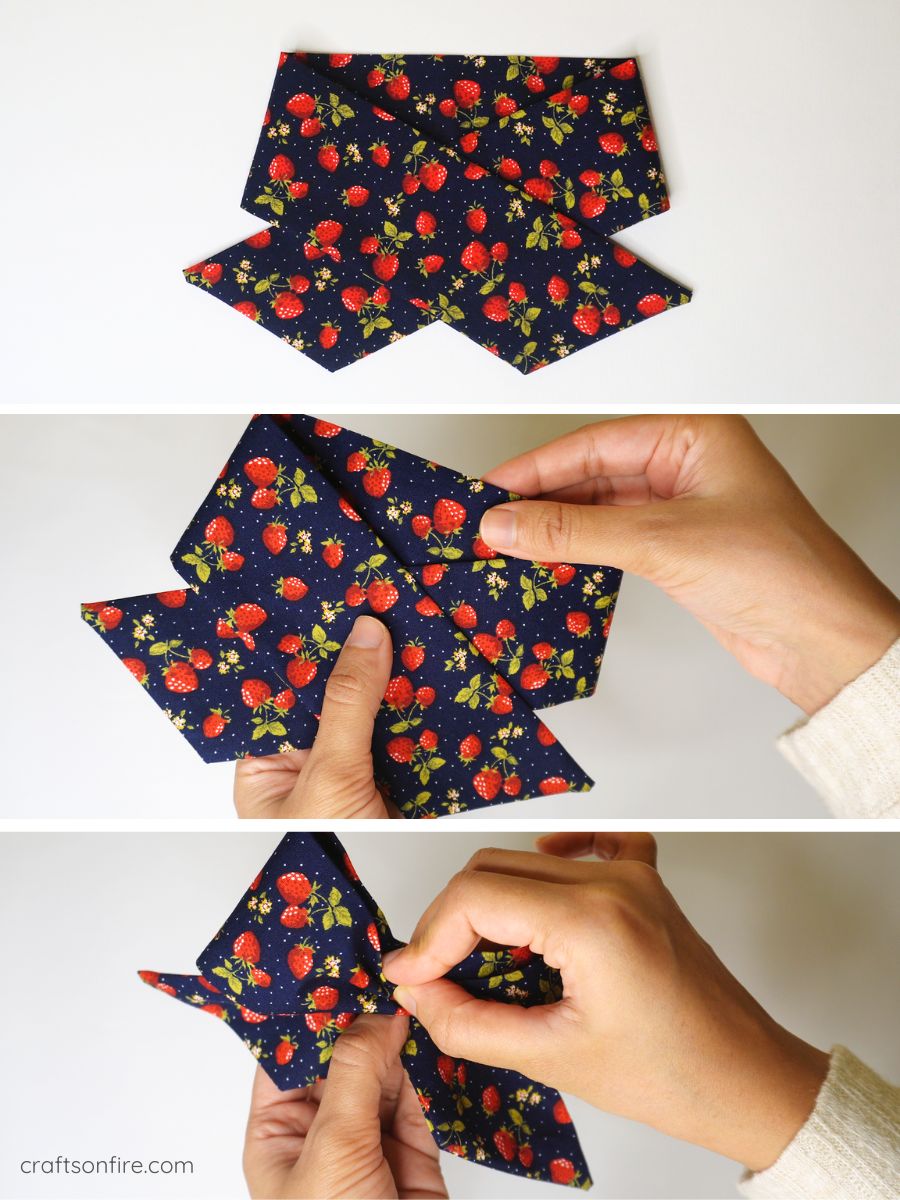
Step 10
Hold the fabric in place and use string to tie it around the center of the bow, securing it tightly.
You can adjust the folds as needed.
Then, take the first fabric strip you made and wrap it around the center of the bow to cover the string/thread.
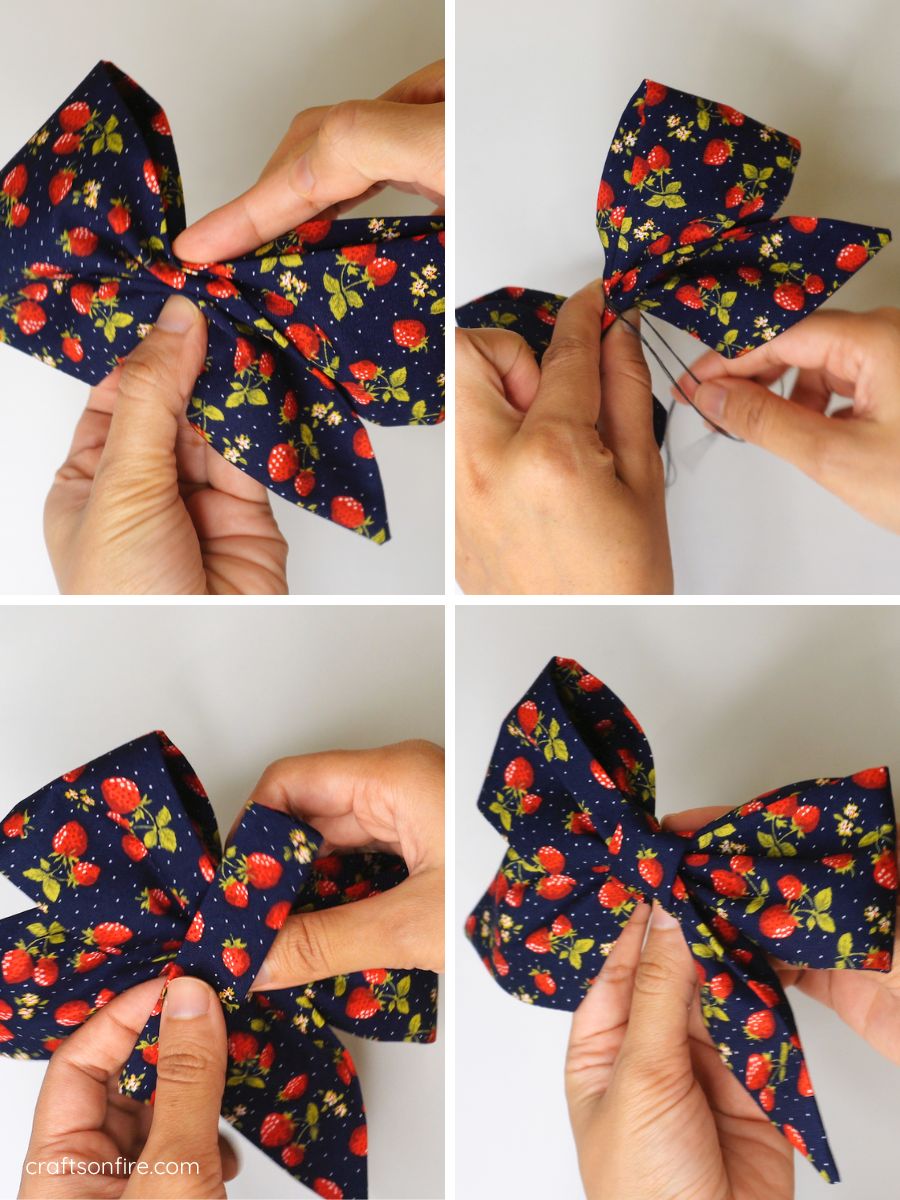
Step 11
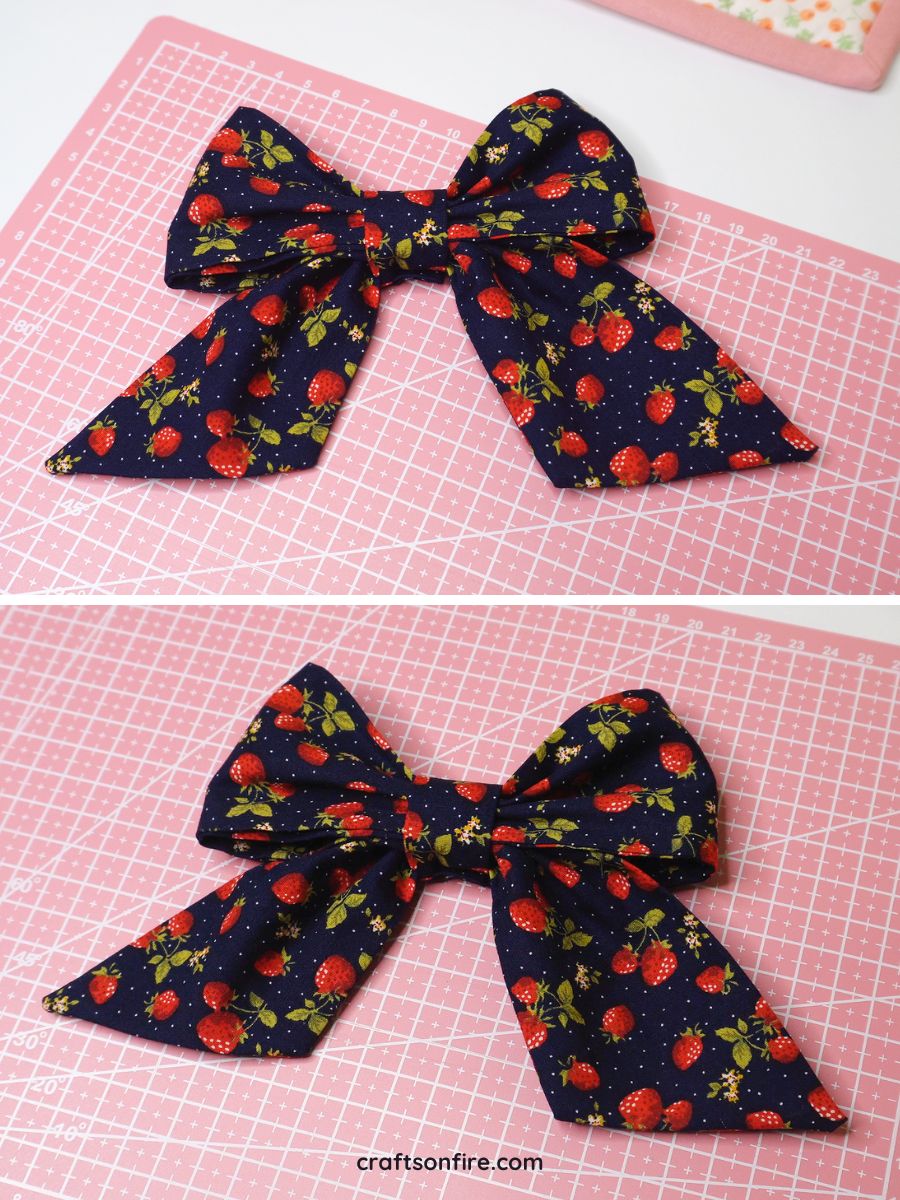
Finally, hand-stitch the end of the fabric strip at the back of the bow to keep everything in place.
Your fabric bow is now complete!
Fabric bows are undeniably charming and adorable, and there’s something even more special about creating one from scratch.
Helpful Q&A’s
What fabric should I use to make a bow?
For sewing a fabric bow, I recommend using cotton fabric as it folds easily and holds its shape well. However, if you’re aiming for a more luxurious look, satin fabric can be a beautiful alternative.
Can I add extra details to the fabric bow?
Absolutely! You can embellish the bows with pearls, beads, rhinestones, or lace.
How do I attach the fabric bow to a clip or accessory?
Before attaching the band to the center of the bow, first hold the clip at the back of the bow. Then, wrap the fabric around and secure it. Finally, stitch the band in place to fasten it to the clip and bow.
Can I make a fabric bow without sewing?
Yes, you can make a no-sew fabric bow by using fabric glue or a hot glue gun to secure the edges of the fabric. The process is the same as sewing, but instead of stitching, you’ll be gluing the fabric in place.
I hope you enjoyed following this DIY fabric bow sewing tutorial—it’s definitely been one of my favorite projects so far!
That said, if you enjoyed this sewing project, I have a few more fun and easy beginner-friendly guides that you can try next: