DIY Pen Holder From Scrap Fabric
Would you like to make a beautiful pen holder with a tin can, some scrap fabric, and rope? Then you’re going to enjoy following this detailed tutorial.
I love making my own pen holders and occasionally swapping them out for a fresh new look.
It’s also quite a satisfying feeling to see your handmade creations displayed around the home.
This is how I came up with this cool way to turn scrap fabric and a tin can into this simple yet elegant pen holder and honestly, it’s so easy to make!
This pen holder looks so good, you can place it anywhere in your home. It also helps reduce waste in your home which is a bonus!
In this tutorial, I’ll show you the full step-by-step process of making this pen holder from scratch.
Sounds good? Let’s get started.
DIY Pen Holder
Supplies
- Tin Can
- Scrap Fabric
- Glue
- Fancy Trim
- Rope
Instructions
Cover The Can
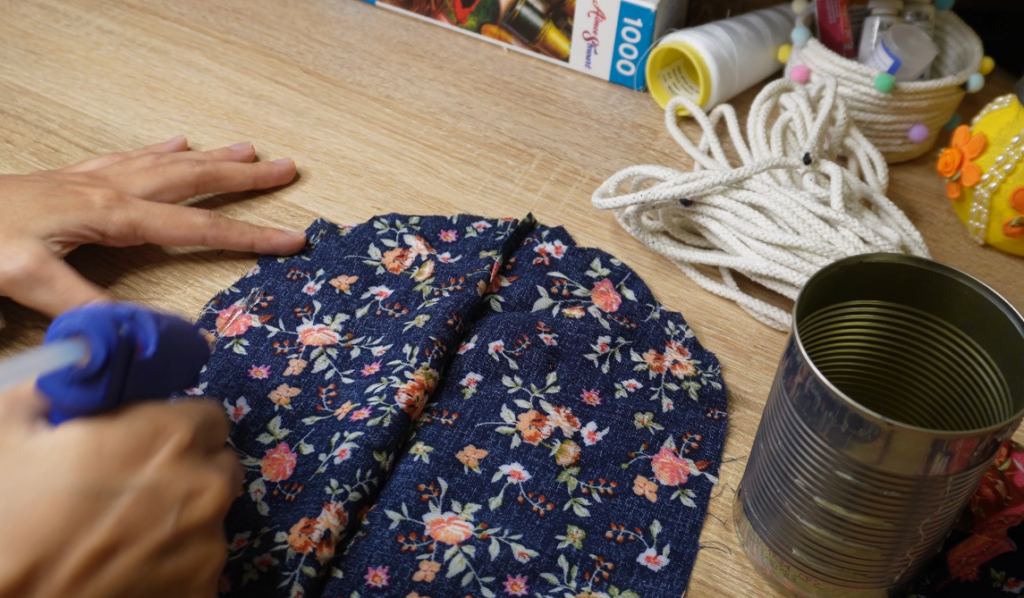
We’ll first use a piece of fabric to cover the tin can. Use a hot glue gun to gun one end of the fabric which you can then place on the can.
Place that fabric piece on the tin can and hold it down for a few seconds until the fabric is glued to the can. If you’re using a glue gun, this should dry in seconds.
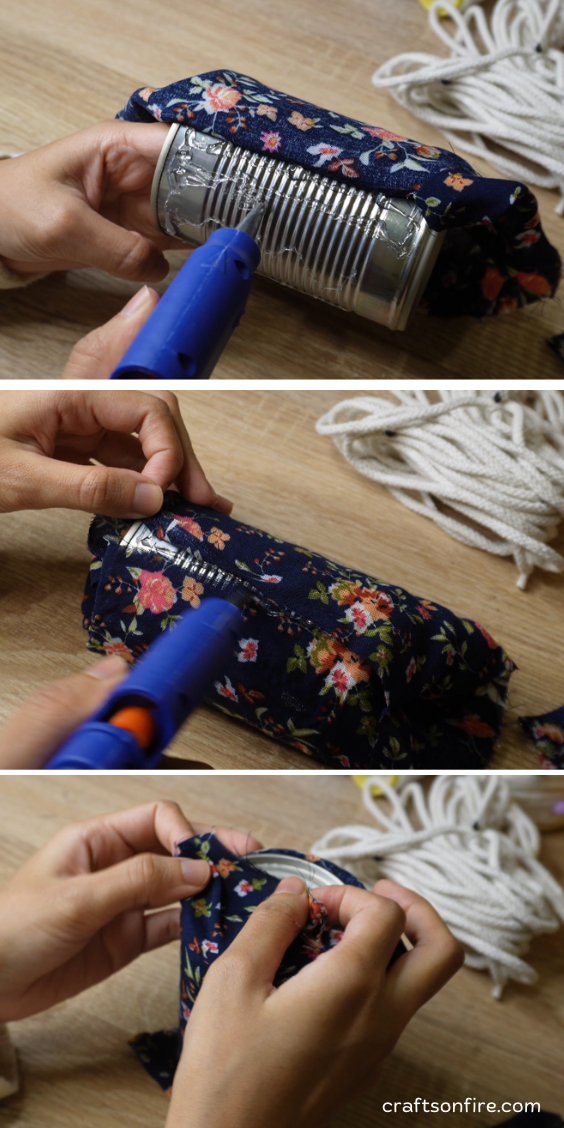
Smooth down the fabric as you glue it for a neater finish. Then, glue the rest of the fabric to the can until the entire can is covered.
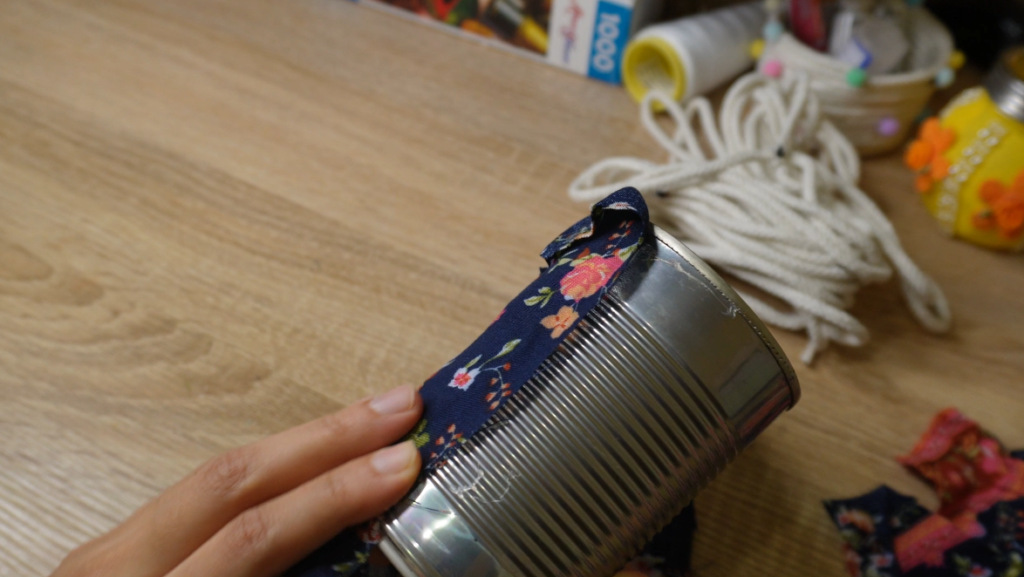
Once you reach the end of the can, cover the bottom with the fabric by folding the fabric together.
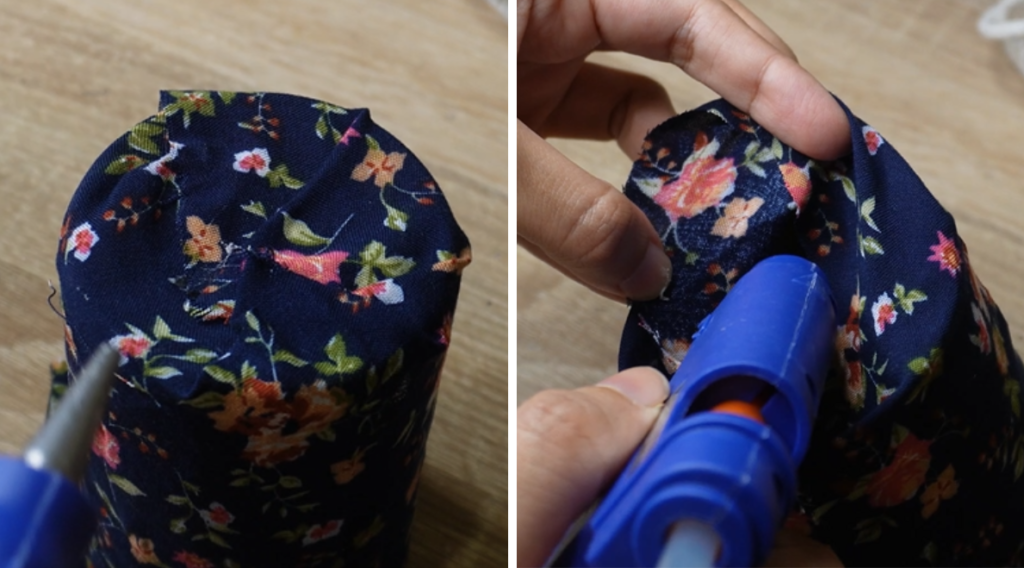
As seen above, use a hot glue gun to secure the cloth to the bottom and inside of the container. Now the fabric should completely cover the tin can from top to bottom.
Decorate The Can
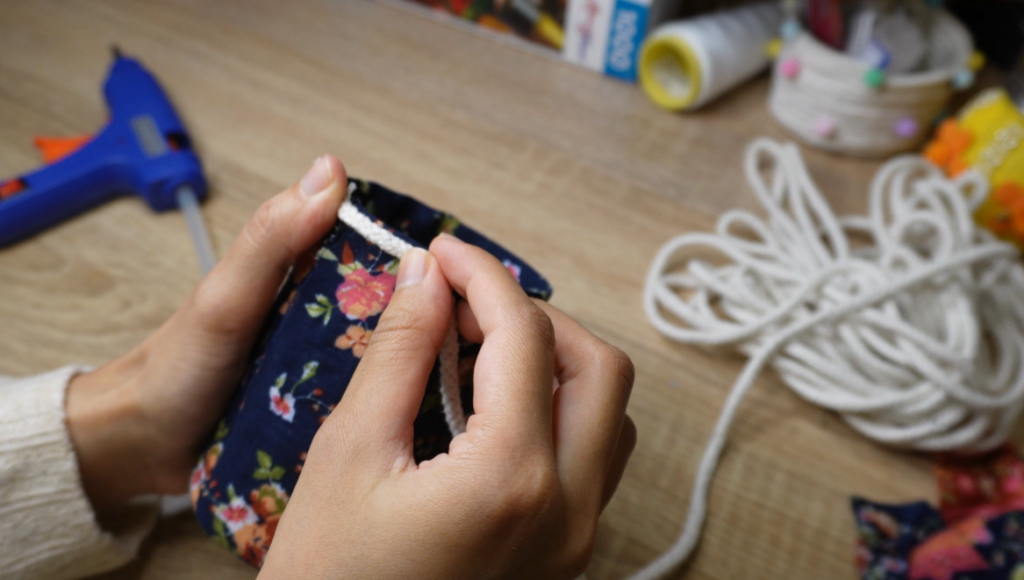
To decorate the pen holder, grab a piece of white string or rope and glue it to the top of the holder.
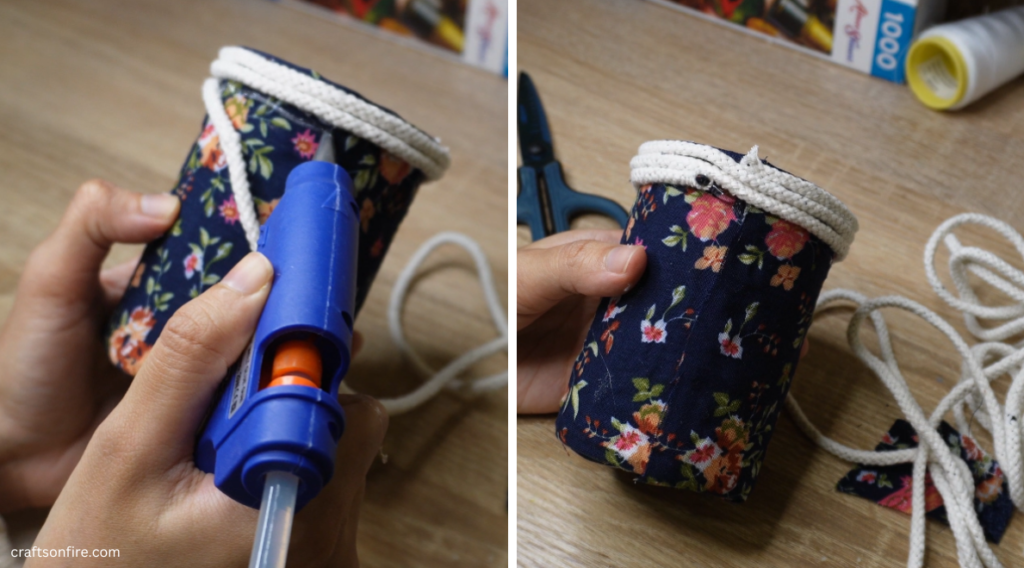
Wrap the string/rope around the can at least three times and glue the rope as you go. When you reach the end, cut the rope and add a small piece of glue to tidy up the edge.
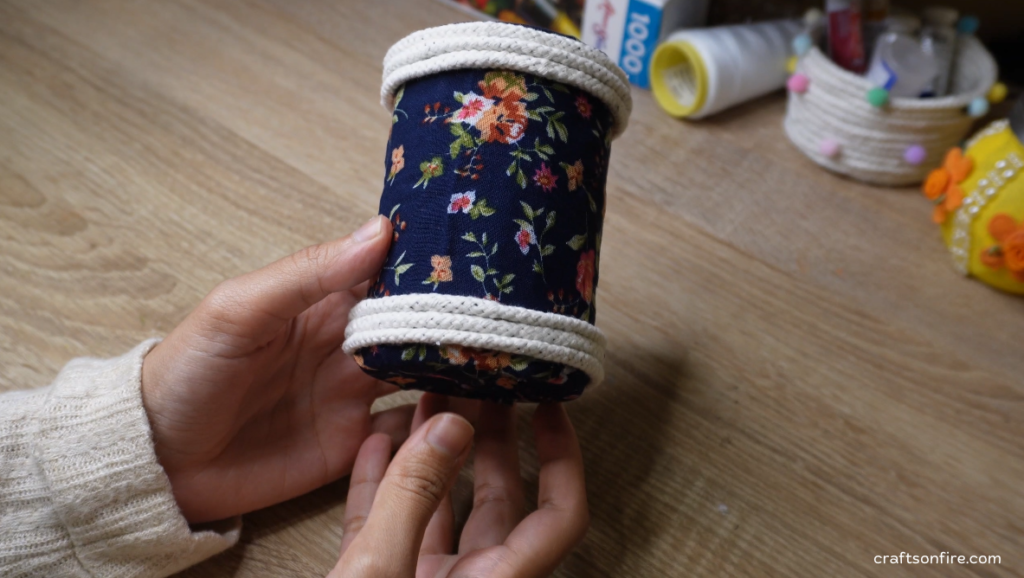
Repeat these steps for the bottom of the holder. Your pen hold should look something like this.

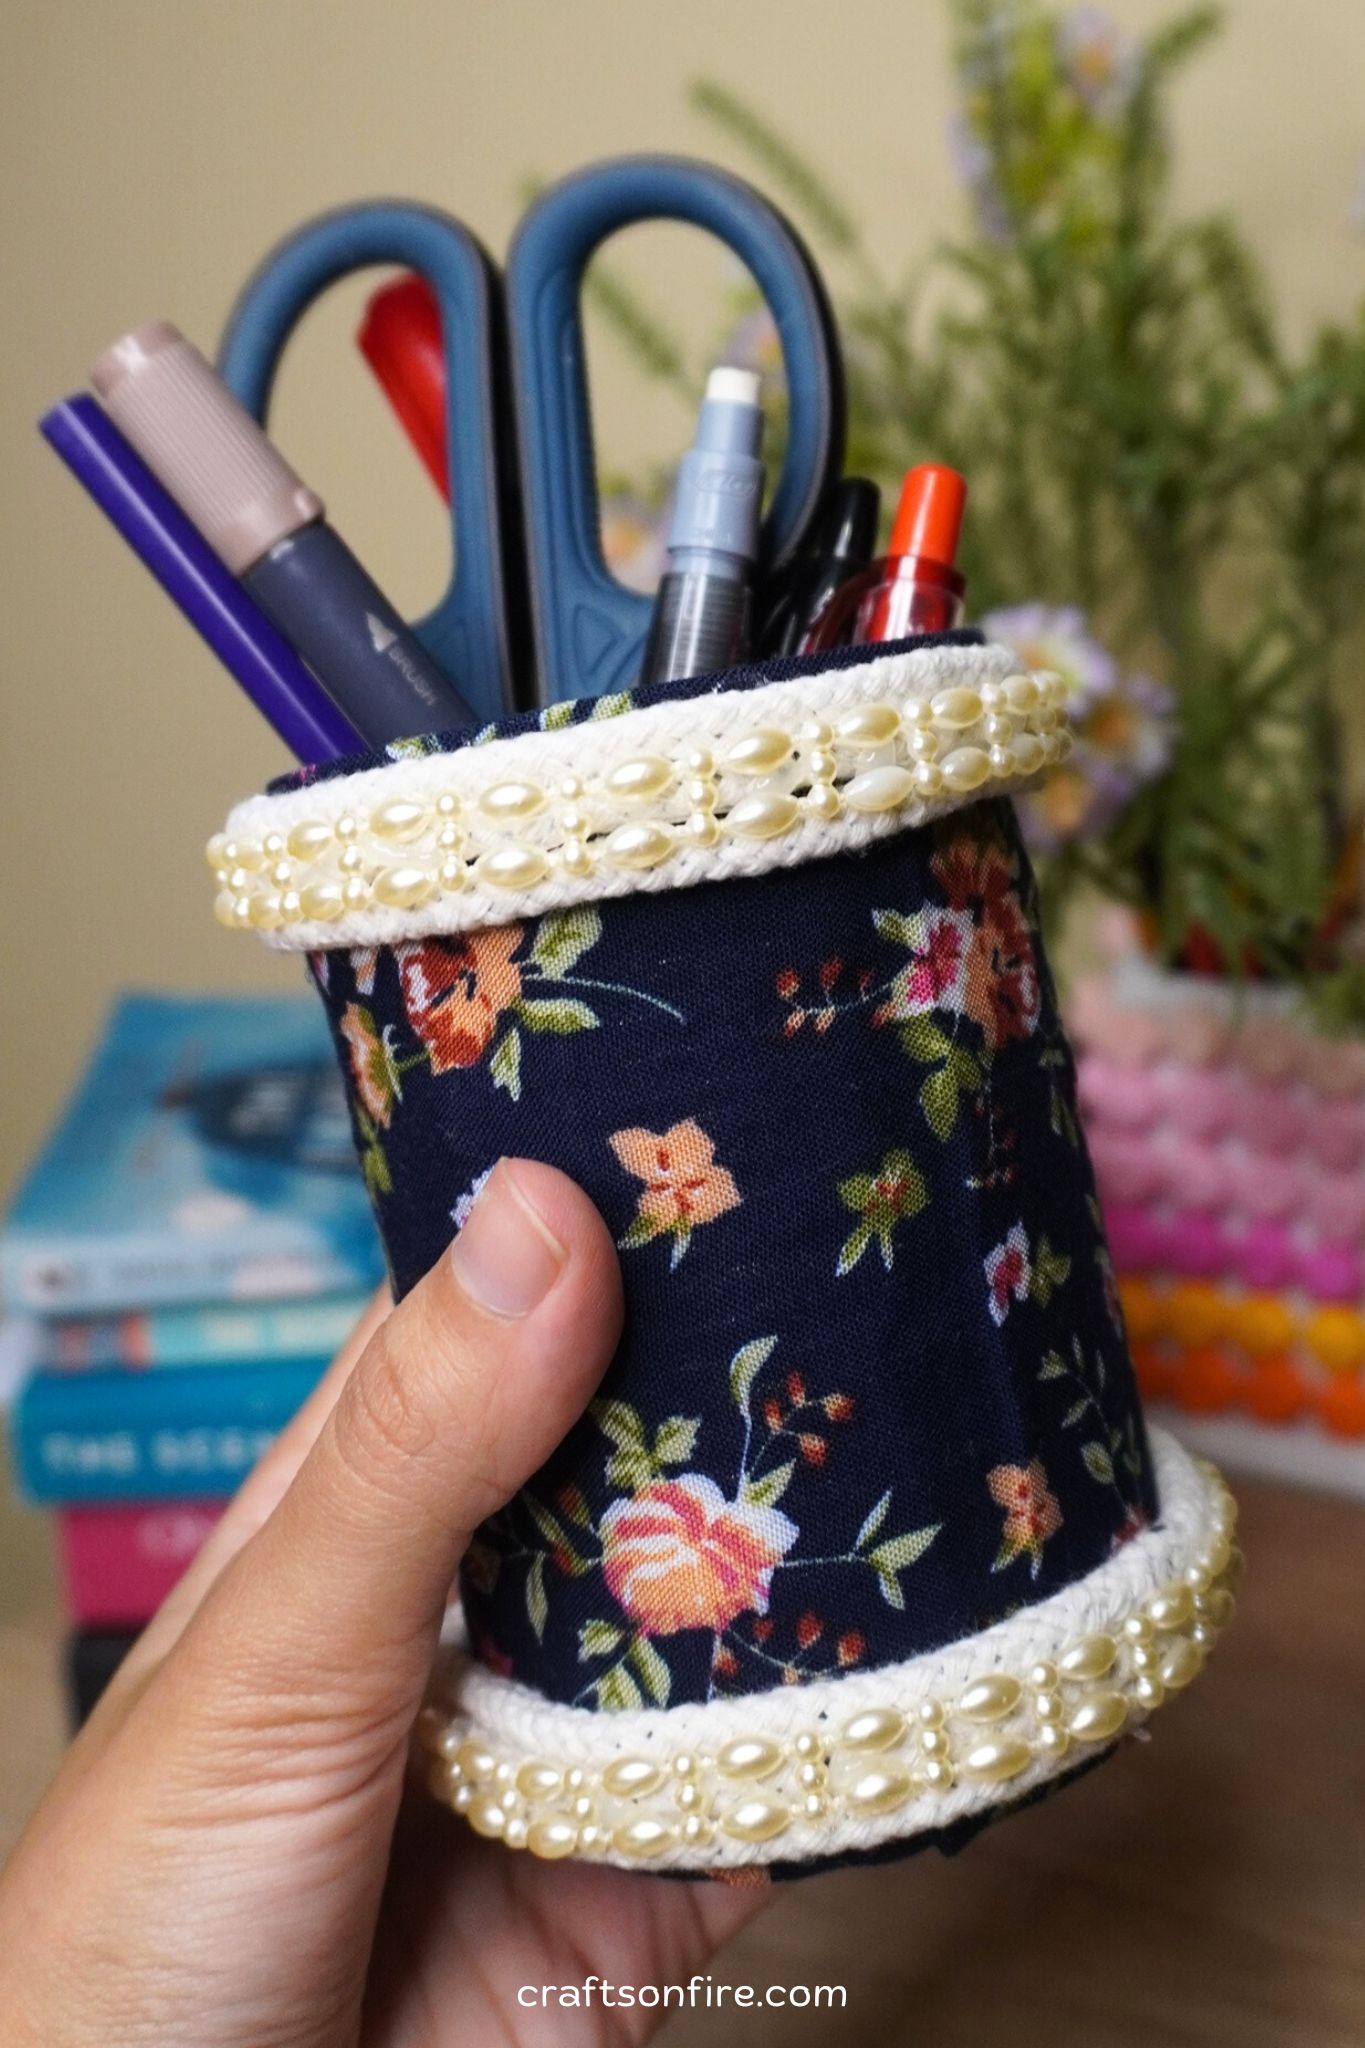
To add a little fancy touch to the holder, glue a fancy trim on the top and bottom of the rope/string.
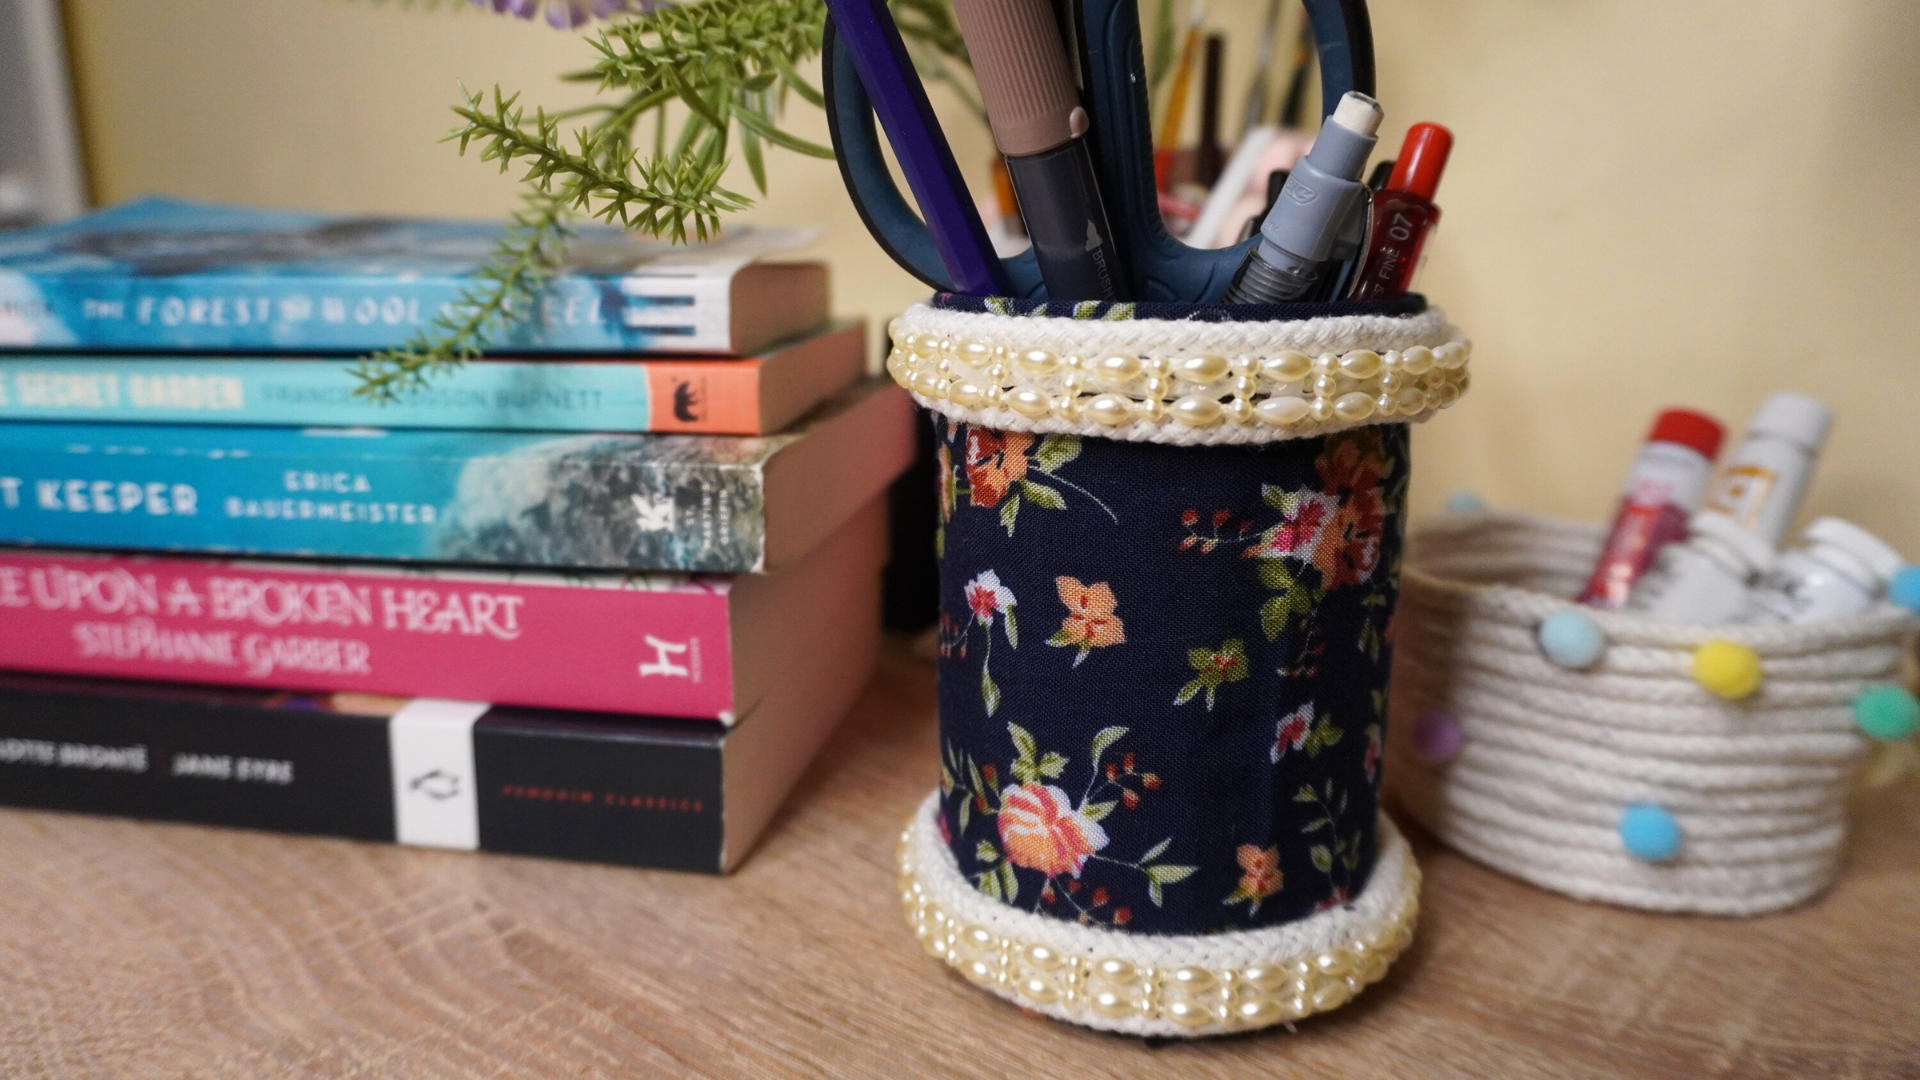
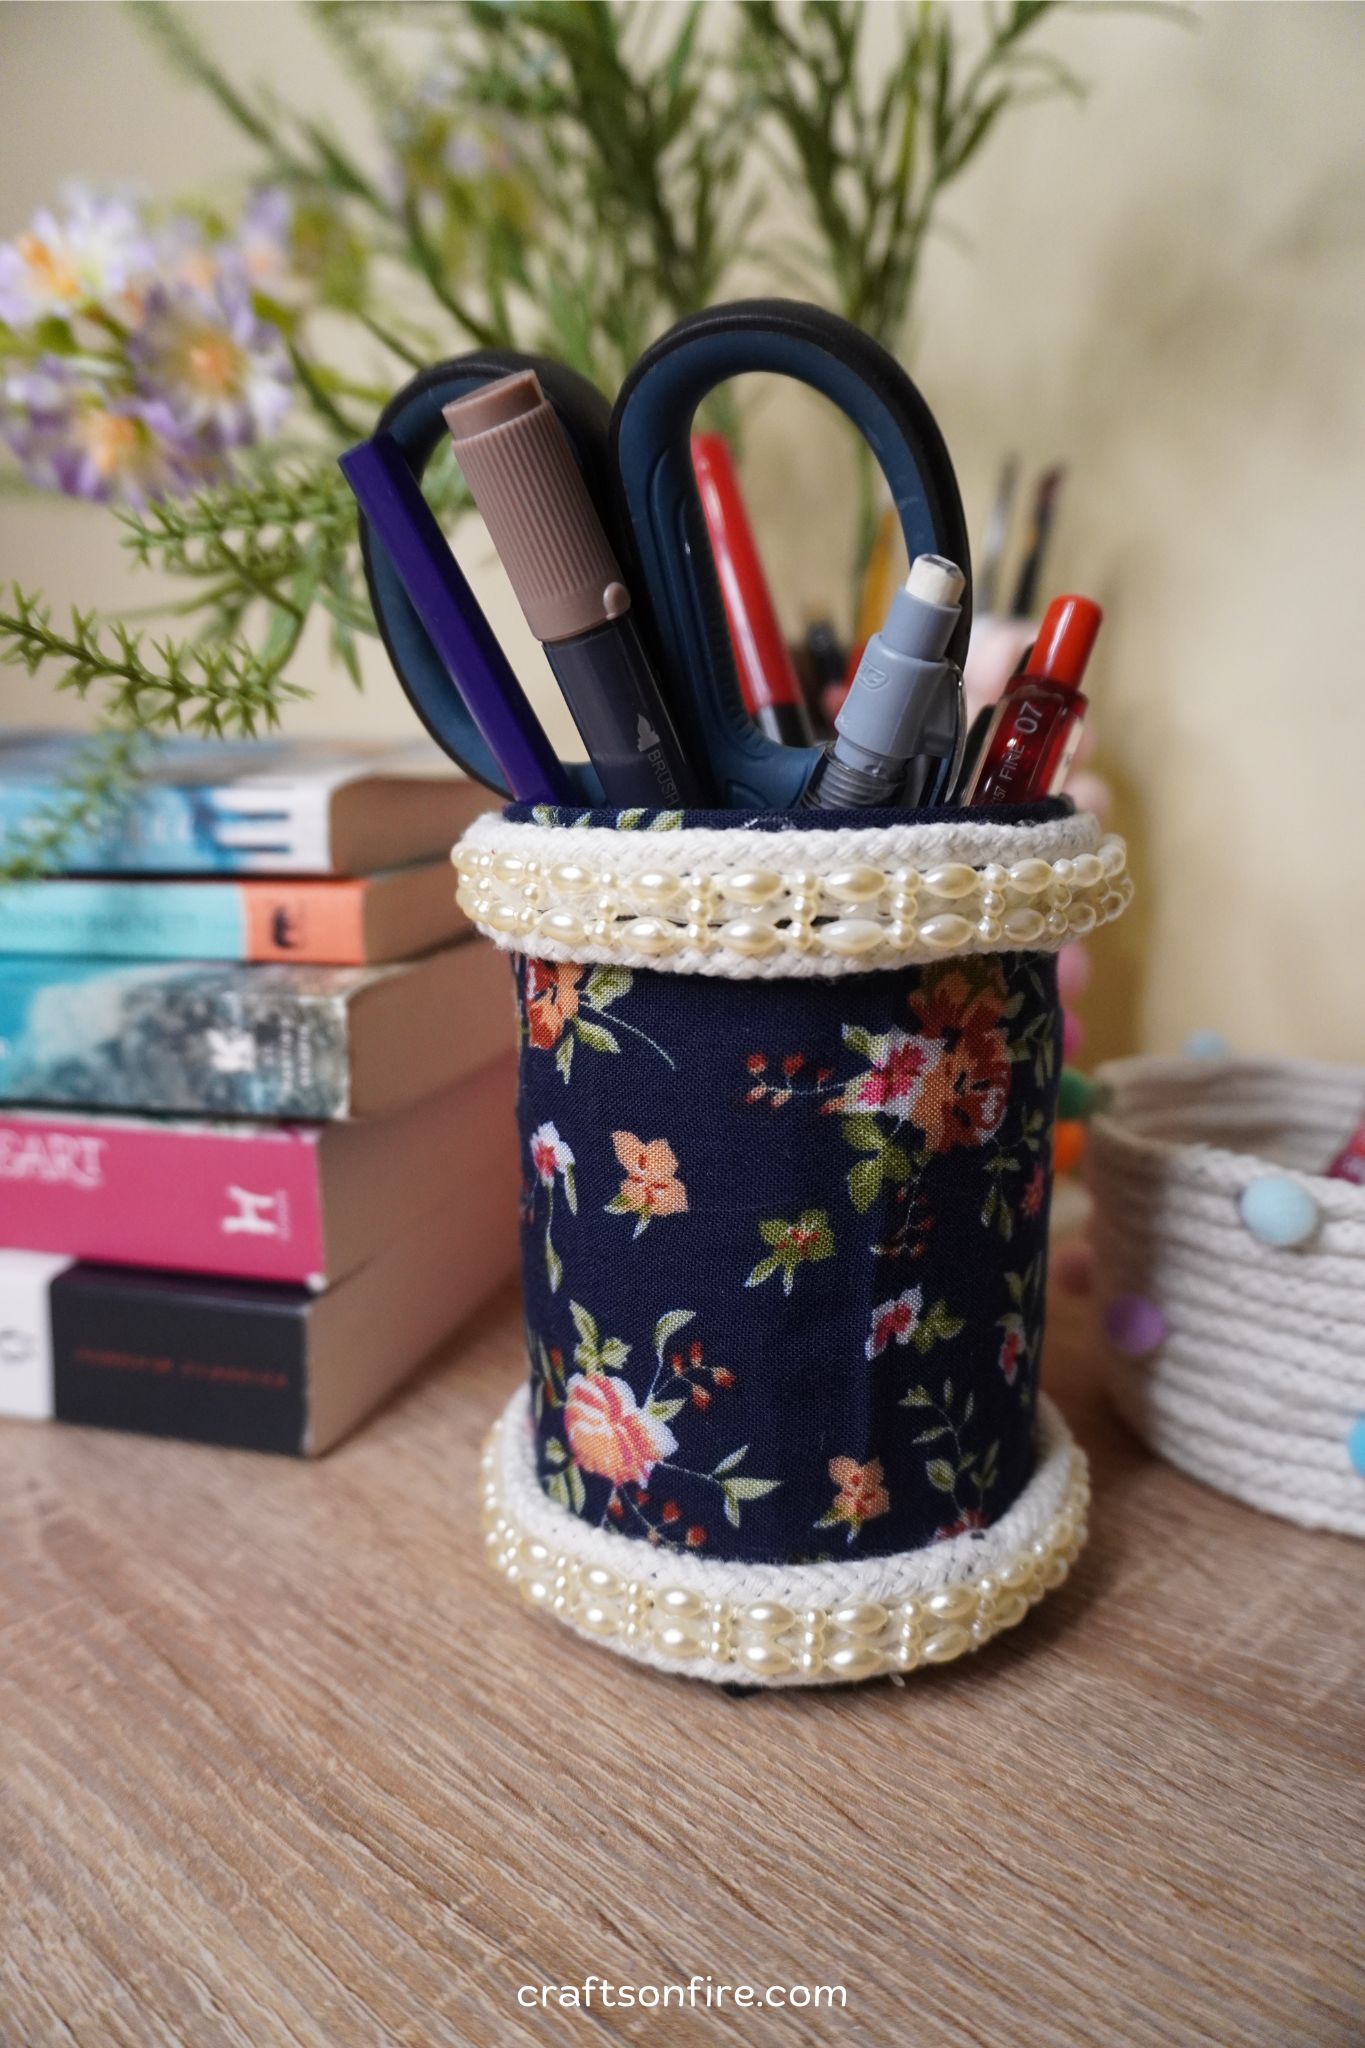
Here’s the final result:
How did your pen holder turn out? I hope you had a fantastic time decorating a tin can with fabric and rope with me and I hope this project inspires you to try other ways of decorating jars, cans, and bottles!
Upcycling items like this is a great way to reuse old items that would otherwise end up in the trash.
With a project like this, you get to decorate and create something beautiful that can be used in your home.
Video Tutorial
If you’d prefer to watch the process of making this pen holder, here’s the full tutorial:
I’m currently using this fabric pen holder next to my work desk. I find that it’s great for storing my go-to pens and markers.
It also looks elegant and fits this space well.
I’ve also experimented with using this pen holder as a faux plant holder, and the green leaves look great with the blue and white holder. So, this is another possible way to use this pen holder in your home!
Either way, this is a charming project worth all the time spent on it.
Before you go, I’d like to share a few more amazing DIY projects you can try next: