How To Draw Flowers: Easy Ways To Draw Simple Flowers
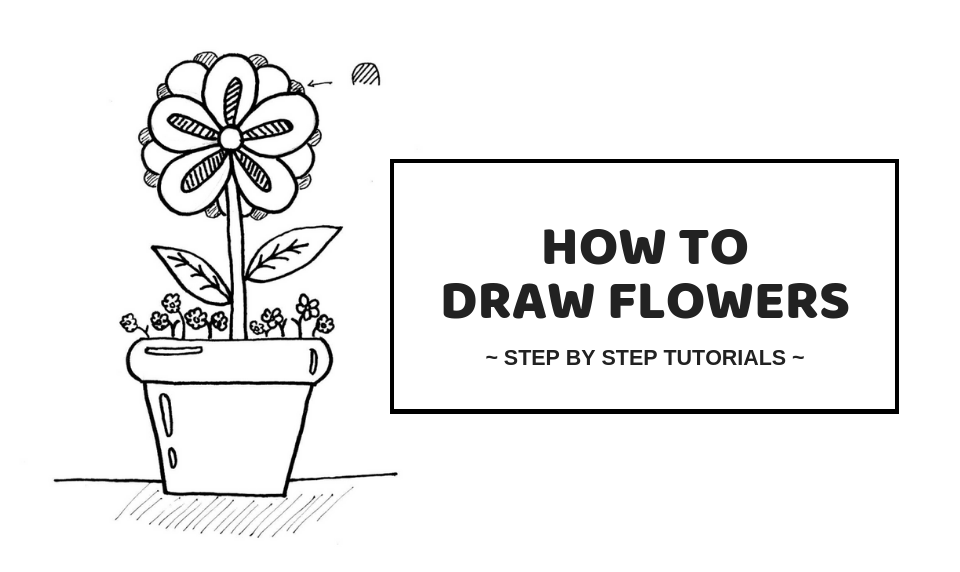
If you’re looking to learn how to draw flowers in a pot, I’ll show you an easy design you can draw in just a few minutes with step by step tutorials. Whenever I’m bored or looking for something interesting to do simple and easy flower drawings are always at the top of my list. I’m constantly drawing flowers in my notebooks where it’s become part of my daily routine.
Not to mention it’s a great way to relax and unwind at the end of each day.
I’ve never been much of a very good drawer I’m still learning but if there’s one thing I’ve learned so far is that the more you draw, the better you become at it. That’s the way it goes in life, am I right?
Okay, I’m sure you’re not here to listen to me ramble about drawing. Let’s get on with sketching!
It doesn’t matter if you’re a kid or a kid at heart, these flower pot drawings are so much fun. You’re going to love this.
You don’t need any fancy drawing supplies. Just grab an ordinary pencil, eraser, and black marker – you’re good to go.
Before we begin, here’s a great tip you should try:
Sketch a rough copy of your flower before inking it. This way, you’ll be able to improve on the design or erase the mistakes you make.
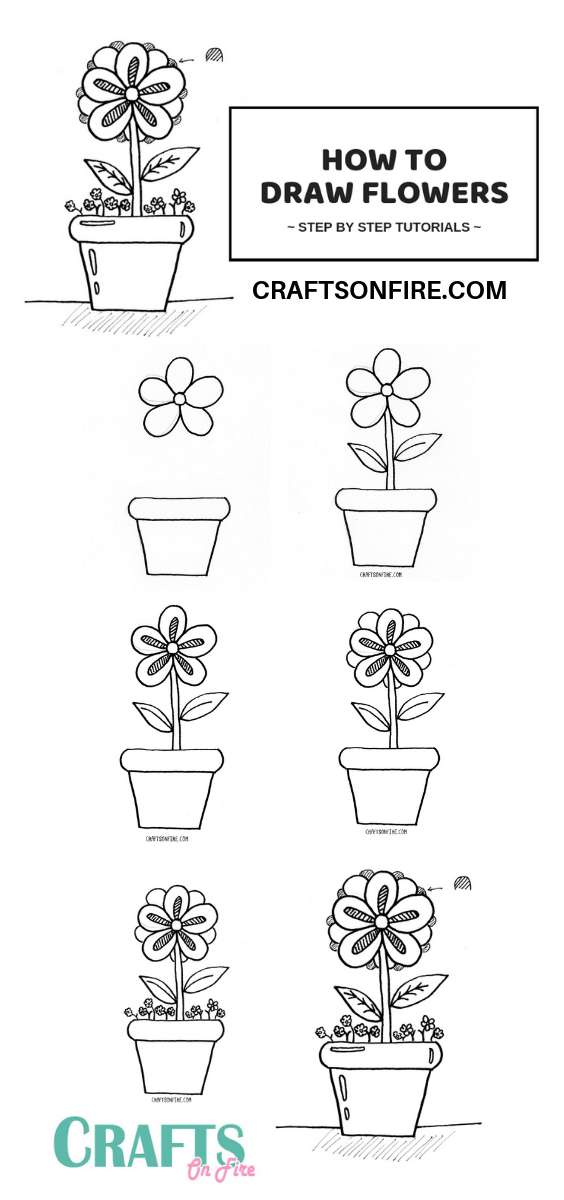
How To Draw Flowers In A Pot
Step 1: Draw the flower pot
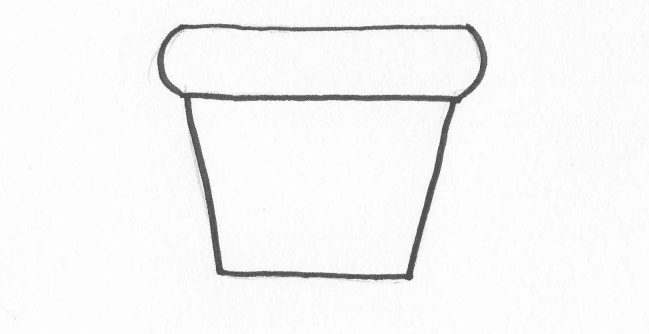
Start off by drawing a flower pot shape. This doesn’t need to be perfect at all, you can just fill in or darken certain spots if you feel like it’s too crooked. Draw a curved long rectangle, then draw two lines in an angle and close it off with a straight line joining the two angled lines.
Step 2: Draw the petals
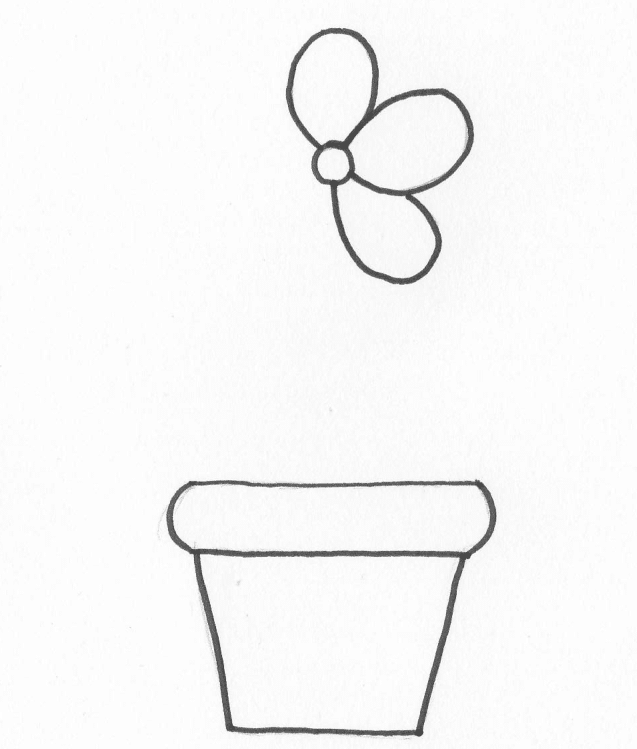
The next step is to draw the petals for your flower. Begin by drawing a circle half up from the flower pot. Then add petals to the circle to form the flower.
Step 3: Complete the petals

Once you’ve completed drawing the petals, your flower will now look like this.
Step 4: Attach the stem
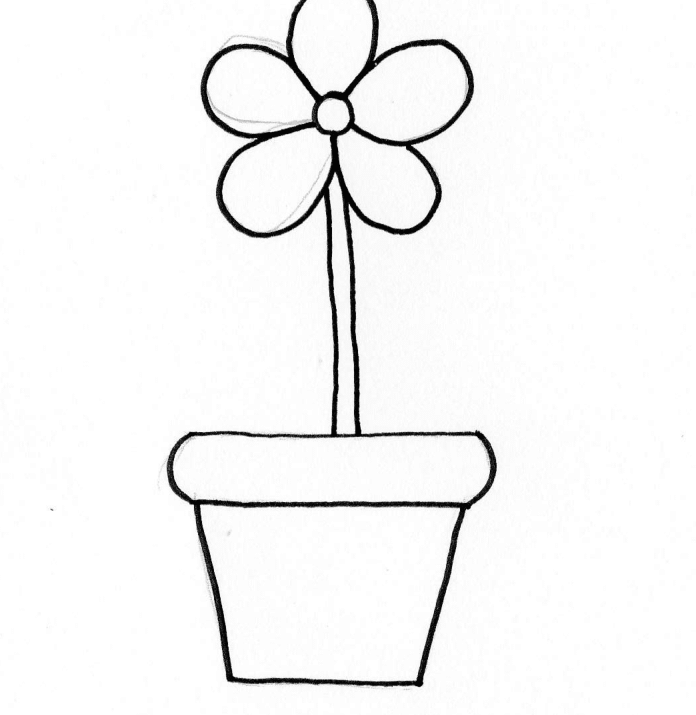
Next up, the flower will need a stem! Draw two straight lines running down to join the flower to the pot. You don’t need to draw a straight stem, choose any style you want. This could be a curved stem running from the right or the left. Totally up to you!
Step 5. Add the leaves
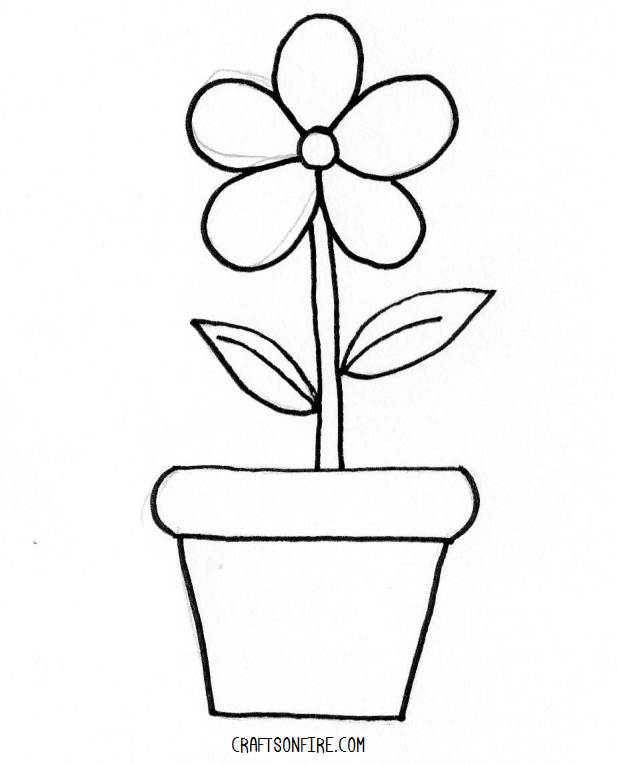
Now you’ll need to add leaves. You can do this by drawing a small curved line on the right side and draw a petal shape around that line. On the other side of the flower, draw another small line and repeat as you did with the other leaf.
SEE ALSO: How To Draw Leaves: 21 Best Tutorials For Beginners
Step 6: Draw smaller ovals in the flower petals
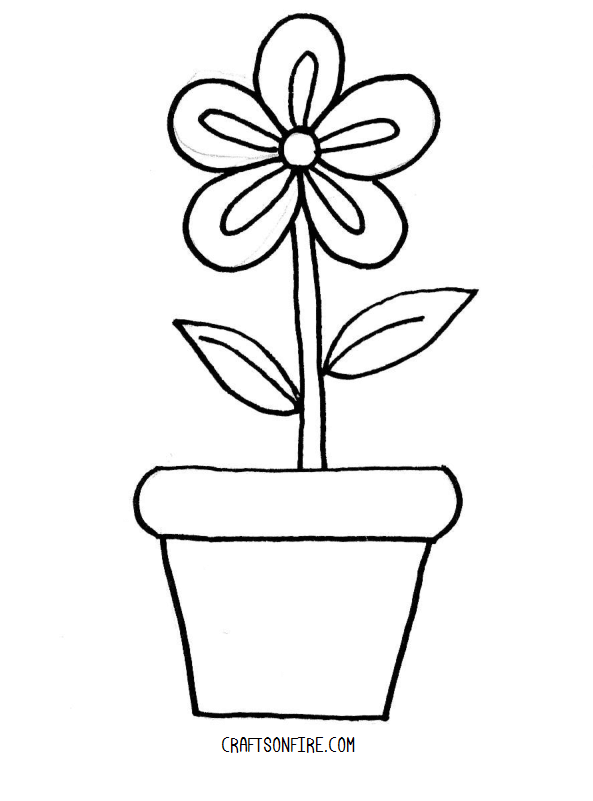
To give the flower more detail, you can add these smaller petals in the middle of the flower petals. Simply draw a sort of stretched oval shape (or a smaller petal shape) using the middle circle as a guide. Continue doing that for each petal until you have another smaller flower design.
Step 7: Add lines to the smaller petals
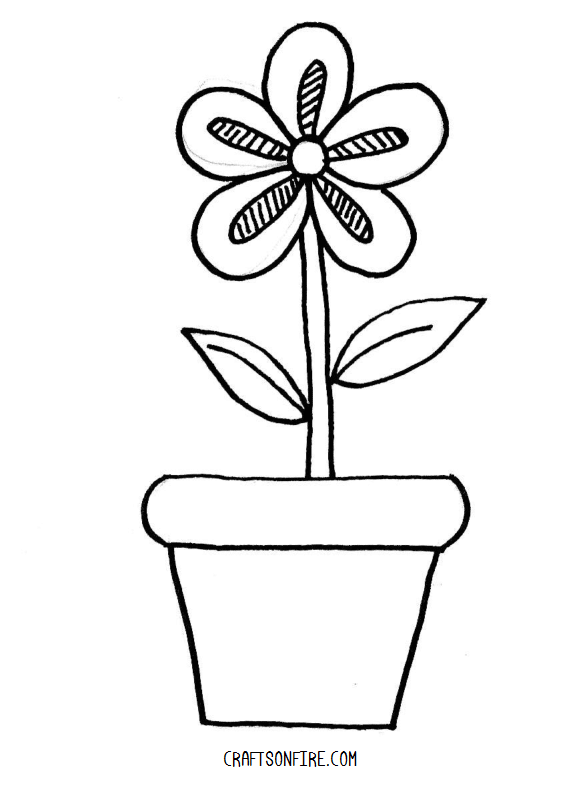
What I usually like to do next is sort of shade the petals in. You can do this by coloring the entire petal or drawing a few lines in the petals to give it more definition so that the flower drawing stands out.
Step 8: Draw more petals
A simple and easy way to make your flower drawing look extra special is by adding more petals! When you do this it makes the flower look bigger and better.
Draw half circles by joining one petal to the next. Keep going around the flower until you notice all the petals have been joined by the half circles.
Step 9: Add smaller flowers to the pot
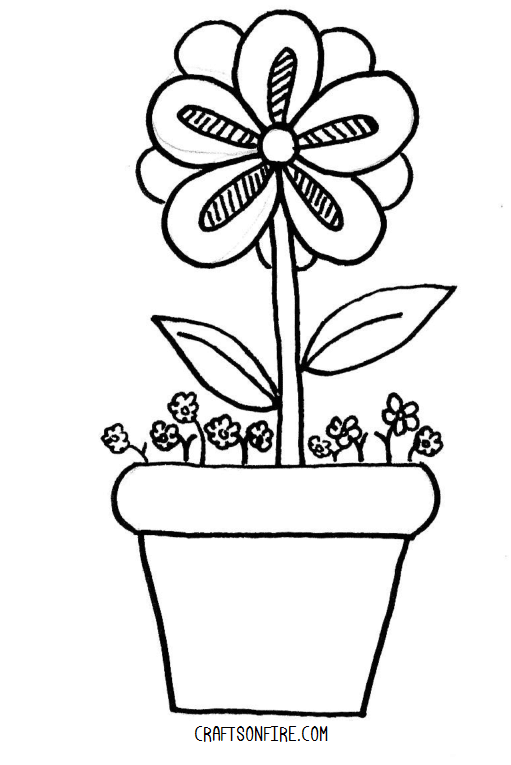
Don’t leave your flower all alone. Draw a few tiny flowers to give it some company! All you need to do is draw a few rough flower shapes a little further from the pot and join them with a curved line to the flower pot.
Step 10: Flower pot and leaf detail
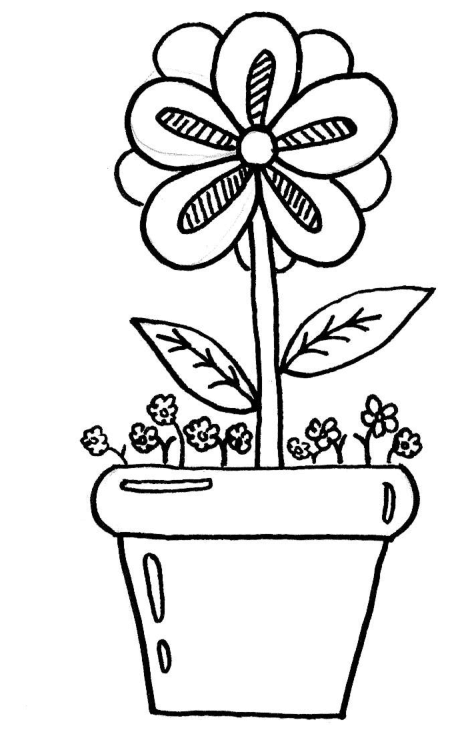
This step is completely optional but if you want to give a bit more detail to the flower pot, just draw a few of these shapes in the pot.
Also, you can add three V shapes to each of the leaves to make it look like stems.
Step 11: Draw the floor
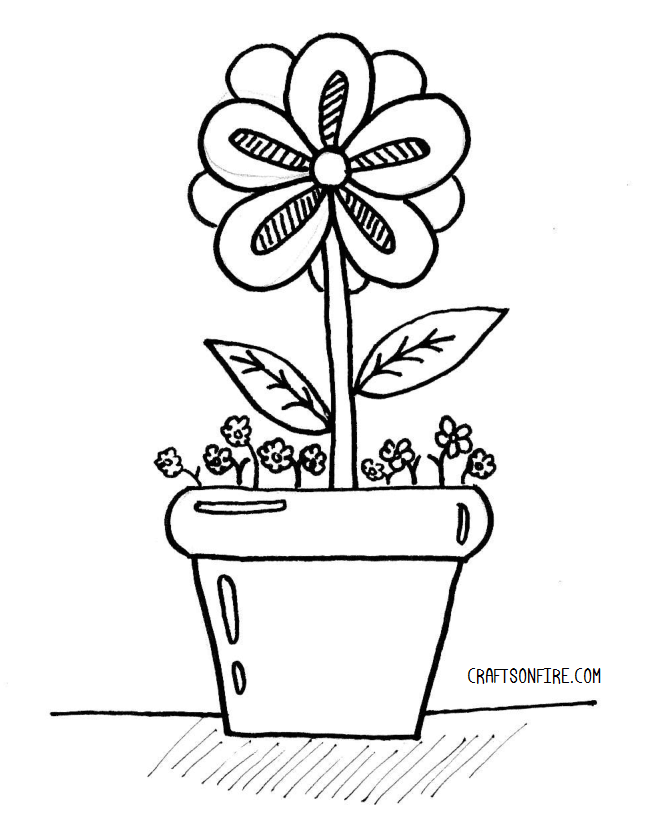
To add the floor or surface area, draw two lines around the pot. Then you can sketch a few more lines in angle for some extra shading which will give the pot a shadow.
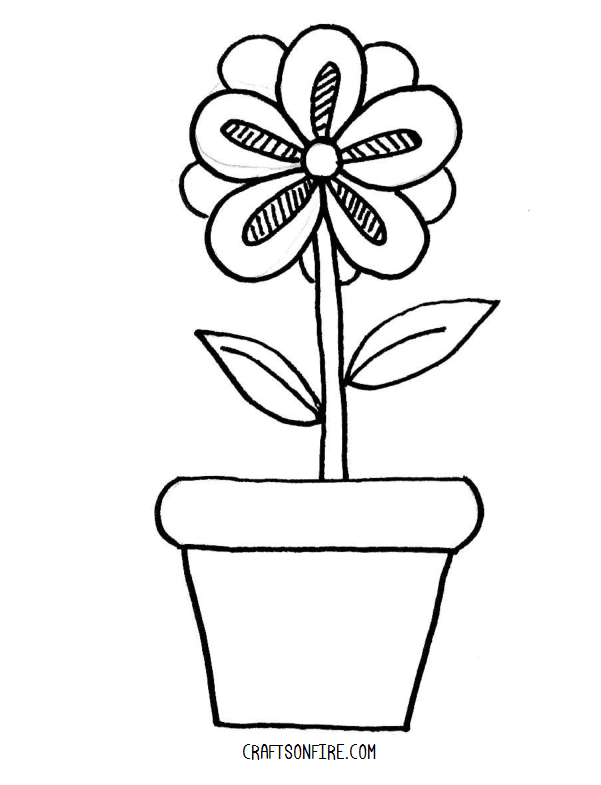
Step 12: Further details (optional)
Since I wanted to match the inner petals with the outer, I added a few more half circles and used the same pattern as the smaller petals in the middle to complete the flower drawing. You can choose to do the same or leave it plain like the last step. Either way, they both look great!
And you’re done! Did you have fun drawing this easy flower?
I sure did enjoy creating this simple flower drawing and showing you step by step on how to draw flowers.
SEE ALSO: How to Draw a Tulip for Beginners
These flowers are perfect if you want to add it a border to your bullet journal or use them as doodles to fill up blank spaces.
They’re also great if you want to just draw something easy and won’t take up much time.
I also recommend trying this easy flower tutorial for kids as well and this detailed lily flower if you want to try something a bit more challenging. Either way, these easy flower drawings are perfect if you want to explore different drawing techniques.
Although the lily flower drawing does look hard, once you get the hang of it, you’ll be drawing so many of them before you know it.
If you liked trying these simple drawings of flowers, let me know in the comments below. I’d love to hear your thoughts.
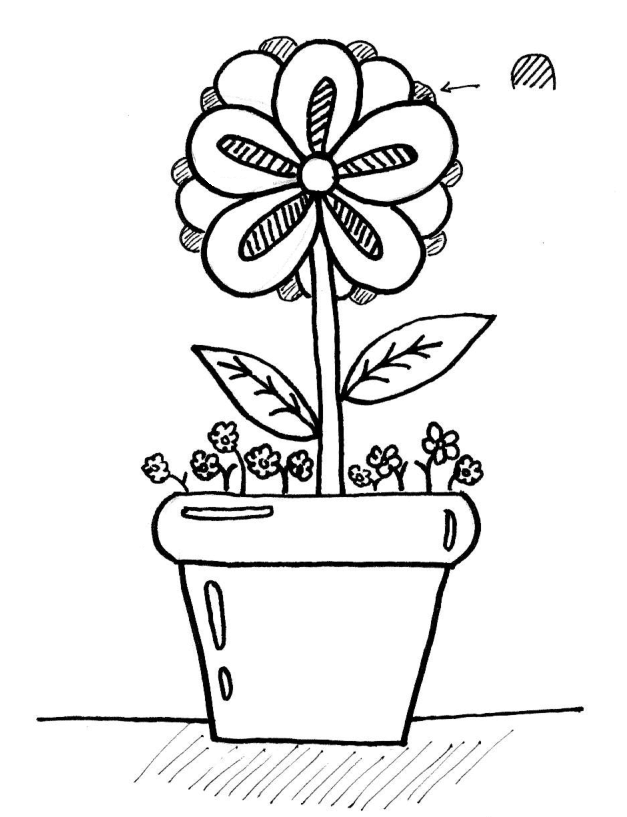
Here’s a full tutorial you can save for later. Enjoy!

i loved how it helped me draw.
I love this Website because it help me a lot