How To Sew Book Sleeve With A Bow (Beginner Tutorial)

Sew the cutest book sleeve with a bow with my easy step-by-step sewing guide. This pattern is a wonderful one to try, and you’ll be so impressed with the final finish of your book sleeve.
You can easily fit at least 2 paperback novels in this book sleeve, and the bow will make sure your books stay snug wherever you go.

Making this book sleeve was a pleasurable sewing project. I’m so happy with how it looks, and using a pretty patterned fabric for the outer piece makes this project even more lovely and worthwhile.
You’ll no doubt be admiring your work whenever you use this padded book sleeve. That’s for sure.
If you have 20 minutes to spare, you can sew this bow book sleeve in any fabric you like.
This sleeve is fully lined, and you can adjust the width of the straps (before sewing) if you prefer a larger bow.
With that said, I’ve put together a full, detailed sewing guide with written and picture instructions. You’ll also find the video tutorial, which I highly recommend watching as well!
Finished book sleeve size: 19 cm x 25 cm / 7.48 inches x 9.84 inches
Bow Book Sleeve Tutorial
Supplies
- Cotton Fabric – 40 cm x 27 cm (15.75″ x 10.63″)
- Lining – 40 cm x 27 cm (15.75″ x 10.63″)
- Batting – 40 cm x 27 cm (15.75″ x 10.63″)
- Strips – 40 cm x 6 cm (or 10 cm) / 15.75″ x 2.36″ (or 3.94″)
For a larger book sleeve, opt for a measurement of 50 cm x 35 cm (19.69″ × 13.78″) instead!
If you want a high-quality, AD-FREE version of this sewing guide with step-by-step instructions included under each picture, you can find the printable PDF guide over here!
Book Sleeve Video Guide
Instructions

01. Start by folding the top edge of one side of the strip. Do the same for the second strip. Next, fold each strip in half with the right side facing inward, and sew them together.
02 – 03. Be sure to sew along the edges of both strips. Do not sew on the folded side of the fabric.
04. Pin a safety pin through the folded side of the strip as shown above.
05. Thread the pin until it emerges from the opposite end.
06. The right side of the strip fabric should be facing out. Repeat this process for the second strip.

07 – 08. After turning out both strips, press the fabric with an iron and then stitch the folded end of both strips.
09. Place the batting and the outer cotton fabric together and pin the fabric to keep it together. If you’re using fusible interfacing, iron the fabric to the interfacing instead.
10. Position the strips along the sides of the fabric, ensuring they are centered. The open (unstitched) ends of the strips should align with the edges of the fabric.
11 – 12. Head to the machine and sew the strips to fabric.
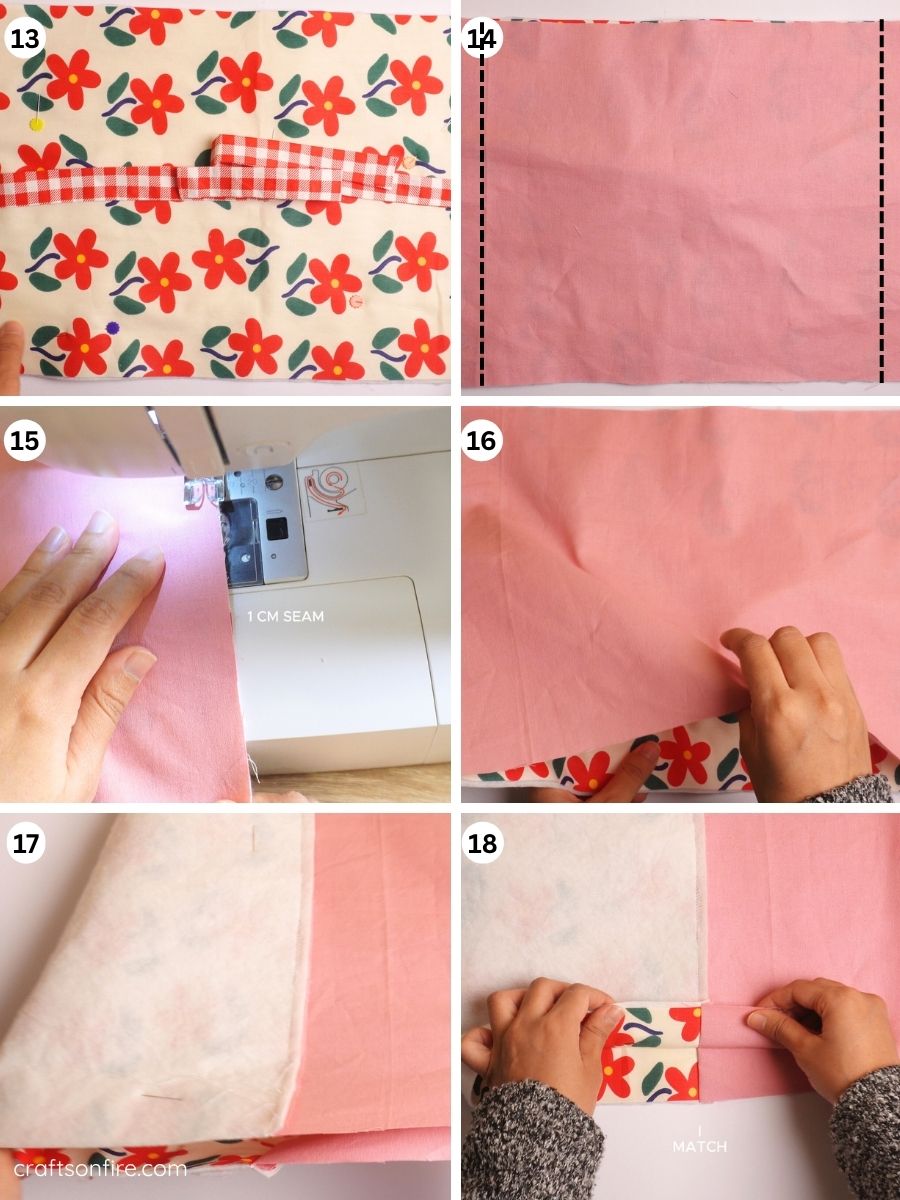
13 – 14. Place the lining on top of the patterned fabric piece (right sides facing each other) and sew the piece on both sides using a 1 cm seam allowance.
15 – 16. After sewing, carefully open the bottom of the piece.
17 – 18. Align the fabric so that the lining is on one side and the patterned fabric is on the other as illustrated.

19. Sew the top and bottom edges of the piece together, ensuring to leave a small section of the lining unstitched for turning it inside out. Use a seam allowance of 1 cm.
21 – 22. We’ll now box the corners. Start by folding one corner into a triangular shape, as illustrated above.
23 – 24. Measure 5 cm (2 inches) and sew the piece. Repeat this process for the remaining corners.
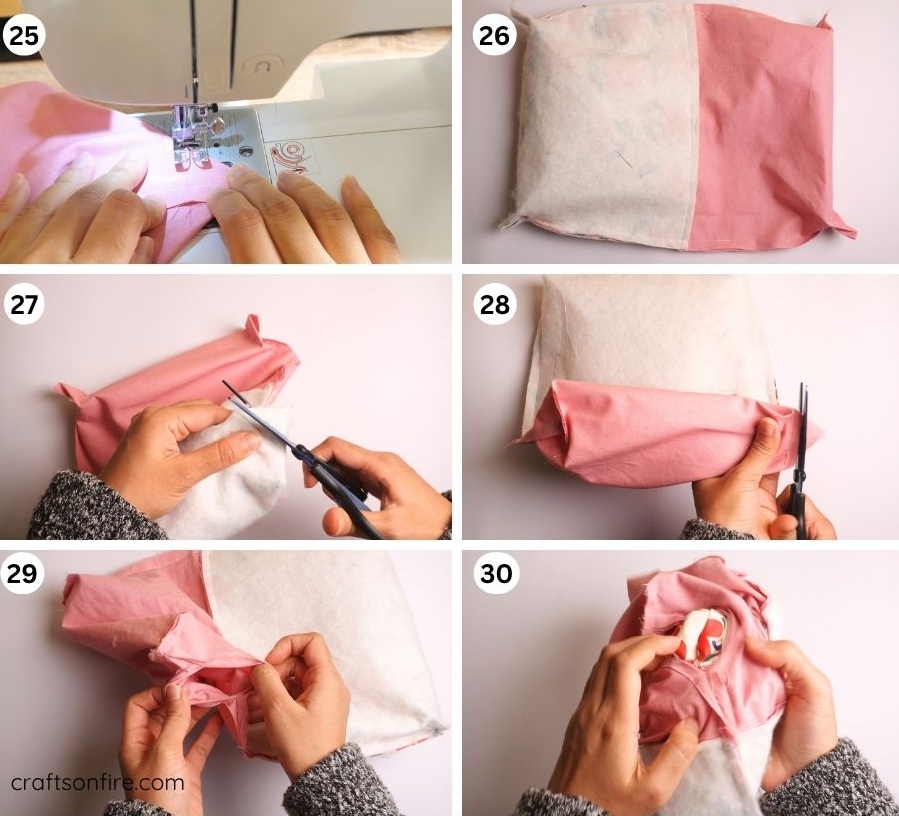
25 – 26. Box and sew all the corners of the piece, and it should look like this.
27 – 28. Snip off the excess fabric from all corners.
29 – 30. Use the opening of the lining to turn the fabric out. Then, place your hand inside the fabric, fold one end of the piece towards the opening, and pull the right side of the fabric through the opening.
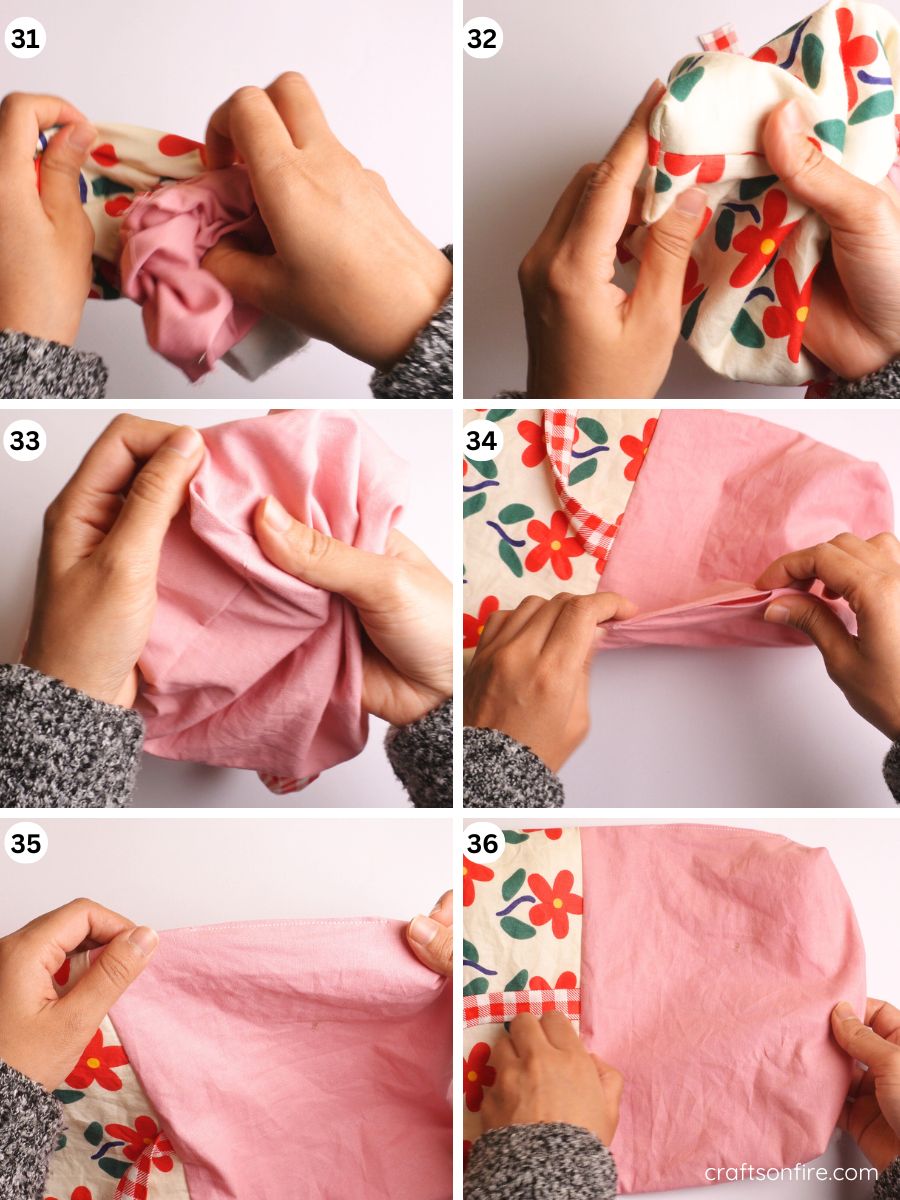
31 – 32. Bring the entire piece to the right side and then use the same opening to open out each corner of the piece.
33 – 34. Tuck the raw edges of the opening inward.
35. Sew a small seam near the fabric’s edge for a neat finish.
36. Place the lining inside the bag.
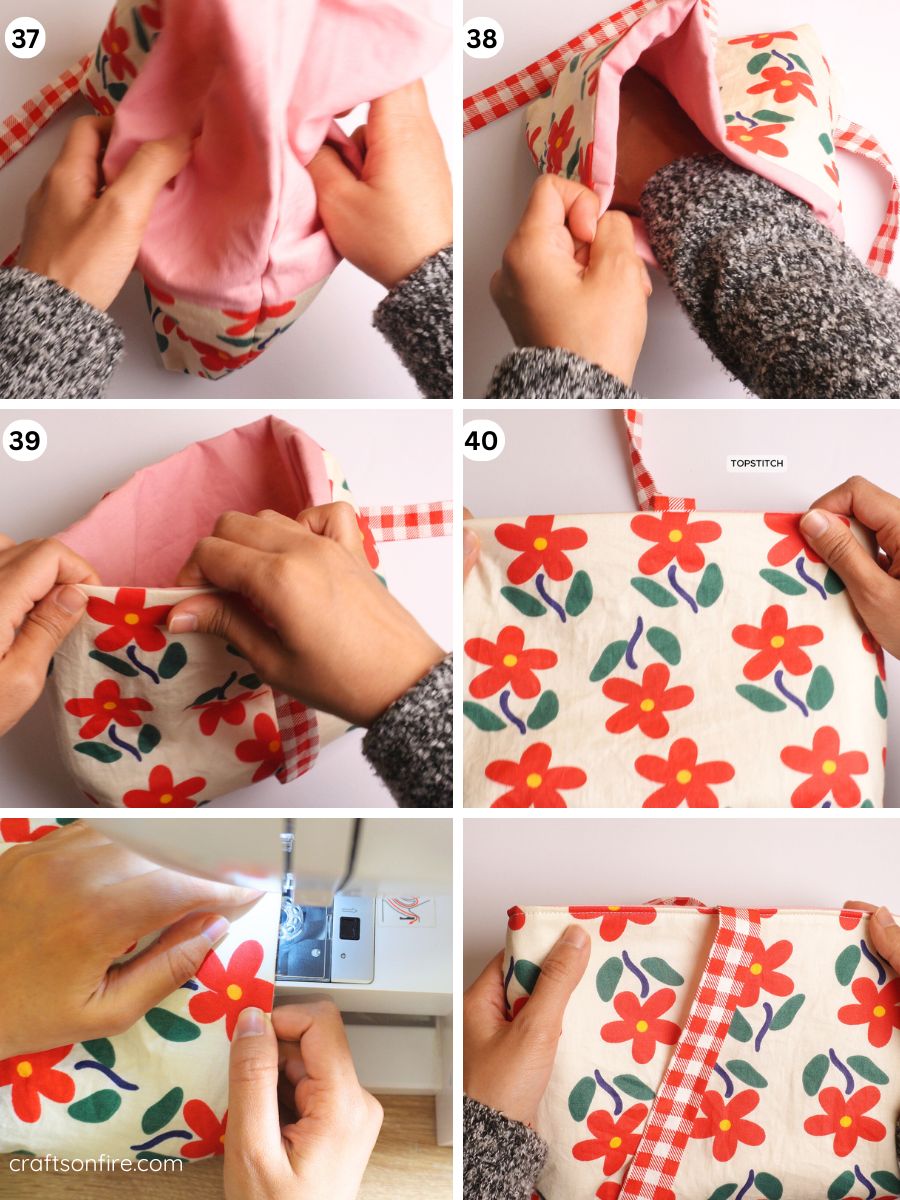
37 – 38. Adjust the lining inside the bag by gently pulling the fabric down and then adjust the top edge of the fabric.
39 – 40. To complete your booksleeve, simply add a topstitch. Feel free to detach the arm of your machine, as this makes it easier to sew.
As a final touch, give your book sleeve a quick press with the iron to remove any creases.
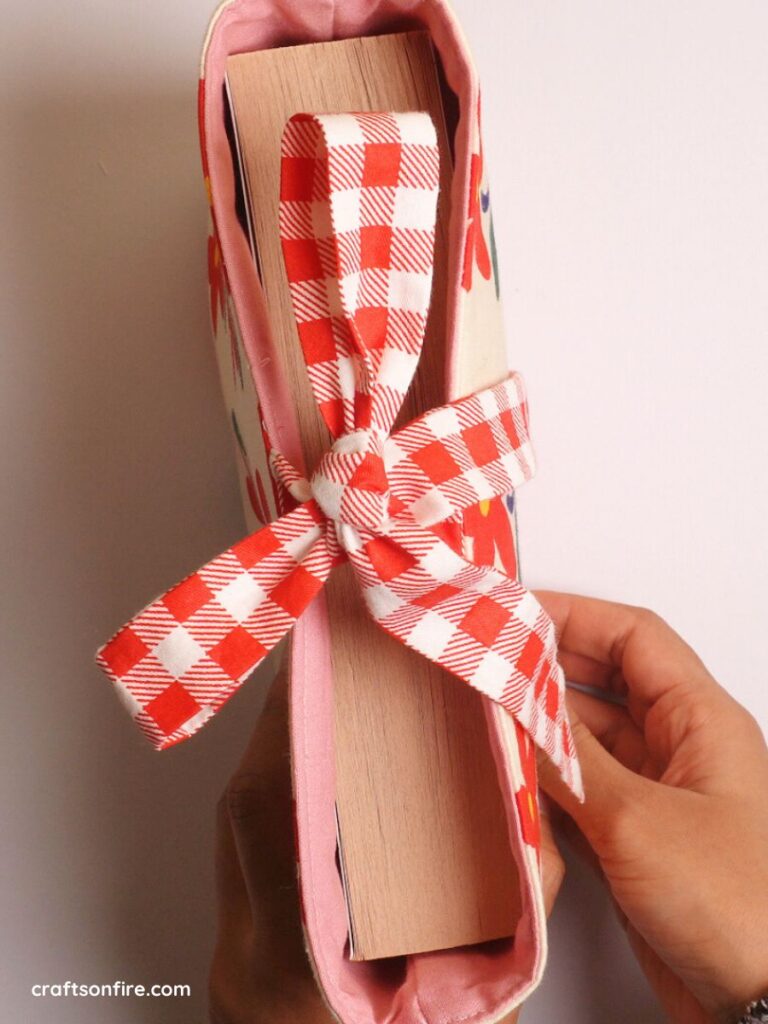
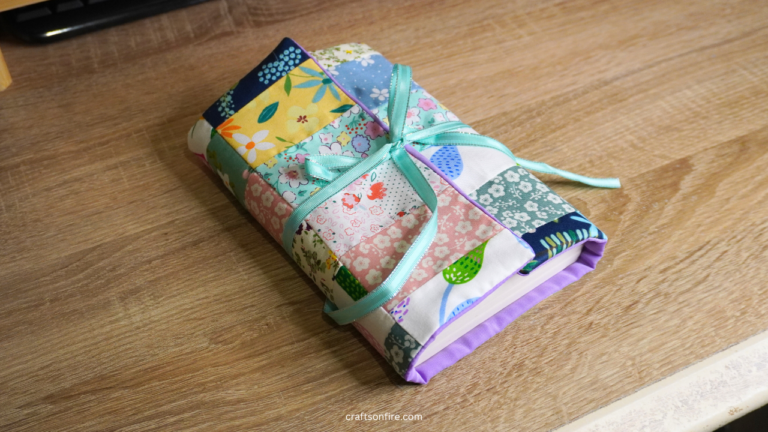
Here’s the finished result:
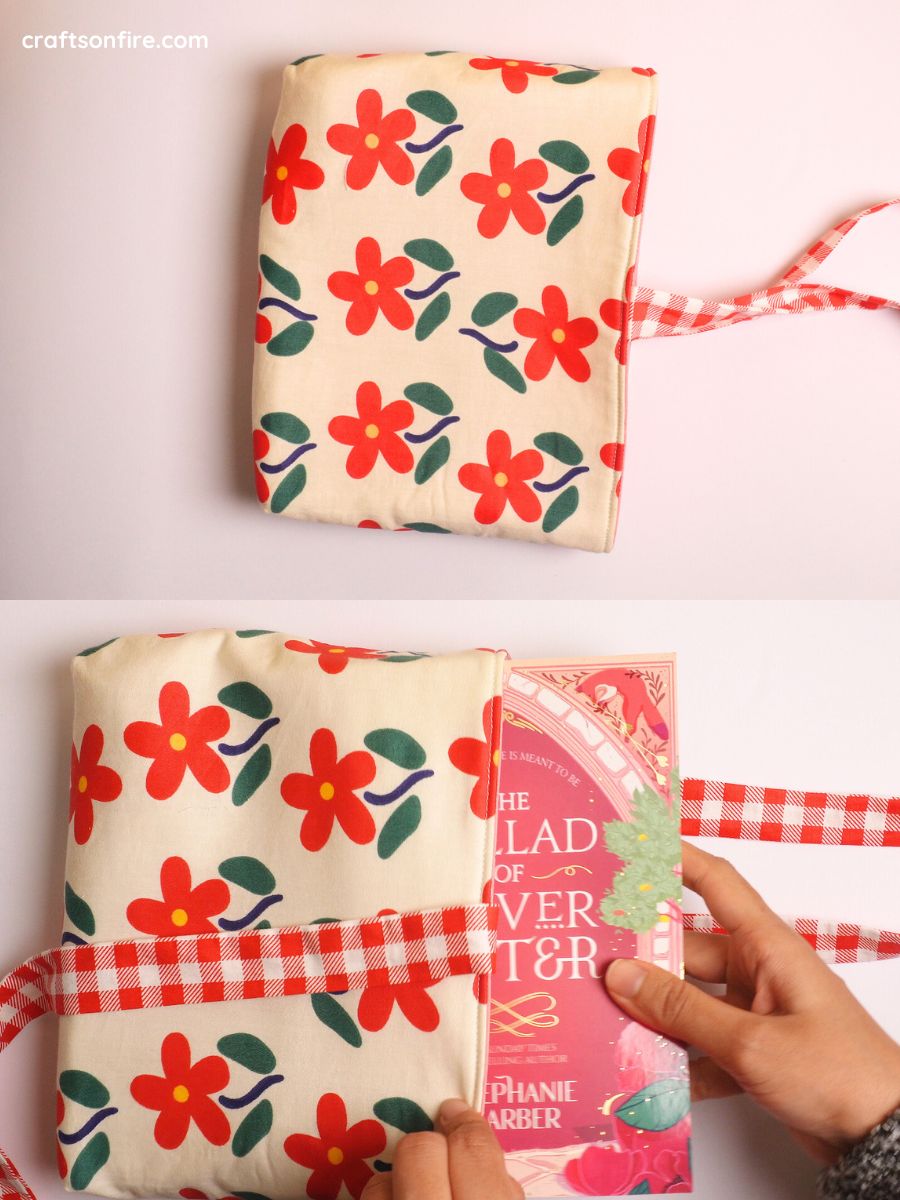
Simply place your novel into the sleeve and tie the two straps together.
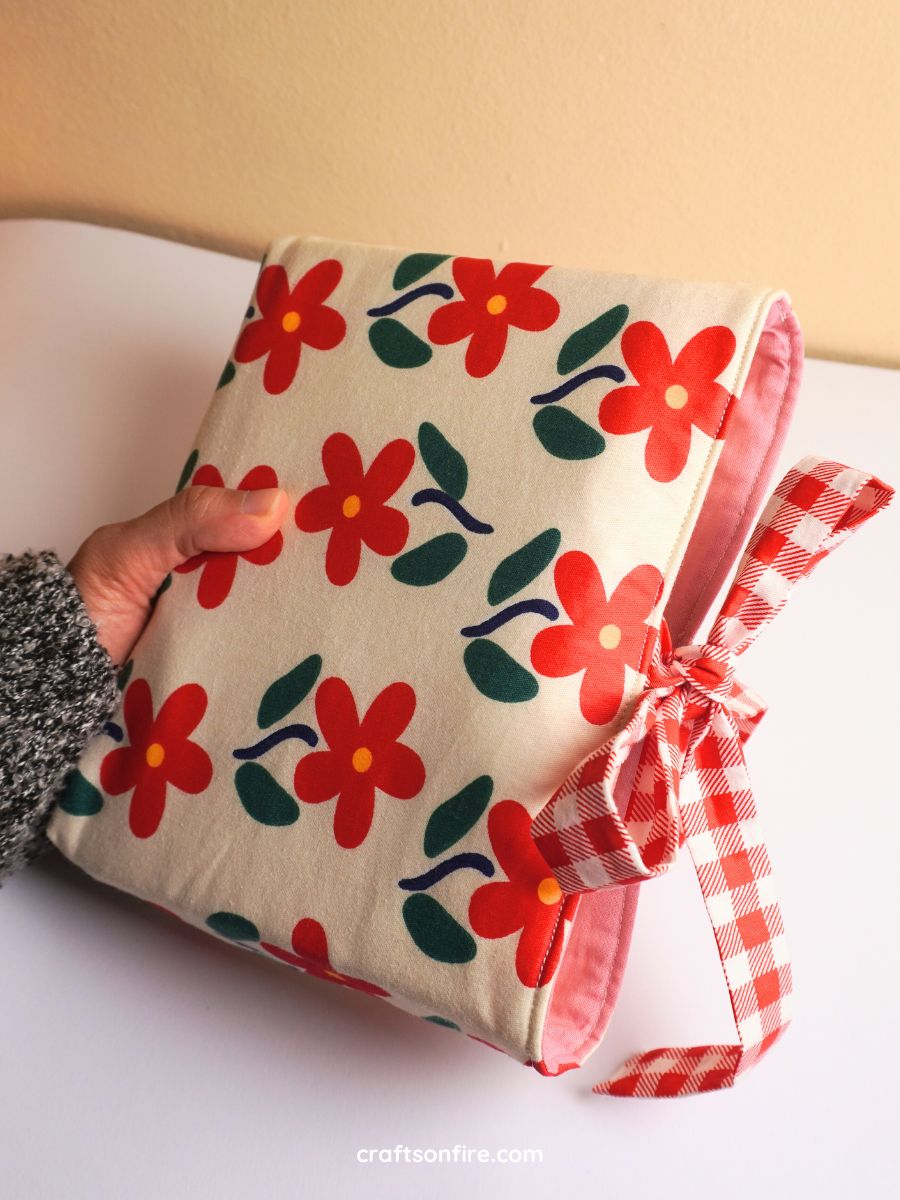
This book sleeve looks so pretty! I love it.
I promise you, it’s so easy and fun to sew this book sleeve, even if it’s your first time.
I’ve been carrying it around with me so often and have received quite a few compliments. I can’t wait to sew a few more of these book sleeves in a different fabric.
If you love reading accessories, this one is worth owning.
Go ahead and give it a try. If you have any questions or tips you’d like to share, drop them in the comments below.
Also, if you do end up making this book sleeve, tag me on Instagram or Facebook. I’d love to see your creations!
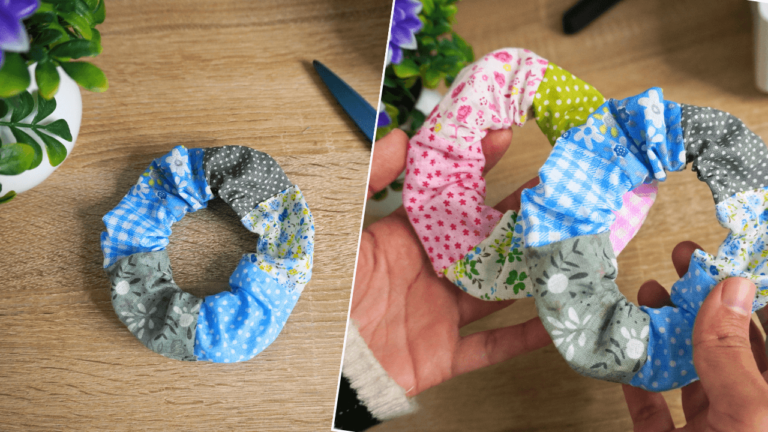
More Sewing Tutorials For Beginners:
This book sleeve tutorial is so sweet and beginner-friendly. The added bow detail is just adorable, such a lovely handmade gift idea.