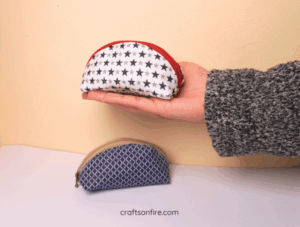
DIY Triangle Pouch (Step By step Sewing Tutorial)

I’ve lost count of how many times I’ve sewn this triangle pouch/bag so far! It’s cute, easy, and fun to sew, and they make the cutest gifts as well. The great thing about sewing these triangle pouches is that you can make them as big or small as you like since the pattern is fairly straightforward.
All you’ll need to do is adjust the measurements according to how you want your triangle pouch to be.
For this sewing guide, I’ve made this bag in a size that’s perfect for small items or makeup supplies. You could even store a few small reels of cotton or other sewing supplies in these pouches!
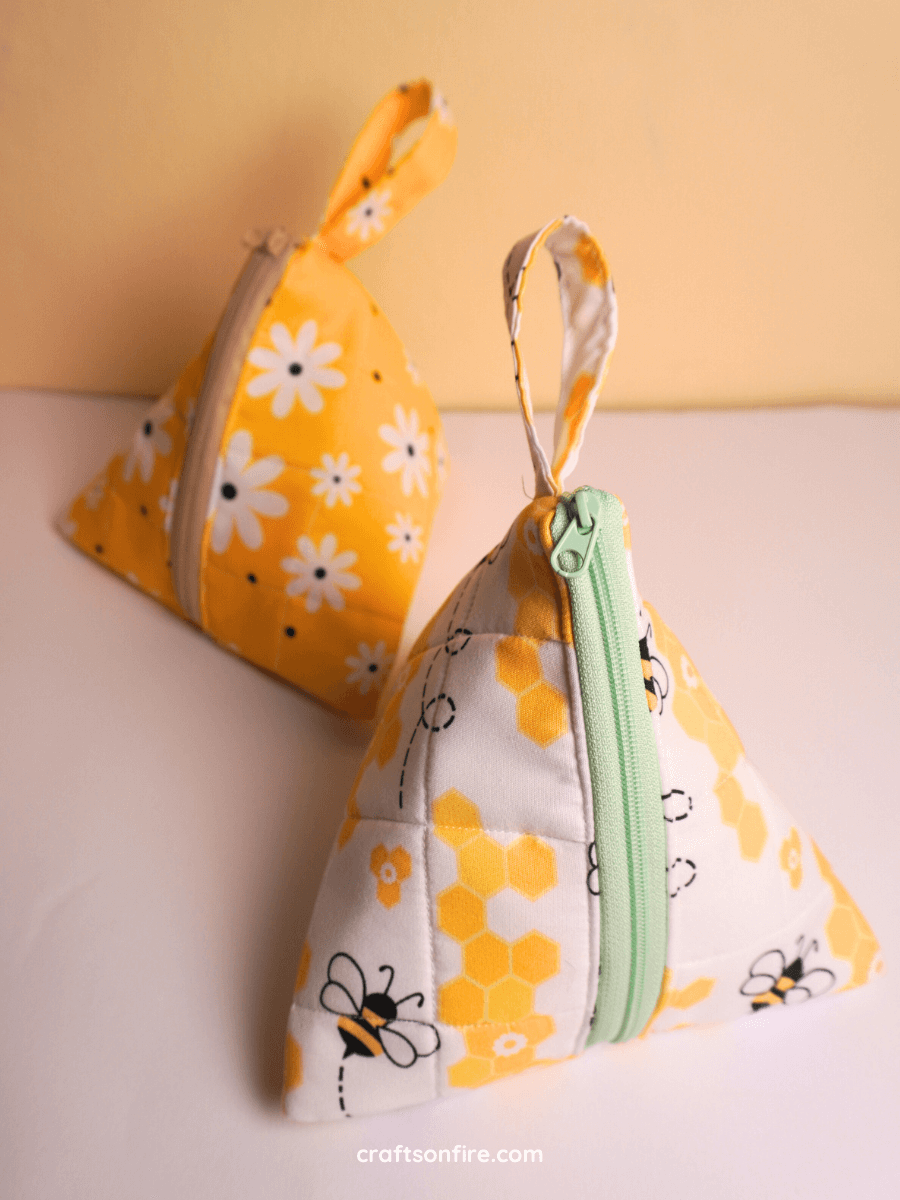
Finished bag size: 17 cm x 15 cm / 6.69″ x 5.91″
I absolutely loved sewing this pouch and creating this guide. It was so easy to sew and I loved how it turned out.
The patterned fabrics and colorful zip makes these pouches even more special. And the design is so intriguing and creative that you’ll want to show it off to everyone you know!
So, if you’re ready to begin, take a quick look at all the fabrics you’ll need, and then we can get started.
How To Sew A Triangle Pouch
Supplies
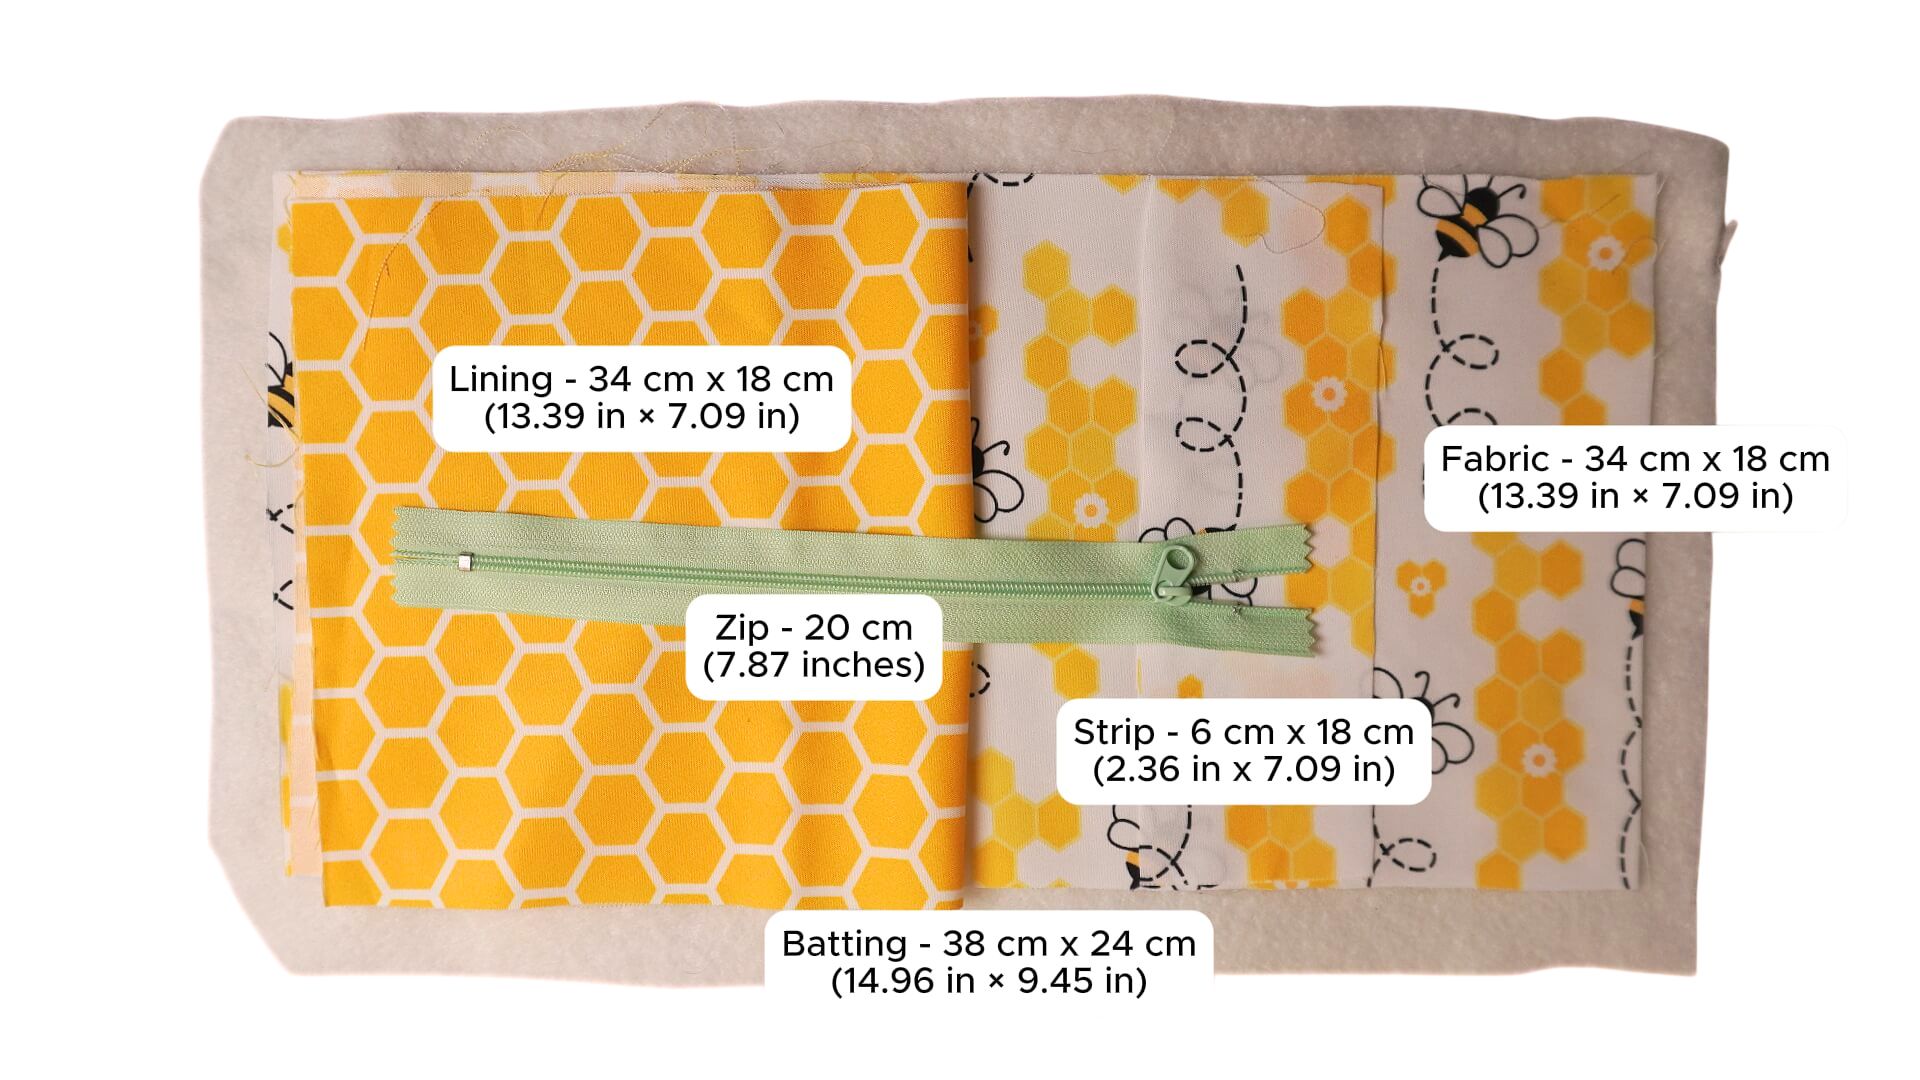
- Patterned Fabric – 34 cm x 18 cm / 13.39″ x 7.09″ (2 Pieces)
- Interfacing – 38 cm x 24 cm / 14.96″ x 9.45″
- Strip Piece – 6 cm x 18 cm (or as long as you like) / 2.36″ x 7.09″
- Zip – 20 cm / 7.87″
If you want a high-quality, AD-FREE version of this sewing guide with step-by-step instructions included under each picture, grab the printable PDF guide over here!
Video Tutorial
I recommend spending a few minutes watching the video version of the tutorial below, as it will really help you understand the overall process, and you can refer back when needed!
Instructions
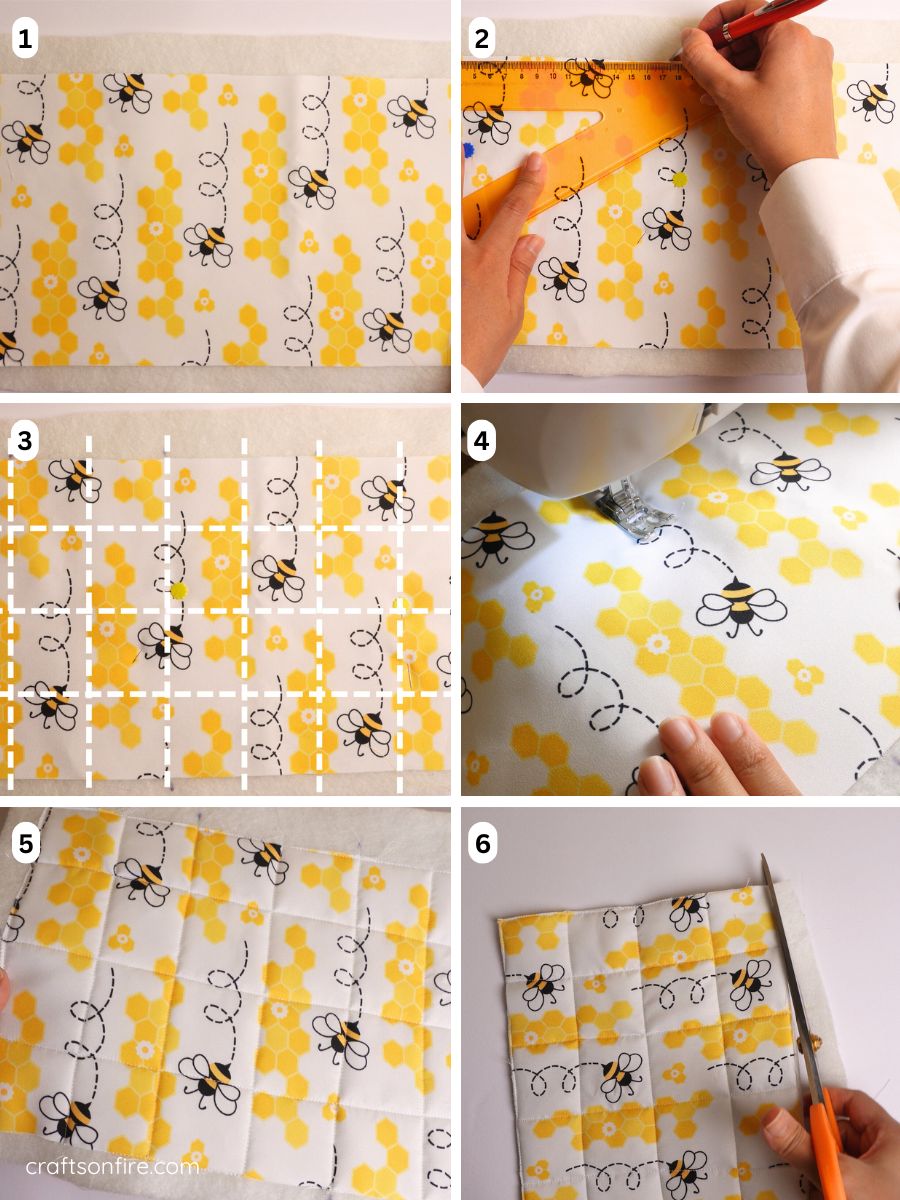
01 – 02. Place your outer fabric piece on top of the fabric batting. Then, find the center point on both sides and mark a line using a fabric marker.
03. This is the design I will be following for quilting the fabric. Alternatively, quilt as desired.
04. Head over to the sewing machine and start quilting the piece.
05 – 06. Once you have finished quilting your entire piece, trim away any excess batting from the sides.
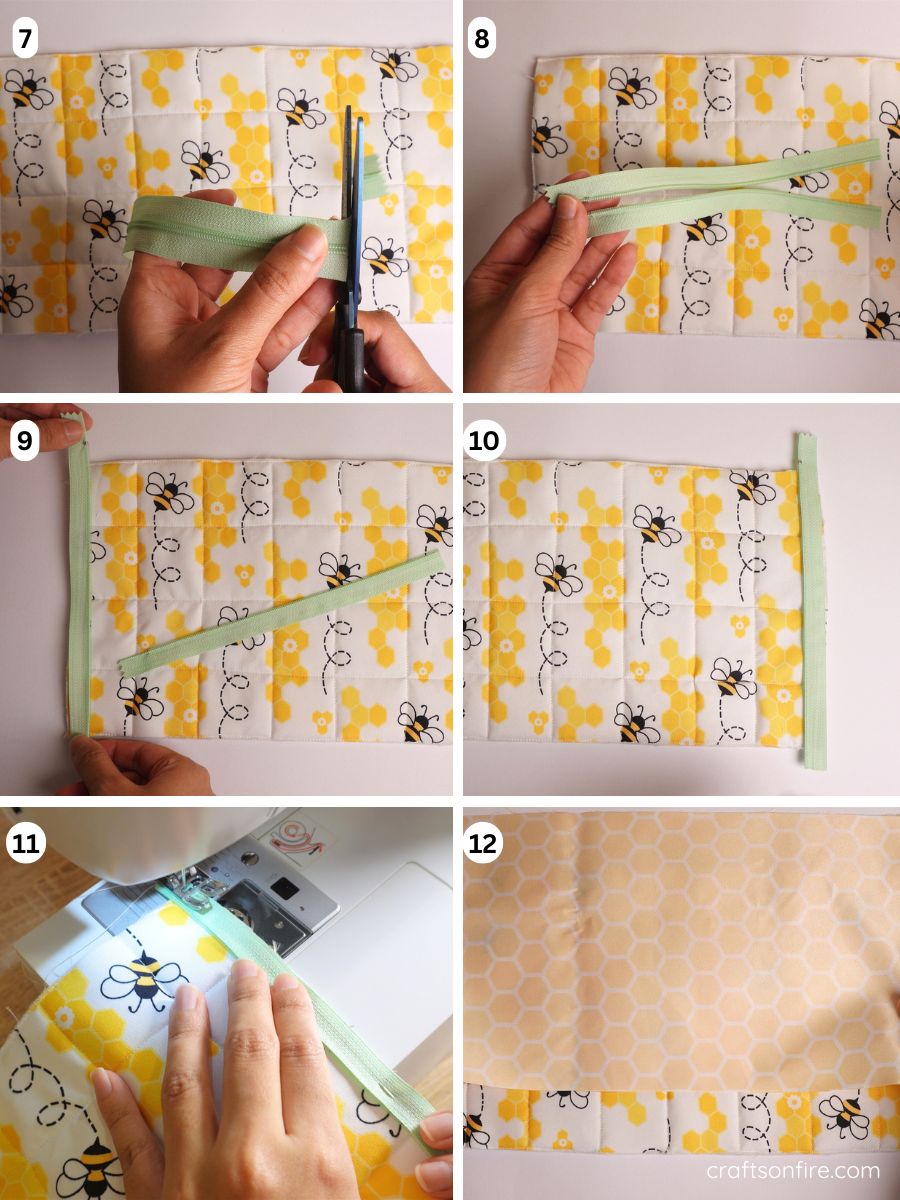
07. Next, cut off the closing section from the end of the zip.
08. Open the zip and remove the fastener. You should now have two separate pieces.
09. To add the zip to the piece, begin by placing one side of the zip face down on the front fabric piece. The right side of the zip should be facing inward as shown above.
10. Go ahead and place the other piece of the zip on the opposite side of the front piece. You can pin the zip if needed.
11. Now sew the zip to the piece.
12. Next, grab your lining piece and place it on top, right side facing in.

13. Sew both sides as well.
14. After the lining is stitched to the zip on both sides, lift the lining piece.
15. Fold the fabric over to the other side so the right sides are facing up.
16. Arrange the fabric by gently pulling the zipper pieces away from the sides.
17 – 18. Pin the fabric to secure the layers, then add a topstitch along the zipper on both sides.
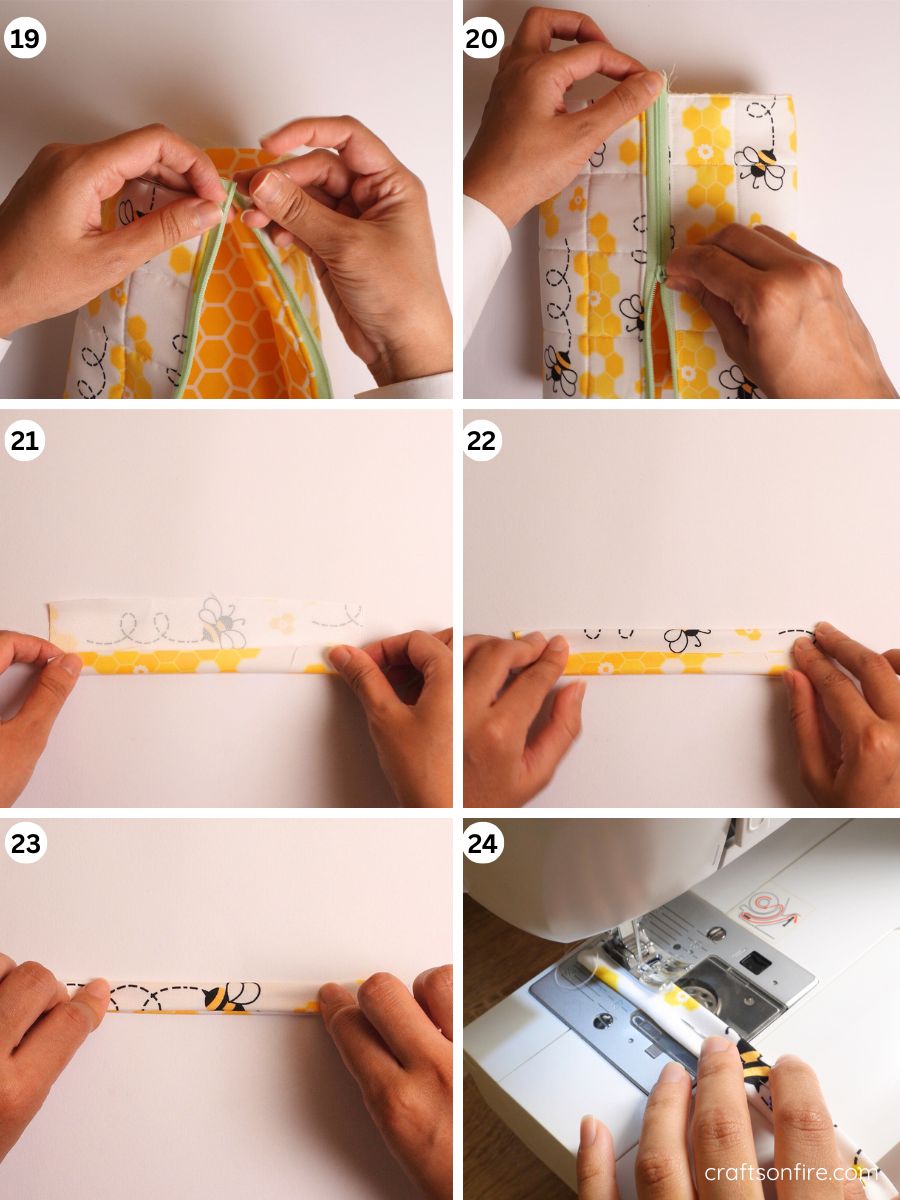
19 – 20. Align the two ends of the zipper and guide the fastener through it, then zip it up halfway.
21. To form the bag handle, take your fabric strip piece and fold one side halfway up.
22. Bring the upper edge down to align with the center.
23 – 24. Fold the top section down again and proceed to the sewing machine to stitch the strip. Sew both sides of the strip if you prefer.

25 – 26. Once you’ve completed the strap, fold it in half.
27-28. Place the folded strap next to the left side of the zip as indicated. The folded end should face inward. You’ll want to sew the strap to the outer piece, not to the lining.
29. Trim the excess zipper pieces so they align with the edge of the bag.
30. Here’s what it should look like.

31 – 32. Pull the lining through the side and turn the bag to the wrong side as shown above.
33. Using the bottom of the zipper as a guide, fold the outer fabric piece in half as shown above.
34. Fold the lining piece exactly the same and align the piece.
35. Use pins to hold the layers together.
36. Sew the side using a 1 cm seam.

37. Turn the piece over to the other side and fold the piece into a triangle shape.
38. Do the same with the lining piece. You’ll want to start sewing from the batting side and make your way to the lining piece.
39. Leave a gap unstitched for turning out.
40. Begin sewing with a seam allowance of 1 cm. Take your time when you reach the zipper area to prevent breaking a needle.
41. Once you finish, your bag should resemble this.
42. Peel open the unstitched section of the lining and pull the right side of the fabric through.

43. Adjust the corners through the opening of the lining. Use a pen or tool to open each point out.
45. To close the opening, fold in the raw edges and pin.
46. Stitch the opening closed and place the lining back into the bag. Now you can adjust the bag once more, close the zip, and you’re done!
The Finished Product:

Aren’t these triangle pouches the cutest?! You could always lengthen the handle before sewing if you want to hold or carry it on your wrist.

These DIY triangle pouches were so worth making, and I highly recommend you give them a shot even if you’re a complete beginner at sewing. There are so many things you can learn from this tutorial, and it’s way easier to make than it looks.
If you have any further questions or need any assistance before/while sewing, please do let me know in the comments below!
Don’t forget to share this sewing guide with family and friends if you found it helpful!
See you at the next one!
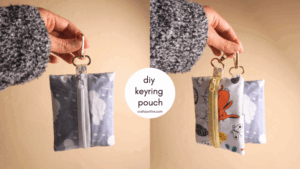
More Pouch Sewing Tutorials
How To Sew A Half Moon Purse (Beginner Tutorial)