How To Sew Fabric Baskets
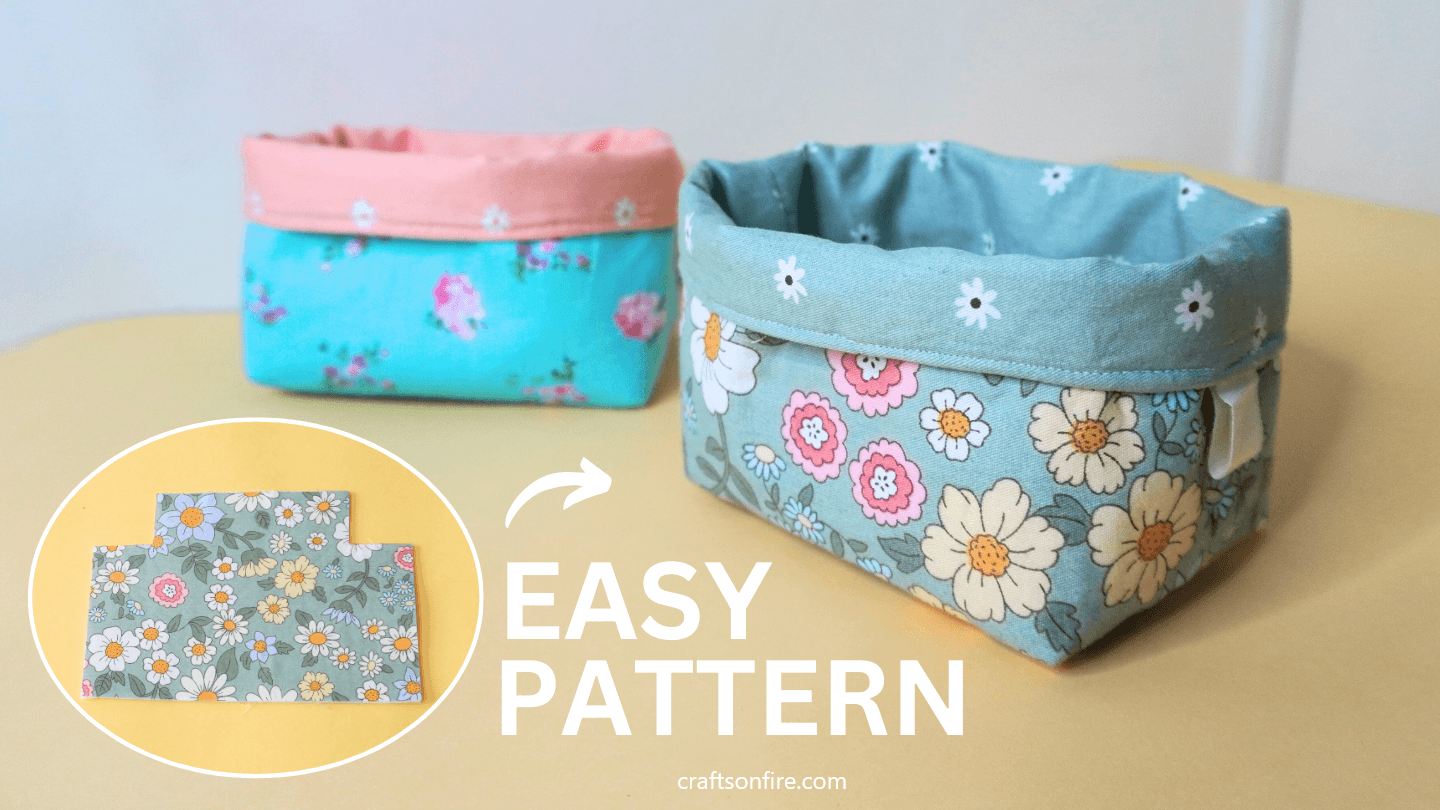
Sew these incredible mini fabric baskets with my easy and quick step-by-step sewing tutorial.
These fabric baskets are the perfect DIY project and an excellent way to store craft supplies, small toys, or keep your makeup products in one place.
With the beautiful floral-patterned fabric as the outer layer and a simple, cute inner lining, you can store and display these baskets anywhere in your home!
If you’ve never sewn a fabric basket before, you’ve come to the right place!
In this guide, you’ll learn how to sew fabric baskets in just a few easy and simple steps.
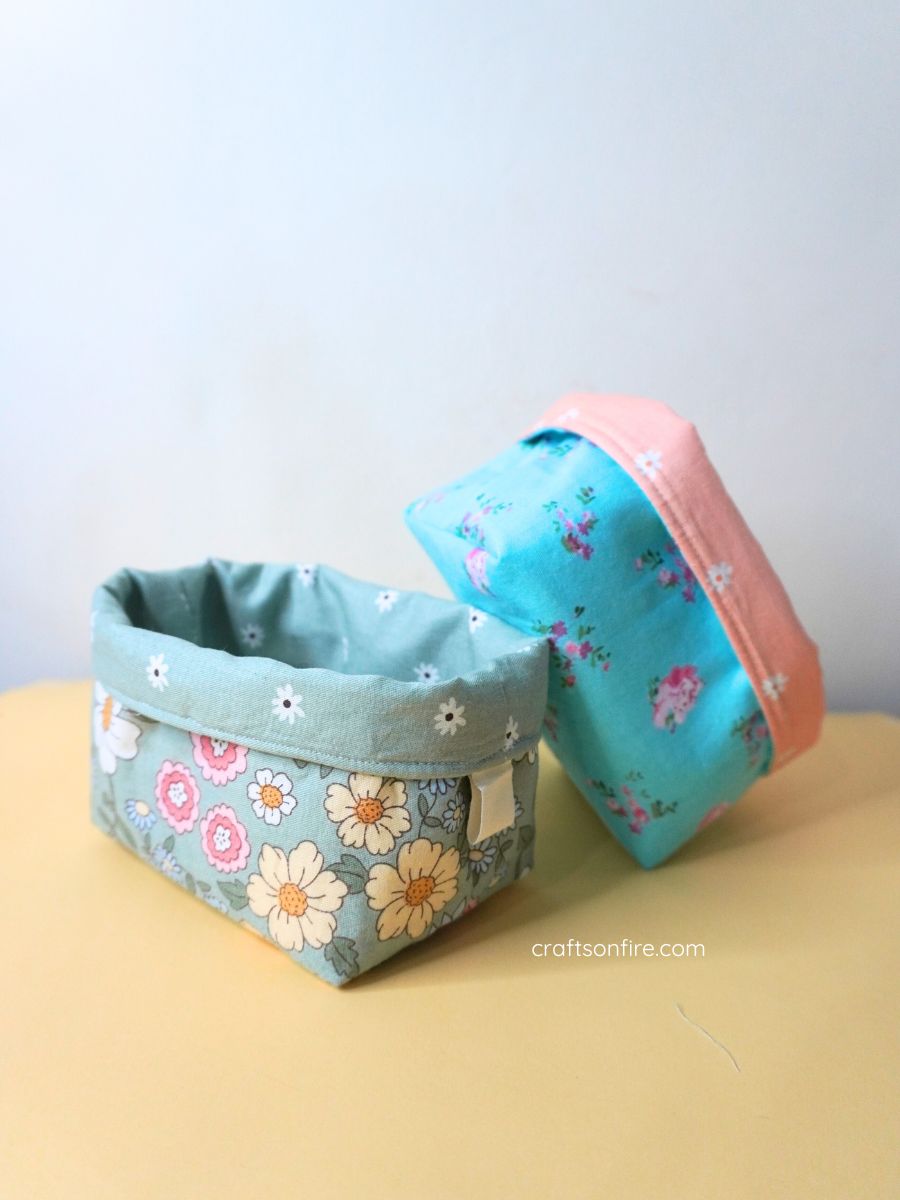
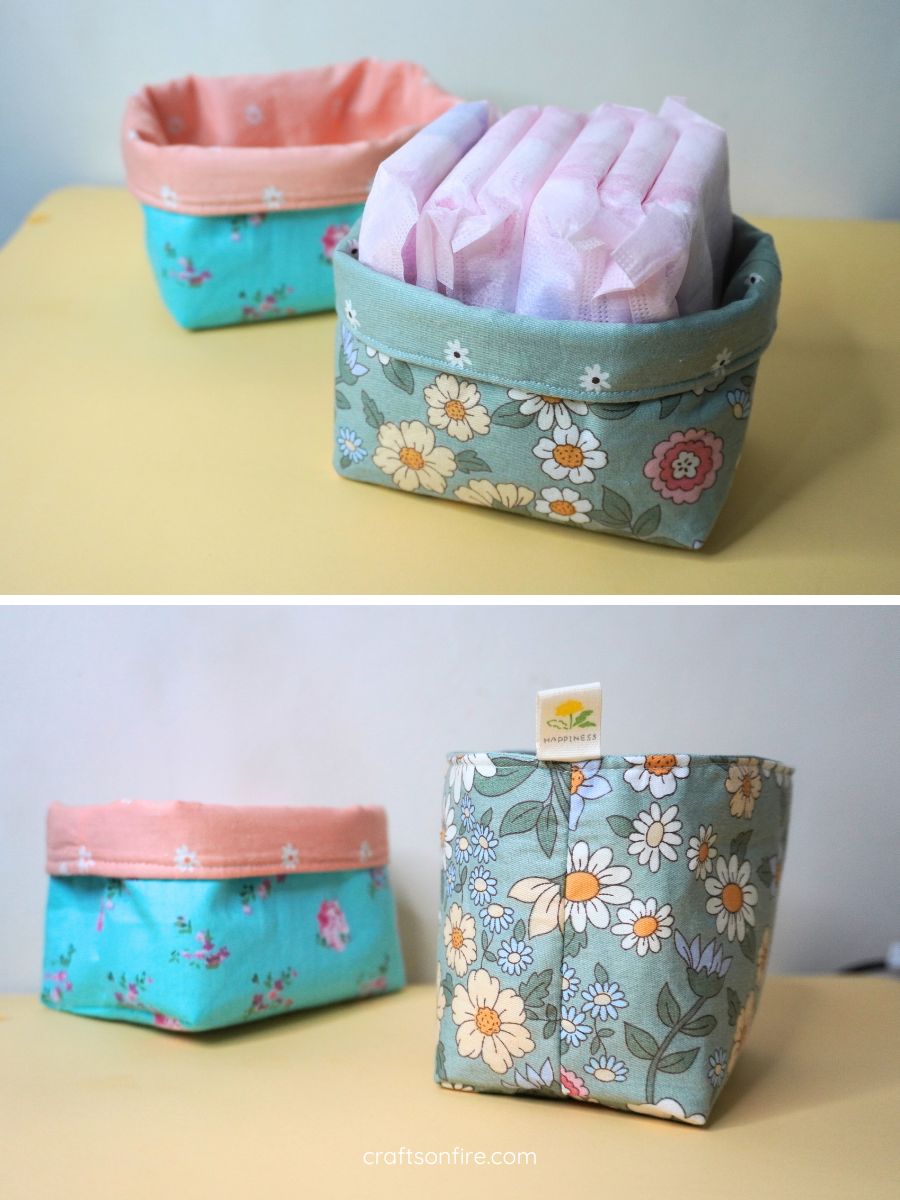
The great thing about this fabric basket is that you can either fold the top portion down or keep it up. Both options look great either way.
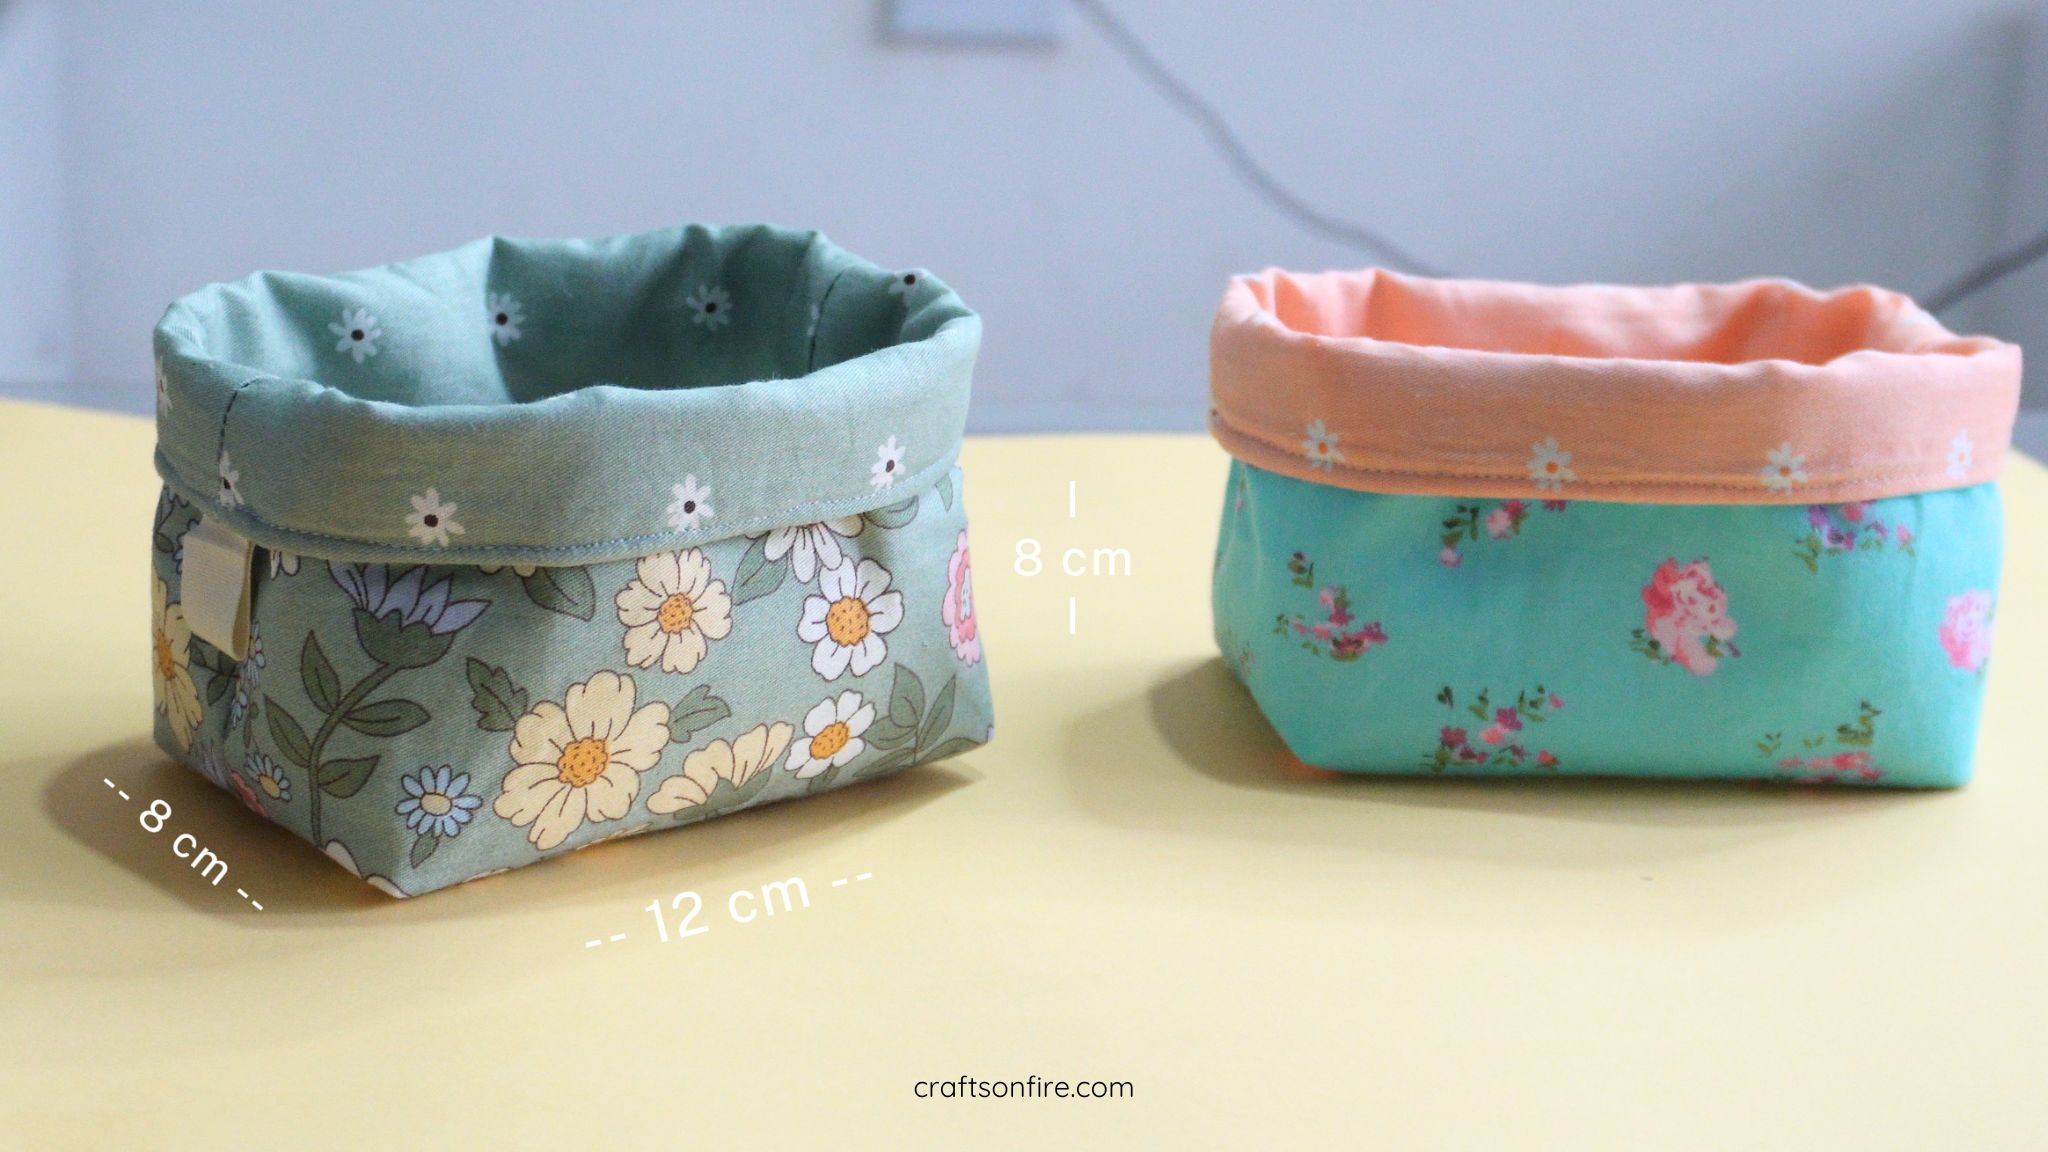
The final measurement of the folded basket: 8 cm (H) x 12 cm (L) x 8 cm (W)
The final measurement of basket: 10 cm (H) x 12 cm (L) x 8 cm (W)
I’m so excited to share this guide with you. If you’re ready, let’s get started!
If you’d like to get the ad-free version of the PDF A4 Printable for this tutorial, you can grab it here!
Fabric Basket Tutorial
Supplies
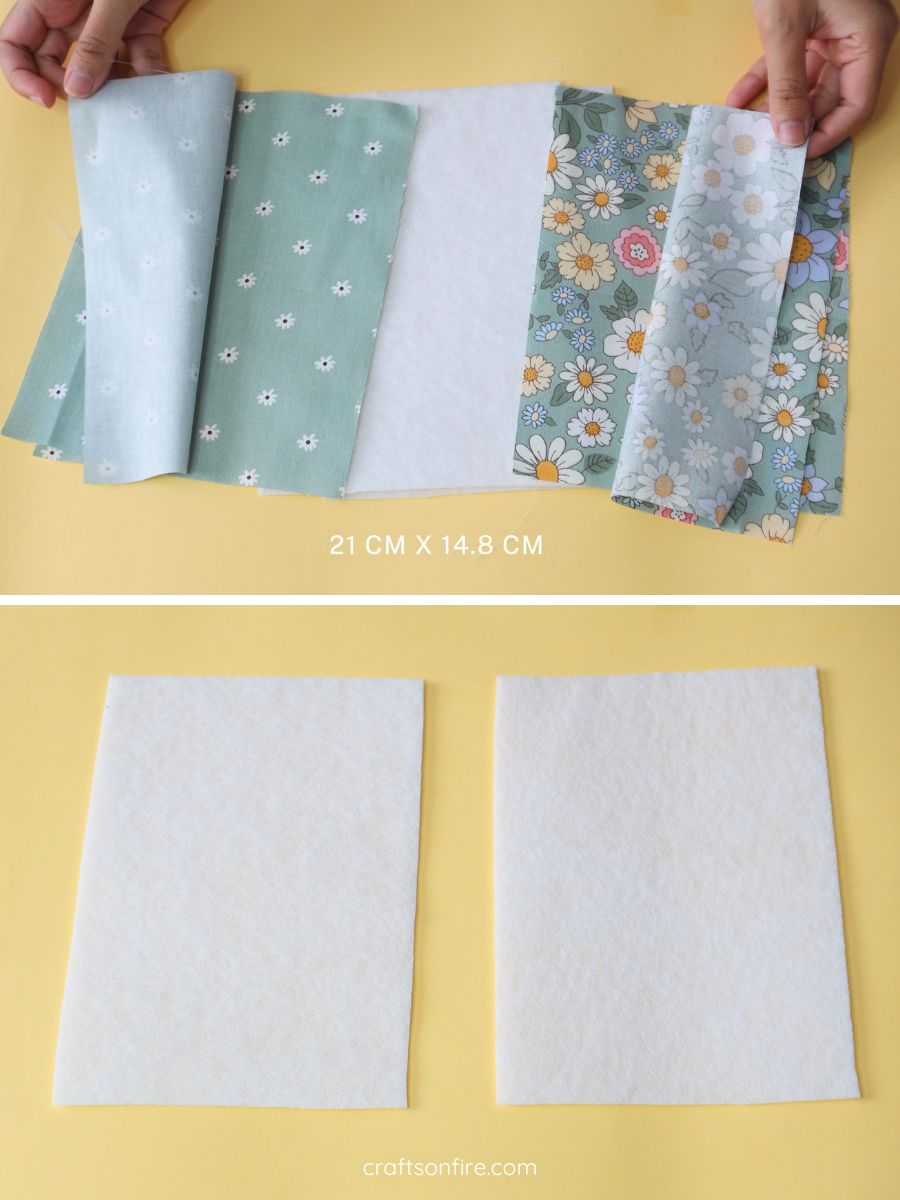
To make this small fabric basket, prepare the following pieces:
- 2 x Patterned Cotton Fabric (21 cm x 14.8 cm)
- 2 x Cotton Lining (21 cm x 14.8 cm)
- 2 x Fabric Batting/Fleece (21 cm x 14.8 cm)
- Pins/Clips
- Scissors
- Sewing Machine
- Label (Optional)
Video Guide
Instructions
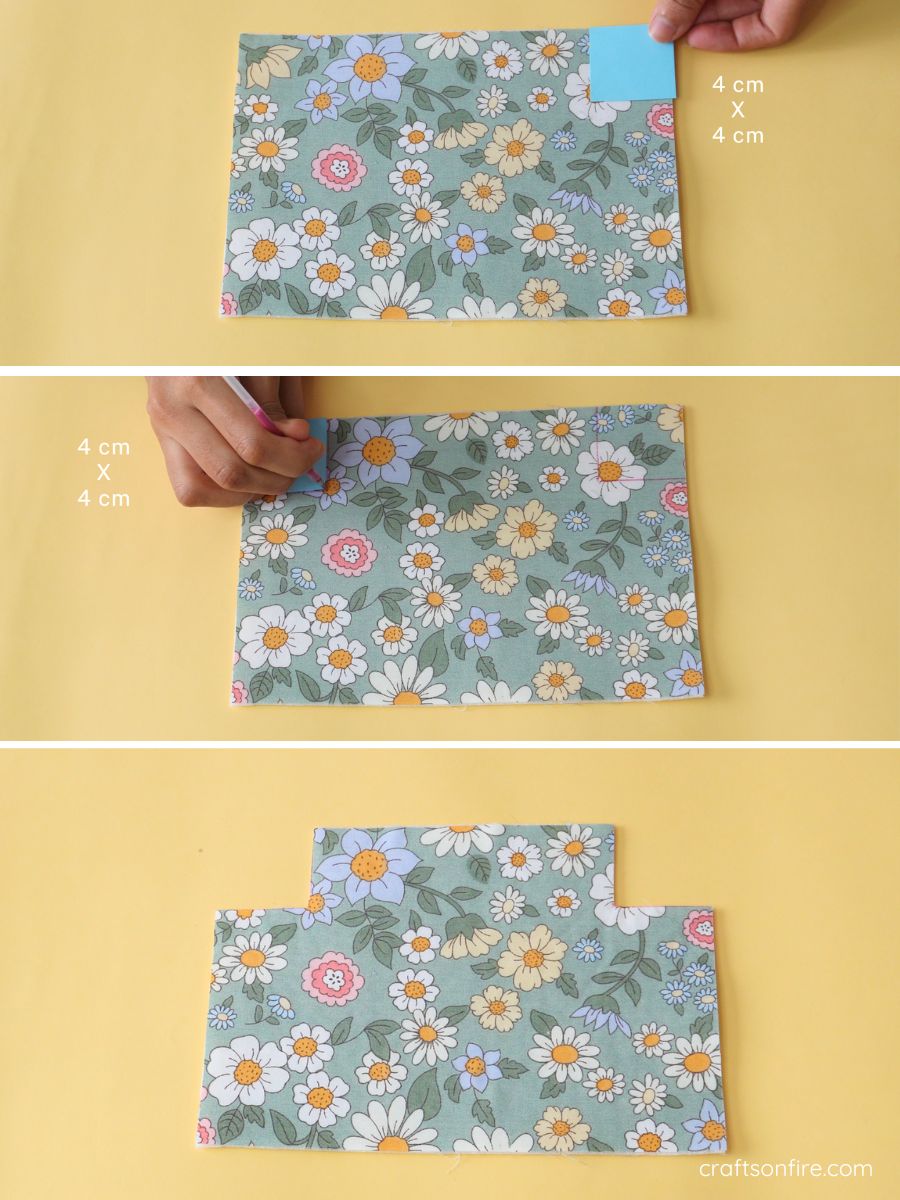
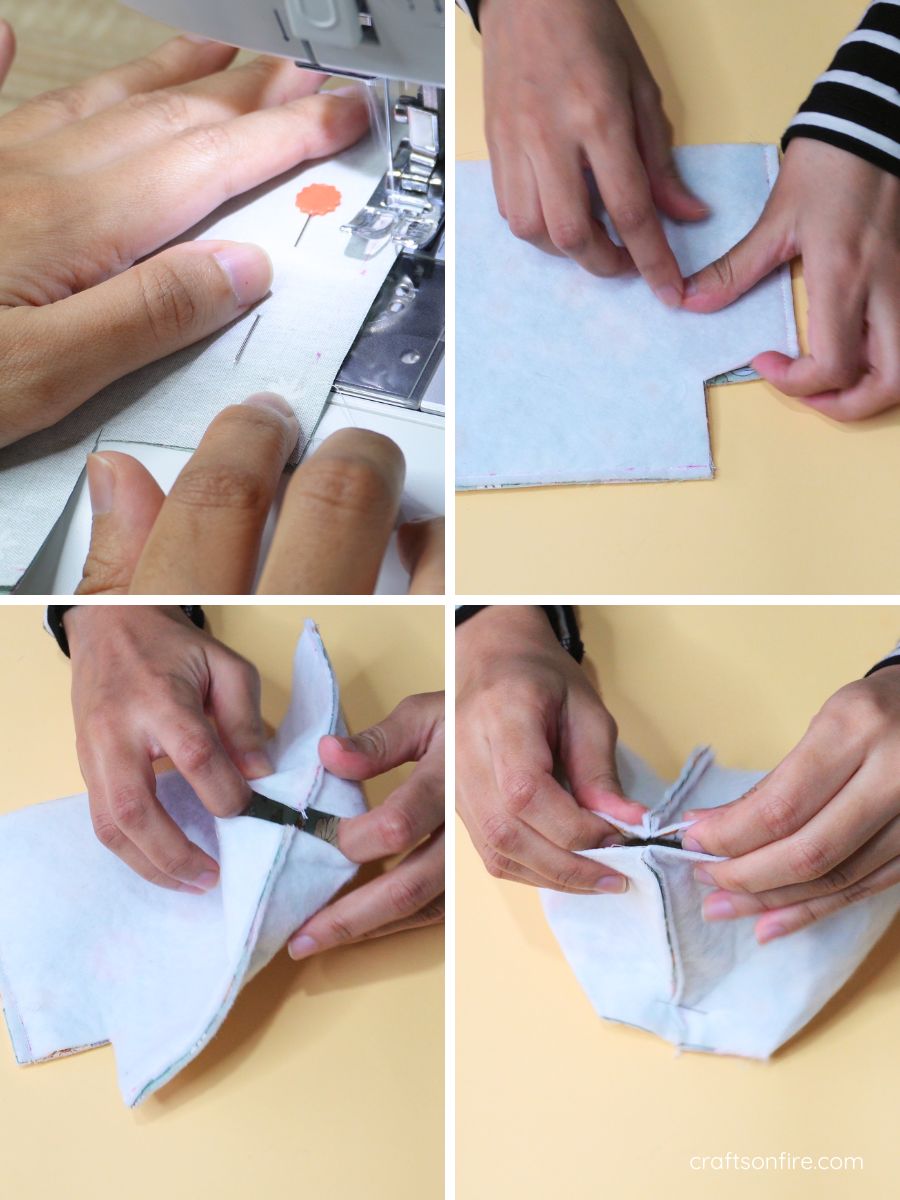
Step 1
Start by placing the two pieces of fabric batting on a flat surface. Then, lay the floral-patterned fabric over the batting, as demonstrated below.
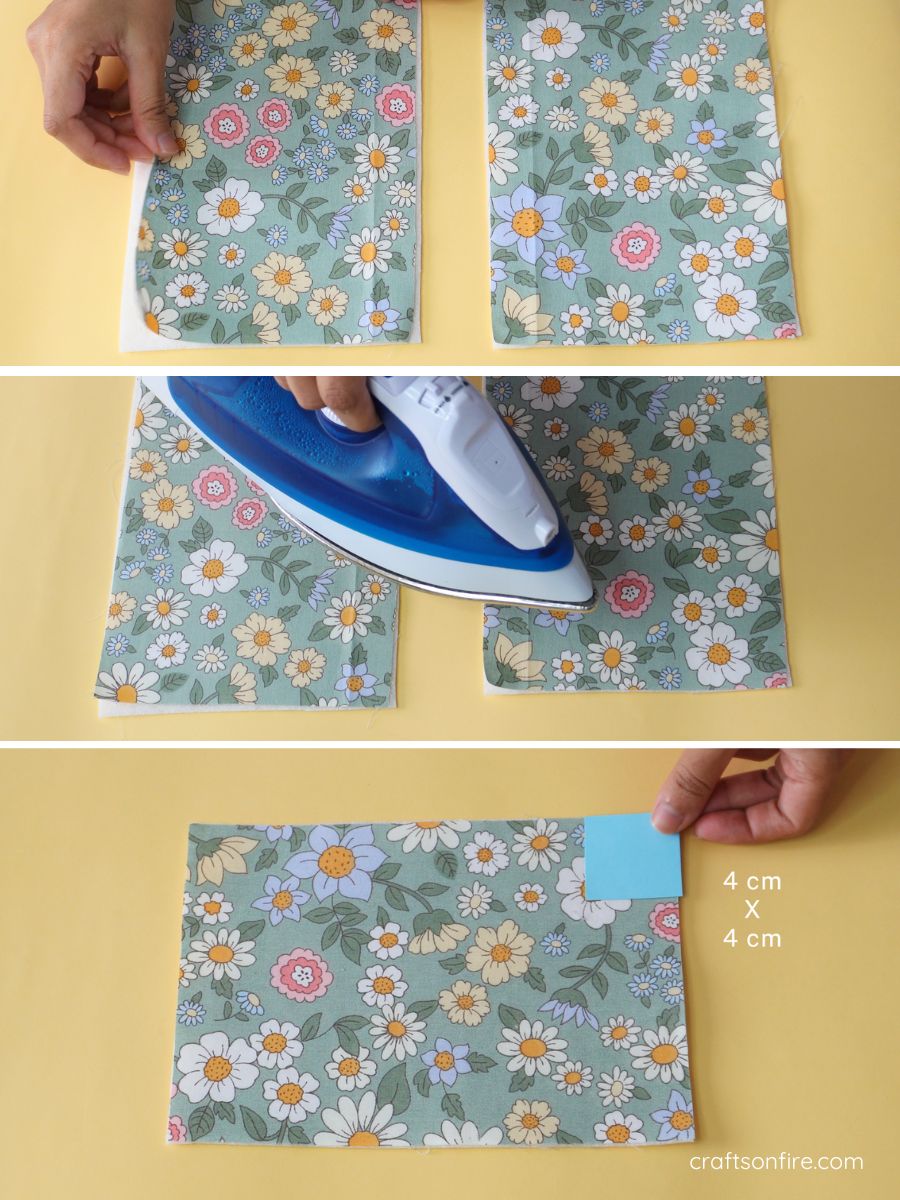
Gently press the floral fabric onto the fabric batting until the two layers adhere to each other.
This will serve as the outer layer of your fabric basket.
Step 2
Measure and mark 4 cm x 4 cm on one corner of the fabric using a fabric pen or tailor’s chalk. Repeat this process on the opposite side.
Use a scissor to cut out the marked section on both corners. Repeat this process for the second piece of fabric.
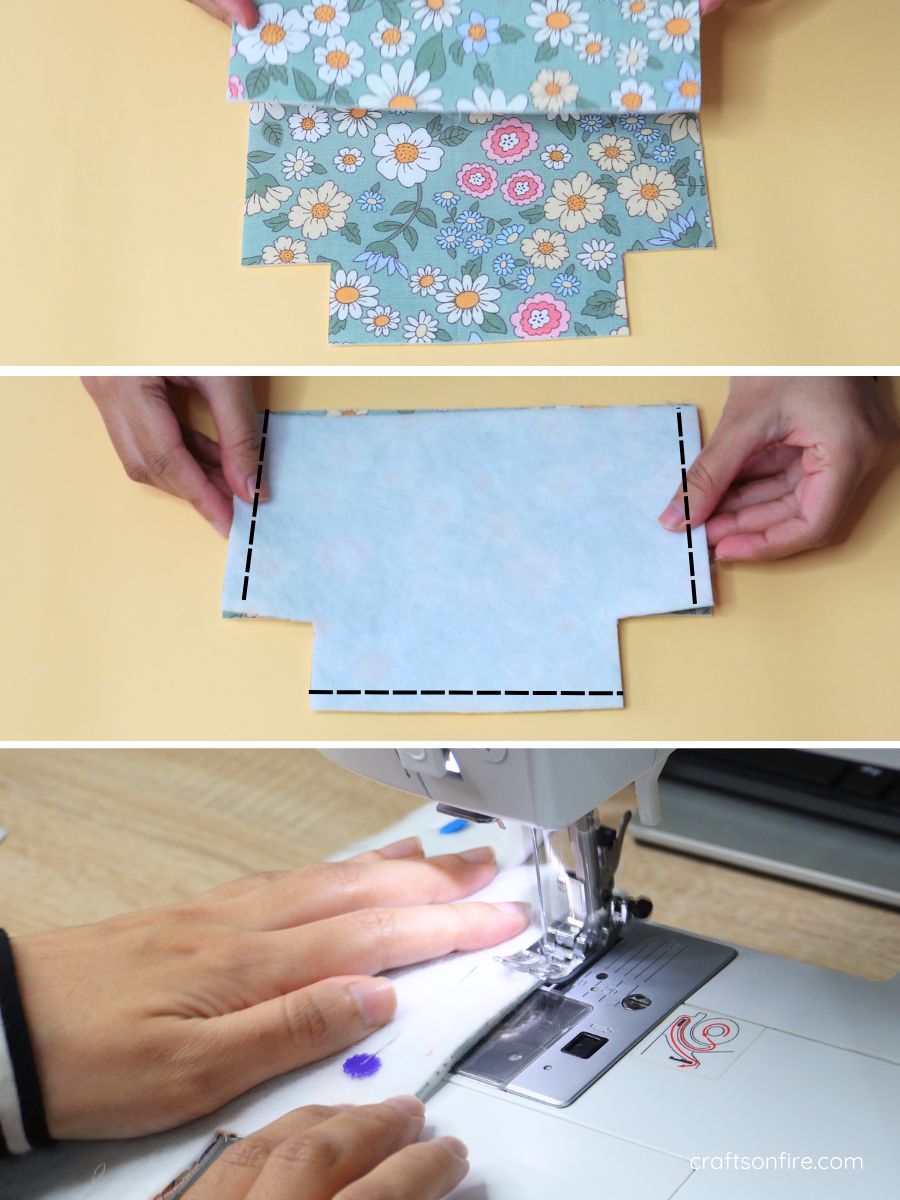
Step 3
With both pieces and their corners cut out, place the fabric together with the right sides facing inward.
Pin all 3 sides with a pin to keep the pieces together.
Then, sew the indicated areas. Stitch one side of the fabric using a straight stitch, leaving a 0.5 cm seam allowance.
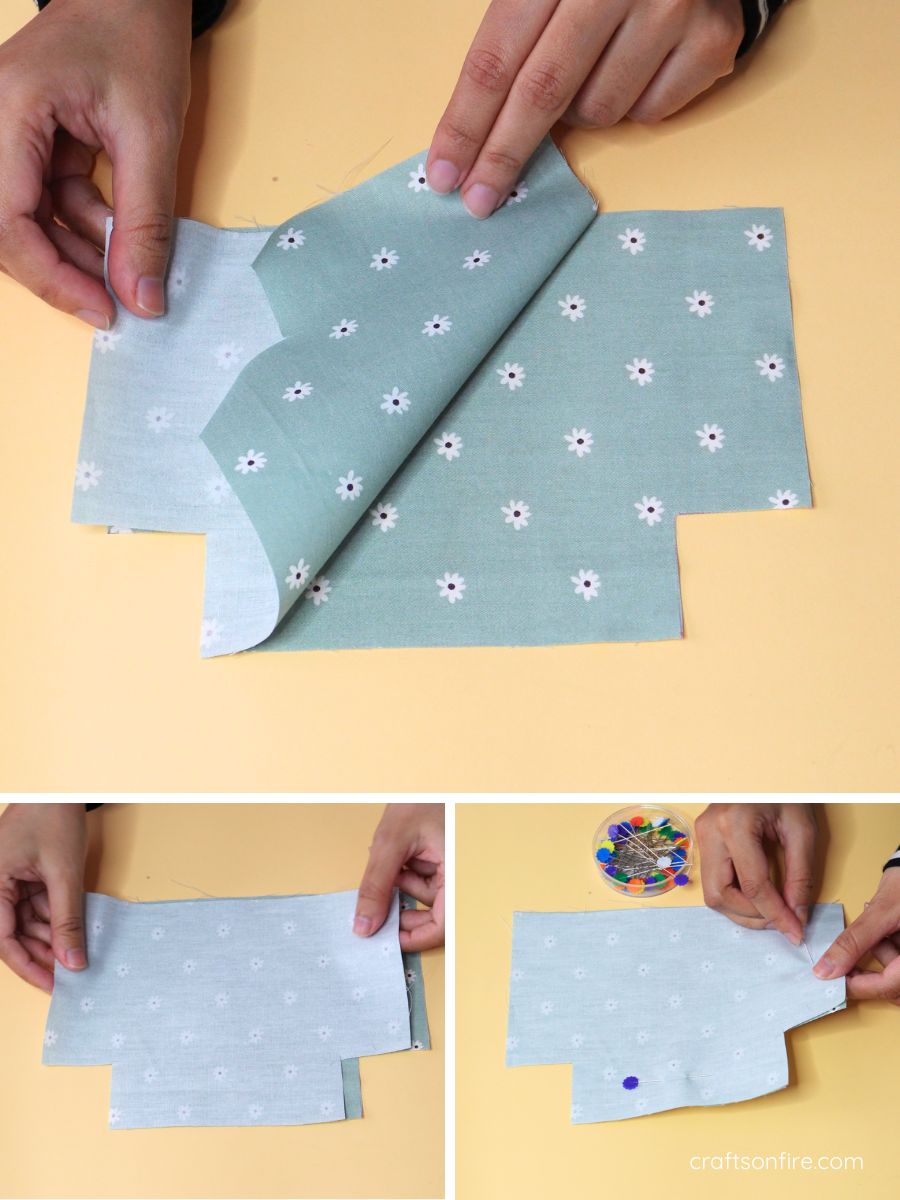
Step 4
Cut the corners of the inner pieces. Then, place the two pieces together with the right sides facing inward.
Pin the three sides together, ensuring the two pieces are aligned.
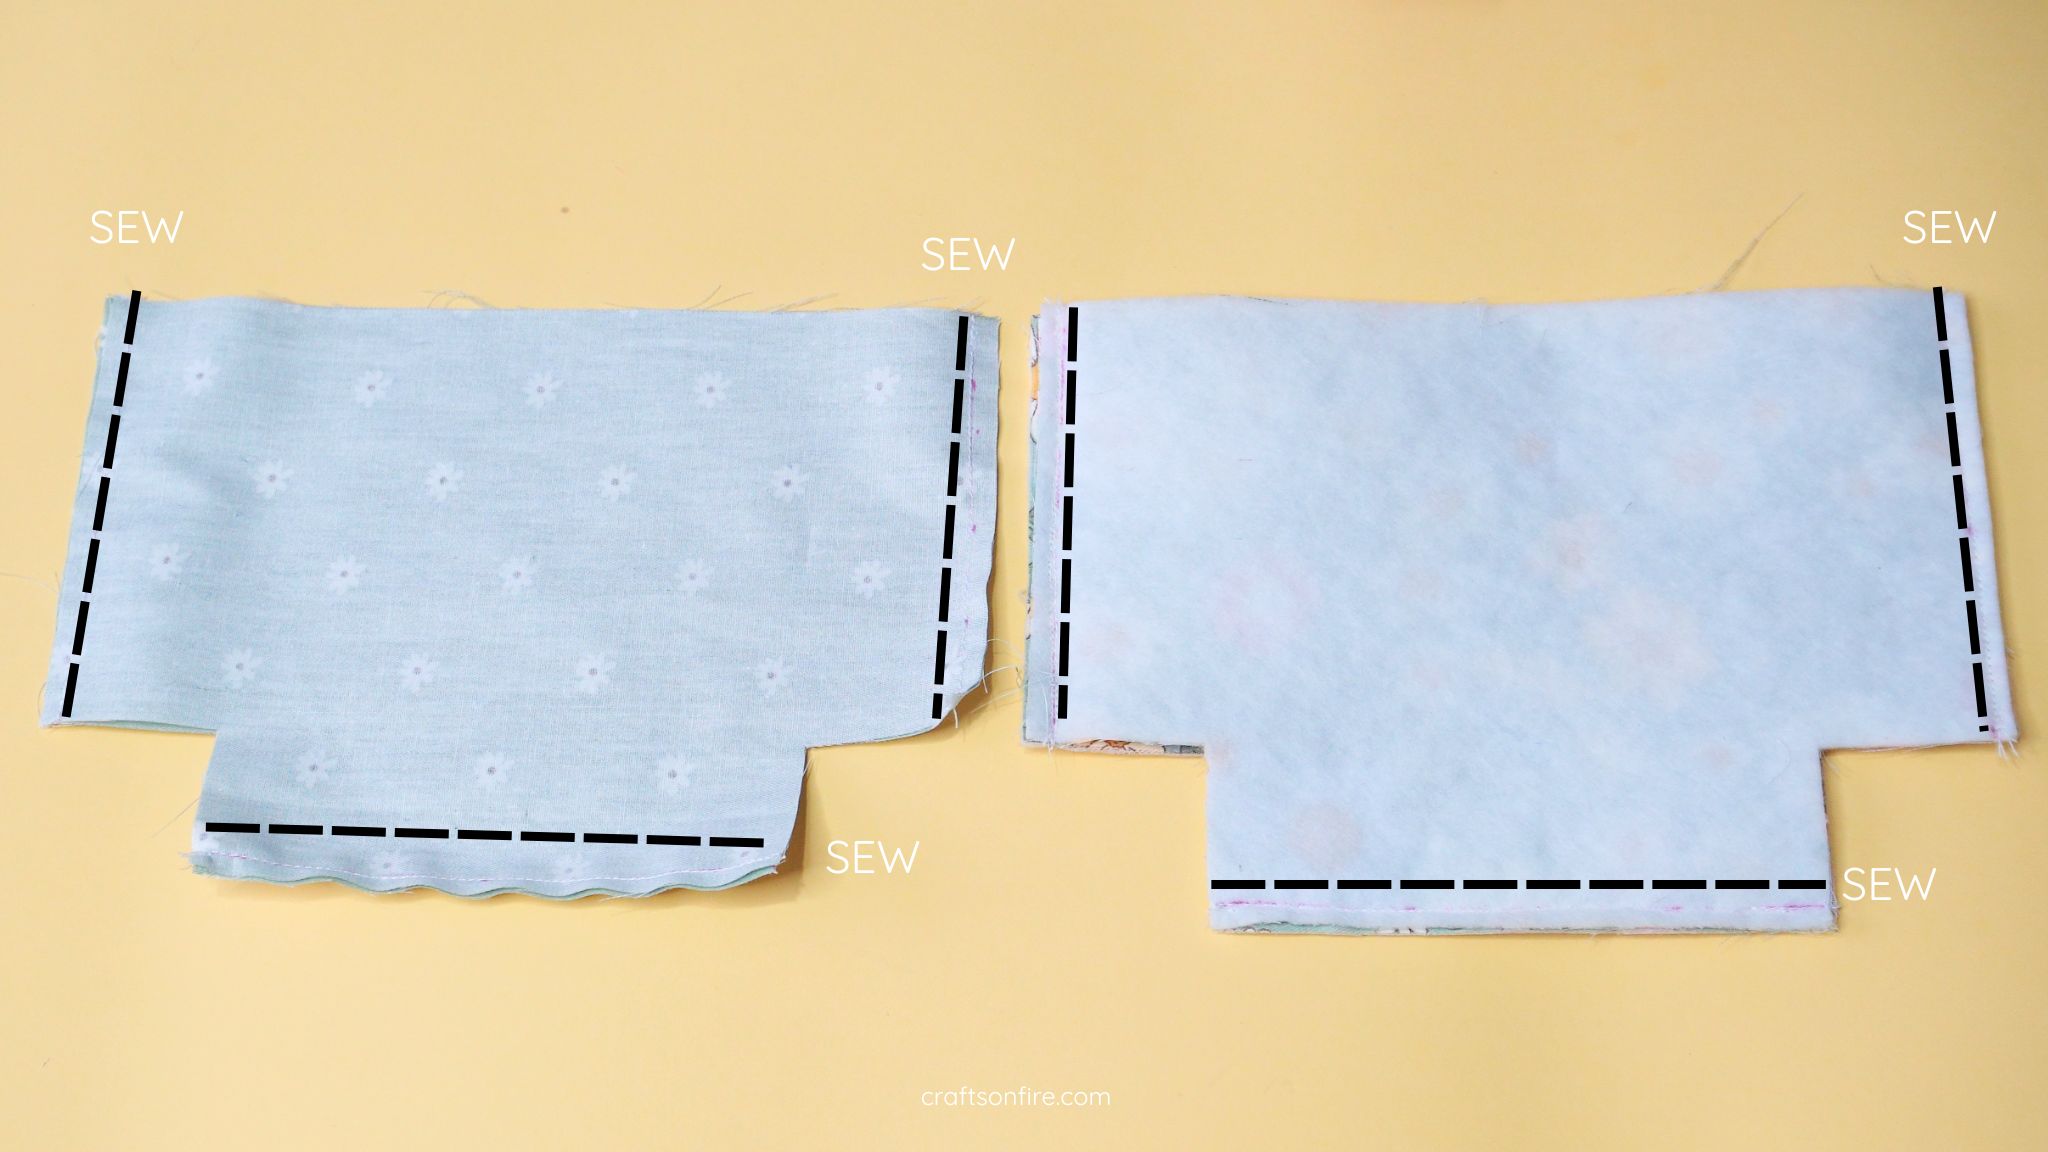
Head over to the sewing machine and stitch all the sides, leaving a 0.5 cm seam allowance.
Here’s what the pieces look like when they are stitched together:
Step 5
Grab the outer piece and open the corner. Carefully fold the corners together. Press the two ends together, ensuring that the seam lines match.
Use a pin to hold the pieces together. Then, go to the other side and repeat the process.
Step 6
The completed ends will look like this:
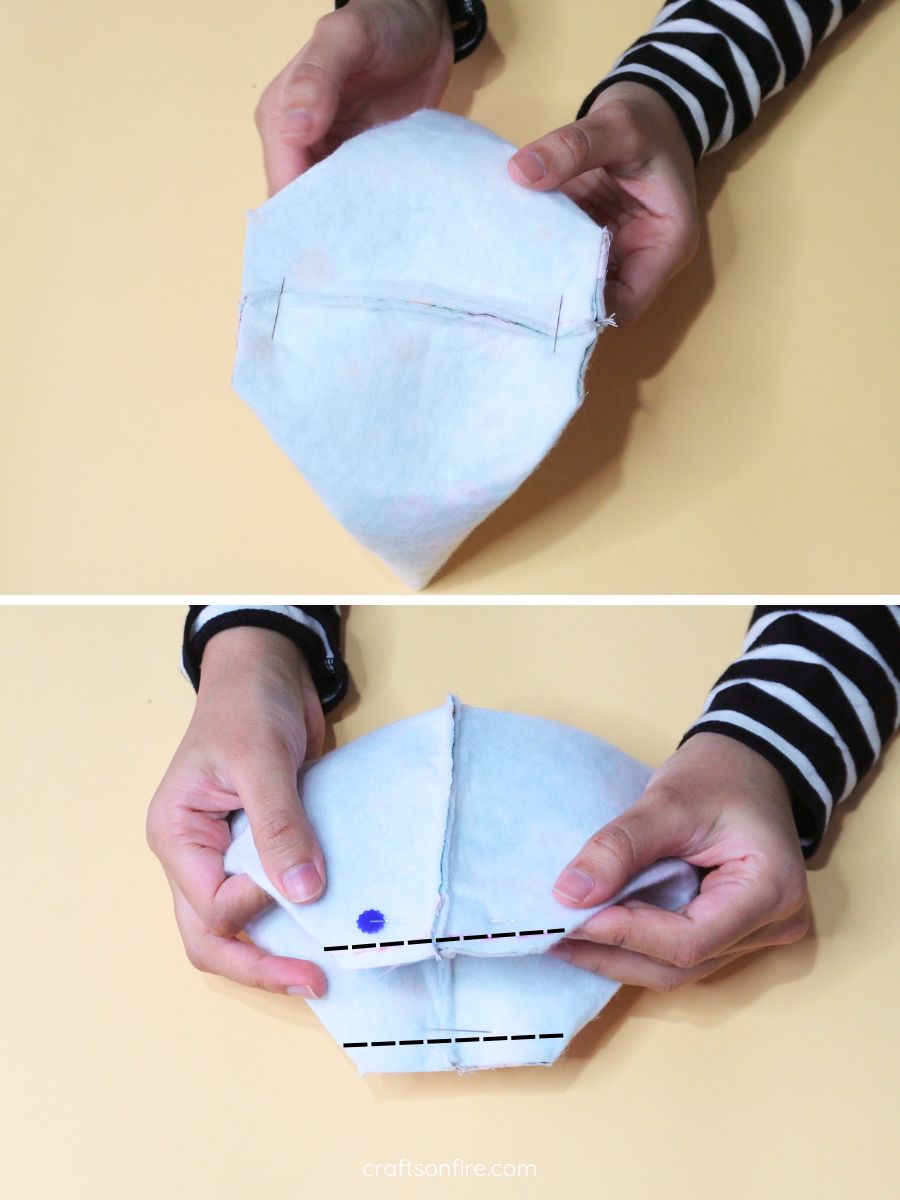
Now, head back to the machine and stitch the corners with a 0.5 cm seam allowance.
Step 7
Open the first corner of the fabric and bring the two ends together. Align the fabric so that the seam lines match.
Grab a pin and secure the piece.
Head over to the other corner and repeat the same process.
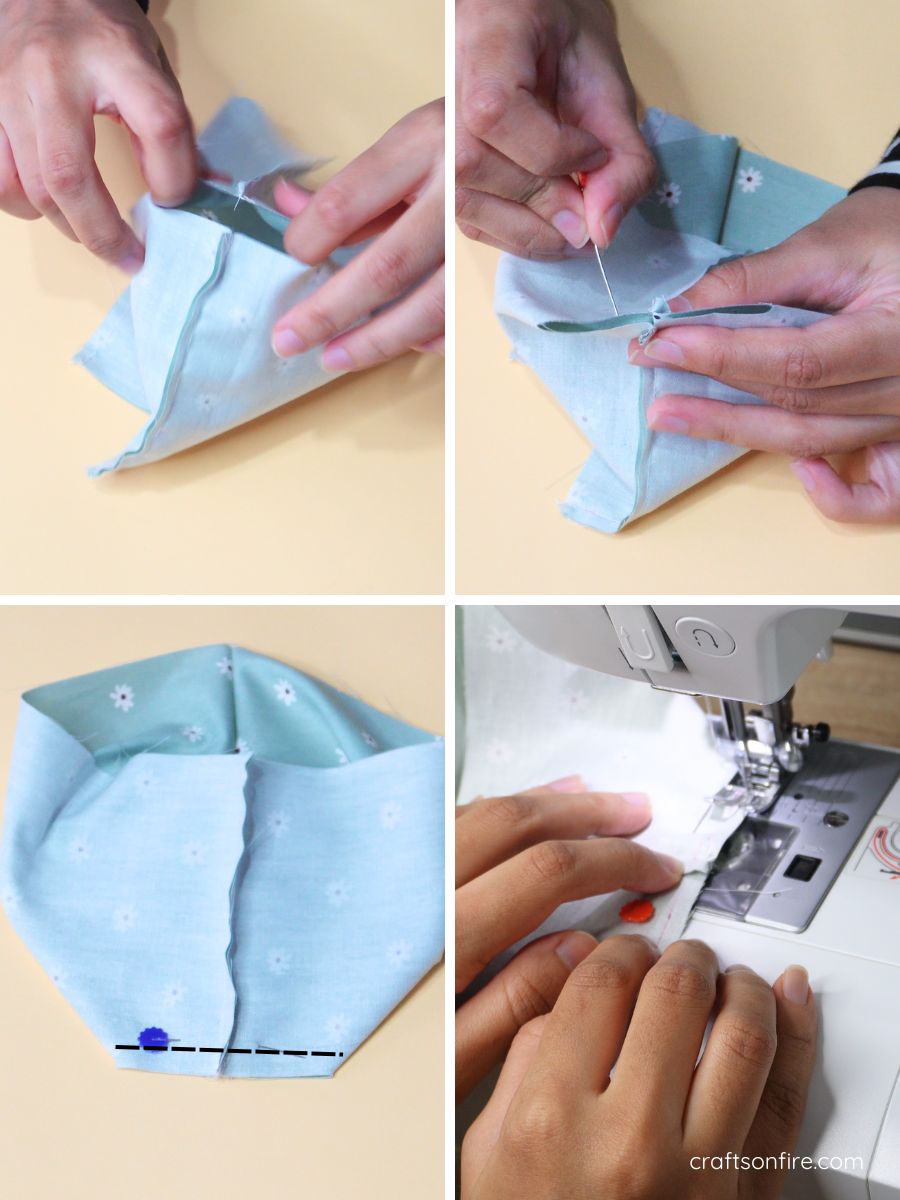
Stitch both corners with a straight stitch, using a 0.5 cm seam allowance.
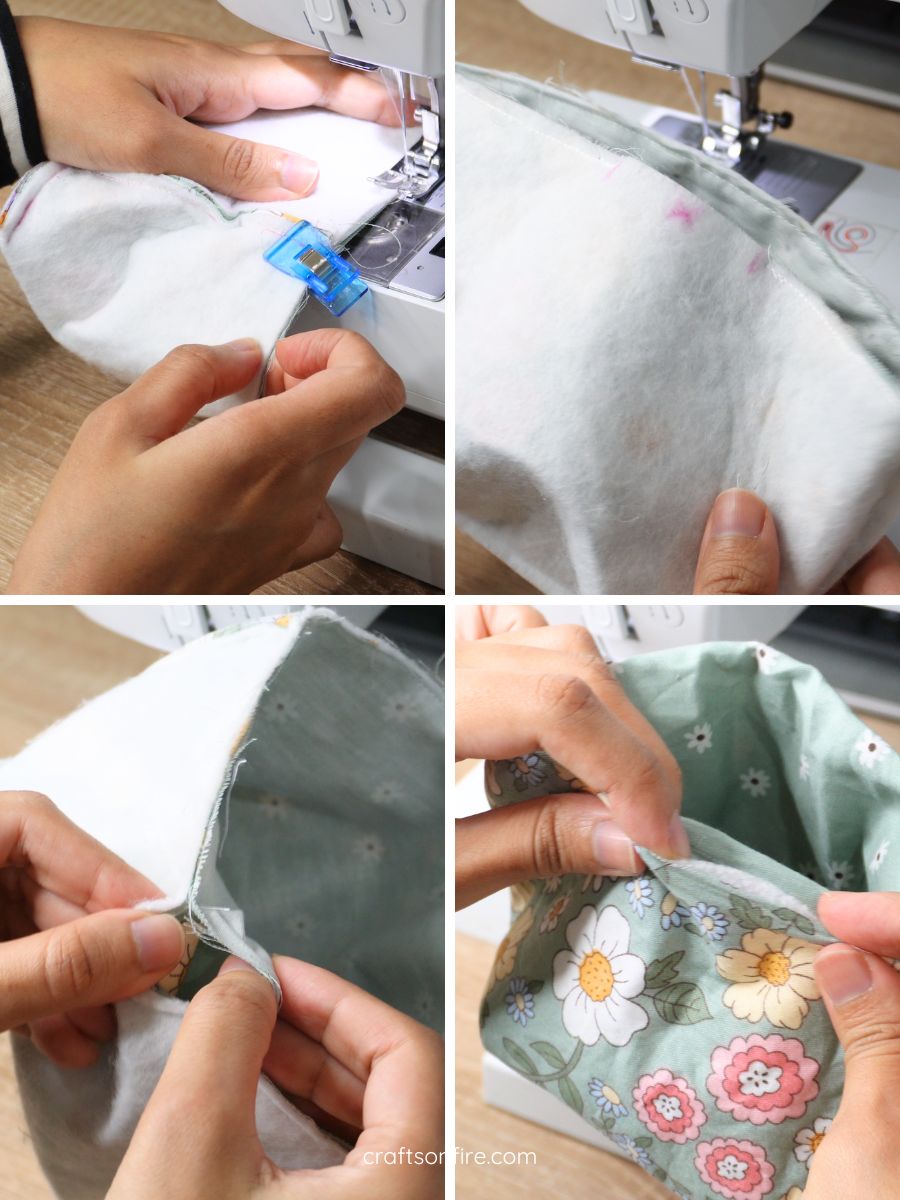
Step 8
Turn the inner piece right side out and open the corners. Next, grab the outer piece and open the corners.
Insert the inner piece into the outer piece, ensuring the seam lines align properly.
The right sides of the fabric should be facing each other! Secure the sides of the basket using a sewing clip or pin.
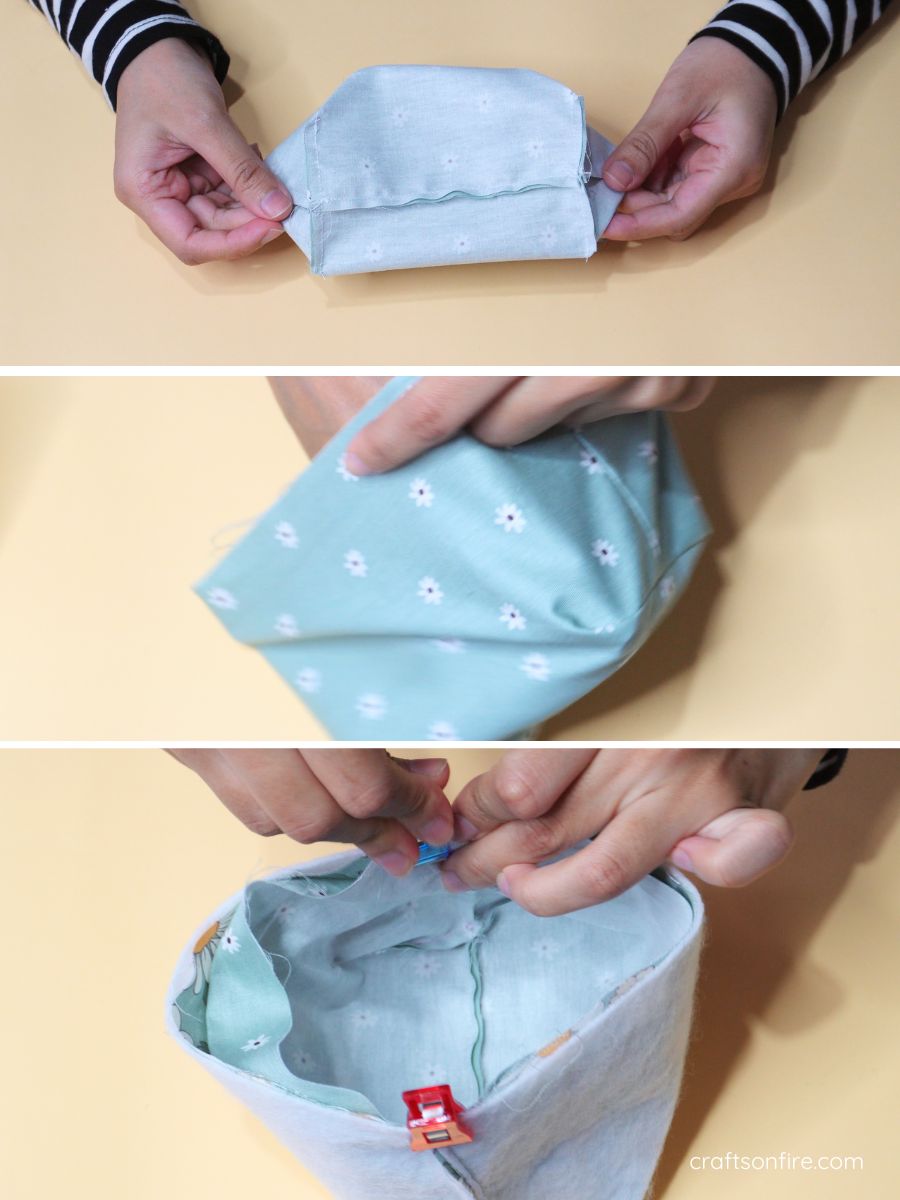
Step 9
Next, add a label to your basket (this step is optional). Take the label and fold it in half. Place the label between the inner and outer pieces.
Hold all three pieces together, then head over to the sewing machine.
If possible, detach the arm of your machine and position the basket. Then, carefully set the fabric layers.
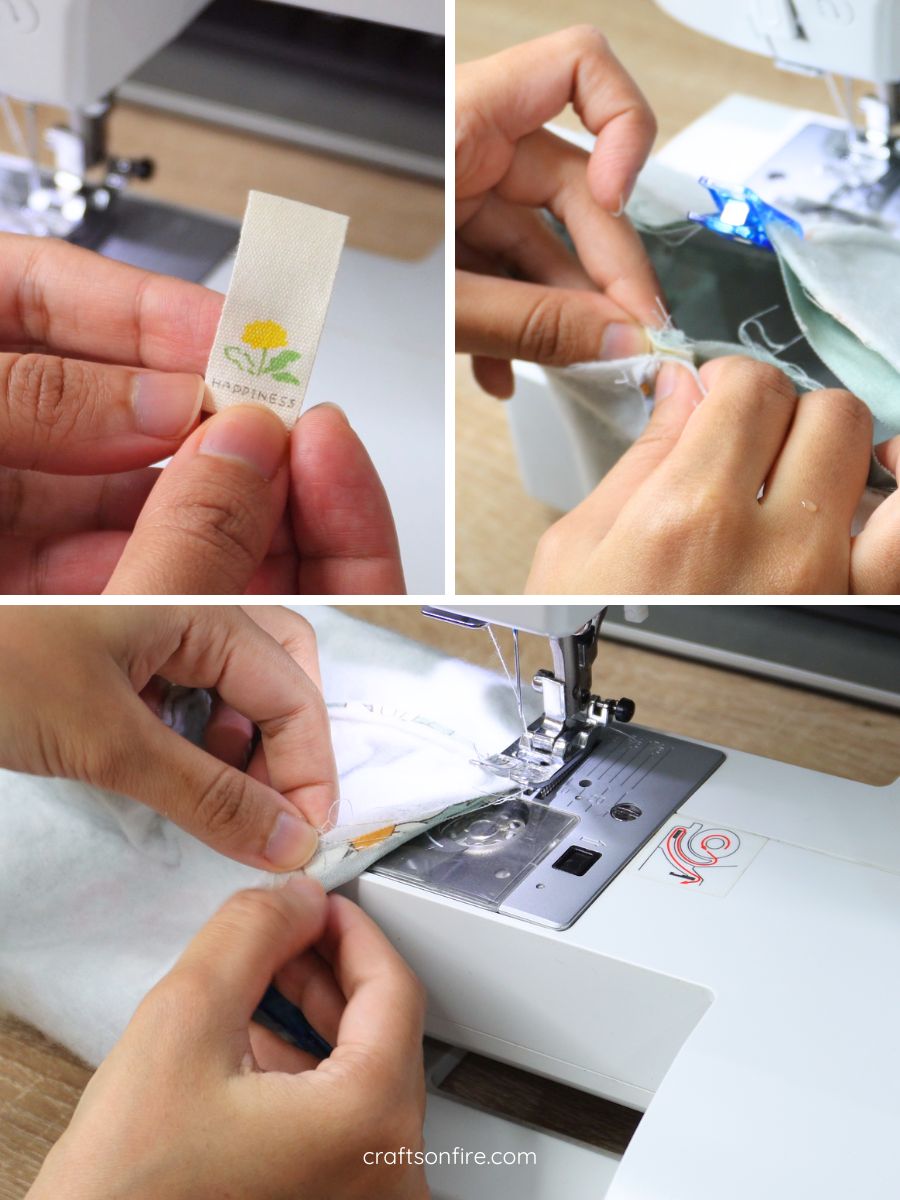
Step 10
Mark a small area for the opening, leaving a 7-8 cm gap for turning out. After reaching the marked area, backstitch and remove the fabric from the machine.
Then, continue sewing from the next marked point.
Finish sewing the pieces together. Remove the basket from the machine and open the unstitched section.
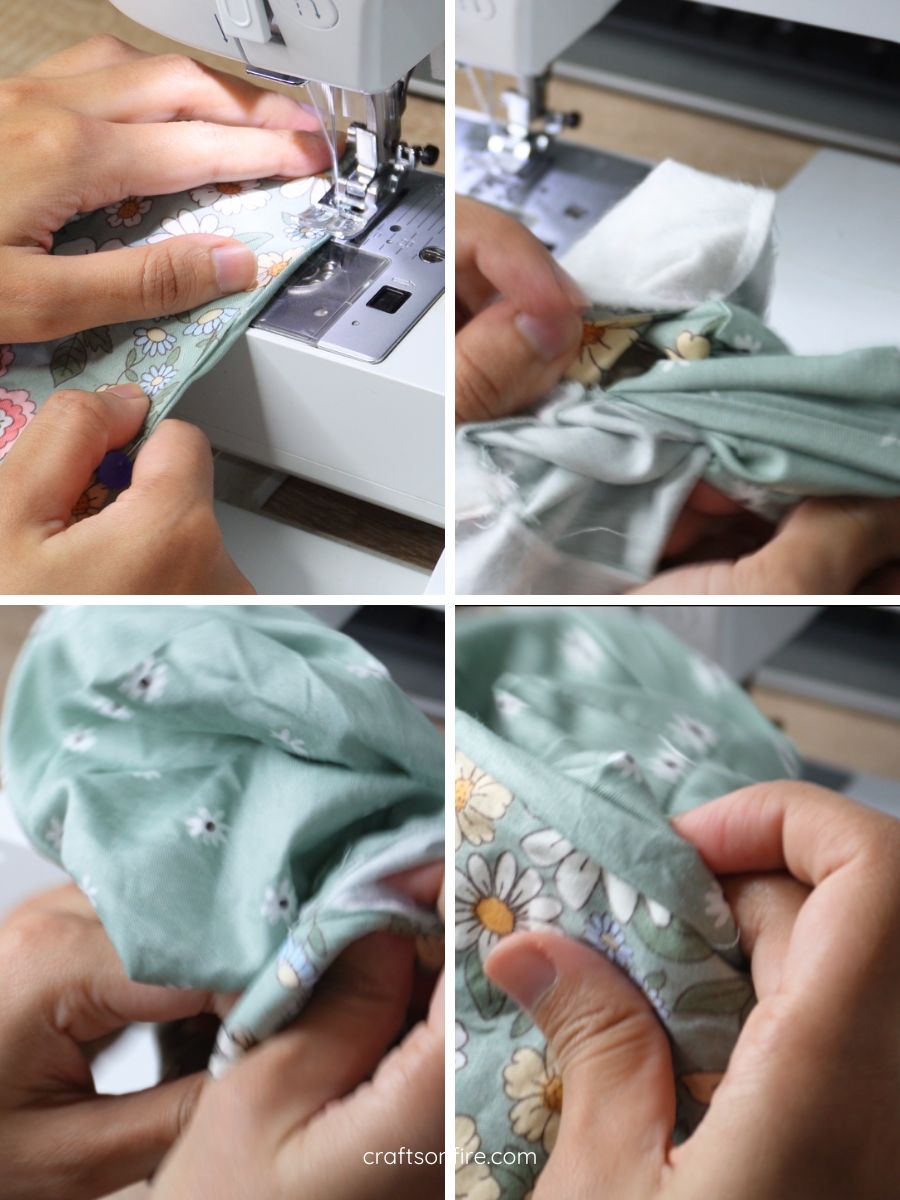
Step 11
Pull the inner piece through the opening and turn the fabric inside out. Continue pulling until the right side is completely free.
Tuck in the edges of the opening, then head back to the machine for a final topstitch using a straight stitch with a seam allowance of 0.2 – 0.5 cm.
Final Result
Ta-da! Your mini fabric baskets are now complete! Here’s how mine turned out:
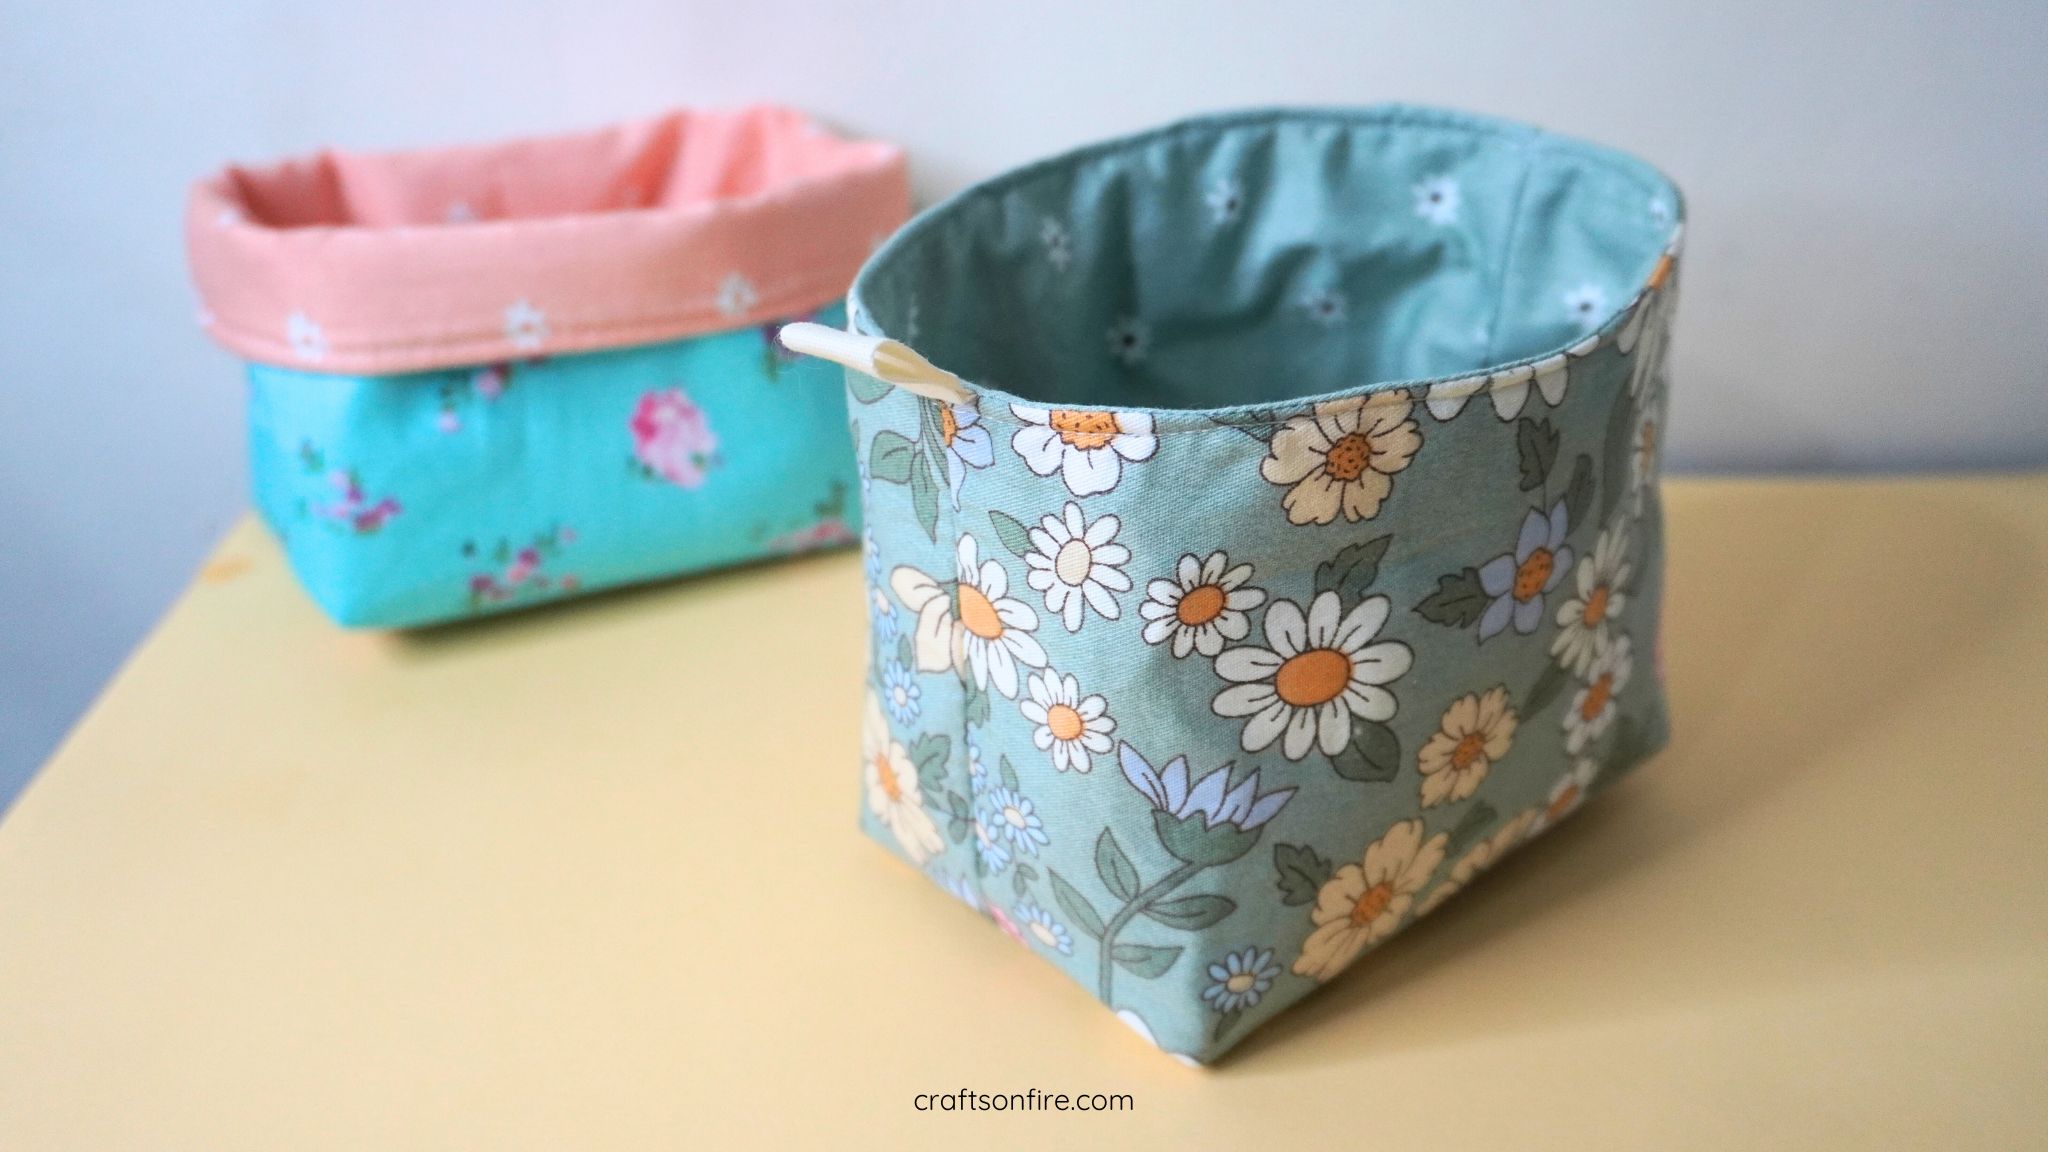
Don’t be fooled by the size of these baskets! You can store so many things – sewing supplies (clips, cotton, pins), makeup, or even sanitary pads!
Wrapping Up
Making these fabric baskets with your own two hands is way more satisfying than purchasing them from a store.
They only require a small amount of fabric and it’s quite a quick sewing project you can do in just a few minutes.
There’s no better feeling than finishing a project and appreciating your hard work.
I had loads of fun sewing these baskets and I really do hope you do too!
I would love your feedback! Drop a comment below or head over to my channel to let me know your thoughts.
See you at the next one!
More Step-by-Step Sewing Tutorials
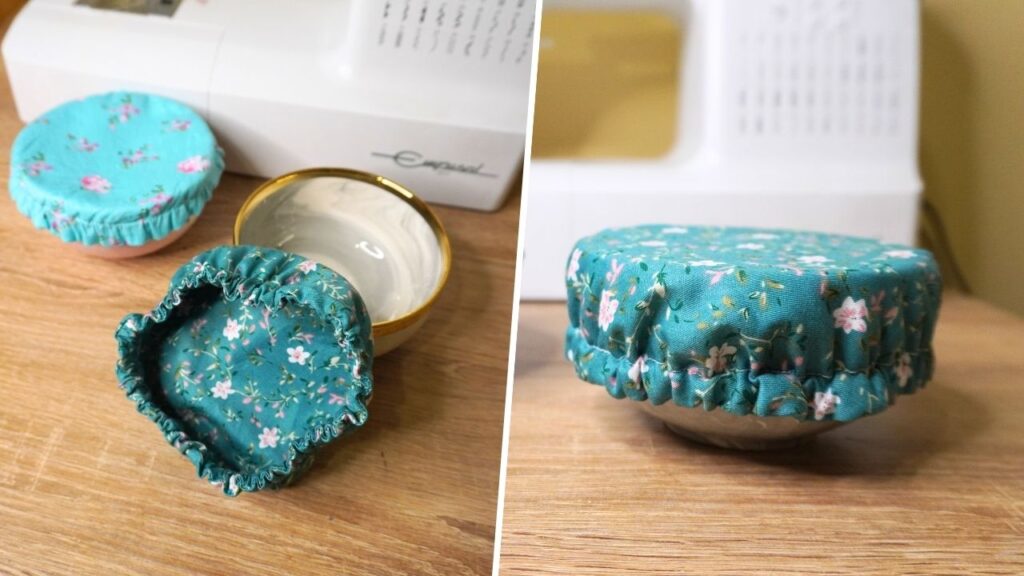
How To Sew A Bowl Cover (Step-By-Step)