How To Sew A Ruffle Pouch With A Front Pocket
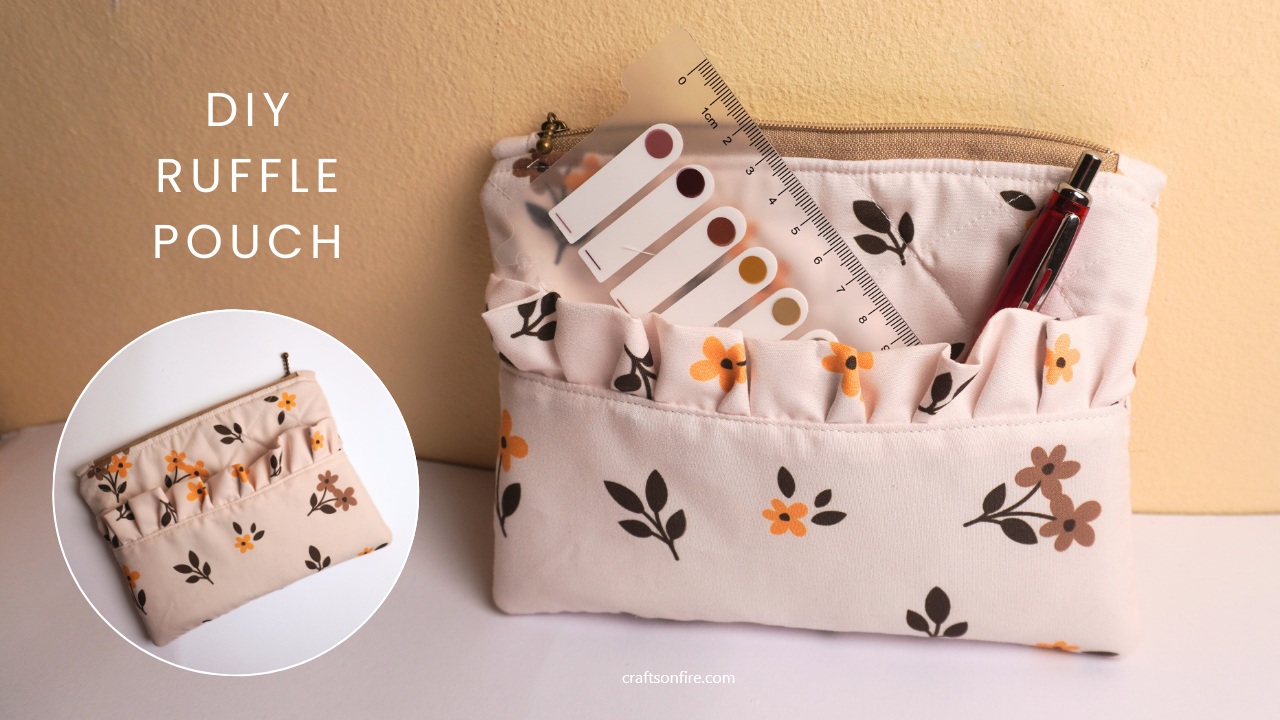
If you love ruffle pouches, you’re going to adore this new design! It features a beautiful quilted finish and a front pocket with the cutest ruffle border. Best of all, it’s super easy to make and perfect for beginners.
The front ruffle pocket adds a fun, feminine touch while also giving you extra storage space—because we can never have too many pockets!
With my step-by-step tutorial, you’ll be able to create this pouch that’s perfect for storing makeup, stationery, sewing supplies, or everyday essentials.

Whether you’re making this pouch for yourself or as a handmade gift, this project will have you wanting to sew many of these pouches in different colors and fabrics.
Oh, and the great thing about this pouch tutorial is that I’ve created a printable pattern cutting template which you can use to easily and quickly cut the fabric. It comes along with a printable guide of this tutorial, so you can have it on hand as you sew.
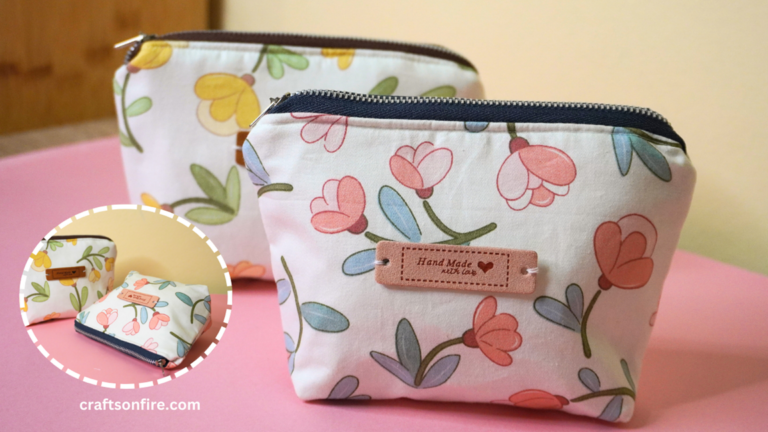
Finished pouch size: 19.5 cm x 14.5 cm (7.68″ × 5.71″)
dIY Ruffle Pouch With Front Pocket
Supplies
- 1 x Ruffle strip – 35 cm x 7 cm / 13.78″ × 2.76″
- 2 x Pocket Fabric – 22 cm x 10 cm / 8.66″ × 3.94″
- 2 x Fabric – 22 cm x 16 cm / 8.66″ × 6.30″
- 2 x Lining – 22 cm x 16 cm / 8.66″ × 6.30″
- 1 x Pocket Batting – 25 cm x 12 cm / 9.84″ × 4.72″
- 2 x Pouch Batting – 25 cm x 18 cm / 9.84″ × 7.09″
- Zip – 19 cm / 7.48″
- Zipper tabs – 6 cm x 4 cm / 2.36″ × 1.57″
If you want a high-quality, AD-FREE version of this sewing guide with step-by-step instructions included under each picture and a PRINTABLE TEMPLATE CUTTING, grab the printable PDF guide over here!
Video Tutorial
Instructions

01-02. Start by placing one of the pocket pieces (correct side facing you) on top of the pocket batting and pin in place. I then used a ruler and fabric pen to mark the spacing to create a diamond quilt pattern, or you can quilt as desired.
03. Begin from the right side of the fabric and sew along the markings.
04. To complete the diamond pattern, I marked up the fabric on the opposite side.
05. Head over to the sewing machine and repeat the process of stitching over the marked lines until you have completed the quilting.
06. Cut the excess lining from the fabric batting.

07. This is what the quilted pocket should look like.
08-09. Now let’s repeat the first few steps on the remaining pieces of the pouch. Place the fabric pouch pieces onto the accompanying batting, mark the lines accordingly, and head over to your sewing machine to complete stitching. Then, trim the excess batting from the sides.
10. Let us prepare the zipper for our ruffle pouch!
11. Place the open end of the zipper into the machine and stitch back and forth until the two ends are joined.
12. Grab your first zip tab piece.

13. Fold one end of the zip tab in half.
14. Place the zip on the folded piece side.
15. Fold the other end of the fabric until it meets the edge of the zip.
16. Fold the fabric over the top of the zip until it creates a perfect pocket for the zip.
17-18. Sew the fabric to the zip and you’ve just created your first side zip tab.

19-20. Repeat the process on the other side of the zip that we secured in place earlier. Once sewn, trim the edges of the zip tabs to match the edge of the zip.
21-22. Fantastic! The zip is now completed, so we can move on to stitching the ruffle strip that will be attached to the front pocket of the ruffle pouch. Grab the long rectangle piece right side facing you.
23-24. Fold the material in half and try to align the edges as much as possible. Use an iron to flatten the material (optional).

25. On the left end of the strip, fold a portion of the material together and hold in place.
26. This is how the fold should look to you. While sewing, you will repeat this fold and stitch. This will create the ruffle. Watch the video guide if you need a refresher.
27. Let’s begin to sew the ruffle from one end to the other. Fold the fabric as illustrated in the previous step and stitch along the side of the strip where the two pieces of fabric meet. Then, stop and create the next fold.
28. Lift the zipper foot, fold the next piece of the fabric, lower the foot, and stitch again. You can also alternate the direction of the fold. Repeat this process until you reach the end of the strip. For a more robust and gathered ruffle, create folds that are closer to each other.
29. This is how the completed strip looks at this point.
Let’s attach the strip to the quilted front pocket of the pouch which we stitched first.

31. Place the ruffle strip along the top edge of the quilted pocket piece. The folded end of the ruffle strip should be facing down.
32. Using a 0.5cm seam or less, stitch the two pieces together along the edge. Ensure that they are securely sewn together.
33-34. This is how the front pocket and ruffle should now appear. Cut the excess pieces from the sides of the ruffled strip to match the pocket.
35-36. Grab the second unused pocket fabric piece and place it onto the completed ruffle pocket piece. The pattern side of both pieces should be facing each other.

37-38. Pin so that you can secure the two pieces together as meticulously as possible.
39. Once you have pinned the two pieces, we can stitch the top edge. Using a 1 cm seam, stitch the top edge together.
40. Trim the edges slightly to neaten the piece.
41-42. Open the joined piece, fold it over so that the ruffle is standing on top of both pieces and the batting side is now inside the two patterned fabric layers.

43. Pin the pieces together on the sides and bottom and head to the machine.
44. Add a top stitch to the pocket piece.
45. Next, let’s attach the ruffle pocket piece to the front patterned pouch piece that we prepared earlier.
47-48. Place the ruffle pocket on top and align to the front quilted piece. Use pins to secure them together.

49-51. Sew around the two sides and the bottom of the pieces. With this step, we have now created the front pocket.
52-54. Fold the same piece in half and mark the midpoint. Now, grab the zip, fold it in half, and mark the center point on both sides. Use a marker to indicate the point or a scissor to cut a tiny piece.

55. Flip the zipper, place it flat onto the front piece (right side of zip facing in). The center point of the material and zipper should be aligned.
56-57. Grab the lining piece and place it on top of both the zip and the front piece ensuring that the top edges are all aligned. The lining should be placed front side facing in. Pin to secure the pieces together.
58-59. I turned over the lining to show you how it would look once stitched. Use a 0.5cm seam and stitch the pieces together in a single line.
60. Open up the piece and fold the lining to the back as illustrated above.

61. Let’s head back to the machine and sew a top stitch.
62-63. Once the top stitch is completed, place it flat onto the table and grab the second quilted piece and place it face down. Align the piece along the top edge of the zip.
64. Hold the pieces together and flip it around.
65. Grab the second piece of lining with the right side facing inward and align it along the top edge of the zip. Pin in place and let’s sew!

68. Open up the lining piece and the patterned fabric piece.
69-70. With the patterned side facing you, head to machine and sew a top stitch along the zipper line.
72. Place the ruffle pouch flat onto the table and open up the zipper. Ensure that the zip stays open for the remaining steps.

73-74. Turn over the right patterned piece so that it meets the other. This will reveal the back of the lining piece which should now be facing each other.
On the side of the lining (as indicated), mark a small opening and do not sew this section. Now, let’s move back to the machine and start sewing from the first marked end on the lining piece (See video if uncertain).
75-76. Open the sides of the pouch to reveal the zipper tab. Fold the zipper tab down towards the patterned fabric piece. Repeat on the other side.
77. Mark the end-point of the zipper tab and use a pin to secure the fabric in place.

80. Once sewn, snip off the corners.
81-82. Use the unstitched opening to pull the right side of the pouch through the opening.
83-84. You can use your fingers, the back of a pen or a ruler to open out the corners.

85-86. Fold the raw edges of the lining where the opened/unstitched piece is and then sew shut.
87. Place the lining back into the pouch, and you’re done! You have just sewn a trendy and unique ruffle pouch with a pocket!

And there you have it – your ruffle pouch is complete!
They’re perfect for gifting as well, and you can easily make a few of these pouches in different sizes if you’d like.
I hope you enjoyed following along with this tutorial and found the steps easy to follow. If you make your own ruffle pouch, I’d love to see it—feel free to share your finished project and tag me @craftsonfire on Instagram or leave a comment below so I can admire your beautiful work.
If you’d like to try another easy sewing tutorial, here are a few that I’d recommend next:
DIY Ruffle Pouch Tutorial (Cute Gift Idea)

DIY Zipper Pouch With Zipper Tabs