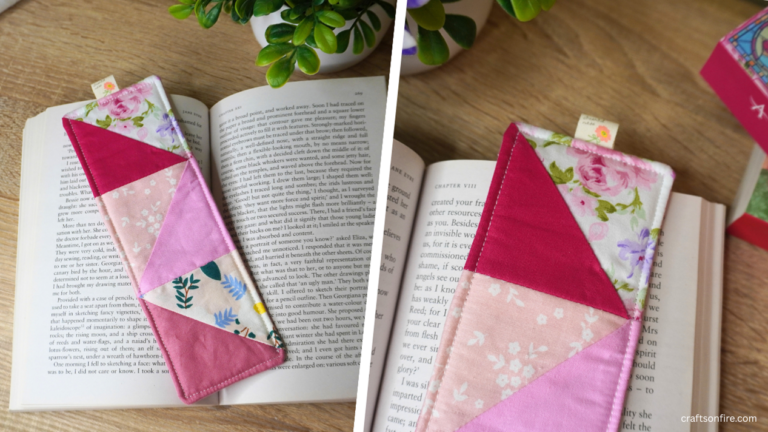
Patchwork Fabric Bookmark To Sew & Gift (tutorial)

Would you like to sew a cute yet intricate bookmark? Then this patchwork bookmark is exactly what you need to add to your fabric bookmark collection!
It’s a quick and easy project that is creative and engaging.
I had tons of fun putting this together and even made one using a blue color scheme!
The great thing about this sewing project is that you can choose any color scheme you want, be it purple, pink, red, or yellow.

There are so many options!
I do want to mention that this project is designed to be more advanced, so you do need some patchwork experience.
I tried to make the instructions as easy as possible, and there is a video tutorial to follow along with if you find yourself stuck on a particular step.
With that said, even if you’re a complete beginner, feel free to give it a try!
Let’s get started.
Patchwork Bookmark Guide

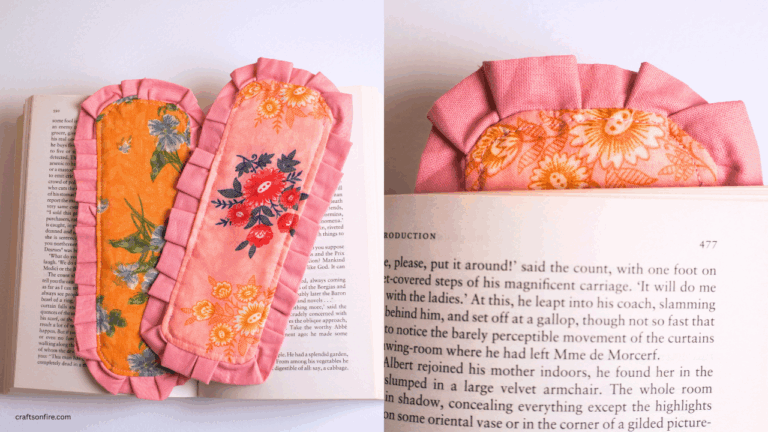
Final bookmark size: 17 cm x 5.5 cm
Supplies
- Cotton Fabric
- 10 Patterned Fabric Squares (5 cm x 5 cm / 1.97 inches x 1.97 inches)
- Fusible Interfacing
- Pins
- Iron
- Sewing Machine
- Fabric Marker
- Scissors
- Ruler
Video Tutorial
Instructions
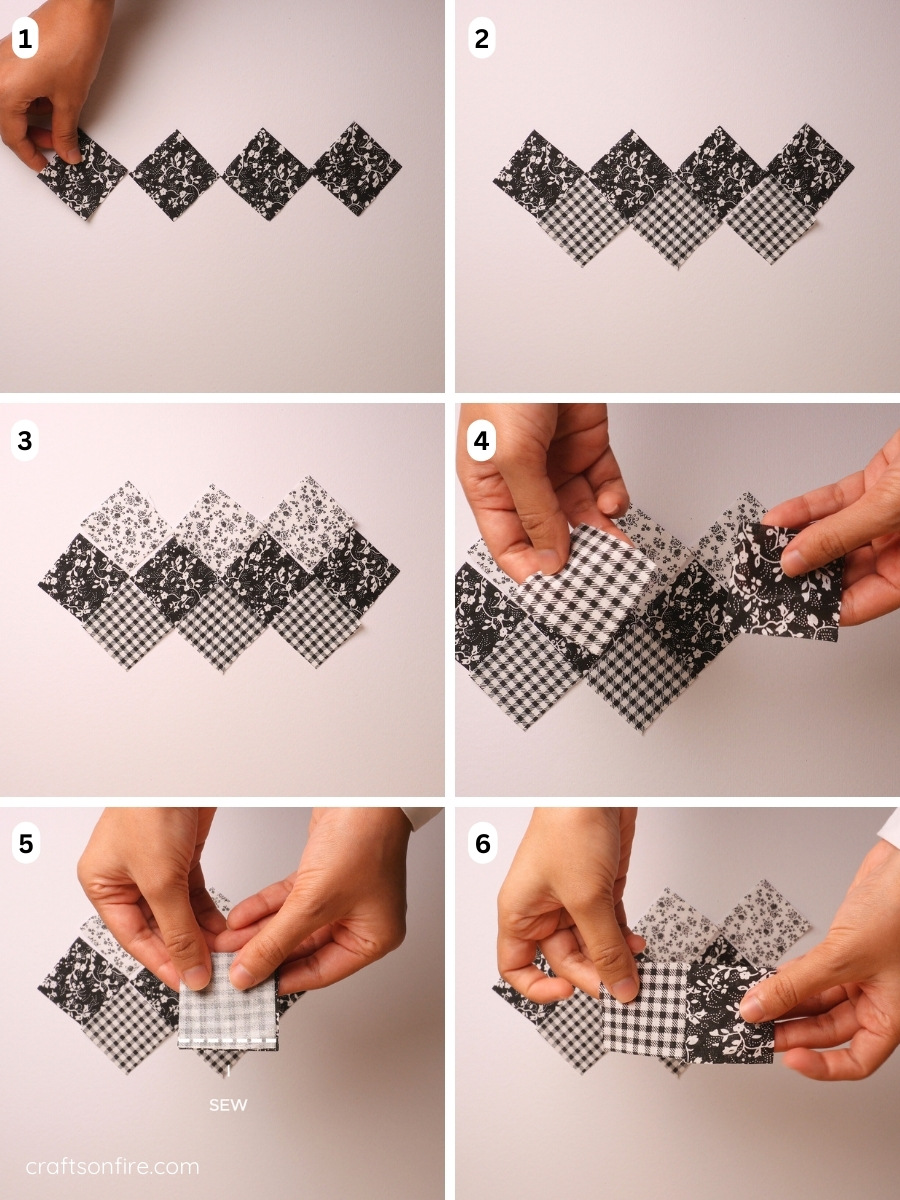
Step 1
Lay out your first four squares in a horizontal row.
Steps 2–3
Place the second set of squares between the first. Then, position the remaining three squares above the first row, as shown.
This is the patchwork pattern we’ll be using to make the bookmark.
Steps 4–6
Take the first two squares on the right side of the row, place them right sides together, and sew along the edge.
You’ve now completed your first set.
Steps 7–8
Join the next two squares in the same way and sew. Open the piece, then attach and sew the third square.
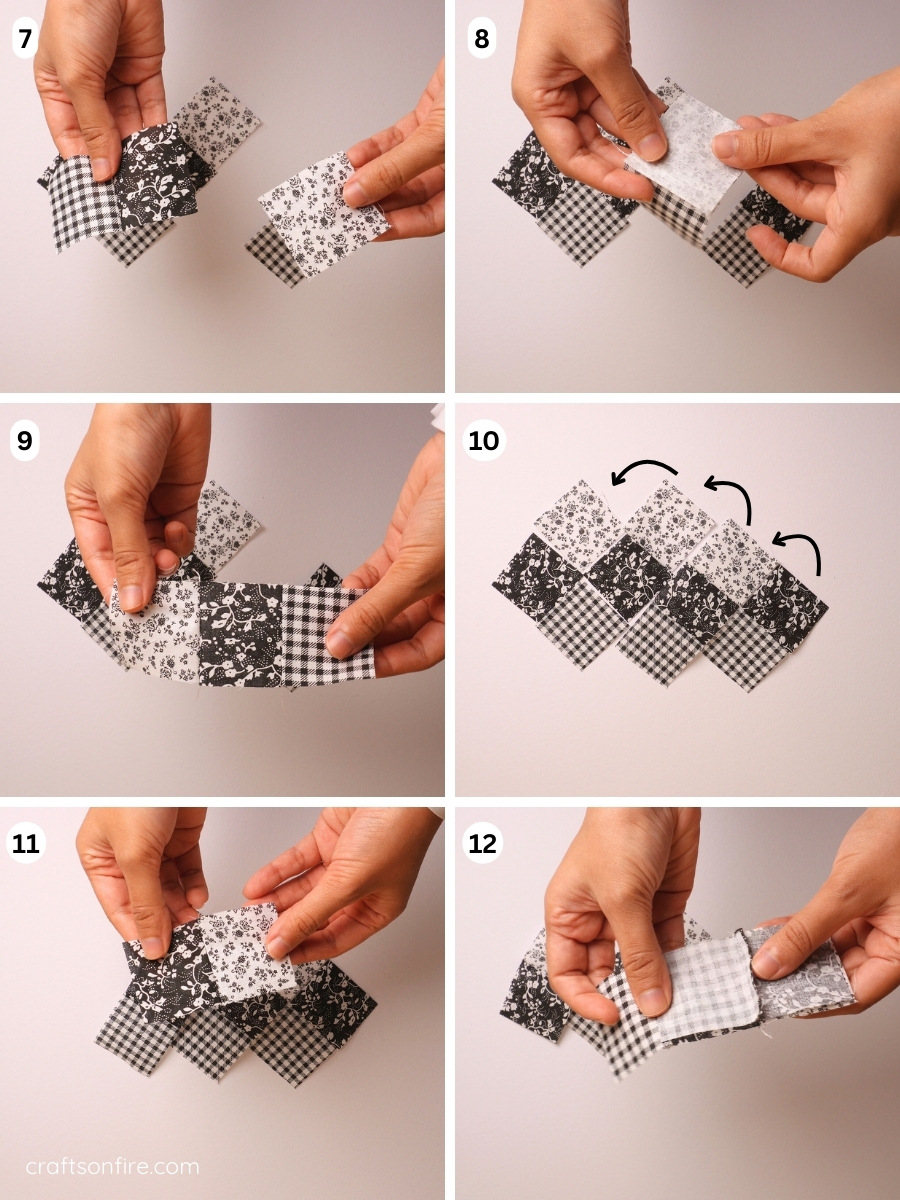
Step 9
Your second strip is now complete.
Repeat this pattern to sew the remaining pieces until you have a total of four strips.
Step 10
Next, we’ll join the strips together to complete the patchwork. I’ve added a few arrows to show you which strips will be joined together, starting on the right side of the image.
Steps 11–14
Take the first two strips (starting from the right end), align them as previously laid out, and sew them together as shown in step 12.
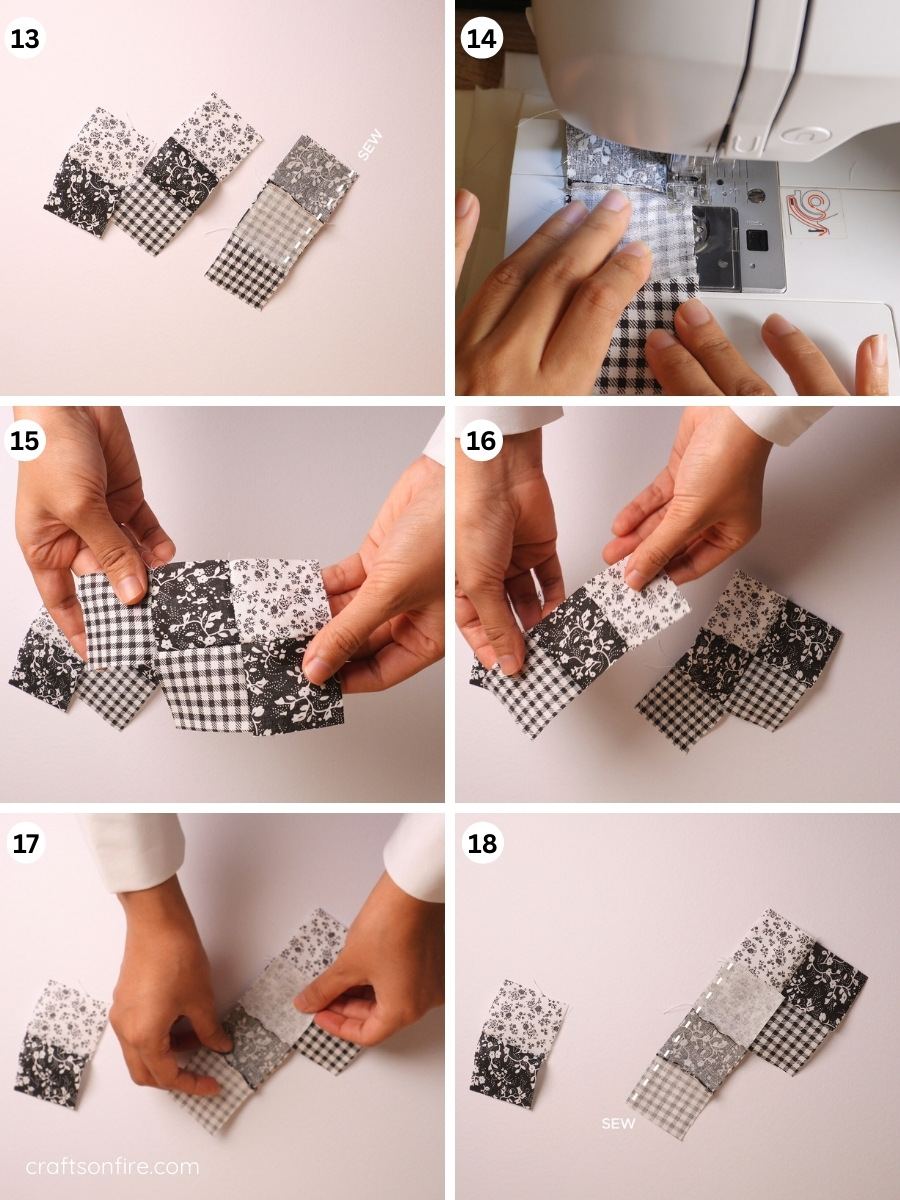
Step 15
Here’s what your piece should look like at this stage once joined.
Steps 16–17
Take the third strip and sew it to the piece you just created. If you forget the order of the pieces, simply refer to step 10.
Step 18
Continue sewing the pieces as shown in this step.
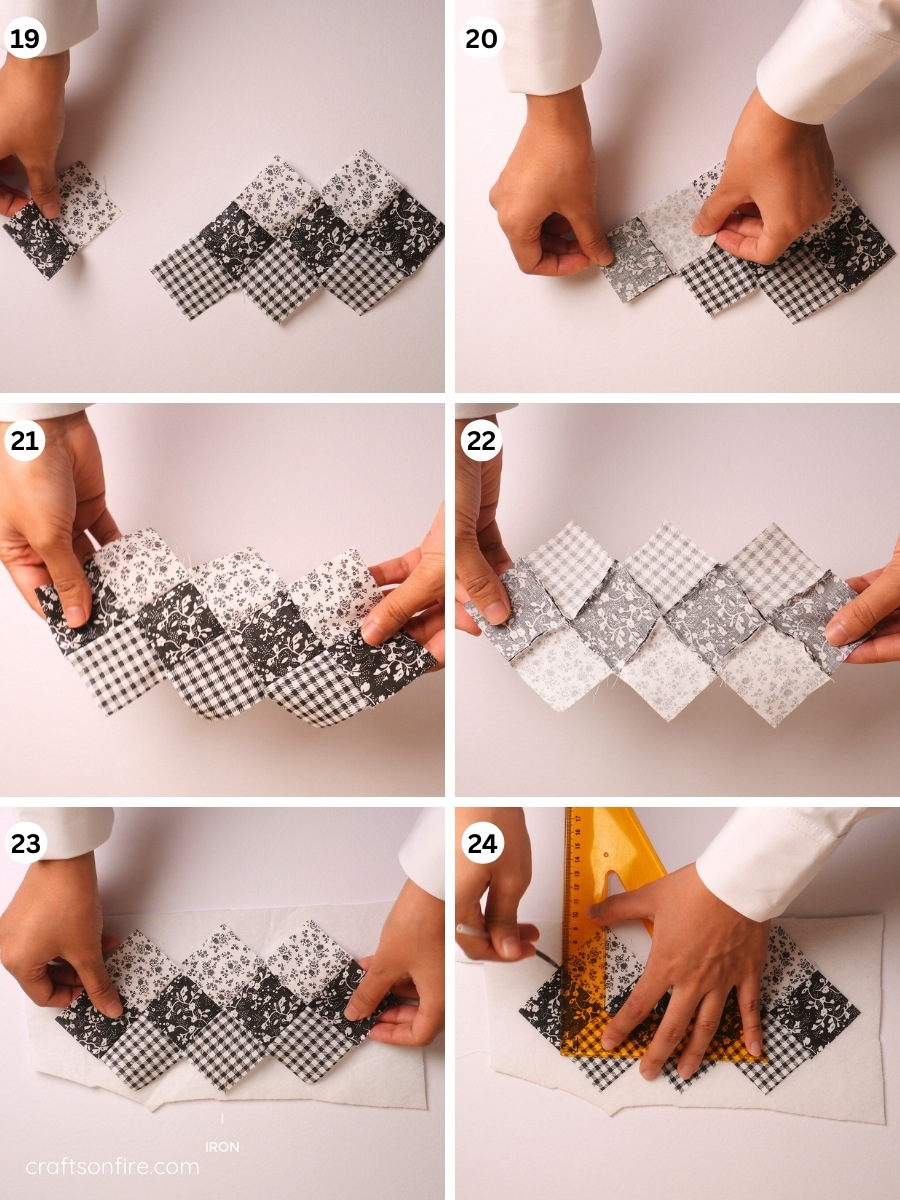
Steps 19–20
Finally, attach the last strip to complete your patchwork.
Step 21
Your patchwork block is now finished! Here’s how the front and back should look.
Step 23
Place the patchwork piece onto the fusible interfacing and iron.
Steps 24–25
Using a fabric pen, draw a rectangle onto the interfacing as shown in Step 25.
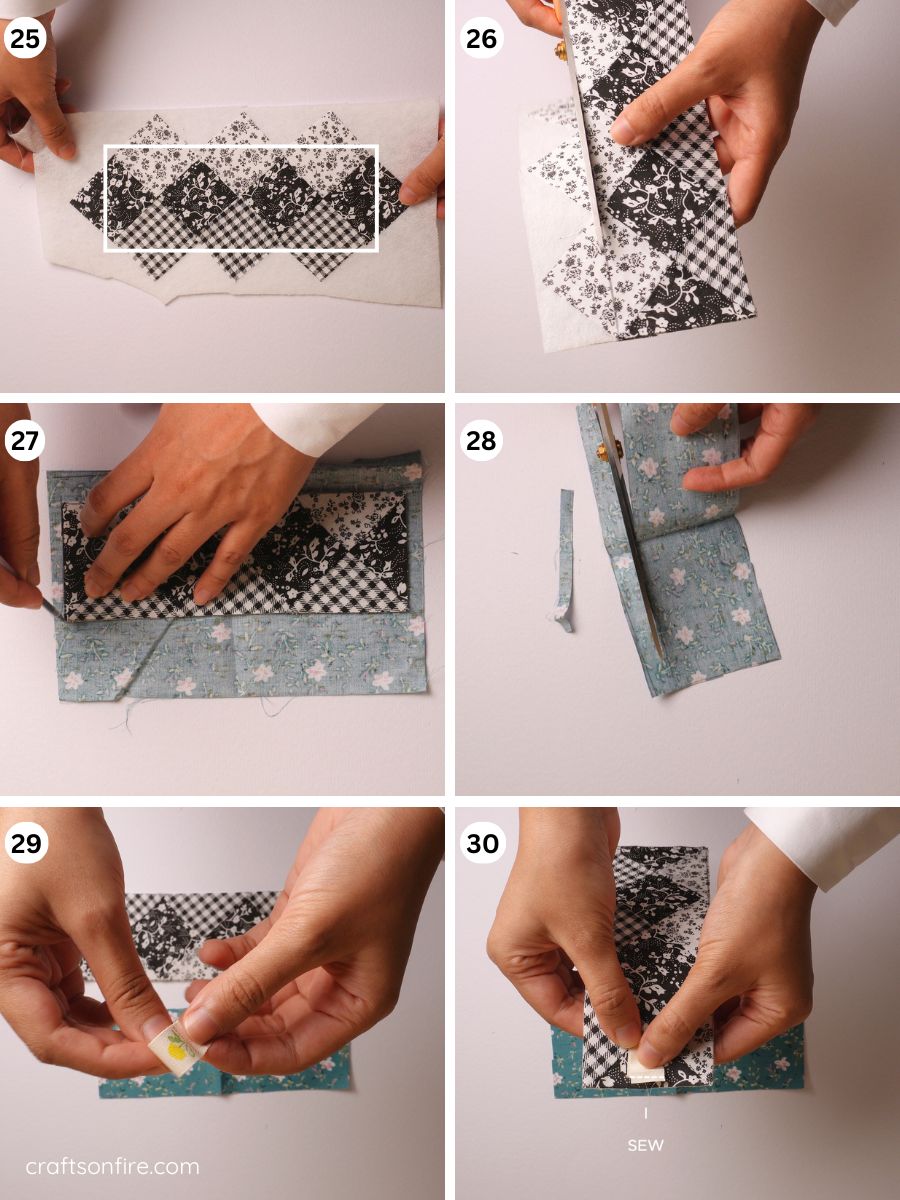
Step 26
Cut along the marked line to shape the piece.
Steps 27–28
Place the patchwork piece on the patterned fabric for the underside of the bookmark and trace around it. Then cut the fabric following your outline.
Steps 29–30 (Optional)
If you’d like to add a small detail to the top of the bookmark, here’s what you can do: Fold a cute label in half, then position it at the top of your patchwork piece, right sides facing in and sew in place.
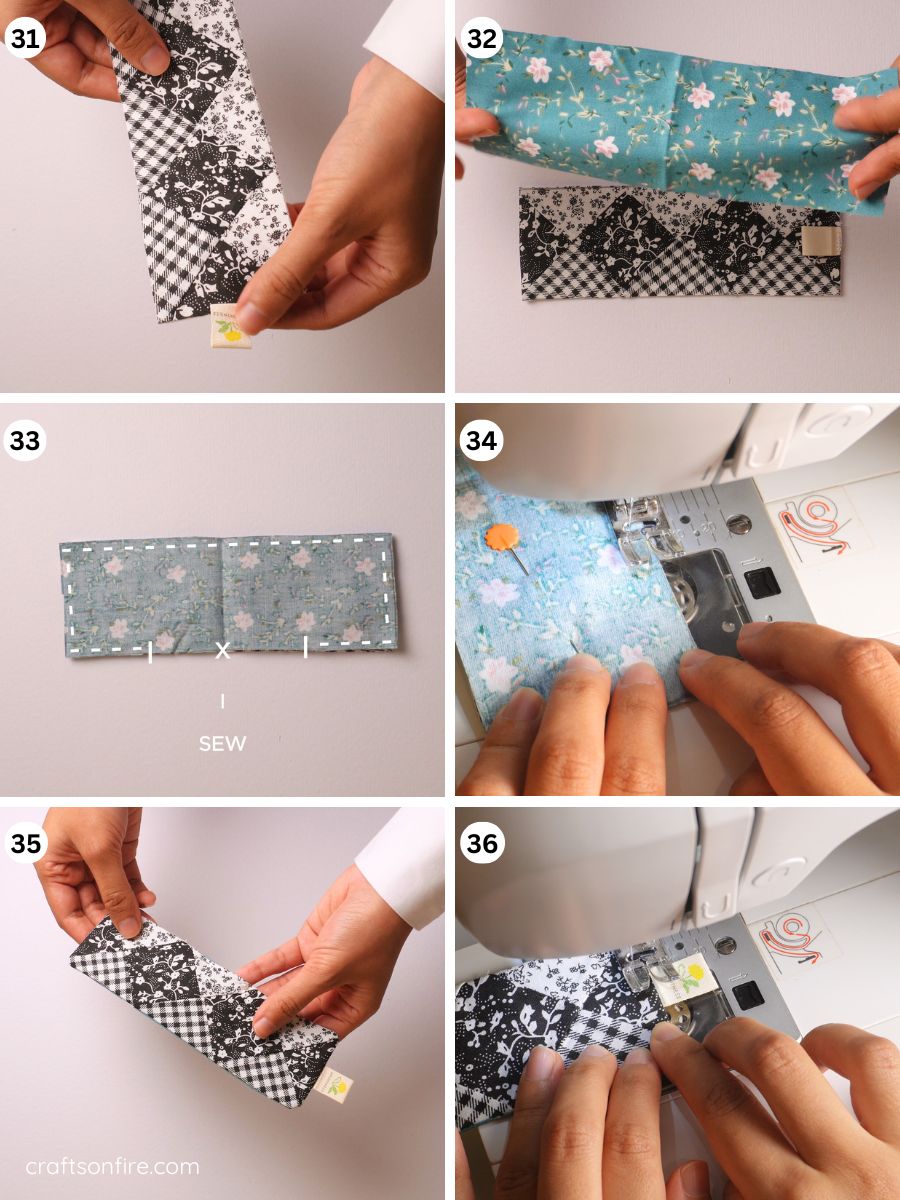
Step 31
The label is now attached.
Step 32
Place the back fabric on top of the patchwork piece, right sides facing in as indicated.
Step 33
Sew all around the edges, leaving a small opening on one side for turning.
Step 35
Find the unstitched section and pull the right side of the fabric through the opening. Then, tuck in the raw edges, pin the opening, and give it a quick press with the iron.
Step 36
Add a top stitch around the edge to finish—and you’re done!
Here’s what the final bookmark looks like:
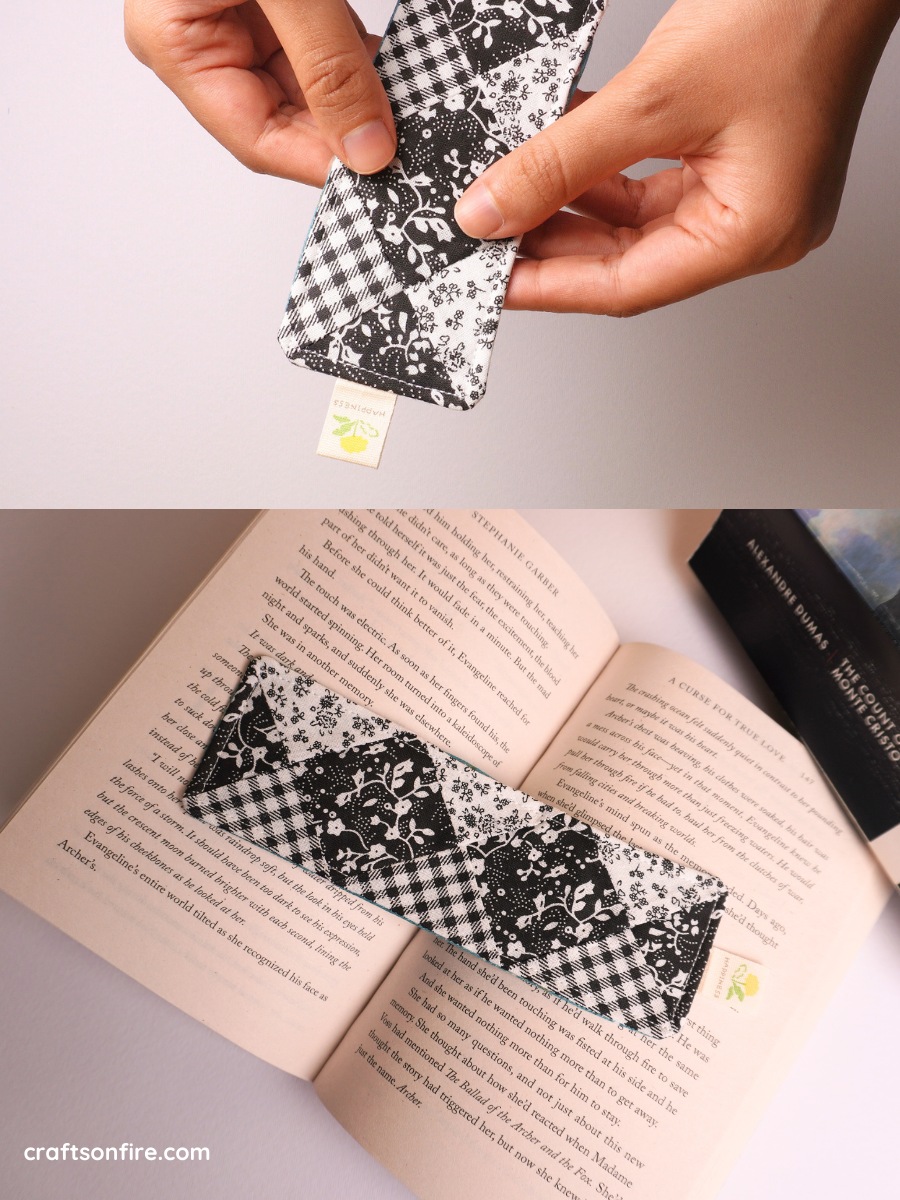
I really LOVE this patchwork bookmark! I think the black, grey, and white combo works so well, but you can use any color scheme you like!
It definitely makes an interesting and creative fabric bookmark, and you’ll want to use this bookmark repeatedly.
I do hope you found my guide easy to follow. Although some parts do look challenging, once you get the hang of it, you’ll be able to make plenty of bookmarks like this to gift to friends and family.
Before you go, here are a few more bookmark tutorials you might want to try next:
Handmade Ruffle Fabric Bookmarks in 15 Minutes (Sewing tutorial)
DIY Patchwork Bookmark Using Half Square Triangles