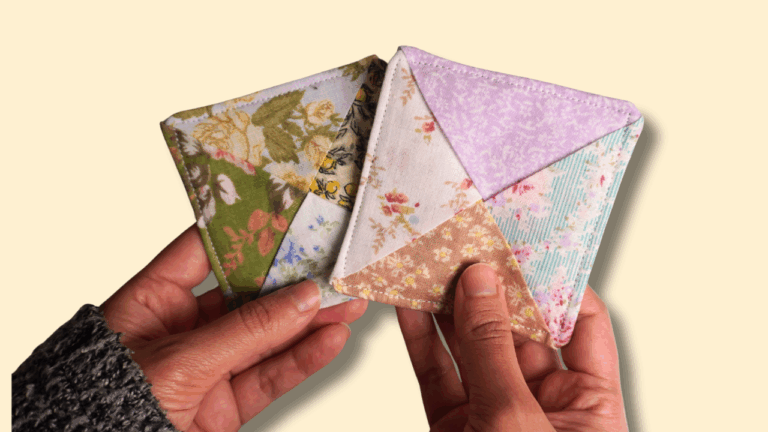
Quick and Easy DIY Ruffle Coasters (Step-by-Step Sewing Guide)

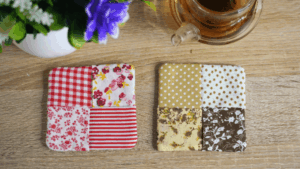
Fabric coasters are one of my all-time favorite sewing projects. They’re quick, functional, and perfect for daily use! It’s a fun little project, ideal for using up fabric scraps and trying out different fabric patterns.
It can also add a bit of personality and charm to your decor. I feel like this specific fabric coaster gives off a cozy, cottagecore vibe, don’t you agree?
Either way, this lovely little sewing project is so fun to make, and I highly recommend you sew one for yourself. Plus, it makes a thoughtful, handmade gift for family and friends.

Finished coaster size – 12.5 cm x 12.5 cm (4.92 inches x 4.92 inches)
In this guide, I’ll walk you through my simple, step-by-step process for sewing a beautiful ruffled coaster.
The pattern for this coaster is so easy, and I’m excited to show you.
With that said, let’s get started!
Ruffle Coaster Sewing Guide
Supplies
To make this ruffled coaster, you will need the following:
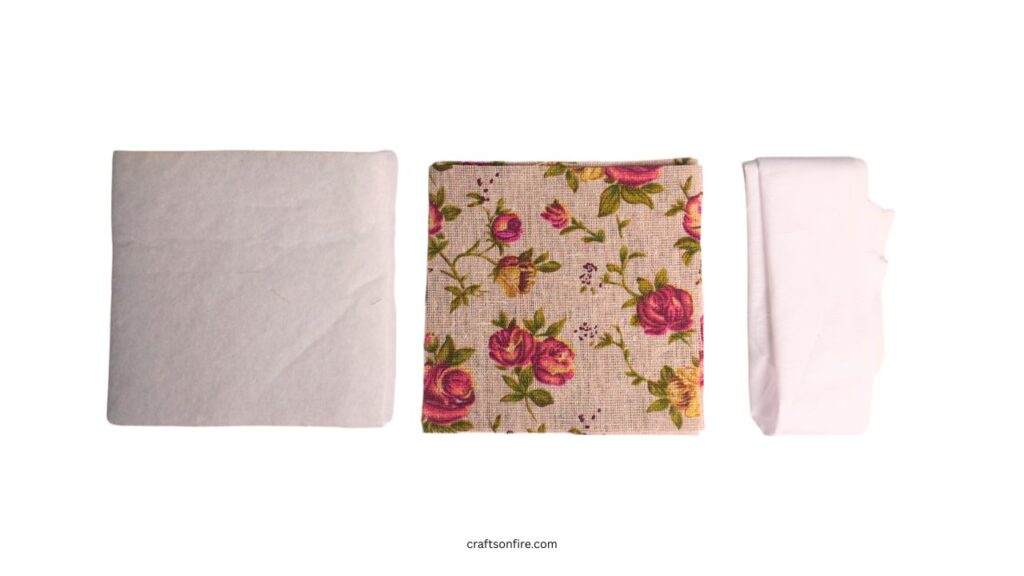
- Fabric (2 Pieces) – 12 cm x 12 cm (4.72 inches x 4.72 inches)
- Fabric Batting/Interfacing (1 or 2 Pieces) – 12 cm x 12 cm (4.72 inches x 4.72 inches)
- Fabric Strip (1 Piece)– 100 cm x 4 cm (39.37 inches x 1.57 inches)
Video Guide
Instructions
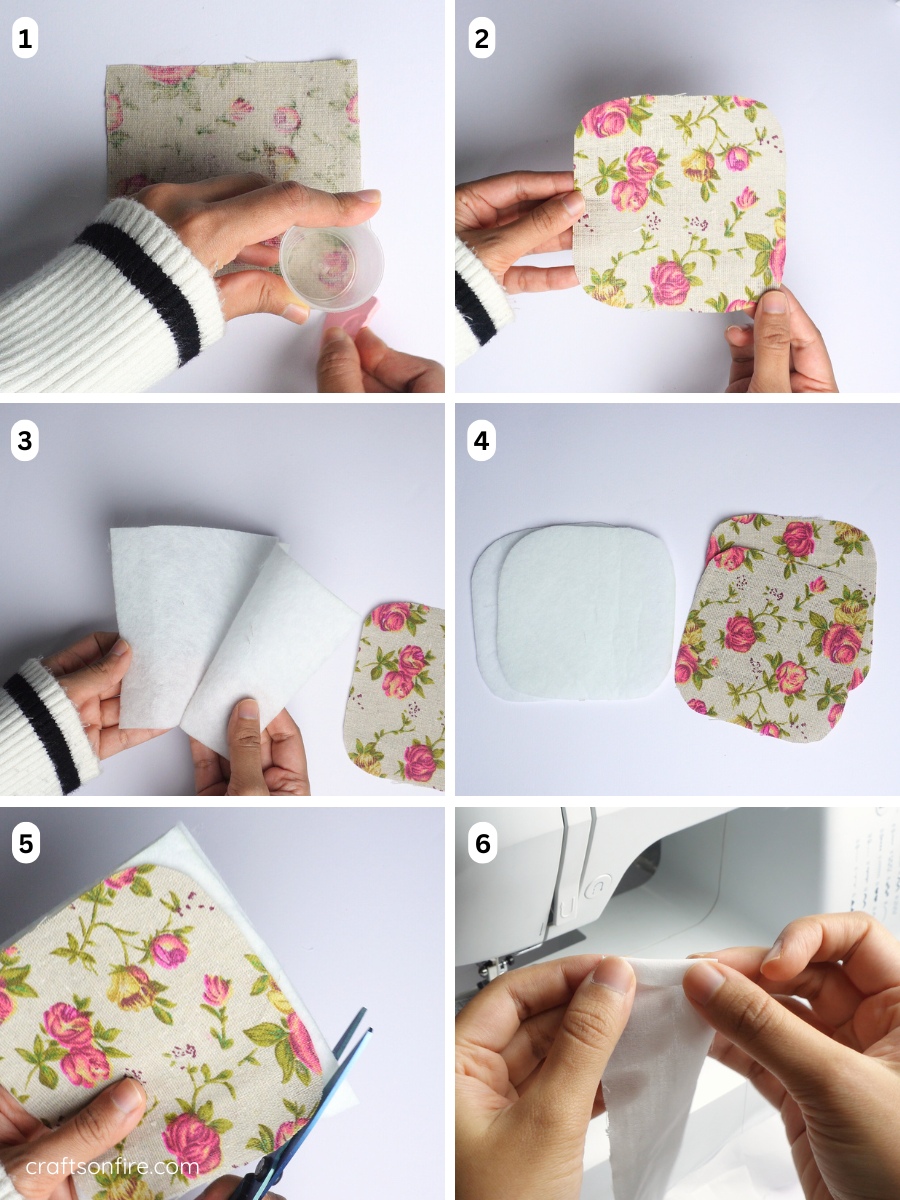
Step 1:
Start by rounding the corners of your fabric square. Use a small, round object like a glass or a lid of a bottle, then cut along the marks for smooth, even curves.
Steps 3-5:
Once cut, you should have four separate pieces ready – two for the coaster and two for the batting.
Step 6:
Take the fabric strip and fold down the top edge. This will form the clean edge of your ruffle.

Step 7:
Next, fold the strip in half lengthwise, with the pressed edge on top.
Step 8:
Now, it’s time to create the ruffle effect. Begin stitching along the raw edge of the strip. As you begin, lift the presser foot, fold a small section of the fabric to form a pleat, then lower the foot and stitch over it to secure the fold.
Steps 9-10:
Continue this process – lift, fold, sew – until you’ve ruffled the entire length of the strip. This will give you a beautifully gathered ruffle for your coaster.
Steps 11-12:
With the ruffle complete, layer your first patterned fabric piece and the batting together. Then, align the ruffle along the edge of the fabric, with the ruffled side facing in toward the center. You can use a pin or sewing clip to hold it in place.

Steps 13-14:
Stitch the ruffle to the edge of your coaster base, keeping the ruffled side facing inward. As you reach the end of the strip, cut off the excess strip, fold the raw edge under, and overlap it slightly with the beginning of the strip to create a seamless finish.
Steps 15-16:
Here’s what the coaster looks like at this point.
Steps 17-18:
Next, place your second patterned fabric square on top, with the right sides facing each other. Sew around the edges using a 1 cm seam allowance, making sure to leave a small opening on one side for turning the coaster right side out.
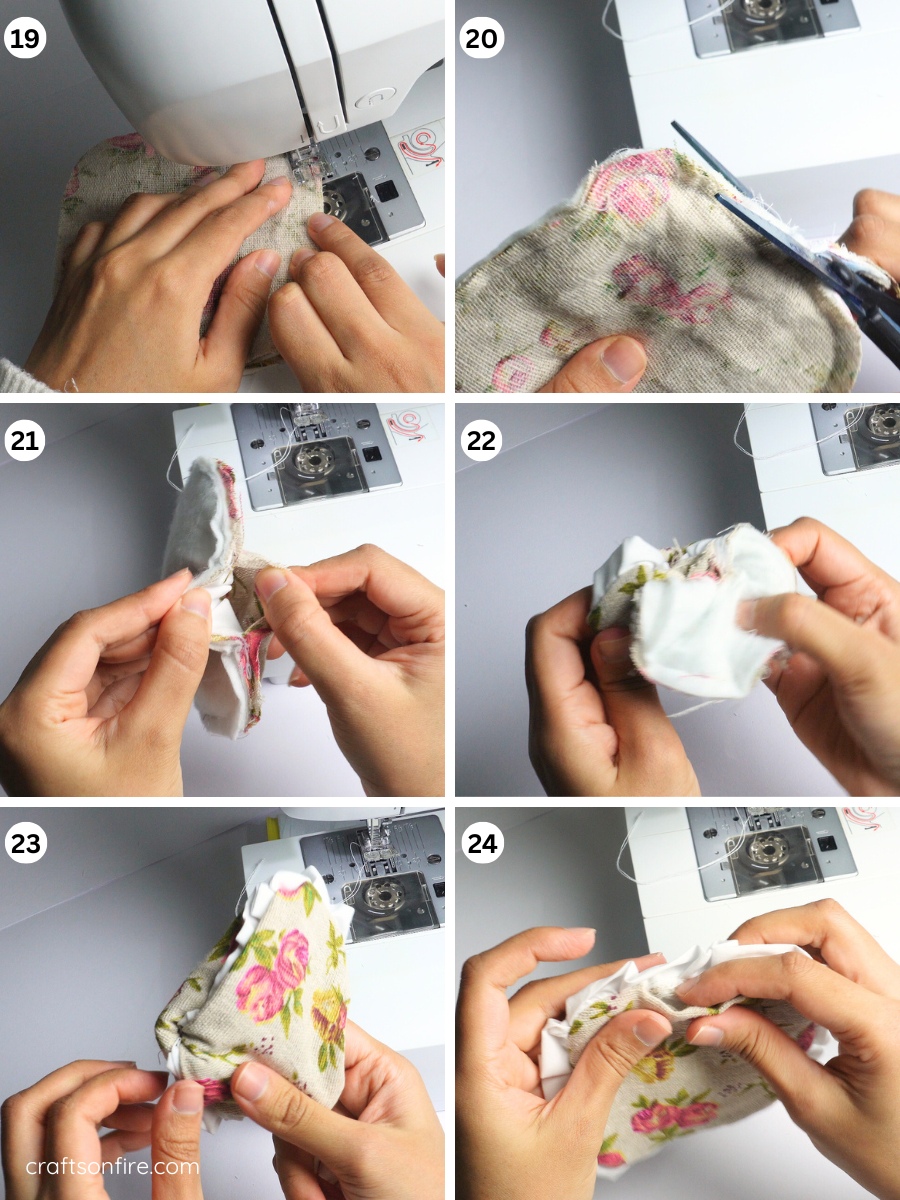
Step 19:
Sew around the entire coaster. Be sure to backstitch at the beginning and end to secure the stitching.
Step 20:
Trim the excess fabric from the sides, including any bulky seam allowances, to help your coaster lie flat once turned. Be careful not to cut into your stitching.
Steps 21-23:
Turn the coaster right side out through the opening you left earlier. Use your finger or a turning tool to gently push out the corners.

Step 24:
Fold in the raw edges of the opening to match the seam line, then add a neat topstitch around the entire edge of the coaster.
And that’s it – you’re done! You’ve just made a beautiful, ruffled fabric coaster. Now, pour yourself a cup of something warm, test your coaster, and admire your handiwork.

Final Thoughts
So, are these ruffle coasters going to be your next project? I sure hope so!
As you can see, the process for making this ruffled coaster is straightforward and beginner-friendly. I’ve already made quite a few, and while they’re not 100% perfect, I’m really pleased with how they turned out.
I can’t wait to make a few more coasters soon!
If you’re worried about spills, feel free to add as many layers of batting as you like, though two layers generally work just fine.
Lastly, if you enjoyed this tutorial, please consider sharing it with others who might find it helpful.
And, of course, if you have any questions or need help with any step, just drop a comment below – I’d love to help!
Before you go, here are a few other sewing guides you might enjoy: