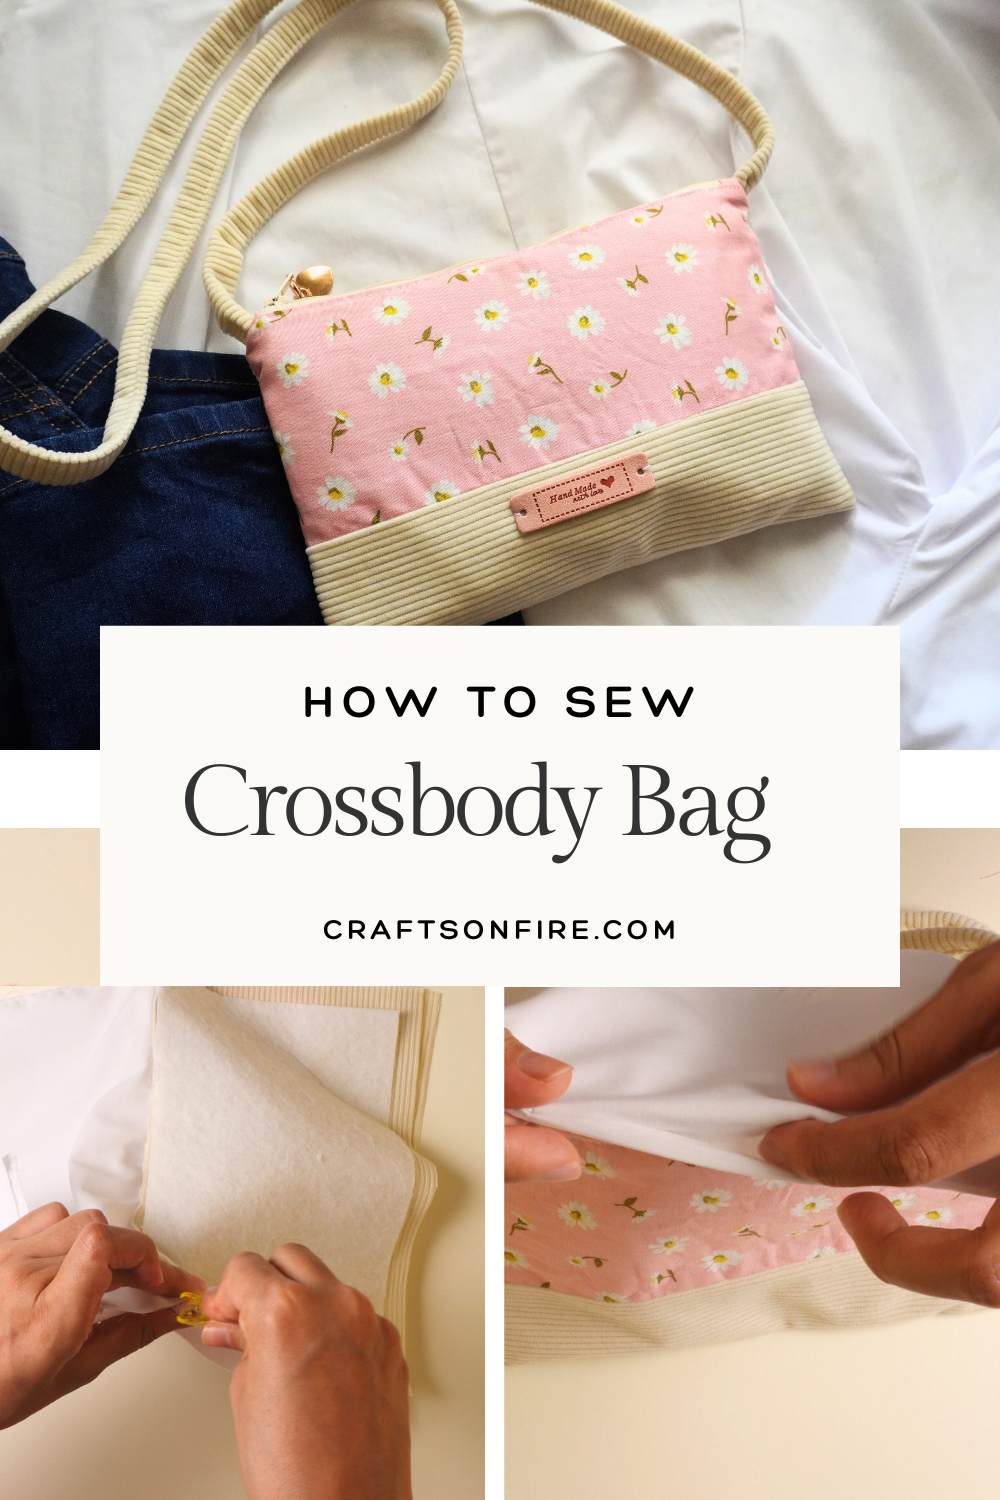
How To Sew A Crossbody Bag (Detailed Sewing Guide)

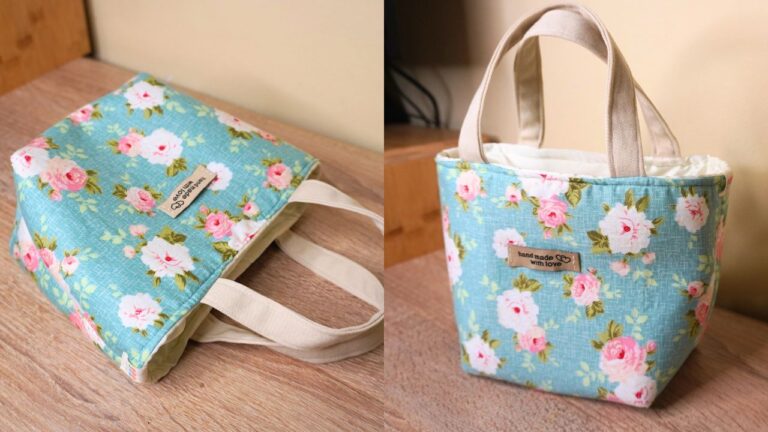
I wanted to make a simple crossbody bag that is light and easy to carry around, but I also needed it to look pretty, and that’s how this crossbody bag came to life!
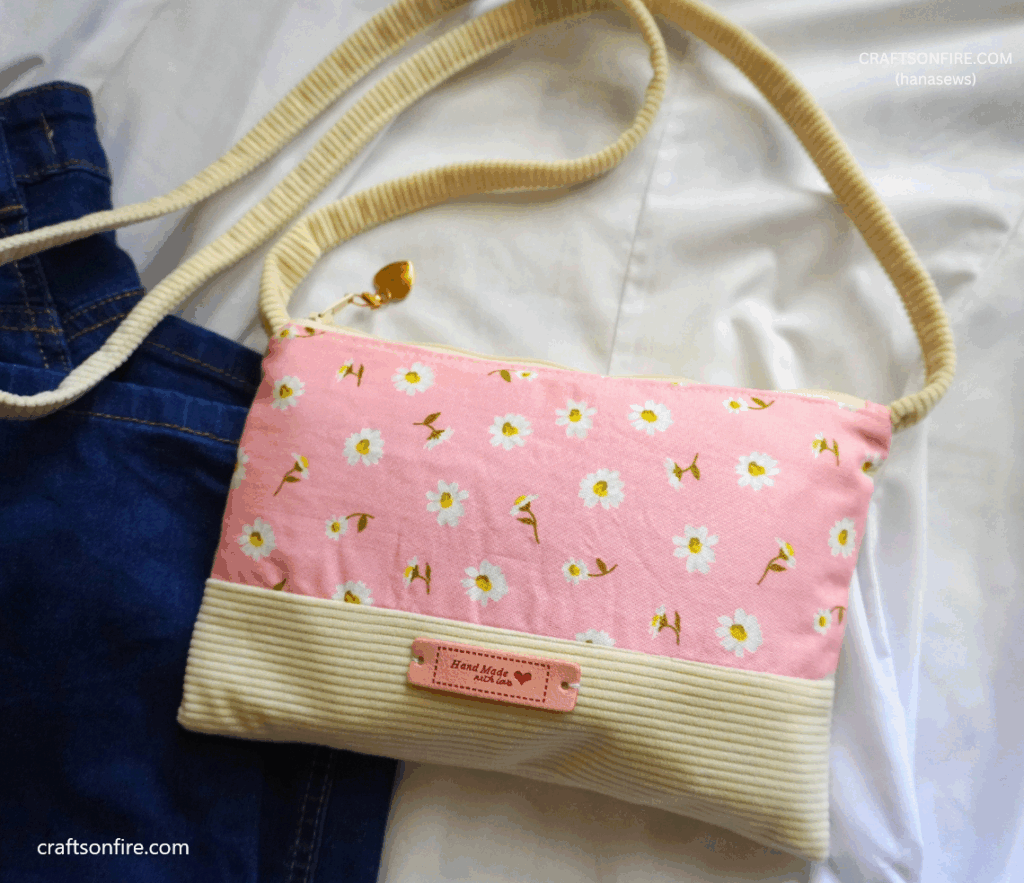
All I did was pair a beautiful patterned floral fabric with a cream corduroy fabric I bought just a few months ago, and this bag turned out so good.
I’m so thrilled to share with you the entire process of sewing this corduroy crossbody bag, and if you want to sew along, you’ll have every step to help you recreate this simple yet stylish bag, even if you’re a sewing beginner.

Sewing this bag was surprisingly not difficult at all, and you’ll see why when you start going through the entire guide.
The great thing about sewing this bag is that you get to choose the length of the strap. So, if you’d prefer to make this bag as a shoulder bag instead, you absolutely can!
With that said, let’s get straight into the tutorial.
Crossbody Bag Tutorial
For this crossbody bag, you’ll need to prepare the following pieces:
Supplies
FRONT
- Patterned Fabric – 25 cm x 11 cm (9.84″ x 4.33″)
- Corduroy – 25 cm x 7.5 cm (9.84″ x 2.95″)
BACK
- Corduroy – 24.5 cm x 16.5 cm (9.65″ x 6.50″)
LINING (2 Pieces)
- 24.5 cm x 16.5 cm (9.65″ x 6.50″)
- Pocket – 24.5 cm x 22 cm (9.65″ x 8,66″)
BATTING (2 PIECES)
- 22 cm x 14 cm (8.66″ x 5.51″)
Zip Tabs (2 Pieces)
- 9.5 cm x 3.7 cm (3.74″ x 1.46″)
Zip
- 22 cm / 8.66 inches
Corduroy Strap
- 110 (or desired length) x 5 cm (43.30 inches x 1.96 inches)
If you want an AD-FREE version of this sewing guide with step-by-step instructions included under each picture for better understanding, you can find the printable PDF guide over here!
Video Tutorial
Instructions
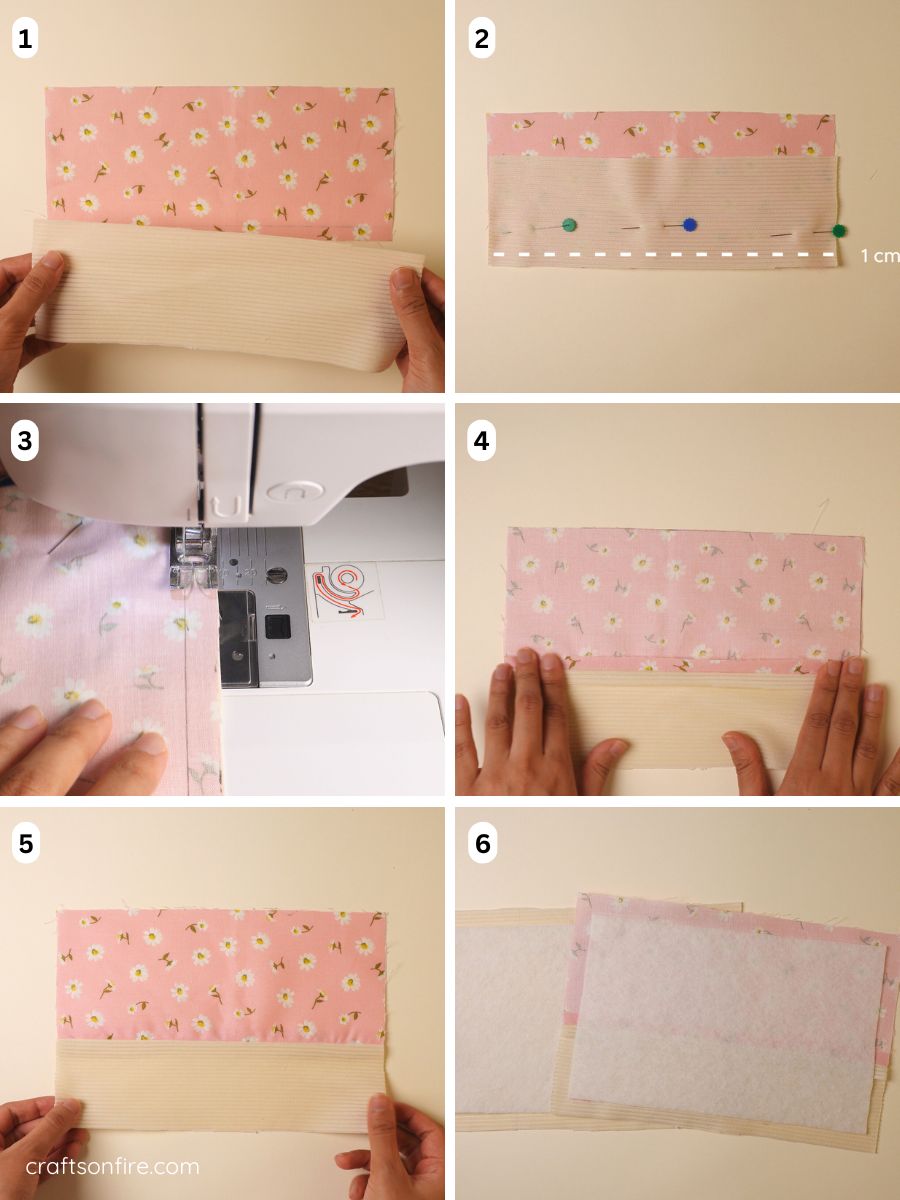
01. Start by pairing the front pieces (the patterned fabric and the corduroy fabric), with the right sides facing each other.
02. Sew the two pieces together, using a 1 cm (0.39 inches) seam allowance.
03. Open the sewn piece and iron the fabric to flatten the seam.
04 – 05. The front piece is now complete.
06. Iron the batting or interfacing onto both the front and back pieces.
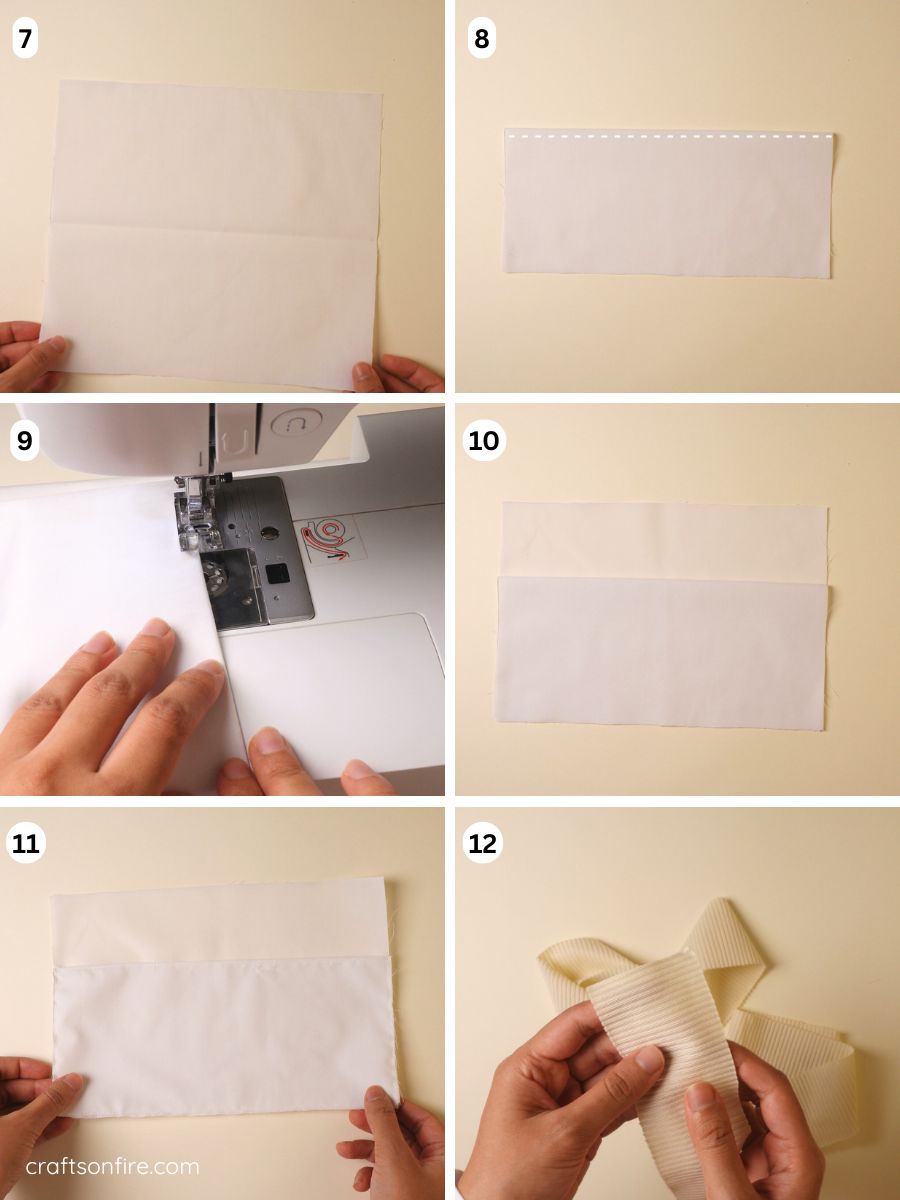
07. Next, take the pocket strip and fold it in half.
08 – 09. Sew along the folded edge of the fabric.
10. Place the pocket piece on one of the lining pieces.
11. Sew the sides and bottom of the pocket to the lining.
12. Next, let’s sew the strap.
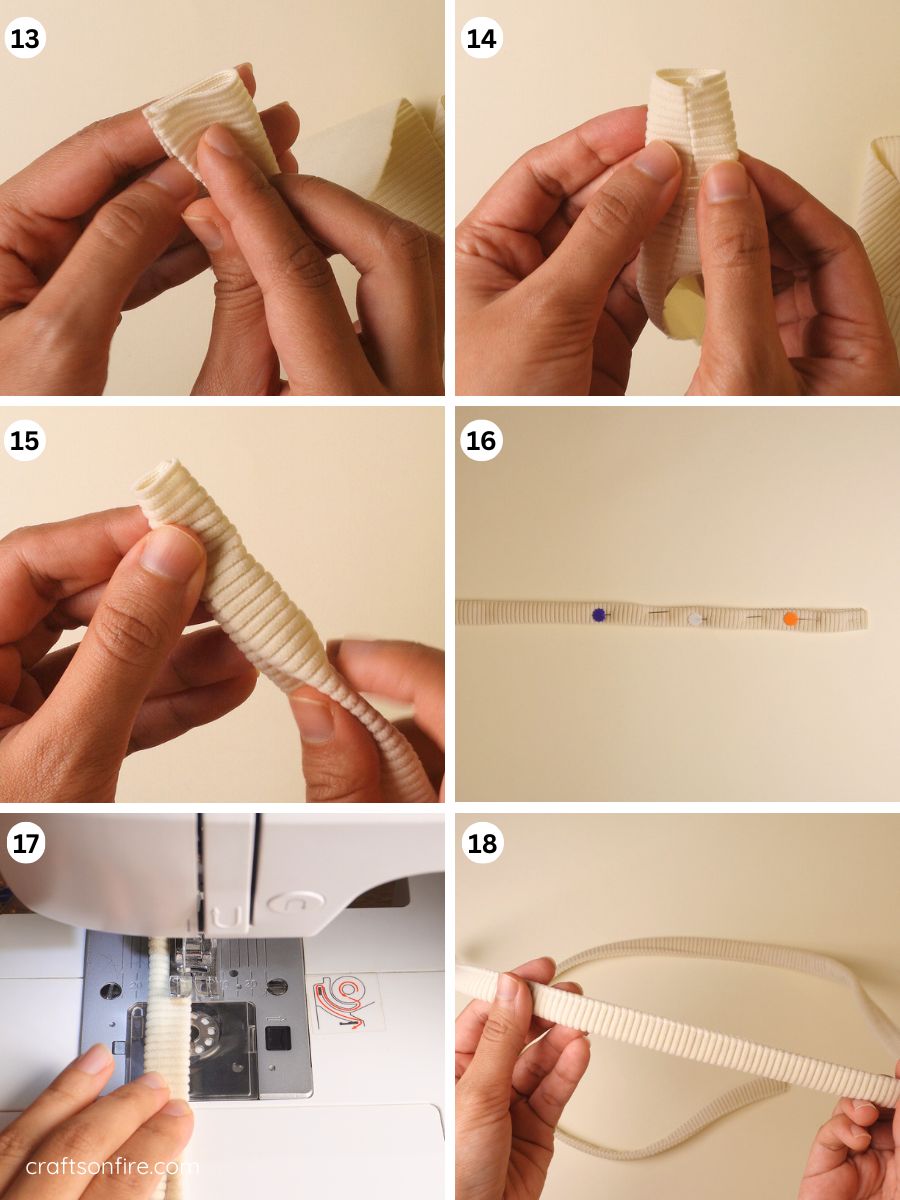
13. Fold the corduroy strip in half and mark the center point.
14. Open the strip and fold both sides toward the center mark.
15. Fold both ends together and pin the fabric, continuing this until the entire strip is folded.
16 – 17. Sew along the entire strip using a matching cotton thread.
18. This is what the strip looks like once sewn.
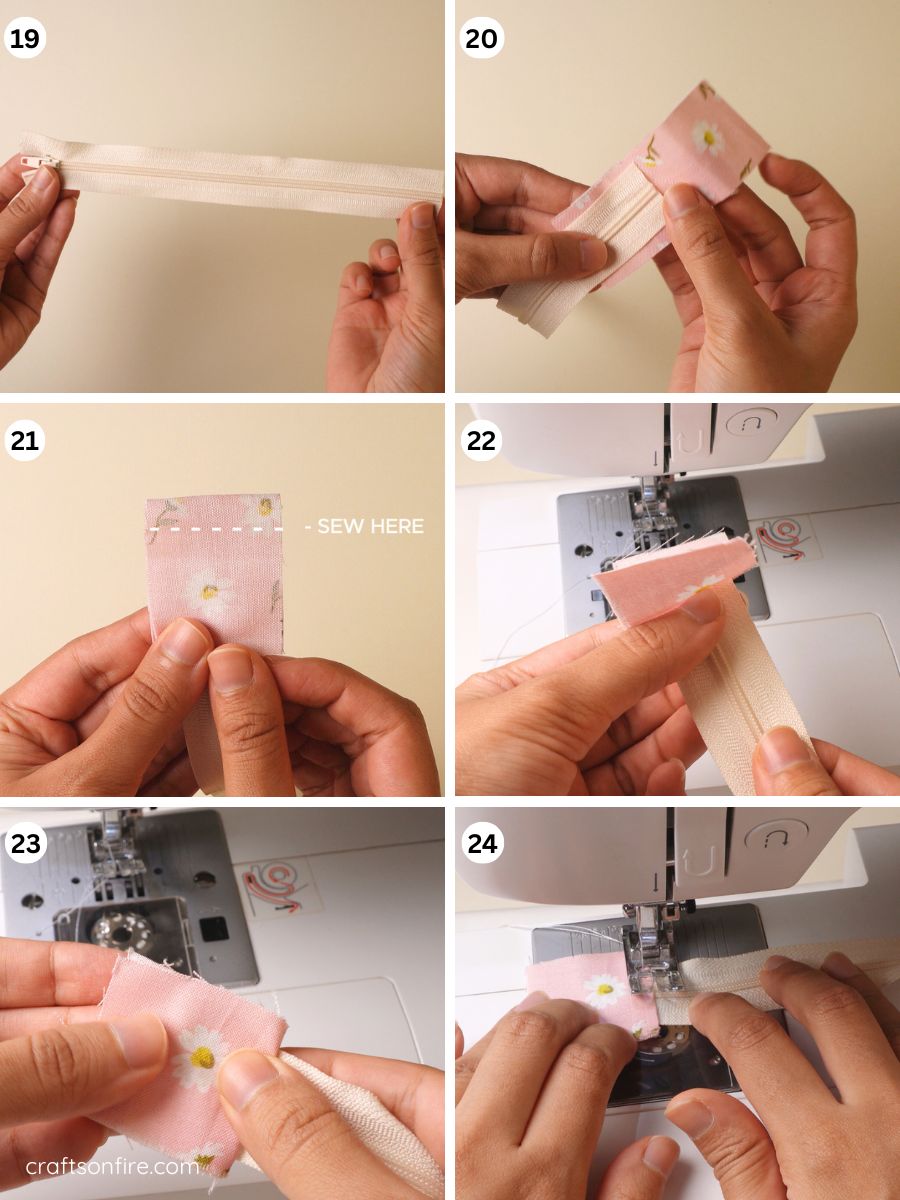
19. Now, let’s add the zipper tabs to the zip.
20. Place the zip halfway down the first zipper tab, on the right side of the fabric.
21. Fold the top of the strip over the zipper and sew it in place.
22 – 23. Fold the two ends of the zipper tab together.
24. Add a topstitch to the zipper tab.
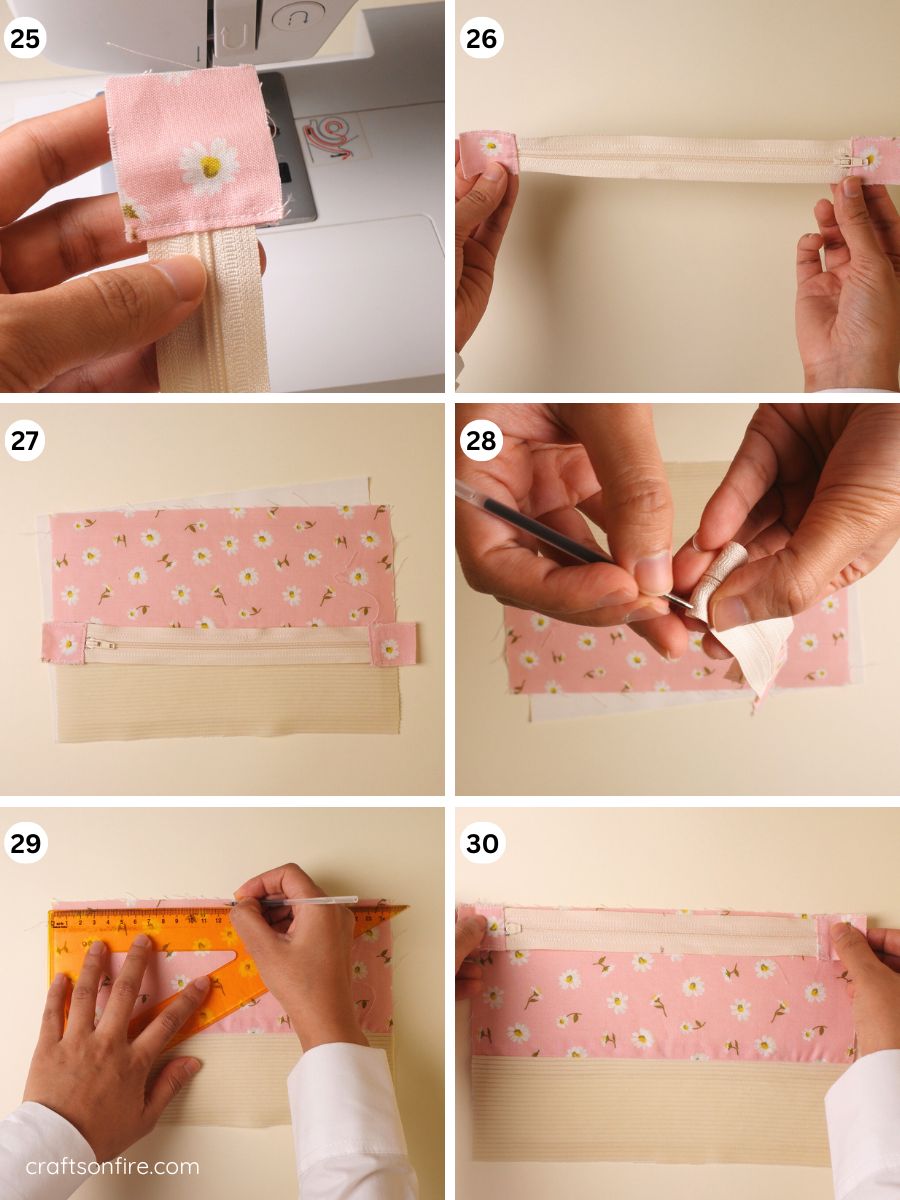
25. This is what it looks like so far. Trim the excess fabric from the sides of the zipper tab, then sew around the edges.
26. Repeat the same process for the other side of the zip.
27. Now, we’ll attach the zip to the front, back, and lining pieces.
28. Fold the zip in half and mark the center points on both the top and bottom of the zip, on the wrong side.
29. Next, mark the center point of the front piece.
30. Place the zip right side down onto the front piece.
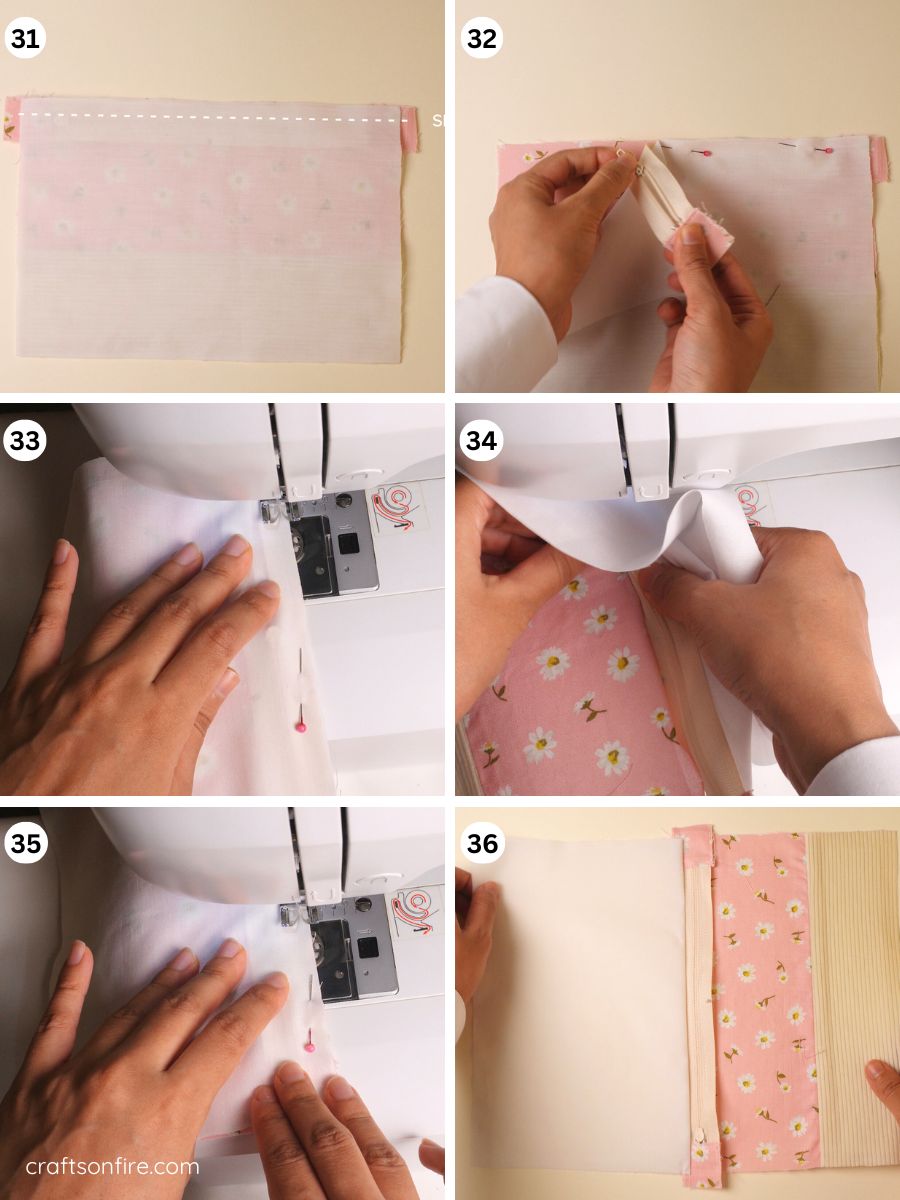
31. Place the lining on top of the zip, aligning the edges, and sew all three pieces together.
32 – 33. Before sewing, open the zipper. Sew the pieces together, but when you reach the zipper, stop and remove the fabric from the machine.
35. Close the zipper, then continue sewing until you reach the end. Backstitch at the beginning and end of the seam.
36. Open the sewn pieces and fold the lining to the back of the front piece.

37. Add a topstitch to the piece.
38. This is what it looks like so far.
39. Next, place the back piece on top of the front piece, with the right sides facing each other.
40. Turn the piece over.
41. Place the lining with the pocket piece (wrong side up) on top of the zipper, making sure all three pieces are aligned at the top, and sew.
42. Sew the pieces together.

43. Now open up both sides of the piece.
44. Add a topstitch to the other side.
45. Trim off the excess zipper tabs from the sides.
46. You should now have a clean edge.
47. Place one end of the strap on the zipper tab, as shown above.
48 – 49. Position the other end of the strap at the end of the other zipper tab and sew both sides. Run a few stitches back and forth over the strap to secure it.
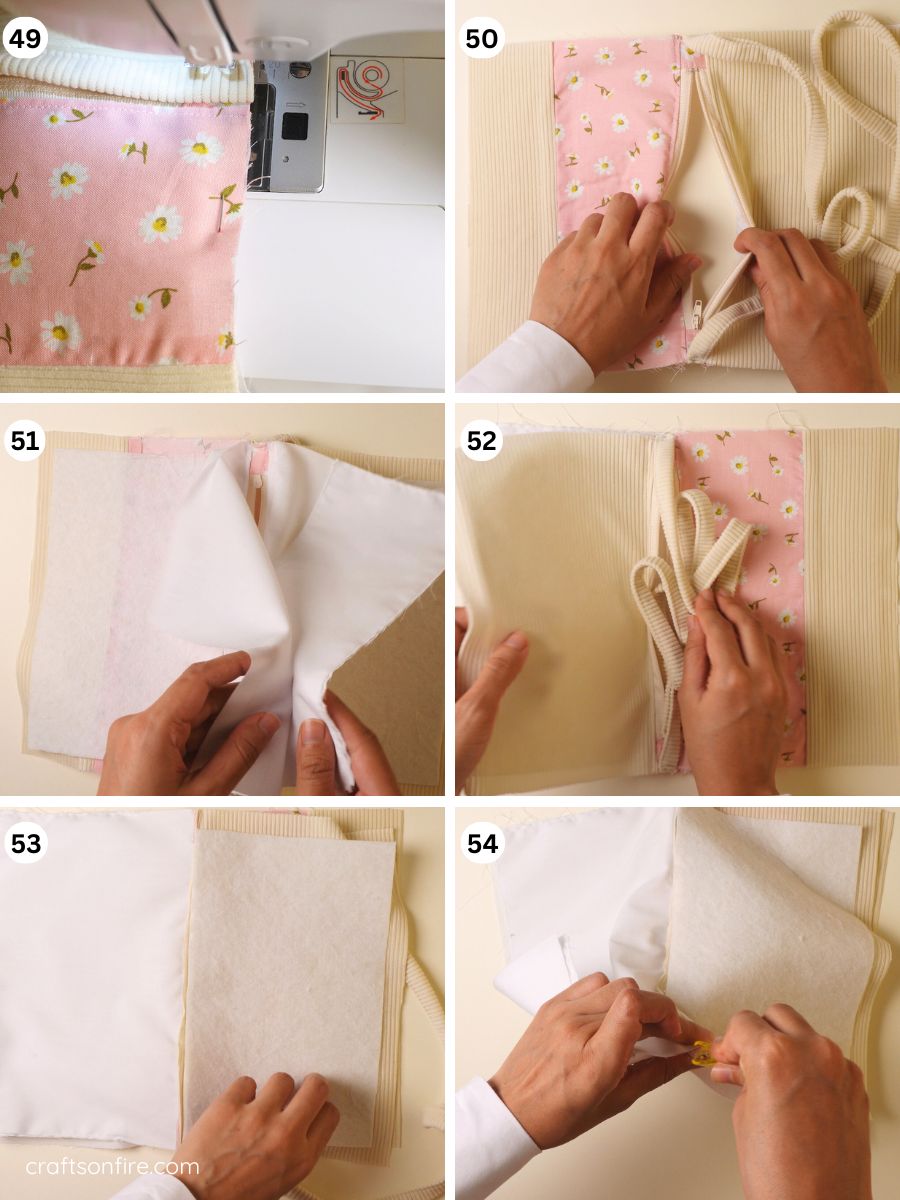
50 – 51. Open the zipper. Pair the lining pieces together and the front and back pieces together.
52. Carefully position the strap inside, as shown above.
53 – 54. Clip the side seams of the bag and pin the pieces together, leaving a small section of the lining open for turning. Sew all around the bag using a 1 cm (0.39 inch) seam allowance.

55. Here’s what it should like so far once pinned.
56. Backstitch and the beginning and end of stitching.
57. After sewing, trim the corners of the bag.
58 – 59. Use the opening to turn the bag right side out.
60. Use a pen or your finger to push out the corners of the bag. Then, fold the raw edges of the lining and pin it in place.
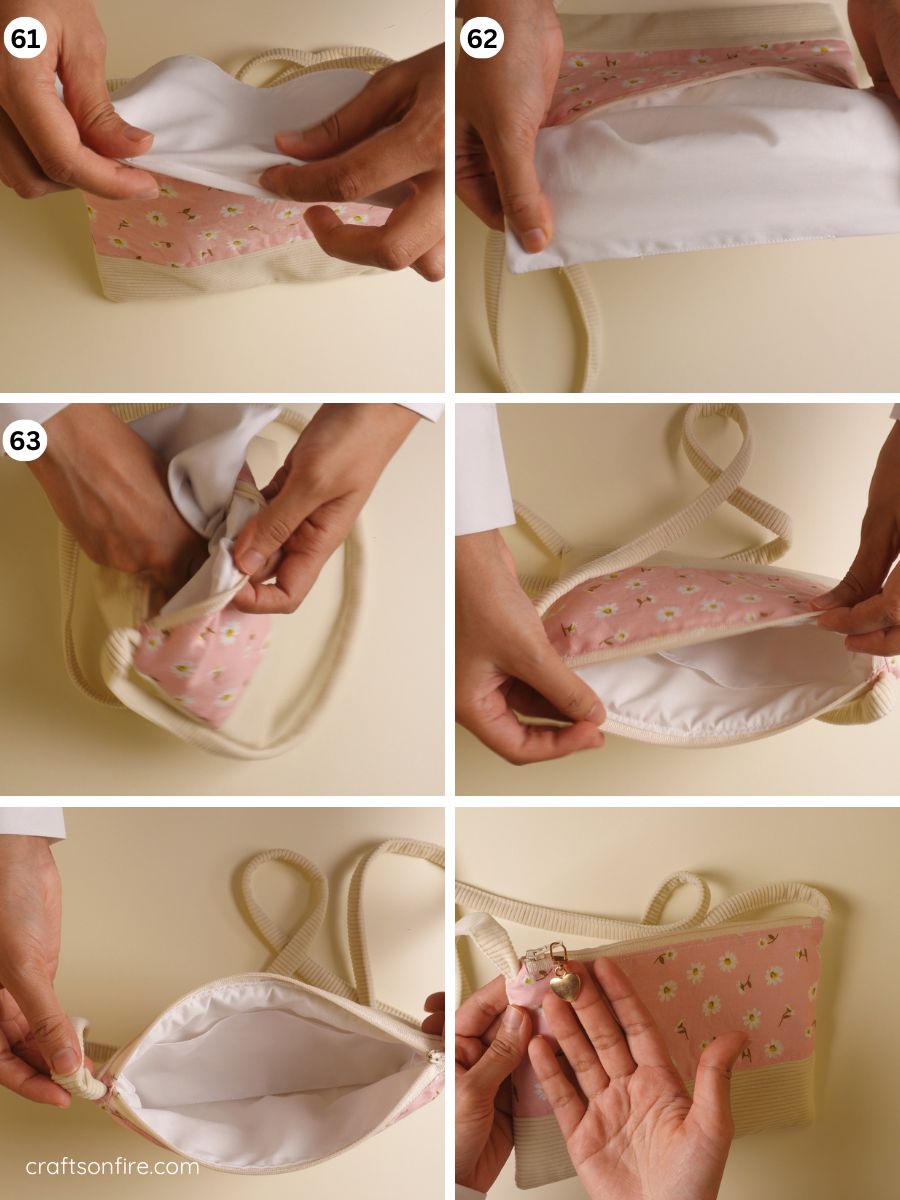
61 – 62. Sew the opening closed, stitching close to the edge.
63. Place the lining back inside the bag.

This crossbody bag is lightweight and easy to carry. If you’d like to add more structure to the bag, consider using a thicker interfacing/batting.
I love how this bag turned out. It’s so pretty and exactly as I imagined.
Although there are quite a few steps listed above, this bag comes along quite easily.
I added every single step because I didn’t want anything to be left out, so this bag sewing tutorial will be as simple and easy for you to follow.
And I do hope I’ve managed to achieve that!
As for this bag pattern, it is a simple one! You can use this same pattern to sew as many variations of this bag as you like. It’s totally up to.
With that being said, are you planning to sew this crossbody bag? If you are, please let me know in the comments below!
Also, before you head out, here are a few more step-by-step sewing tutorials you might want to check out next:

Happy sewing!