How To Make A Gift Bag From Patterned Paper
Have you ever been in a situation where you had an awesome gift for someone, but you totally forgot to purchase a gift bag and you needed to give that gift to them as soon as possible?
After experiencing this way too often than I like, I’ve recently learned how to make a quick and easy gift bag from scratch!
The way you present a gift is just as important. Having your special gift wrapped up in a cute bag can make the gift-giving experience more wholesome and fun.
If you have a roll of wrapping paper, patterned paper, or even printer paper, you can make this gift bag in just 5 minutes!
In this tutorial, I’ll show you the exact steps you need to take to make this cute bag.
Let’s begin.
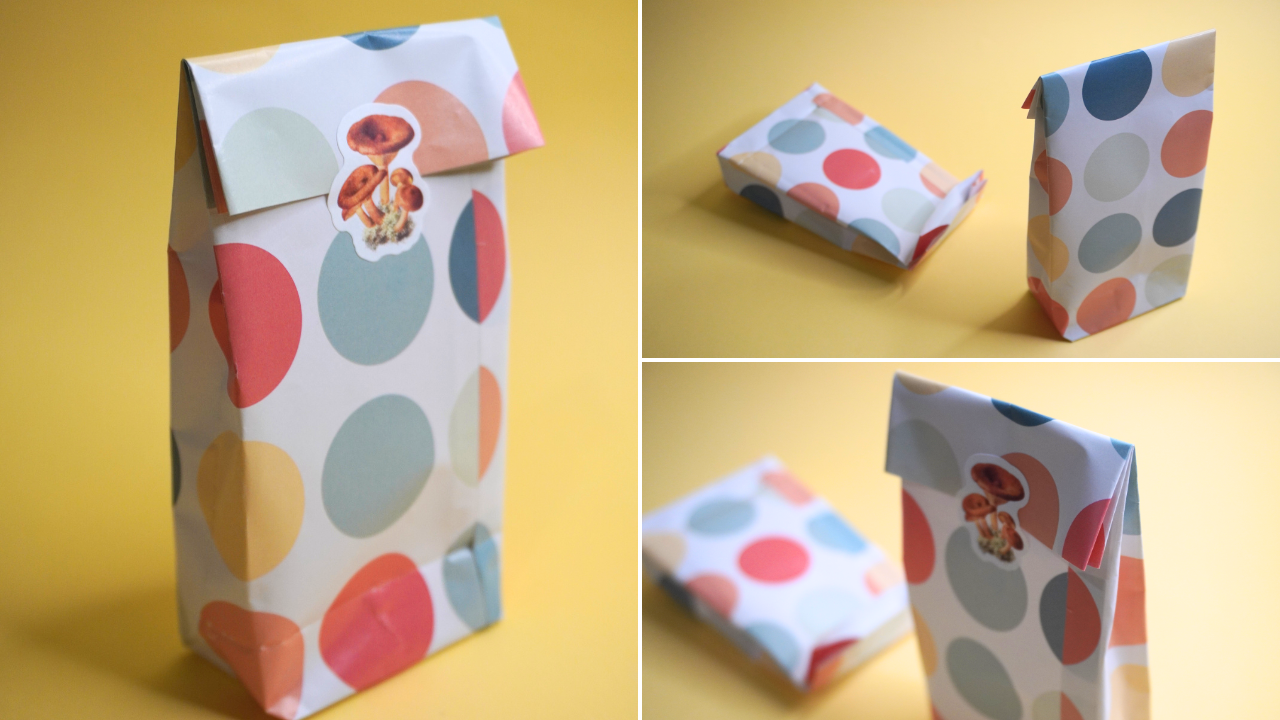
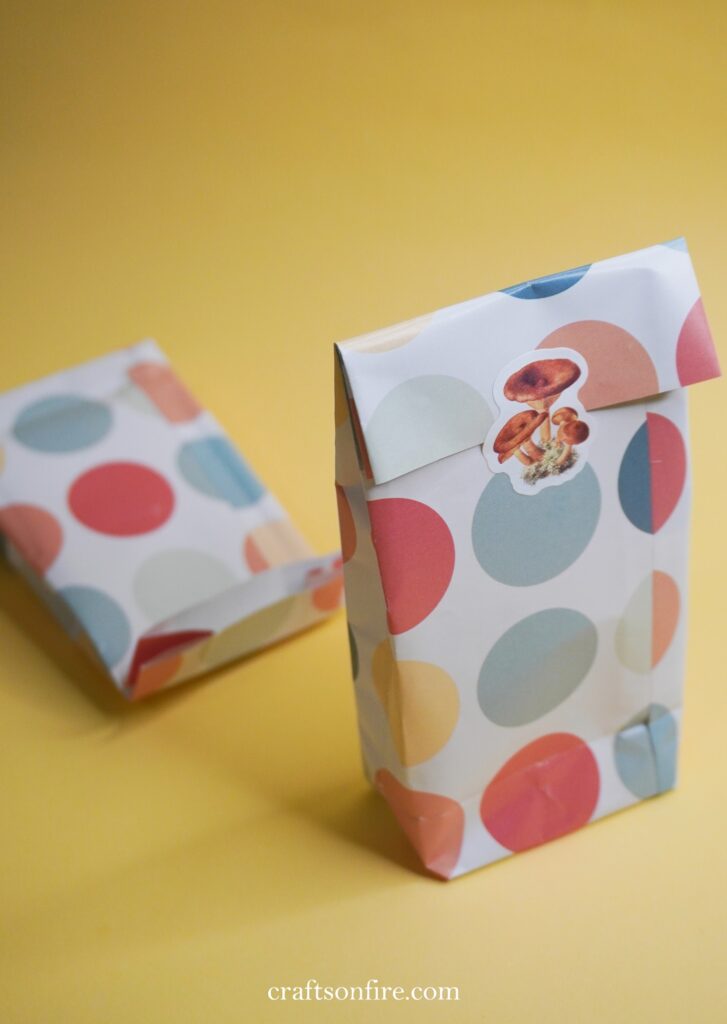
DIY Gift Bag
Supplies:
Instructions
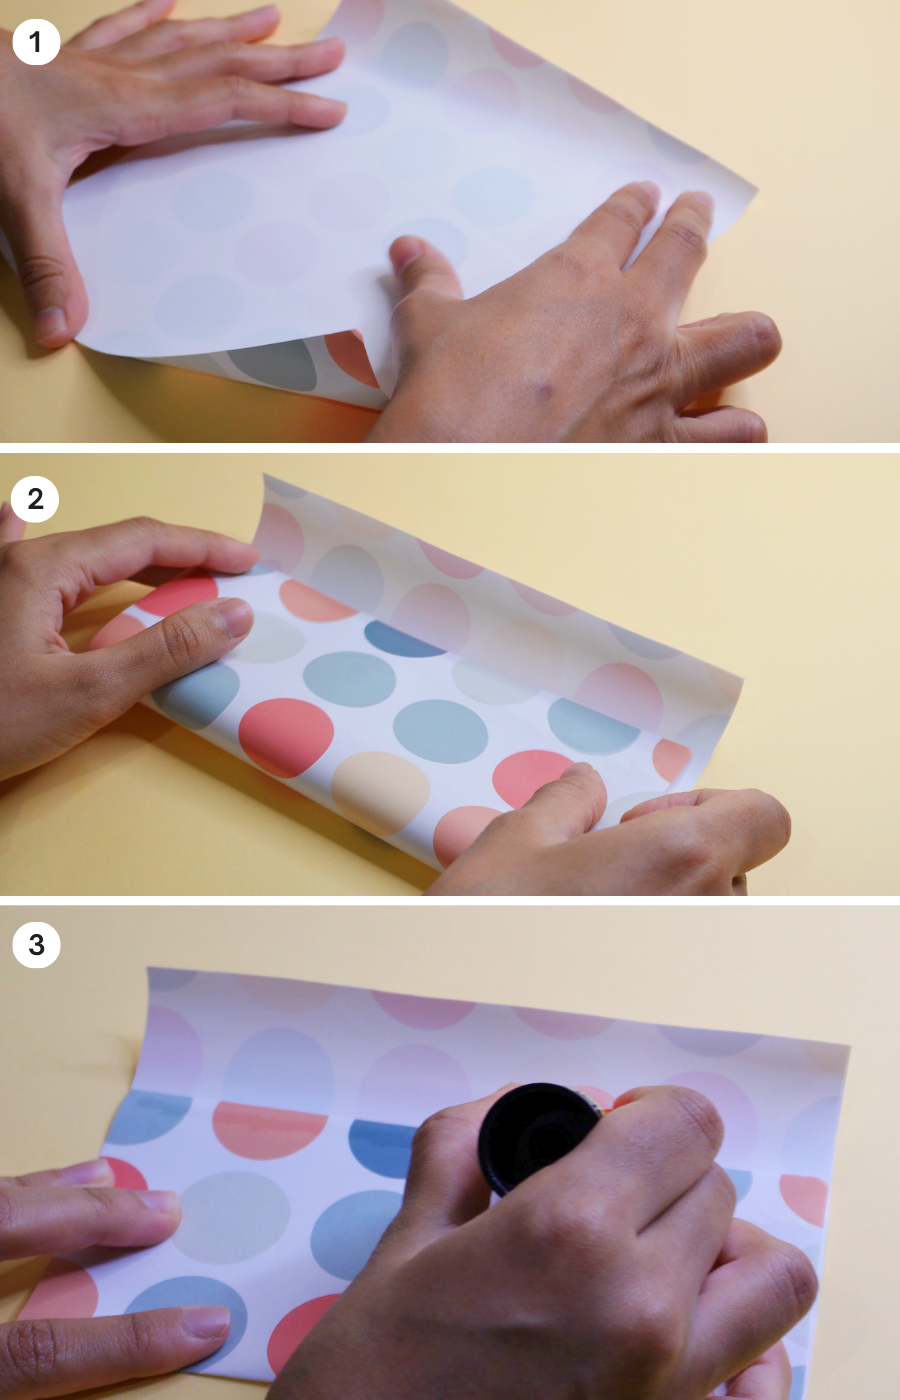
Step 1: Cut out a small piece of paper from the roll of wrapping paper, depending on how big or small the gift bag needs to be. An A5 size should be fine for small gifts and trinkets. For anything larger, you can do a test piece first with scrap paper to see if your gift will fit.
Step 2: Take one end of the paper and fold it over to the other end. Make sure to leave that gab piece as shown above.
Step 3: Glue the edge of the folded piece. Then, fold the other flap down onto the glued line.
Step 4: Proceed to fold the bottom of the bag.
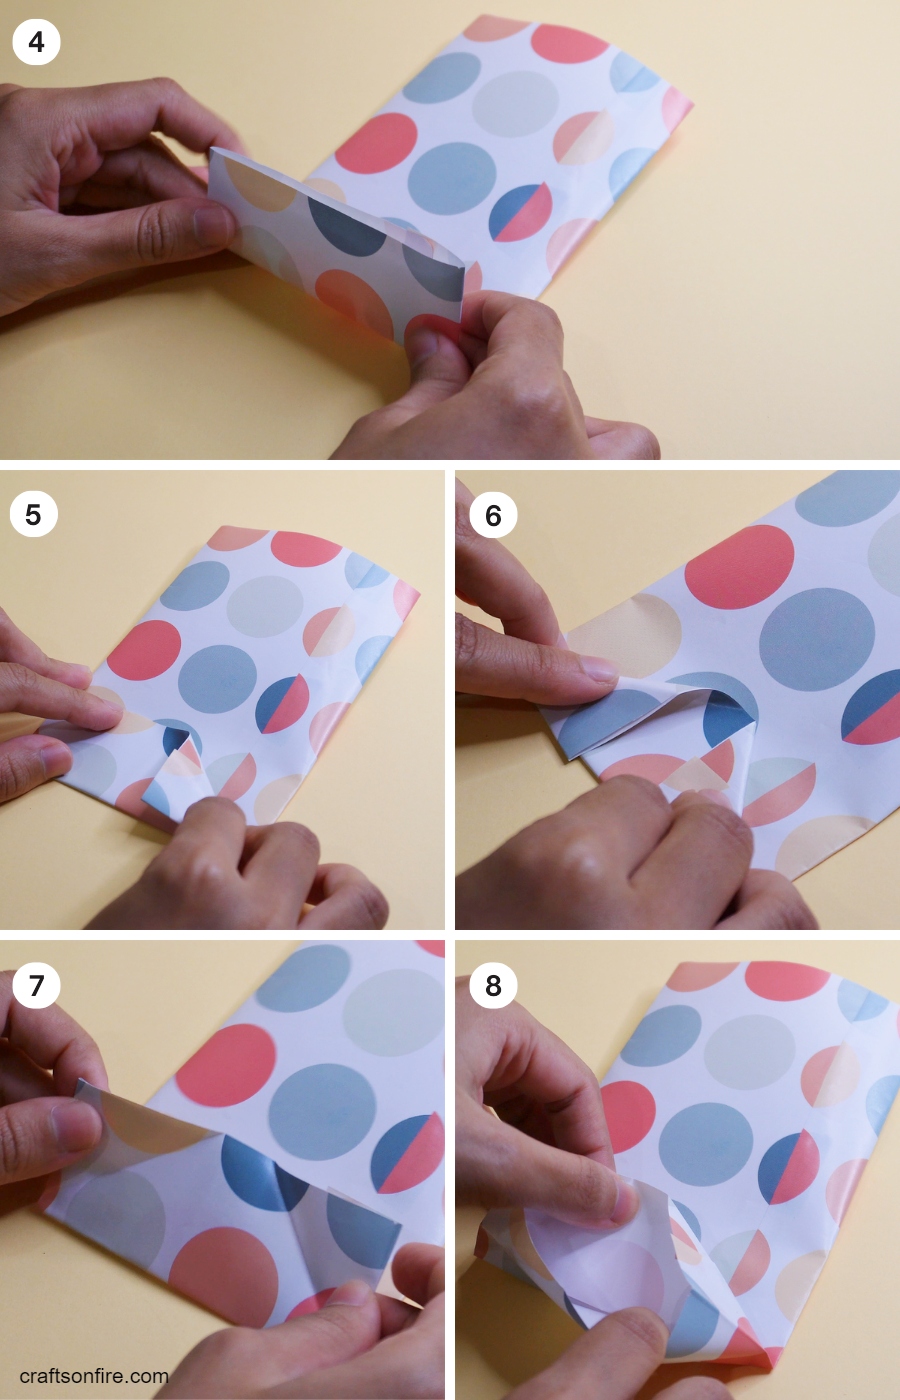
Step 5: With the part that you just folded, turn up one end of the corner of the fold to create this triangle and gently press down.
Step 6: Repeat the same process for the other end.
Step 7: Unfold the two ends and it should look like this.
Step 8: Now, open the bottom of the bag.
Step 9: Fold the opened piece down as shown below in step 9.
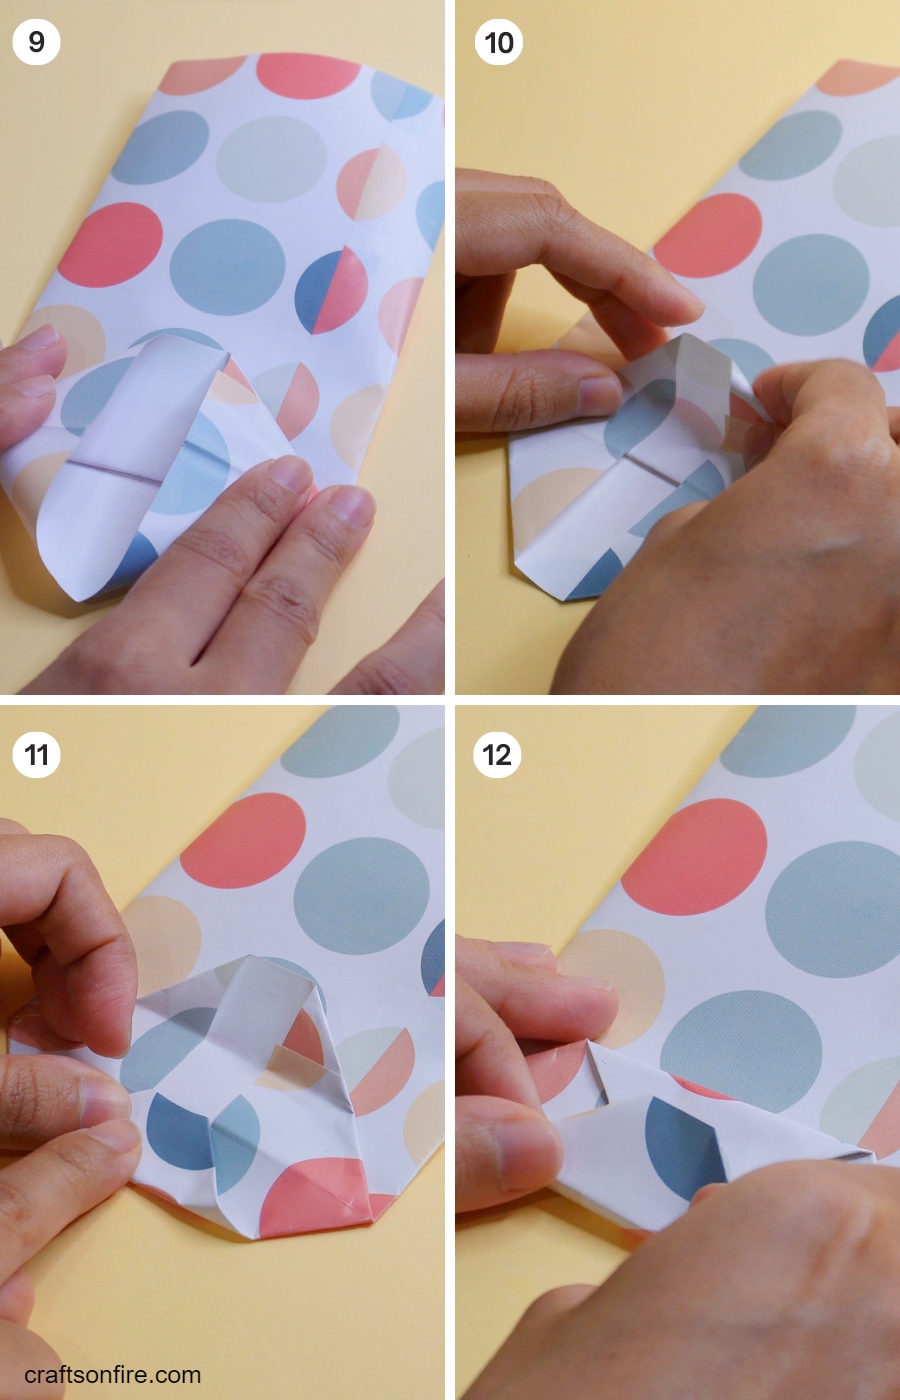
Step 10: Take the top part of that folded piece and fold the top half so that it matches the middle of that center line.
Step 11: Fold the bottom part as well, folding it slightly higher than the center line.
Step 12: Apply glue to the top of that piece and glue the two folded pieces together.
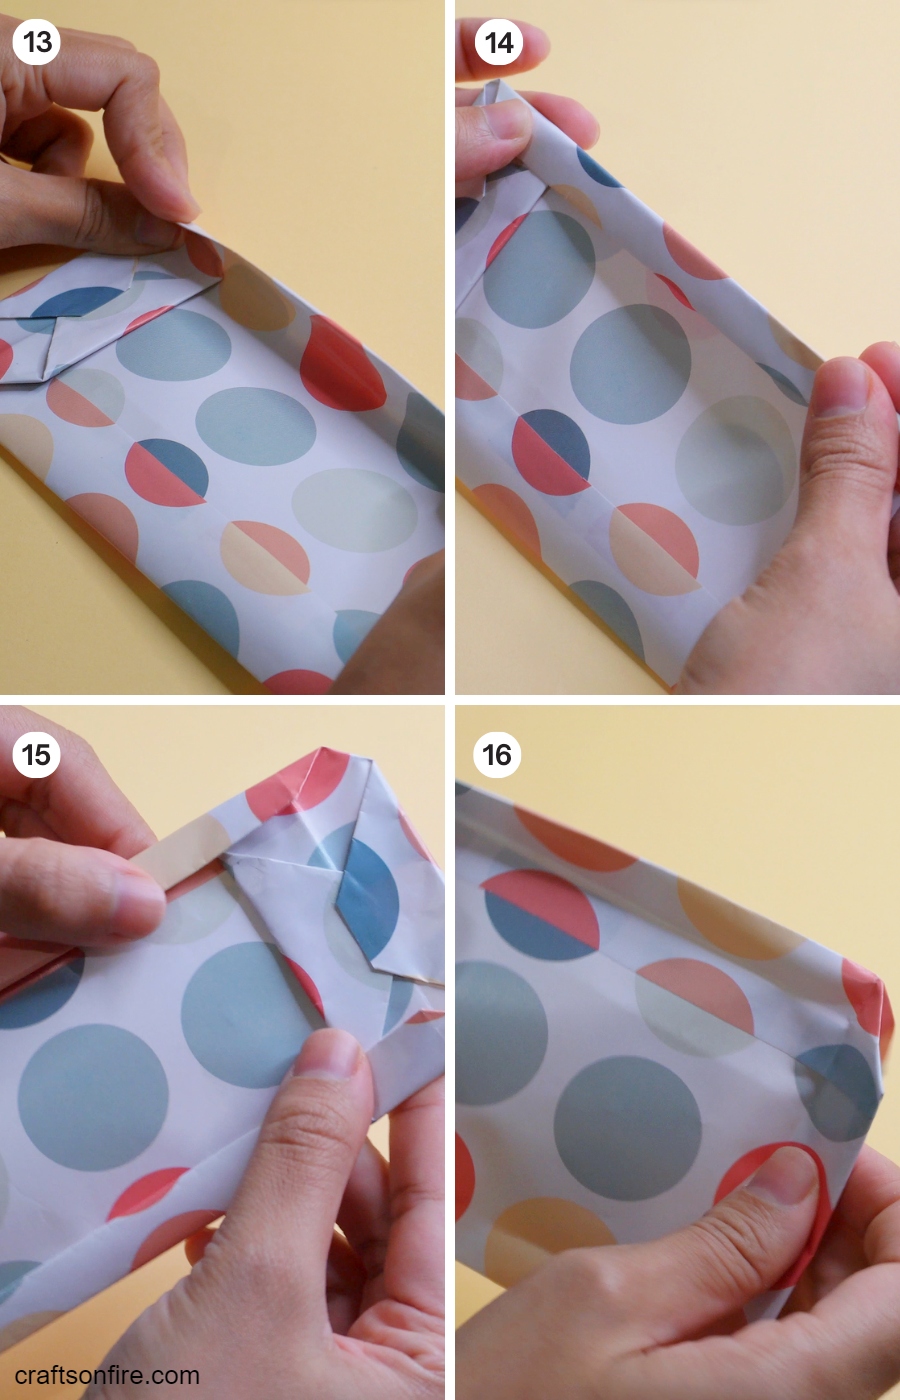
Step 13-15: Next, fold the sides of the bag.
Step 16: Then, unfold the sides and open the top of the bag.
Go ahead and fold the sides inward to create the shape of the gift bag.
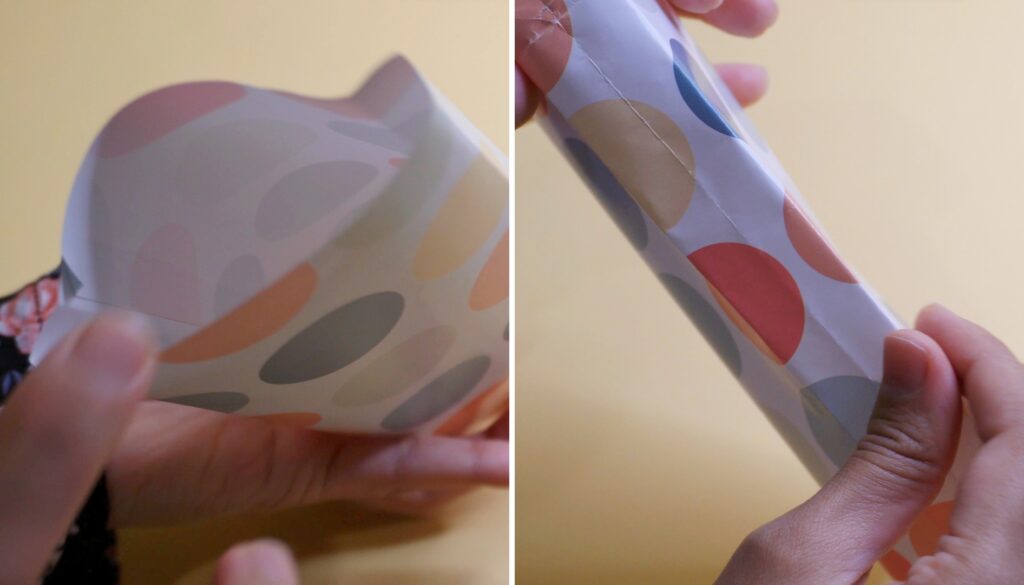
If you find it difficult to open the entire bag, try using a ruler.
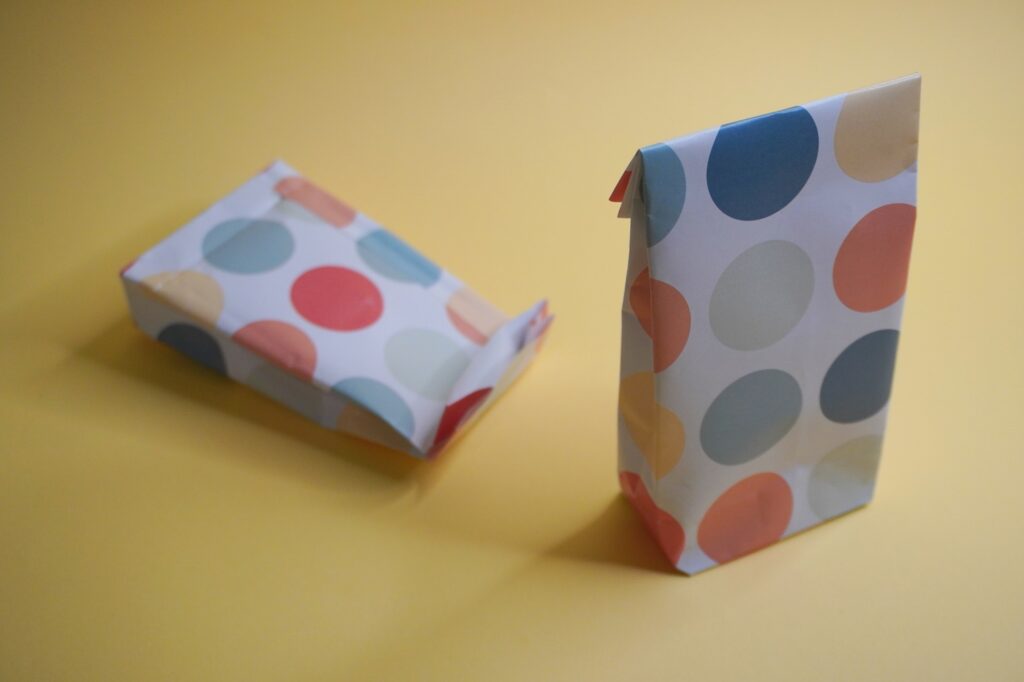
This is the basic way to make a gift bag. You can use the same instructions if you need to make a larger gift bag.
To seal the opening of the gift bag after placing the gift, fold the top over and seal it with a sticker.
Alternatively, punch a hole through the middle or on either side at the top of the bag and loop a thread instead to tie it off.
Totally up to you!
I also created a video version of this tutorial if you’d like to see me create this gift bag from wrapping paper in real time. Here you go:
This was surprisingly fun to make and I love the fact that you get to choose the patterned paper that matches your gift.
It’s simply a fun and cool way to make your gift-giving more personal and special.
If you need any additional help or perhaps you have a few questions about this tutorial, drop them below. I’ll be happy to help!
See also: 21 Cheap DIY Party Favor Bags Your Guests Will Love