DIY Air Dry Clay Speckled Tray

This diy air dry clay tray was one of the best things I’ve made this week and I enjoyed every second of it.
Not only did it take less than 15 minutes to make, you can create any pattern or design to personalize and make this tray look great!
I wanted to create a clay that looked bright, colorful, and artsy and I think I managed to capture just that!
This simple clay tray also makes the perfect holder for rings or loose change that can be displayed on a bedside table or vanity but honestly, it can go anywhere in your home.
By now, you’re probably excited to get started.
Here’s my step-by-step tutorial:
How To Make An Air Dry Clay Tray
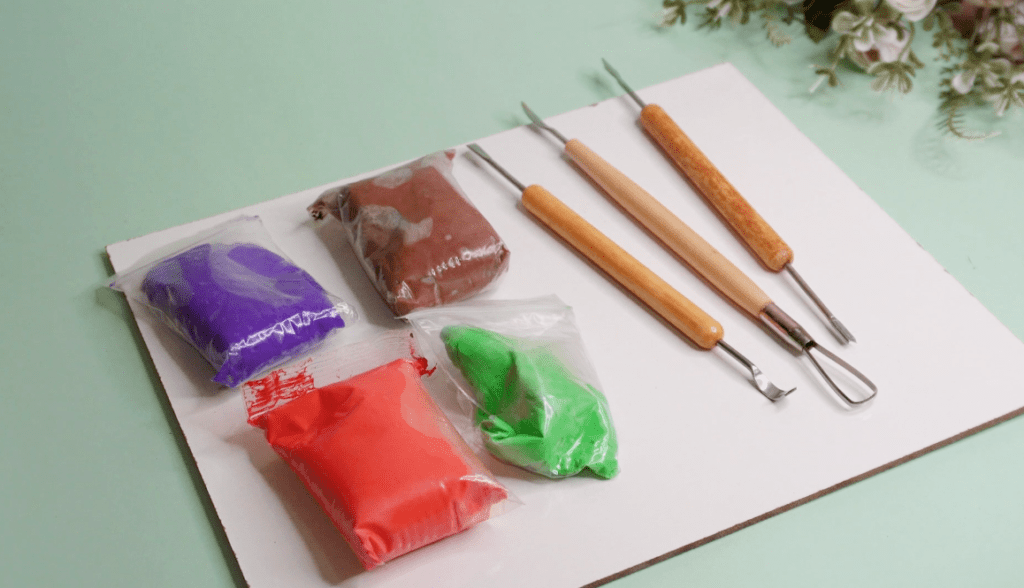
Supplies
Instructions
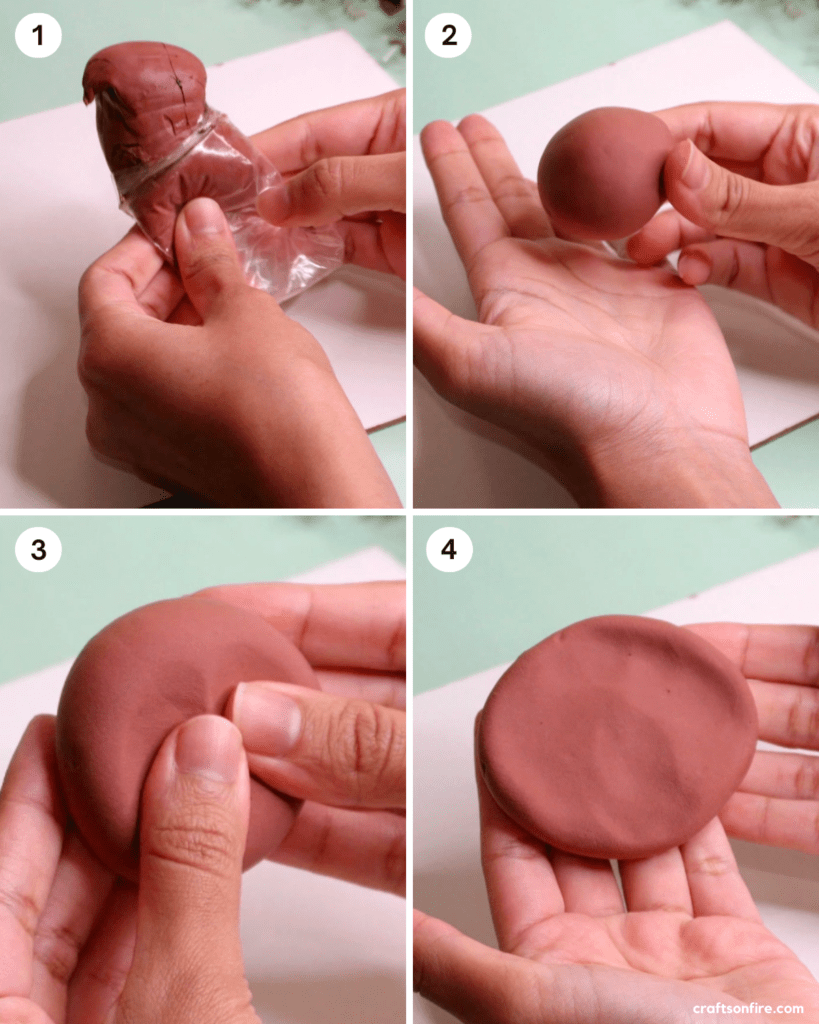
- For this tutorial, you’ll need a large piece of brown clay to create the tray. If you don’t have air dry clay, then use polymer clay instead. Remove the clay from the bag and knead well until the clay feels soft and moldable.
- Roll the clay into an oval and press down gently using the palms of your hands and fingers.
- The clay piece should start taking shape at this point.
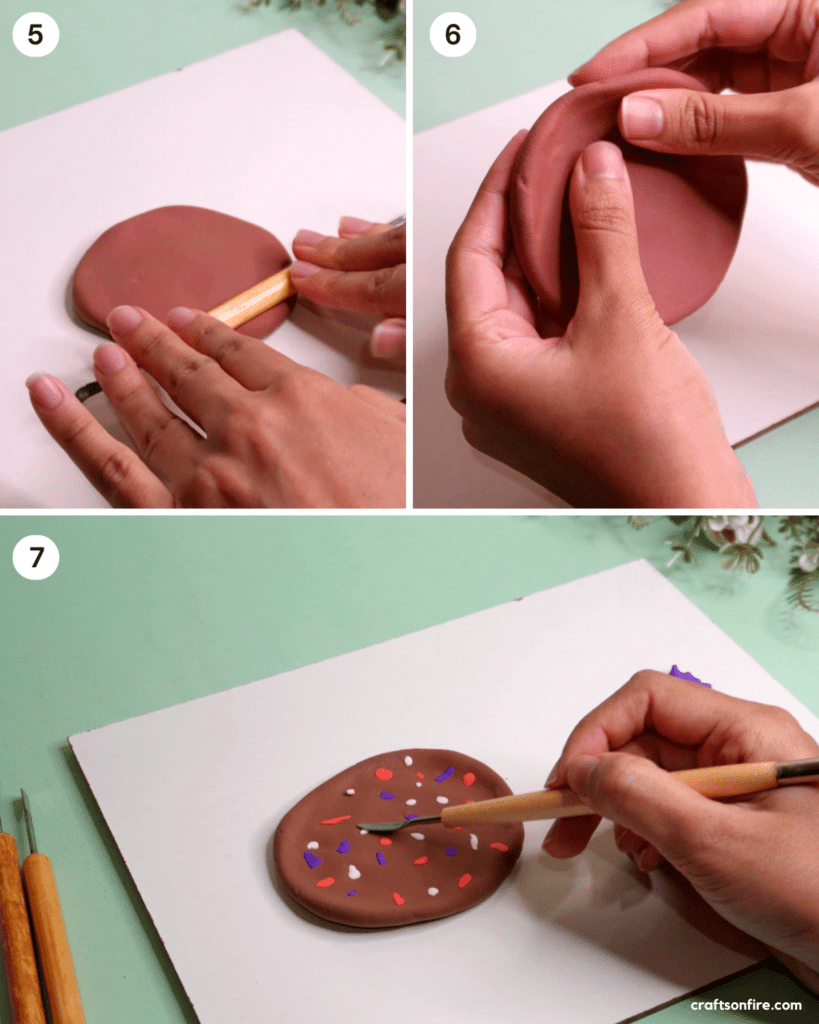
- Place the clay down on the board and use the handle of the tool (you could also use a pen or paintbrush) to roll and flatten the clay. Doing this will also expand the size of the tray.
- Once you have the size you’re happy with, lift the clay and shape the sides of the tray. I used my fingers to lift the sides so that it created a slight border.
- Next, break tiny pieces of purple, red, and white clay. Spread the pieces throughout your tray to create the design.
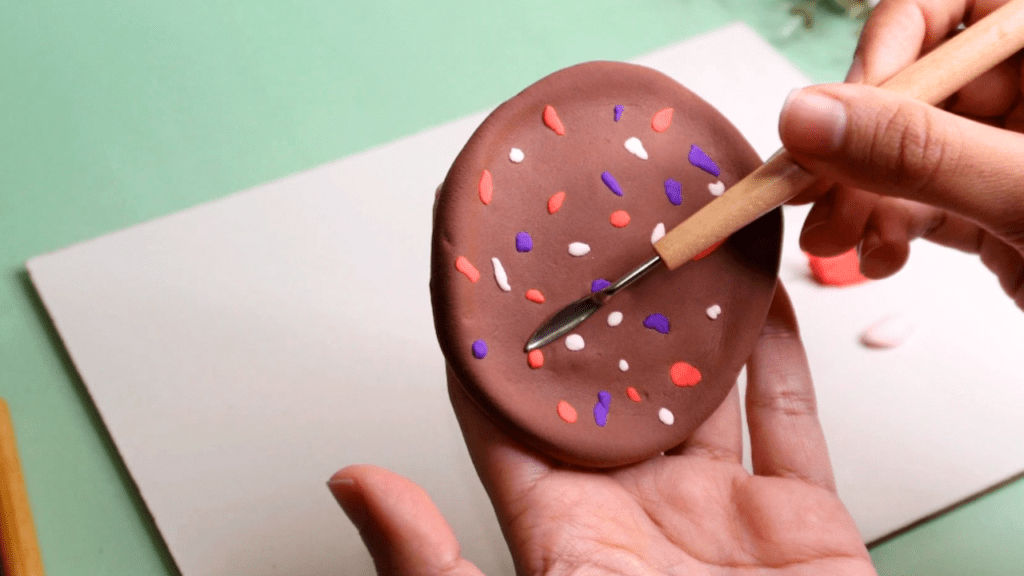
As a final step, grab that clay tool and smoothen the small red, purple, and white spots so that they blend into the brown clay. This will also give a flatter, consistent finish.
Once you’ve finished this step, set the tray down and allow it to dry for a couple of hours or at least for a day until it hardens.
You can add a shiny finish to the tray by using a high gloss varnish. A coat or two of the varnish should also maintain the quality of this tray.
Additional Tips
- This clay tray is easily customizable – change the colors from a brown to a white tray if you prefer a versatile piece.
- The design on the tray can be changed by creating a random pattern of lines or circles or using a small mold to cut out shapes such as stars, triangles, hearts, or flowers.
- You could also use a round cutter for a circular tray instead of an abstract one.
- This air dry clay tends to dry with a dull, foam finish. It’s best to give it a coat of varnish for a shiny, attractive finish.
I also created a video version of this tutorial. If you want to make your clay tray alongside me or perhaps you’d like to watch the process, here you go:
So, how did your tray turn out?
If you want to add more cool decorative pieces to your space, I highly recommend trying out my other easy projects:
How To A Glass Jar With Clay Flowers
How To Decorate Flower Pots Using Air Dry Clay
DIY Pen Holder Using Air Dry Clay
Give them a try when you have the time. I’m certain you’ll love it!