How To Draw A Snowflake In 3 Steps – Easy Drawing Tutorial
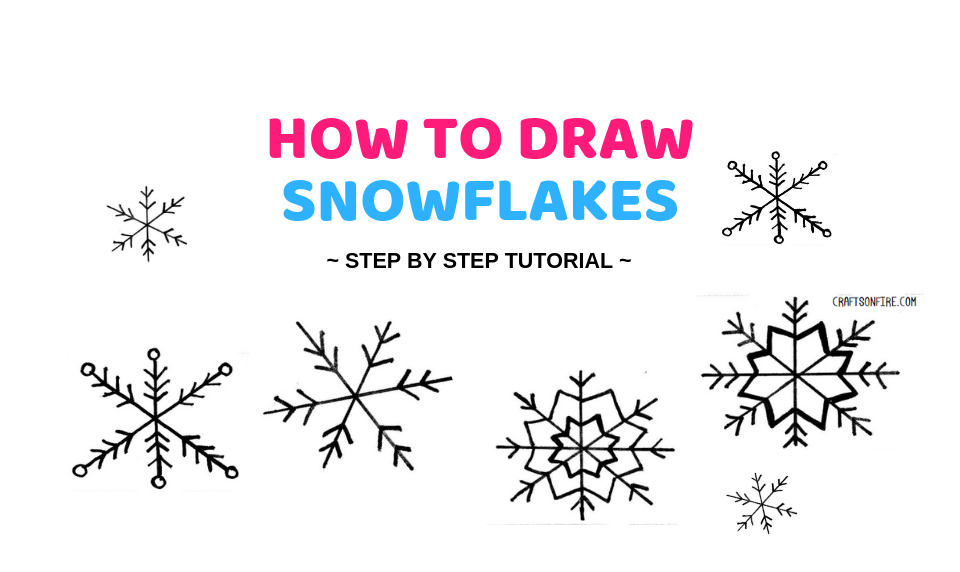
Learn how to draw a snowflake in just three easy and simple steps with our detailed step by step guide. Drawing snowflakes in your December calendar or bullet journal spread is essential for keeping the theme and celebration of the winter season alive. It’s a fantastic way to make a boring spread look amazing with these snowflakes.
Here you’ll find five different yet easy snowflake designs you can copy in just a few minutes. There are a few hand-drawn snowflake doodles that are more detailed but simple enough to remember. You can easily choose to draw a few of these snowflakes or draw them all, totally up to you!
Before we get started, let’s take a look at what you’ll need:
Table of Contents
How To Draw Snowflakes
Supplies
- Sketchbook, bullet journal, or any blank piece of paper
- Pencil, eraser, and a ruler.
- Micron Pens
Now we’re ready! Let’s start, shall we?
Drawing Instructions
1. Simple Snowflake
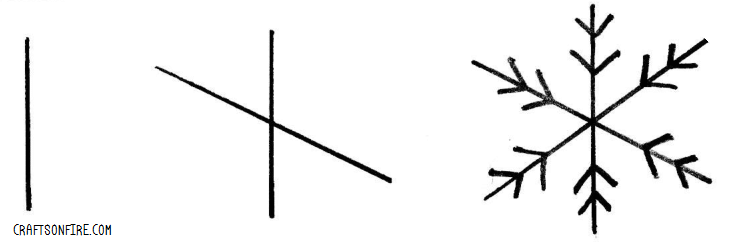
Here’s a simple and easy snowflake doodle you can start with. For this one, start by drawing a straight line down.
Draw another line slanted from one side to the other of the first line. Now draw another line from left to right.
Now, it’s time to add details. Draw two smaller V shapes on each of the snowflake sides to get a simple design like this.
2. Snowflake Design With Circles

Do you remember the first snowflake doodle you just drew? Now we’ll try drawing another snowflake similar to the one before but slightly more detailed.
Begin by drawing an X shape. Then draw another line straight down that one.
Once the shape of the snowflake is done, it’s time to add details.
On each of the sides, draw three V shapes. To finish off this snowflake drawing, go ahead and draw a circle on each of the sides. You can shade the circles in or leave them open like this one.
3. Snowflake Design With Arrows

This snowflake design is a little more different than the previous two where in this instance we have eight sides rather than six. To create this snowflake doodle, you’ll need to draw a cross shape first. Then go ahead and draw an X shape over that cross shape.
Now here’s the tricky part. We’re going to need to draw the star shape. To this, draw an upside-down V shape in each corner of the snowflake more towards the middle of the lines.
Once you’ve done this, go ahead and add V shapes on each of the other lines. You can go back and darken the lines you want to stand out most.
4. Snowflake Design With Detailed Shapes

Did you like the previous snowflake design? Then let’s try drawing another version of that one! Just as how you had drawn the shape of the snowflake before, do that again.
For this design, begin the details by drawing a smaller star shape towards the middle and then leave a bit of space and draw another star shape.
To finish off the design, draw one or two V shapes on each line.
5. Easy and Detailed Snowflake
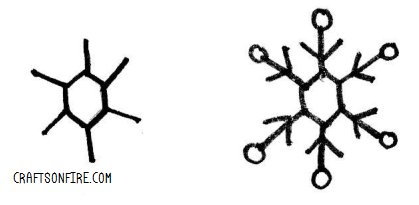
This snowflake drawing is different from the others so you might need to spend some extra time on this one.
Start by drawing a sort of hexagon shape and draw a small line on each of the sides.
Then go ahead and draw a V shape on each of the sides. Close the snowflake drawing off by drawing a small circle on each line.
Conclusion
So, there you have it! Five different snowflake designs you can draw in minutes! Did you have fun learning how to draw a snowflake?
If you’d like to learn how to make a paper snowflake, head over to Instructables for a full tutorial you’ll have loads of fun making it.
That’s all from us but we’ll see you in the next drawing tutorial!

