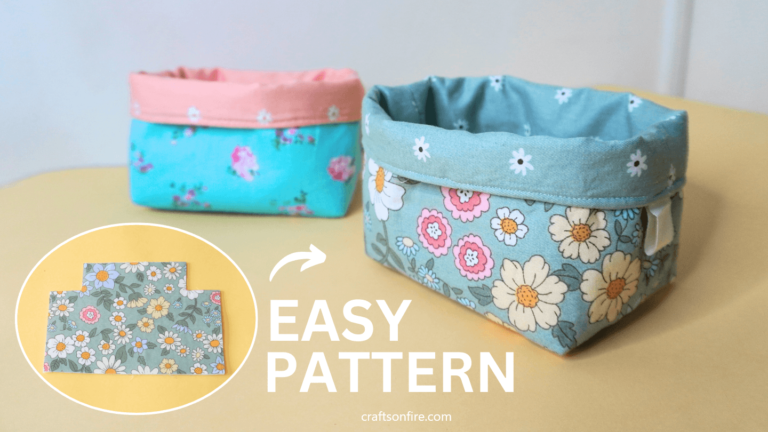
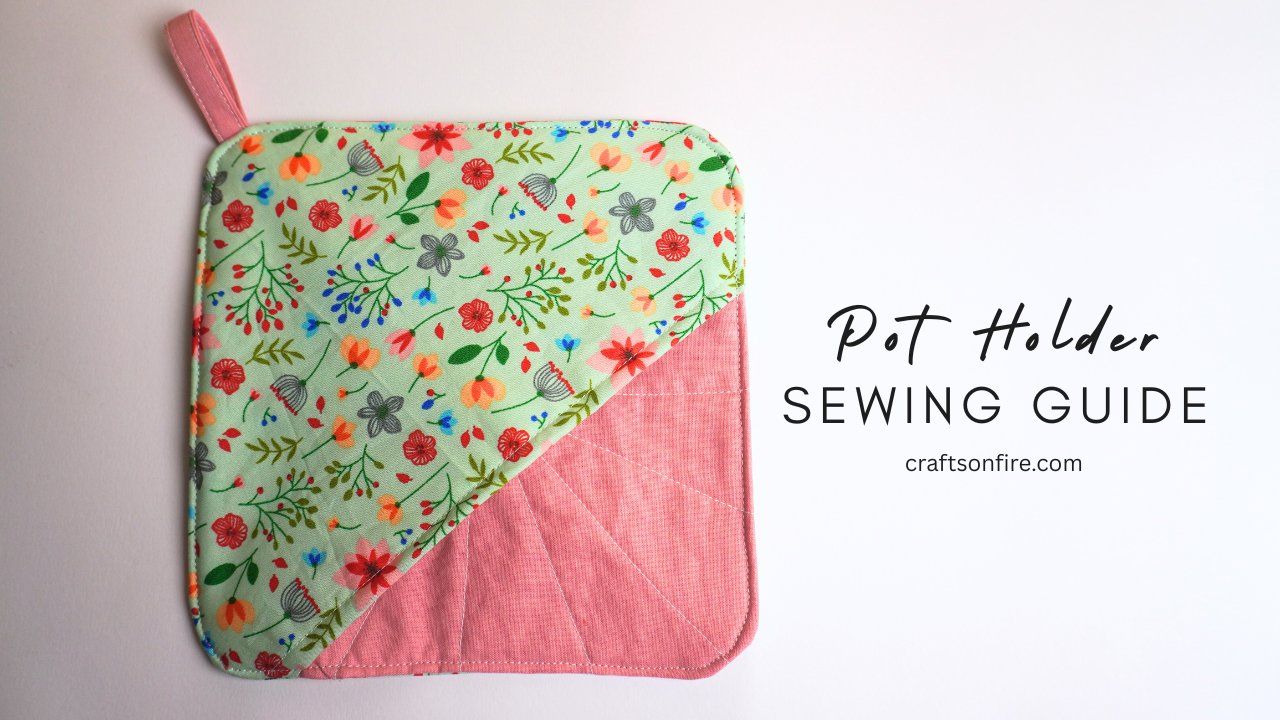
How To Sew A Pot Holder With A Top Pocket
In this tutorial, I’ll walk you through how to sew a pot holder with a top pocket step by step, so you can easily make your own.
This simple project will help you create something you’ll actually use in your kitchen – it’s a fantastic project for beginners!
Not only does it protect your hands from hot pots and pans, but the pocket also gives you an extra grip when lifting a pot lid or dish from the stove.
With just a few pieces of fabric and batting, you can create a pretty patchwork kitchen accessory that’s both beautiful and useful.
Once you sew this pot holder, you’ll probably want to sew a few more in different fabrics!
Finished pot holder size: 17 cm x 15 cm / 6.69″ x 5.91″
Please note: HanaSews (Craftsonfire.com) is not responsible for any issues if you use this pattern and tutorial to create your pot holder. I highly recommend using 100% cotton fabric and heat-resistant batting. Please use this item at your own risk.
Table of Contents
Pot Holder Sewing Tutorial
Supplies
1 x Loop strip piece – 6 cm x 15 cm / 2.36″ x 5.90″
1 x Top Patterned Fabric – 38 cm x 28 cm / 14.96″ x 11.02″
1 x Plain Inner Fabric – 20 cm x 20 cm / 7.87″ x 7.87″
1 x Bottom Fabric – 25 cm x 25 cm / 9.84″ x 9.84″
1 or 2 x Heat resistant batting: Inner piece – 25 cm x 25 cm / 9.84″ x 9.84″
1 or 2 x Heat resistant batting: Top piece – 19 cm x 28 cm / 7.48″ x 11.02″
If you want a high-quality, AD-FREE version of this sewing guide with step-by-step instructions included under each picture, grab the printable PDF guide over here!
Video Guide
Instructions
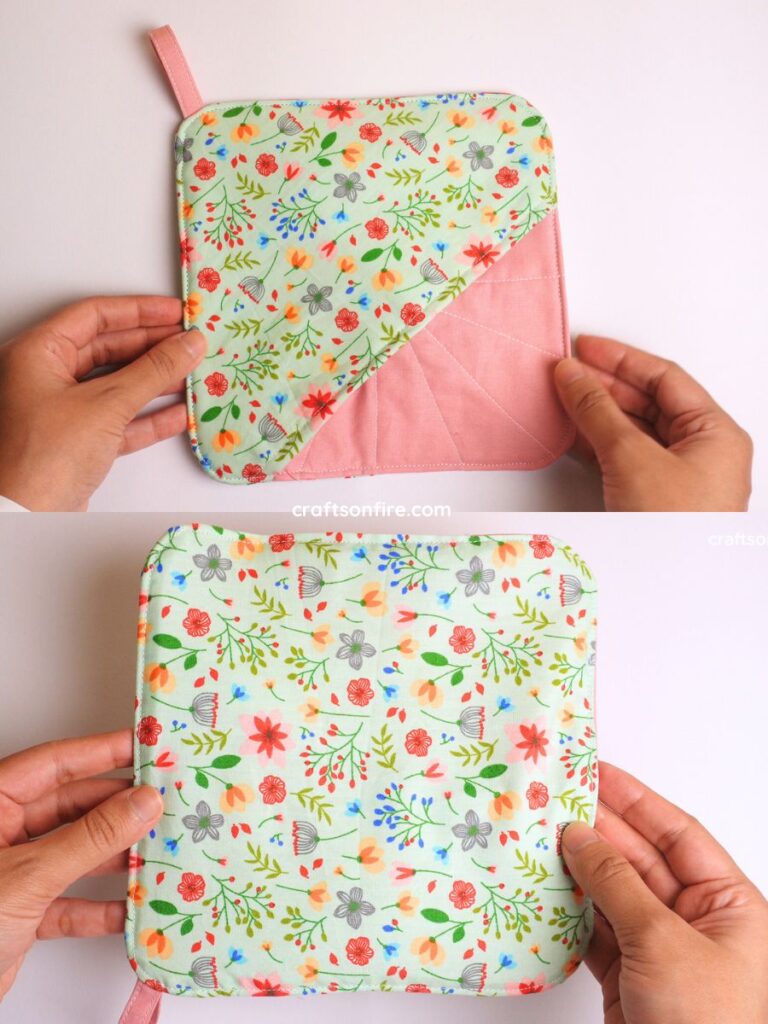
Start by positioning the loop fabric strip with the wrong side facing up.
Then, fold the bottom edge toward the center.
Fold the top edge down toward the center.
Bring the two ends together as illustrated above, and then use a pin to hold the fold together.
Head over to the sewing machine and sew both ends of the strip. Then, fold the strip in half to form a loop. Sew the two ends of the strip together.
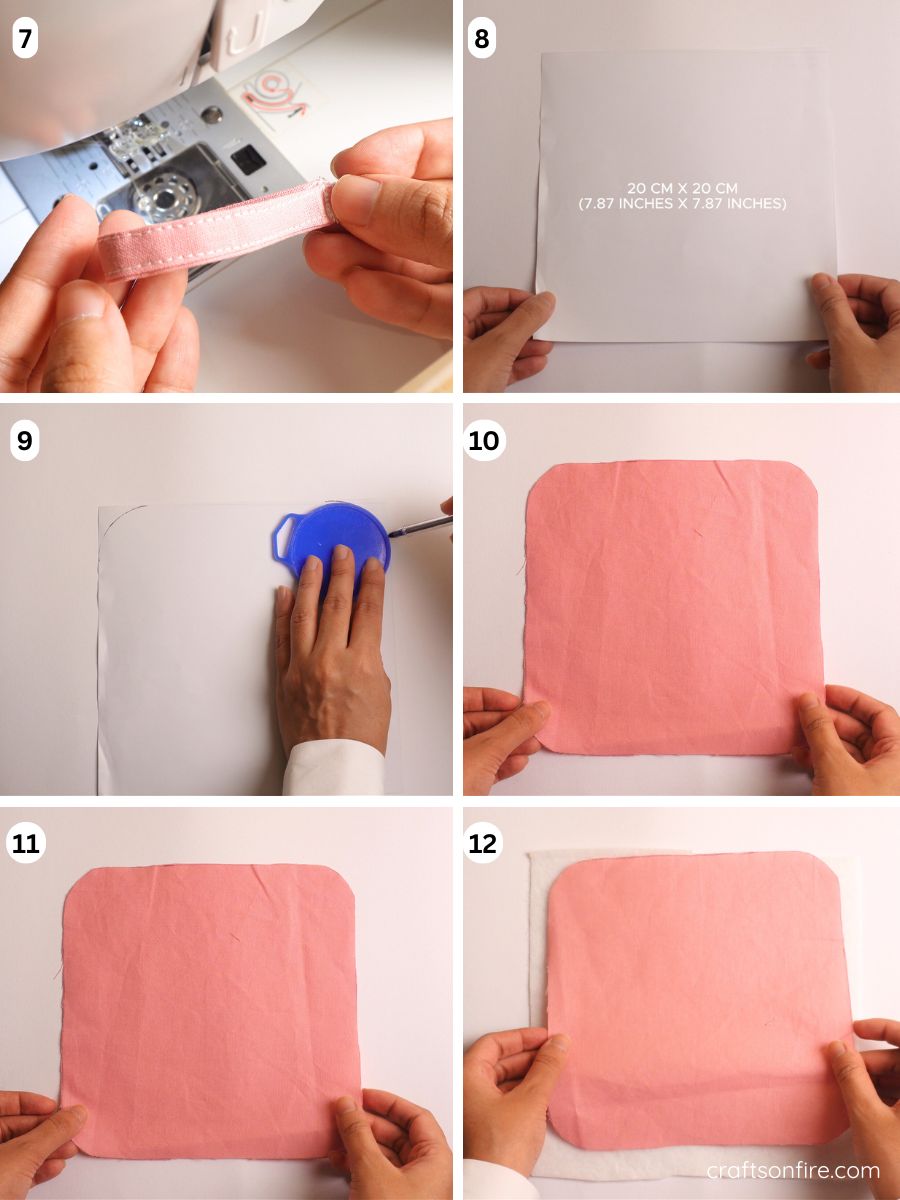
Your loop is now created. Set this aside for now.
To create the pot holder template, cut a piece of paper to measure 20 cm x 20 cm / 7.87″ x 7.87″. Next, take a small round object and trace a curve along all four sides of the square. Finally, carefully cut along the curved edges.
Use the paper template to trace and cut out the fabric for the inner piece.
Place the inner piece on a heat-resistant batting (use one or two layers based on thickness). Ensure that the batting is slightly larger than the inner fabric piece.
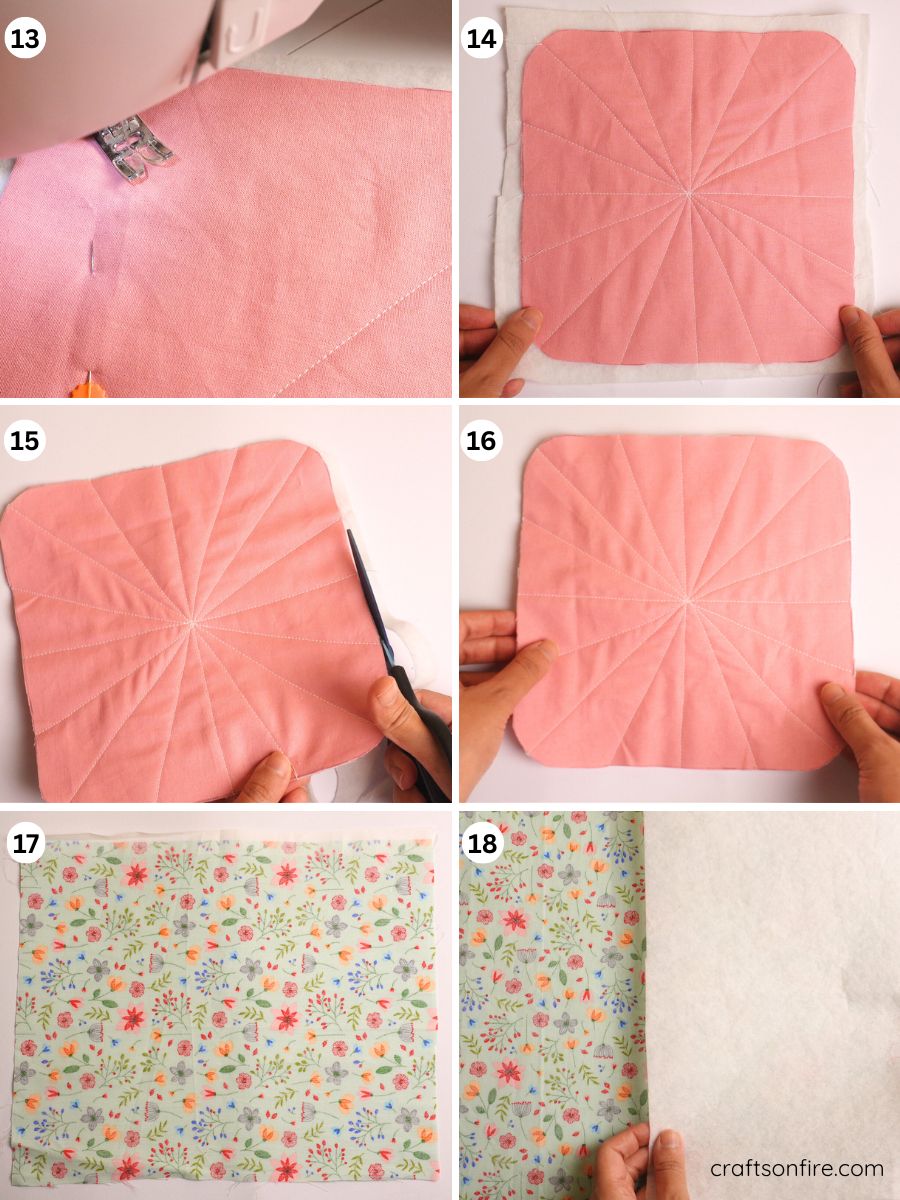
Now it’s time to quilt the fabric. Feel free to select any design that inspires you!
Here’s what my piece looks like after being quilted
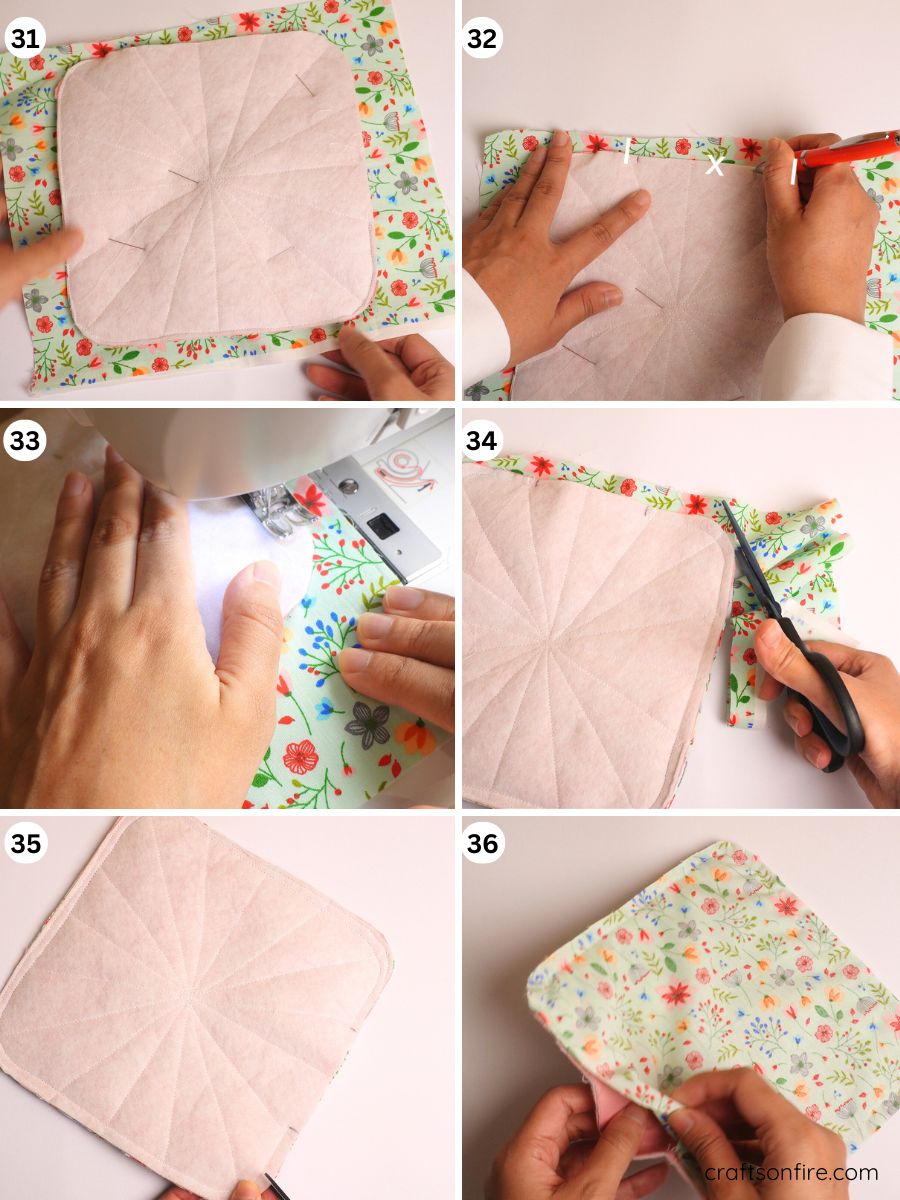
Go ahead and remove the excess batting from the sides.
Here is the finished quilted inner piece. Please set this aside for now
Position it with the wrong side facing upwards.
Grab your top printed fabric (38 cm x 28 cm / 14.96″ x 11.02″).
Take the top batting piece and place it on one side. You can use 1-2 pieces of batting depending on thickness. Then fold over the other side of the fabric.
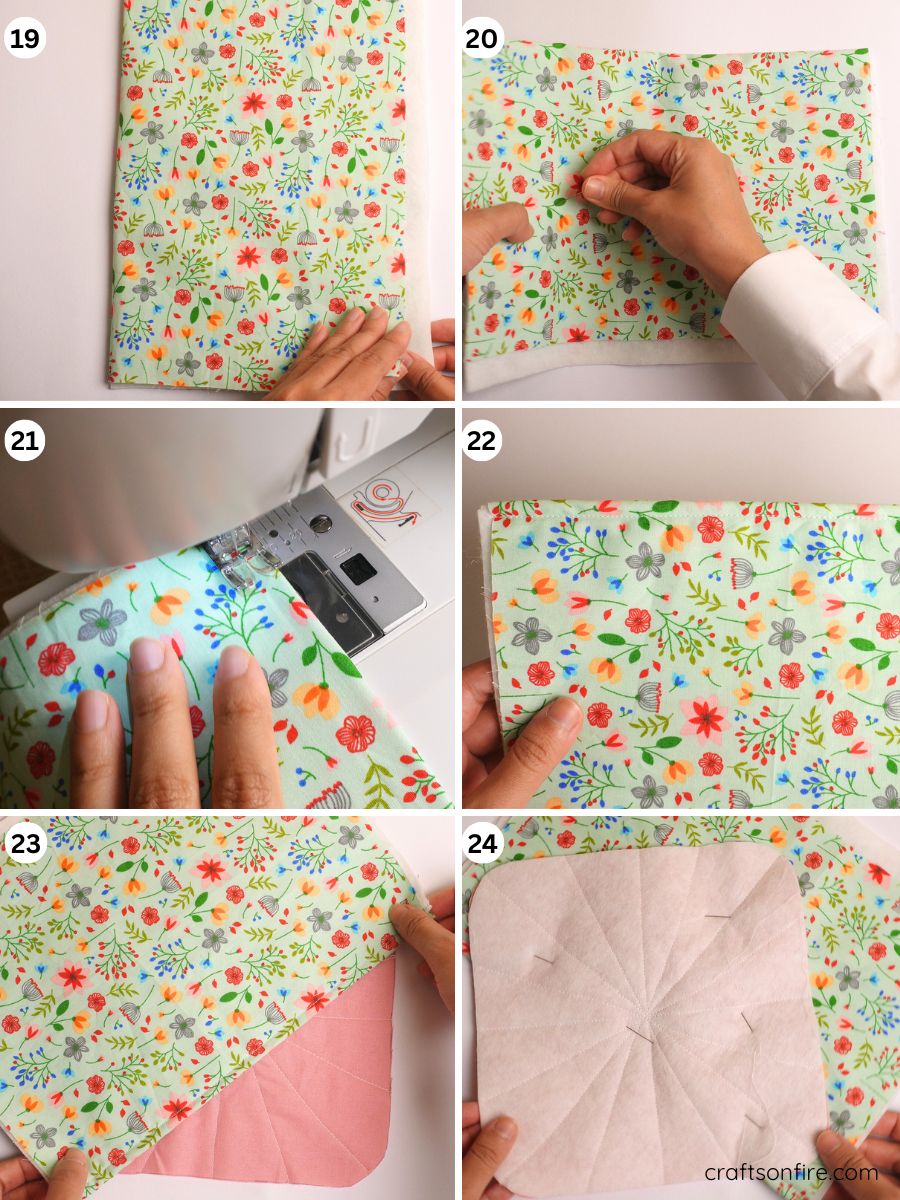
Take the top batting piece and place it on one side. You can use 1-2 pieces of batting depending on thickness. Then fold over the other side of the fabric.
Place this top piece over the inner quilted fabric piece as shown above. The folded side of the top piece should be facing in.
Pin the top piece to the inner piece. You’ll now want to stitch the pieces together as indicated
Go ahead and sew the two pieces together using a small seam allowance.
Remove the excess fabric from the sides of the holder.
Your pot holder should look like this so far.
Grab the loop you made earlier and place it on the side or top corner of the holder. Face the loop part inwards.
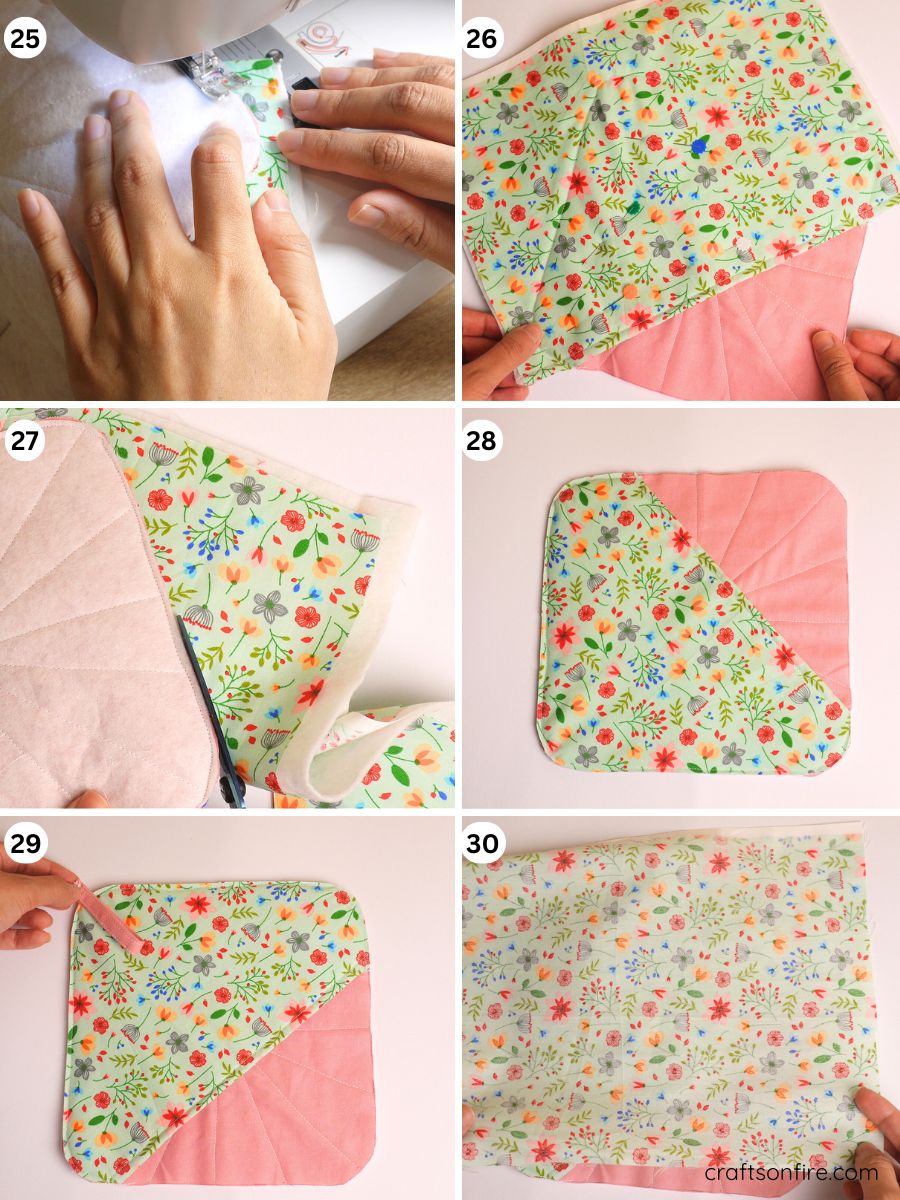
Stitch the loop to the edge of the pot holder and then cut off the excess bits.
Next, take your bottom fabric (25 cm x 25 cm / 9.84″ x 9.84″) and lay it over the top piece, ensuring that the right sides are facing inward. Pin the fabric in place, then flip the piece over to the batting side.
On one side of the holder, mark out a small section for the opening (7 – 10 cm / 3.93″). Do not stitch here.
Begin stitching your pot holder following the curved edge. Use a 1 cm seam allowance.
Once sewn, cut off the excess fabric from the sides.
Next, make tiny snips all around the holder.
Use the unstitched opening to pull the right side of the fabric through.
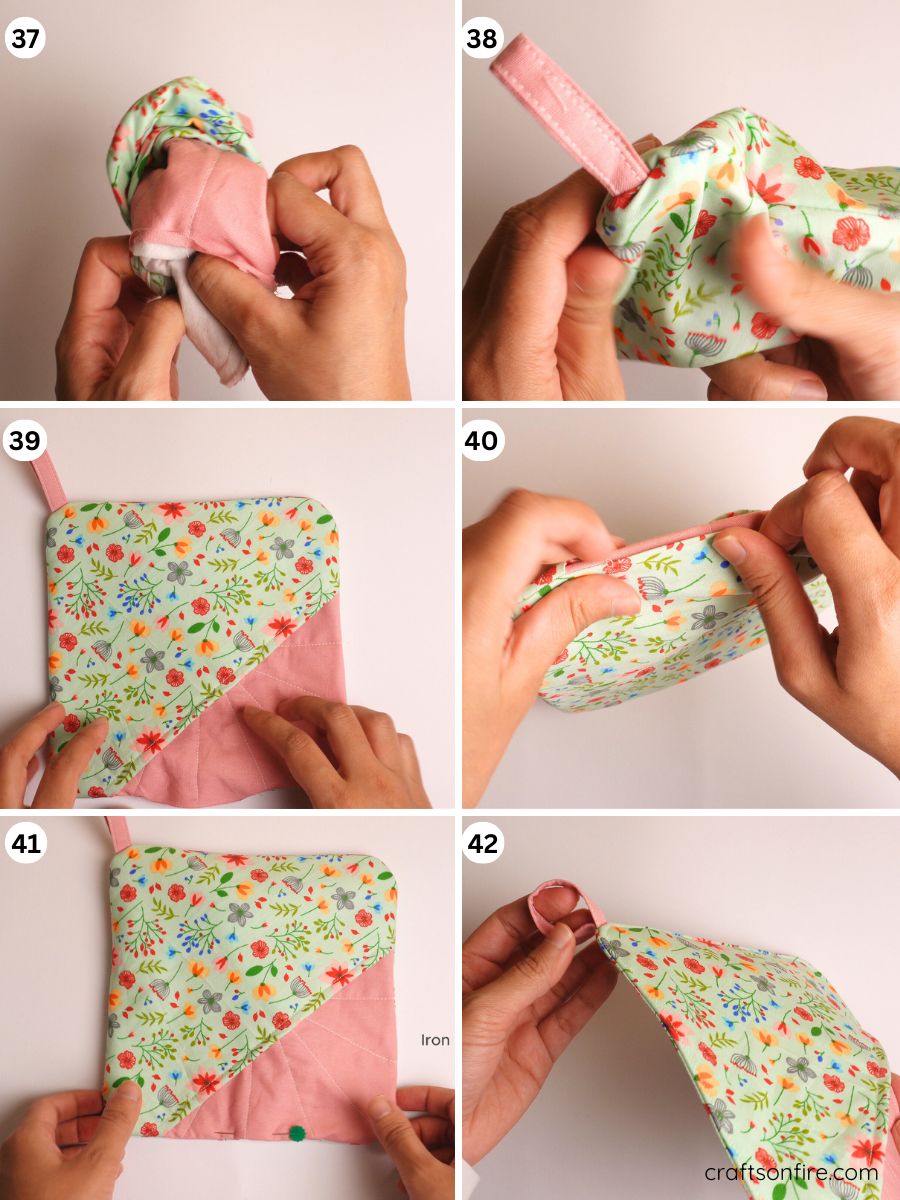
Once the right side is facing you, use a pen or your finger to shape the corners of the pot holder through the opening, ensuring that they are neatly curved for a smooth finish.
Tuck the raw edges of the opening inward and secure it with a pin or sewing clip. If you like, you can gently press the pot holder.
Finally, head to the machine and add a topstitch to the pot holder. This should also seal the opening.
Finished Item
And that’s it! Congratulations – you’ve just sewn your own pot holder with a top pocket!
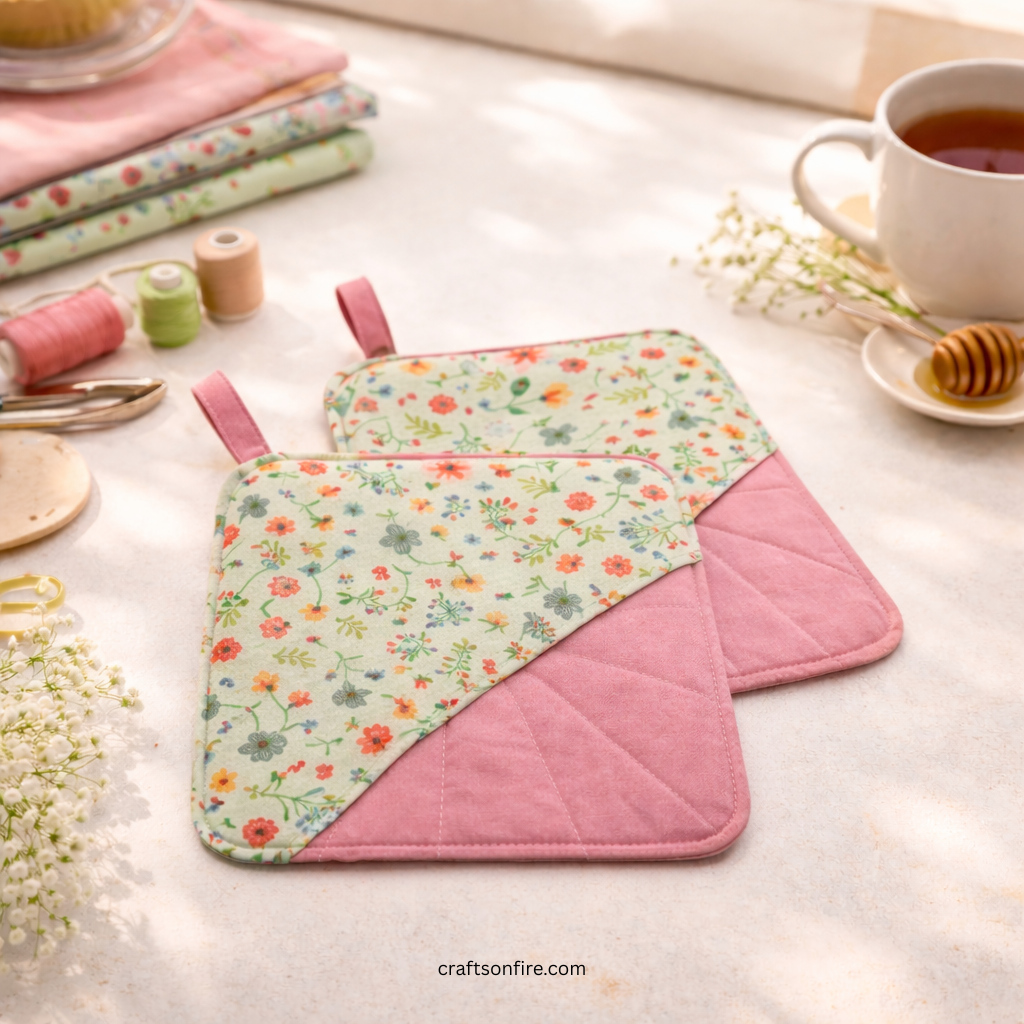
The best part is how customizable this project is. You can mix and match fabrics, add quilting lines, or even make a matching set for your kitchen decor.
Once you get the hang of it, these pot holders come together quickly and make the perfect gift for friends and family.
With that said, I do hope you found this guide useful.
If you’d like to sew other cool projects, here’s what I would recommend you try next:
Easy Patchwork Pot Holder tutorial