Patchwork Hot Pad Sewing Tutorial
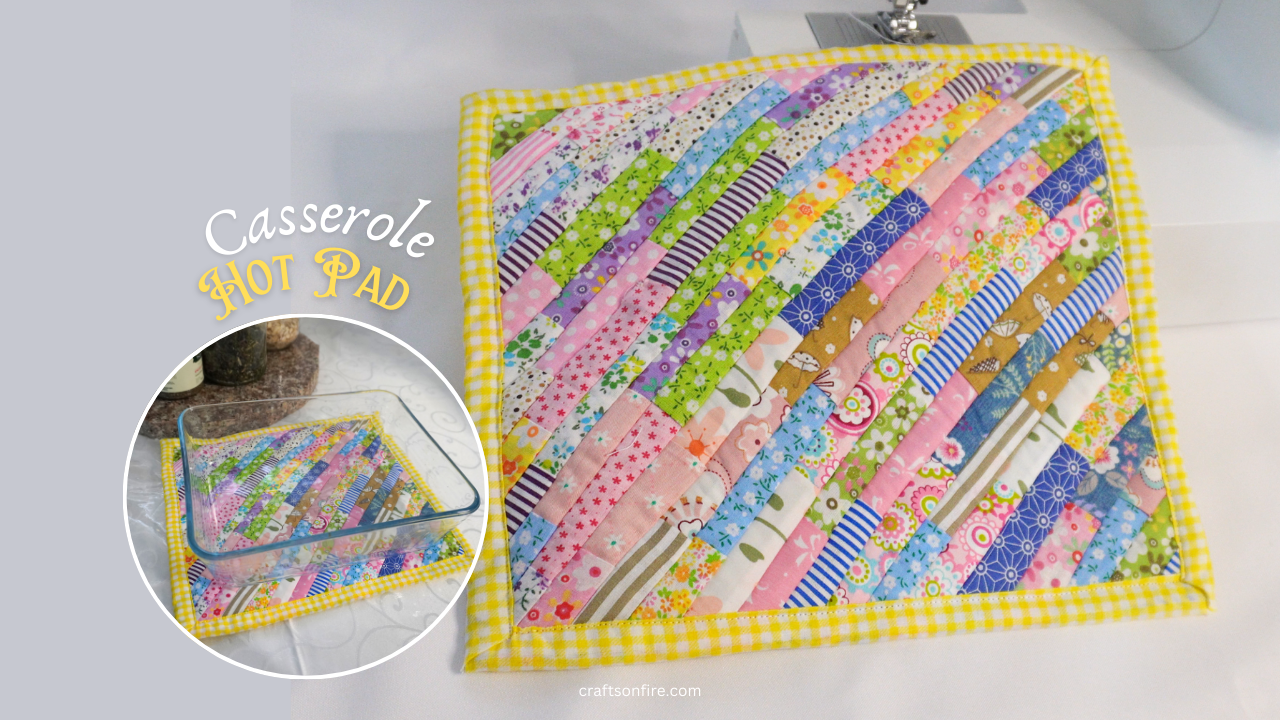
As a creative person, I’m always searching for new and exciting projects that are visually engaging and enjoyable to create. A project also has to be slightly challenging but still fun and easy.
This patchwork hot pad ticked all the boxes and I’m so excited to share my exact process of piecing this patchwork piece together!
I’ve included all the steps you need – from sewing scraps of fabric together and arranging the patchwork to adding the final details.
If you like sewing small scraps of fabric together, you’ll definitely love this idea.
This hot pad will make a wonderful new addition to your kitchen. It’s brimming with personality and charm!
Customizing and sewing this hot pad is simple and easy. It’s also a great way to use leftover scrap pieces of fabric.
So, grab your supplies, and let’s start sewing.
Table of Contents
Hot Pad Tutorial
Supplies
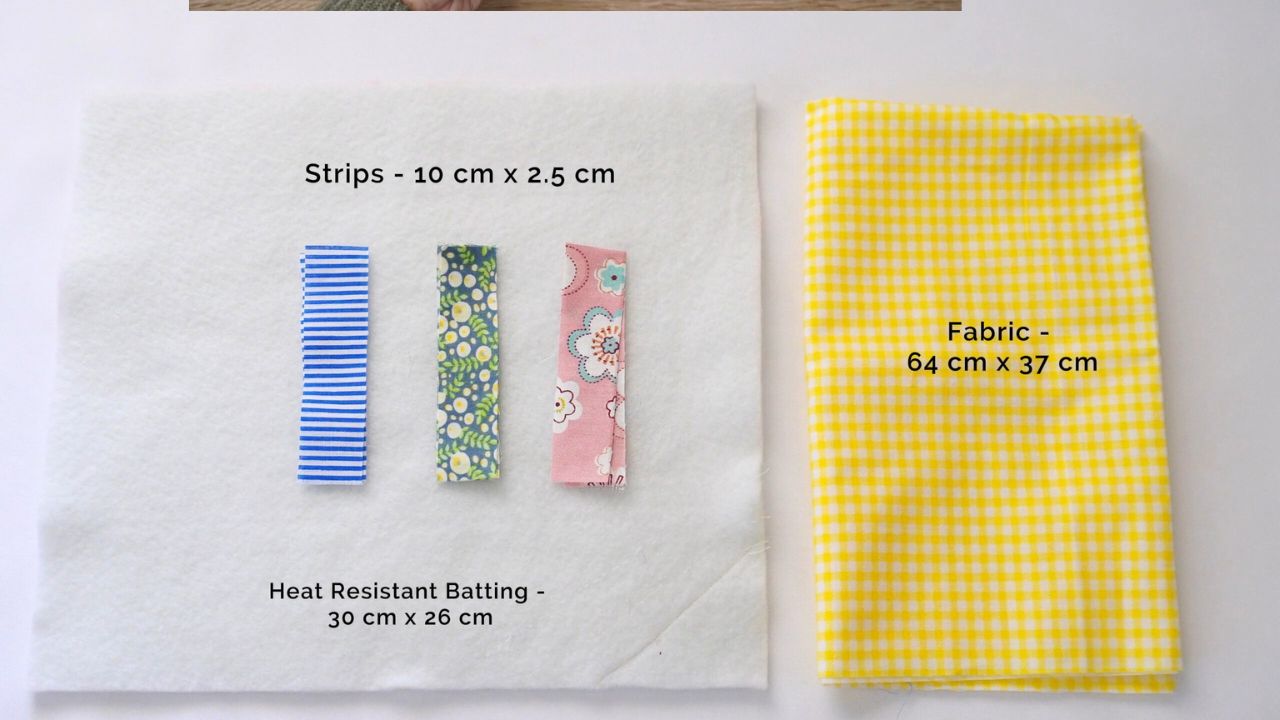
- Scrap Fabric cut into 10 cm x 2.5 cm strips
- Heat Resistant Batting – 30 cm x 26 cm
- Fabric – 64 cm x 37 cm
- Sewing Machine
- Pins
- Scissors
- Fabric Pencil/Tailors Chalk
- Ruler/Tape Measure
Video Tutorial
Instructions
Create The Patchwork Pattern
The first step is to create the overall pattern. You’ll want to cut your fabric into 10 cm x 2.5 cm strips.
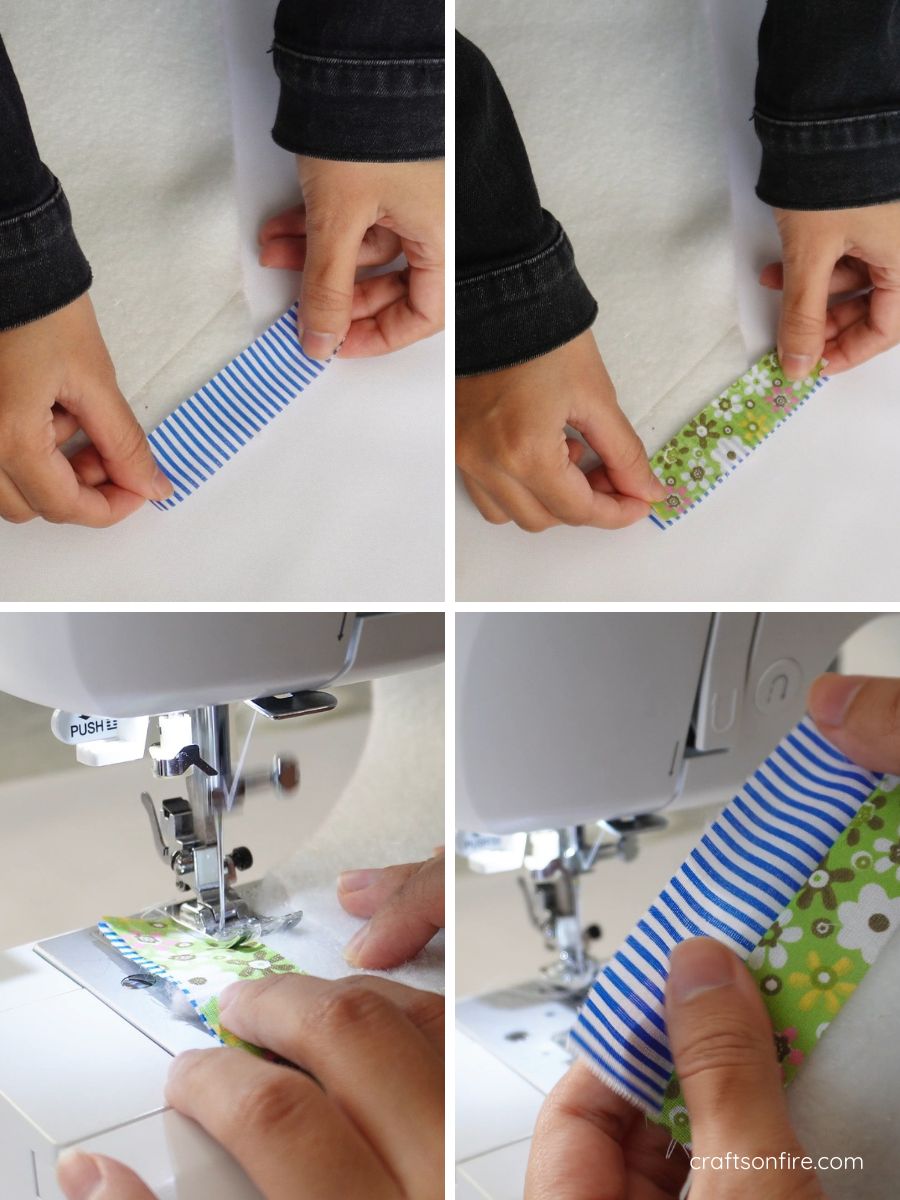
Grab your heat-resistant batting (30 cm x 26 cm) and place the first strip down on one corner of the batting.
Grab your second strip and place it on the first strip with the right sides facing in.
Then, head to the sewing machine and sew the two strips together. Remove from the machine and open the piece out to see the joined pieces.
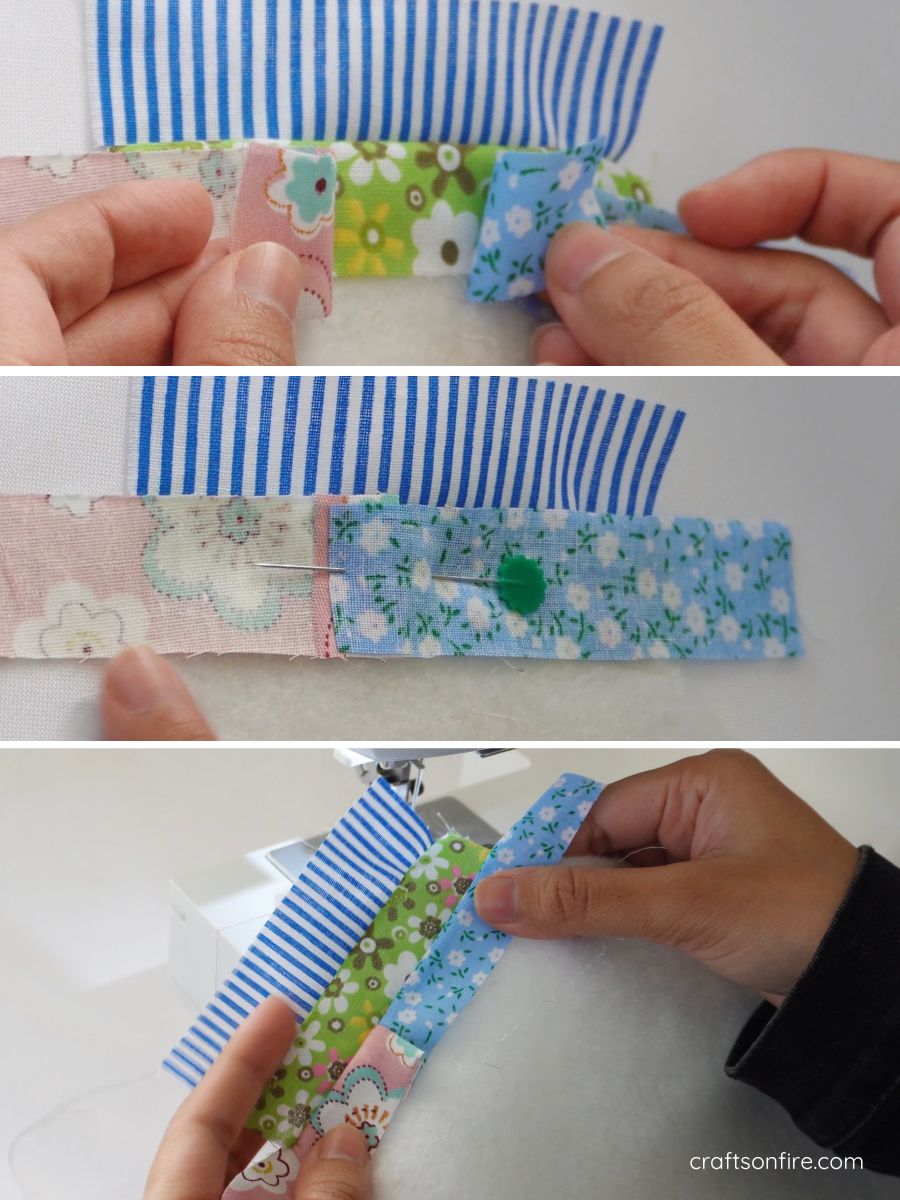
Grab 2 new strips of fabric and place them on the first piece with the right sides facing in.
Grab the end of the two pieces and fold them together. Pin in place and sew all these pieces together.
Continue following this pattern until the entire batting is covered. Turn the piece over and remove the excess fabric by cutting off the ends.
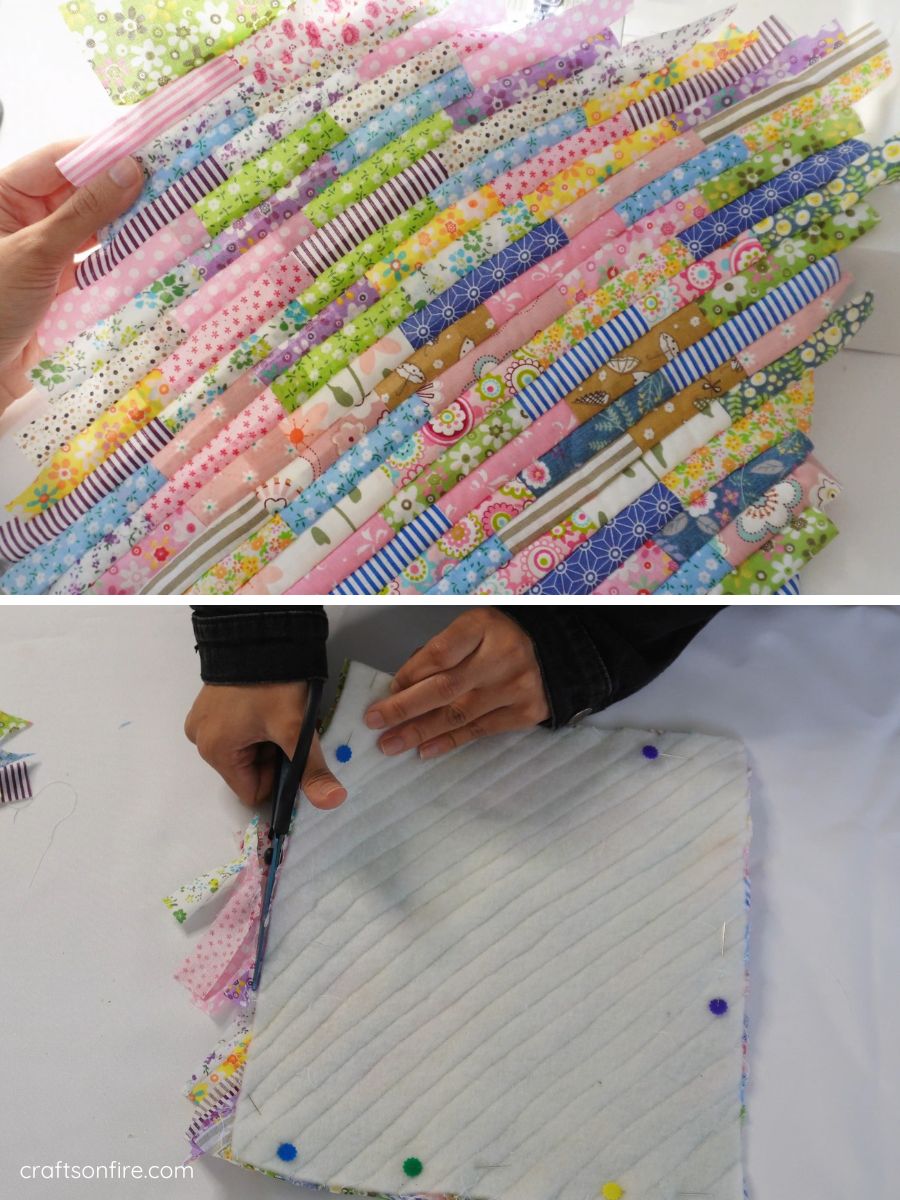
Join Patchwork Piece With Second Fabric Piece
Once your patchwork piece is neat, place it over the second piece of fabric with the wrong sides facing in.
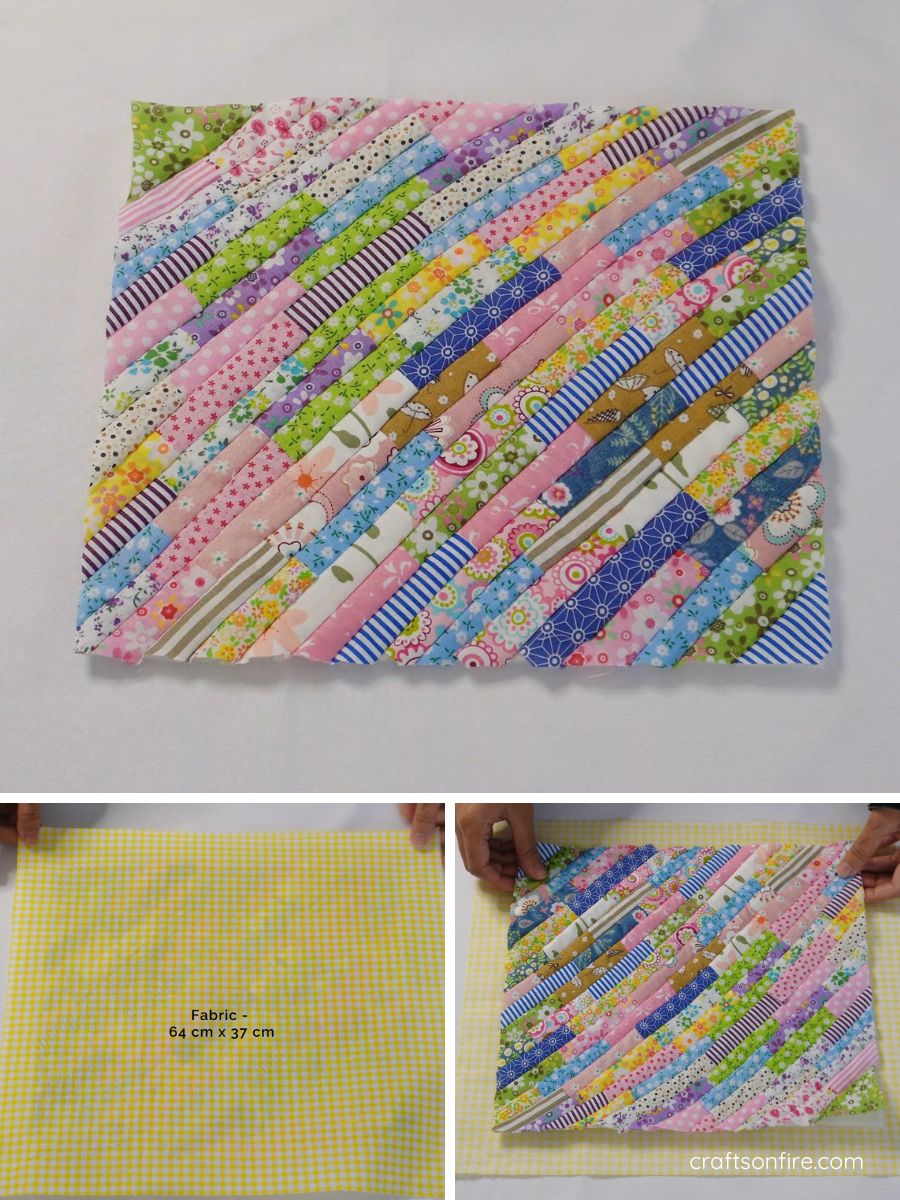
Lightly press the patchwork piece with an iron to smooth out any creases. Now measure and mark 3 cm on one side and 2 cm at the top of the yellow fabric.
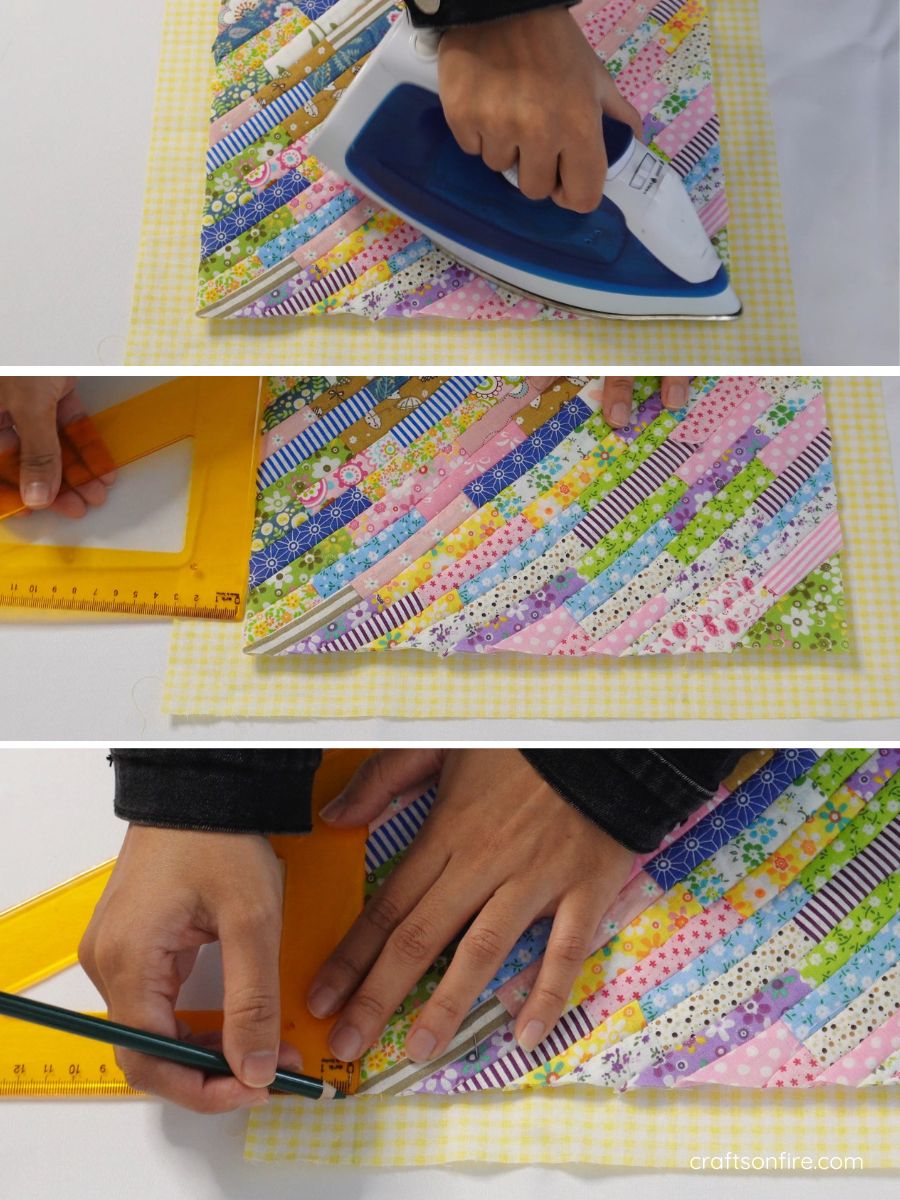
Create Border For Patchwork Piece
Mark out all 4 ends using this measurement. Then, use a pair of scissors to cut out these marked corners.
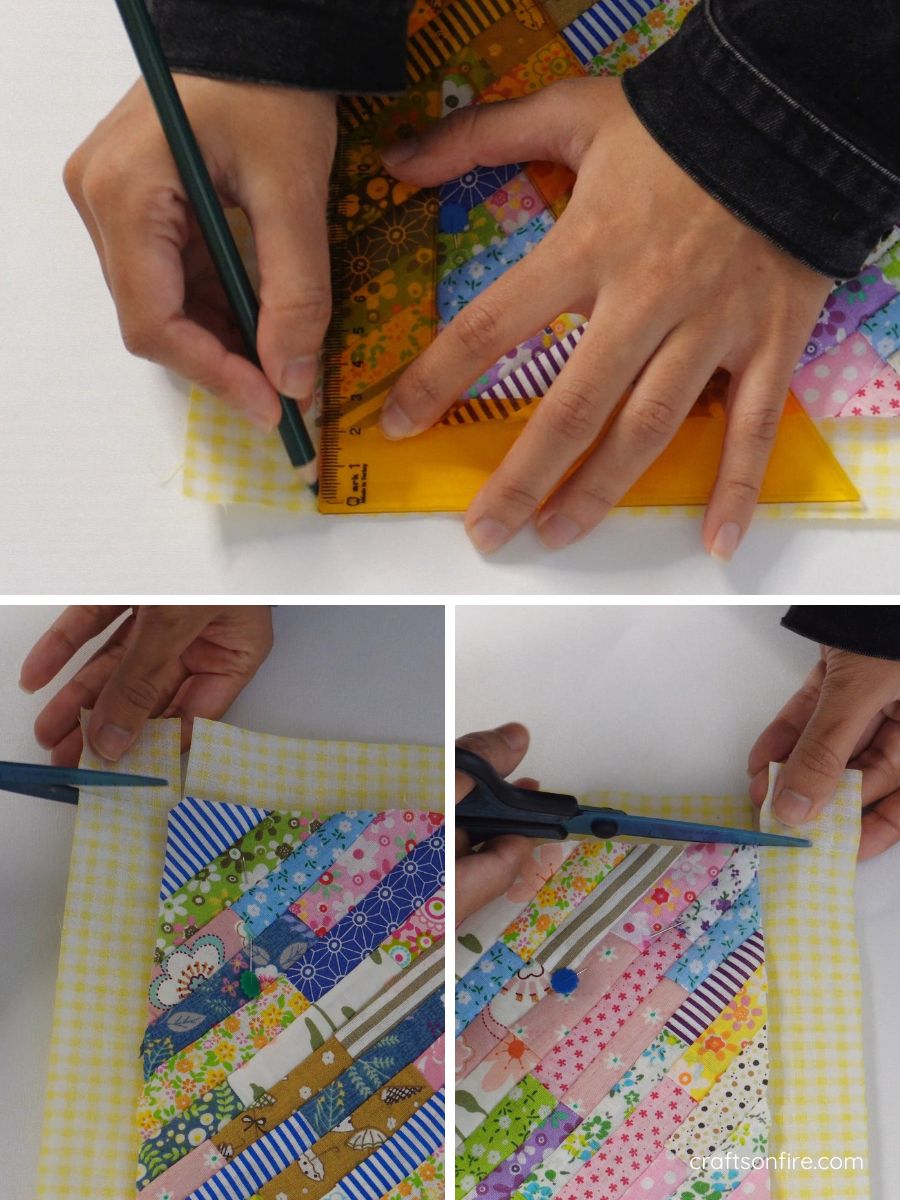
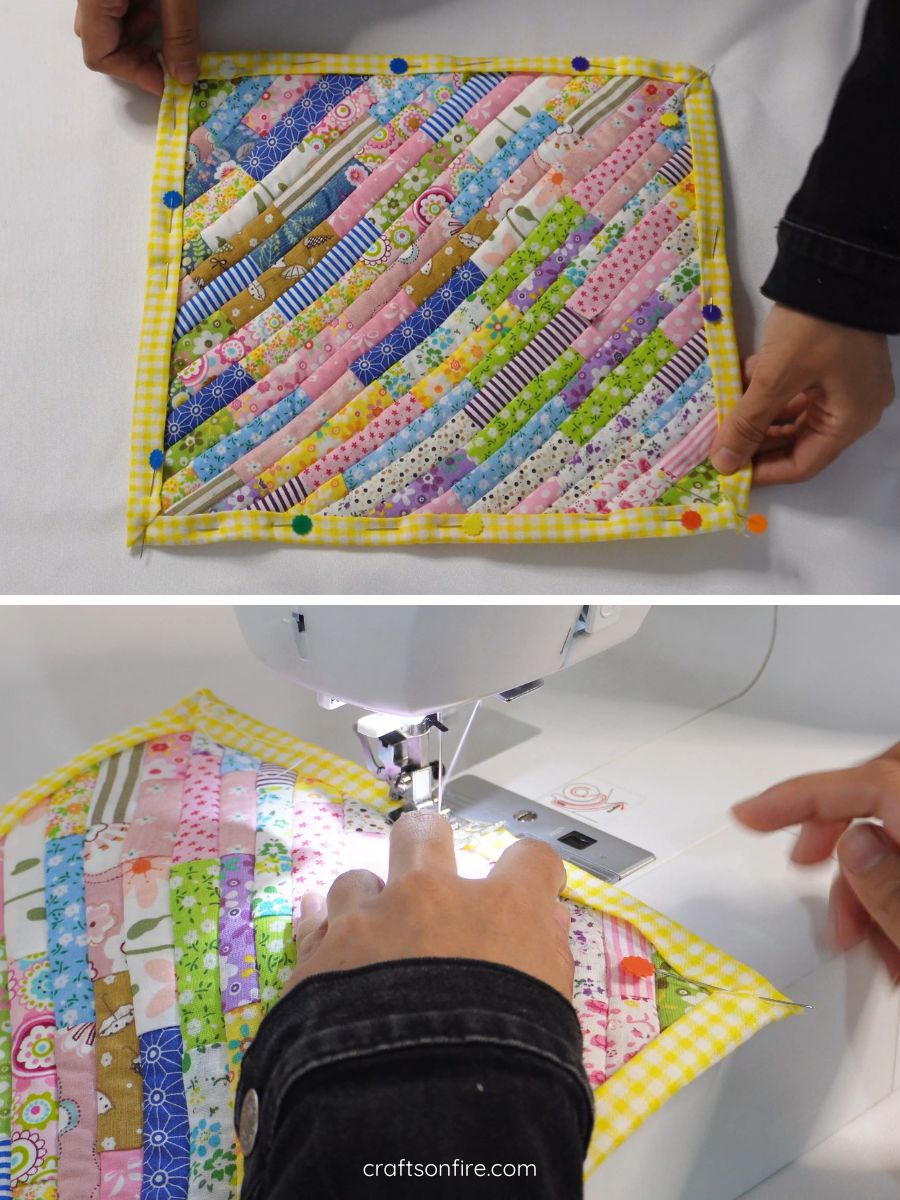
Grab the one end of the fabric and fold in half. Then fold once more over the patchwork piece and pin.
Head over to the other side and fold the corners of that flap. Then fold the entire flap in half again, and once more over the patchwork piece to create this border.
Repeat this step for the remaining sides.
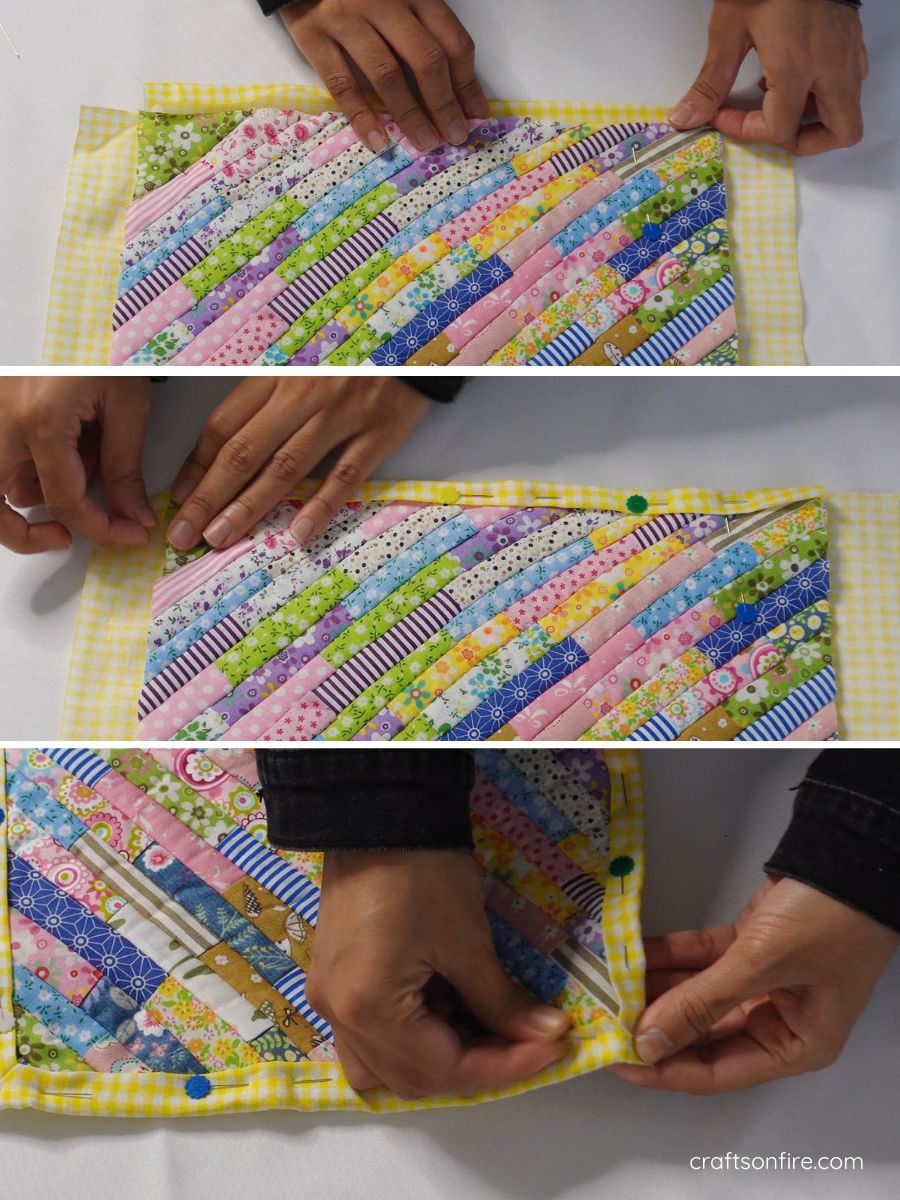
Once all sides are done, head to the machine and sew the entire border piece.
Final Result
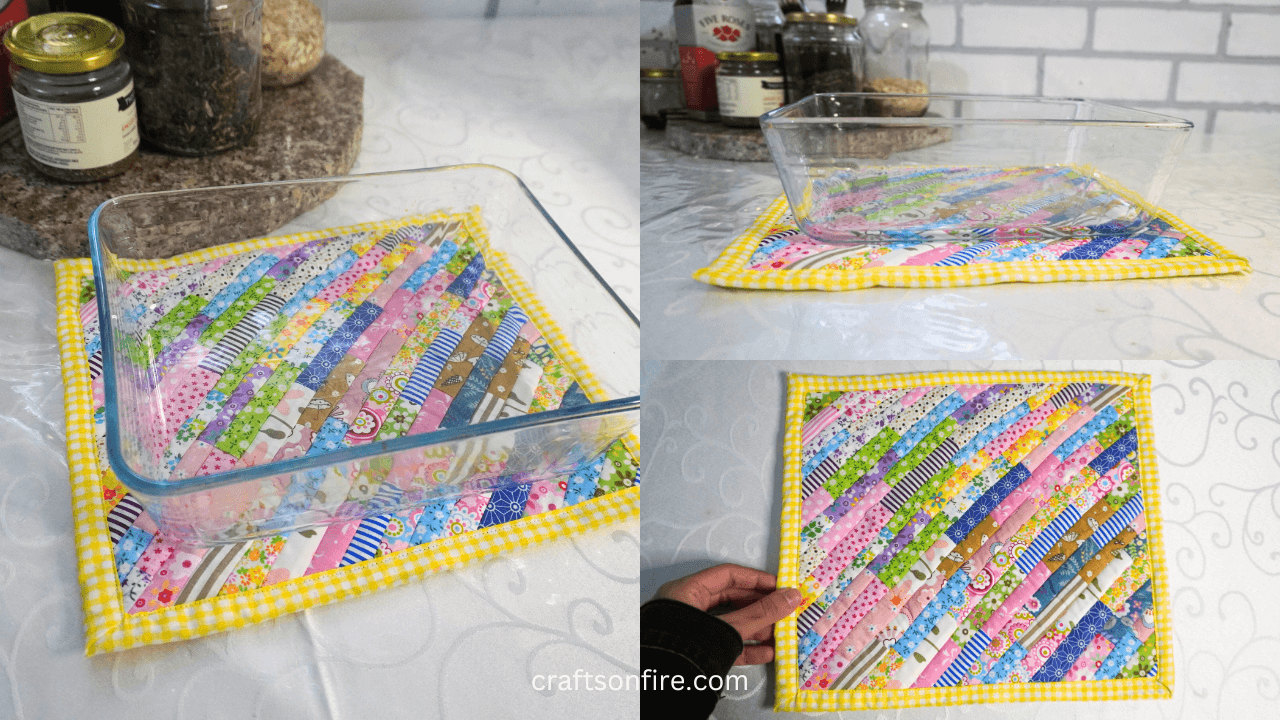
And here’s how the final piece looks once completed:
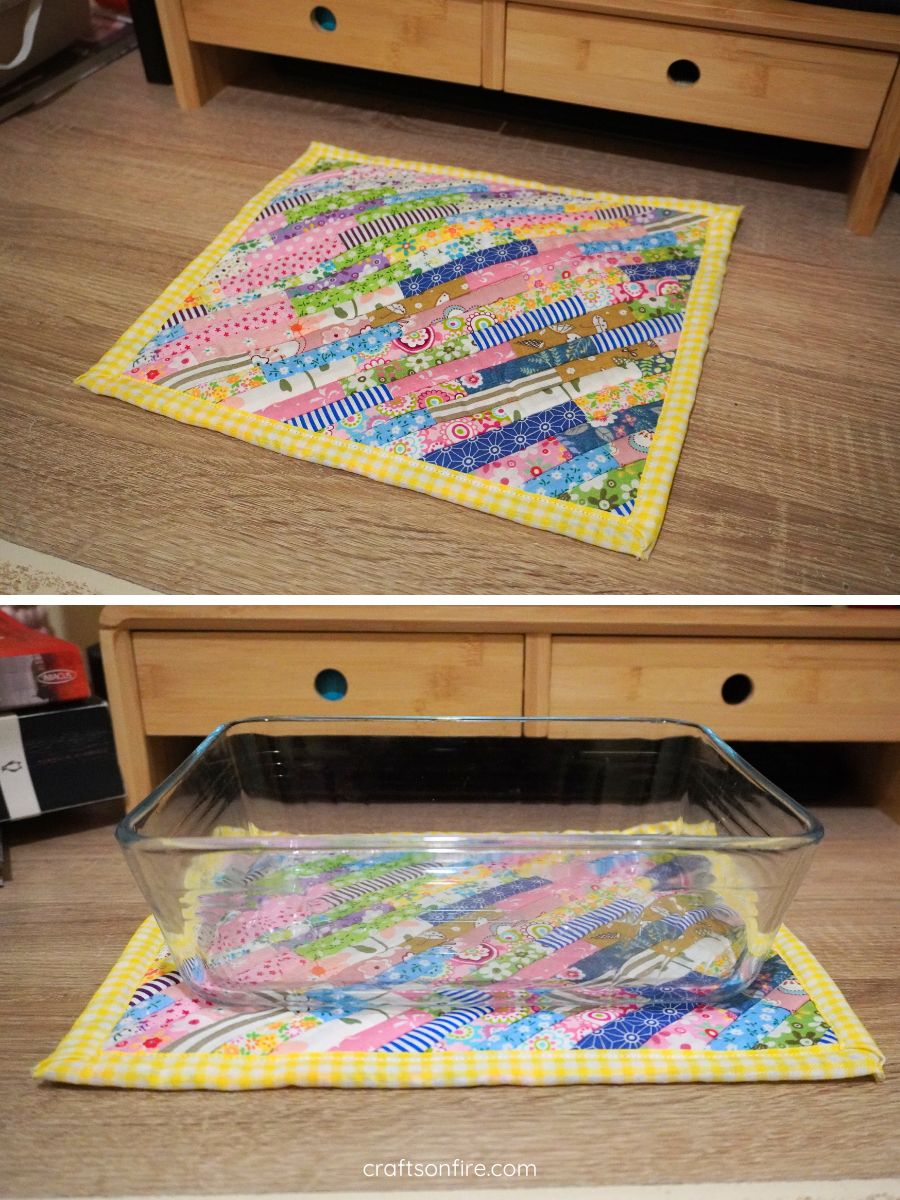
This patchwork hot pad is great for small and medium-sized casseroles.
I love how this came together! The different colors and patterns paired with the bright yellow border resulted in a fun, unique, and colorful hot pad.
While patchwork projects can be time-consuming, they are quite rewarding. I was completely hooked in the process of putting this hot pad together.
I definitely look forward to sharing more patchwork sewing projects in the future.
However, if you’re looking for a more simple and quick pot holder/hot pad to sew, here’s another tutorial you can follow instead:

Thanks for taking the time to follow my patchwork hot pad sewing tutorial. See you in the next one!
