How To Sew A Patchwork Basket (Detailed Tutorial)
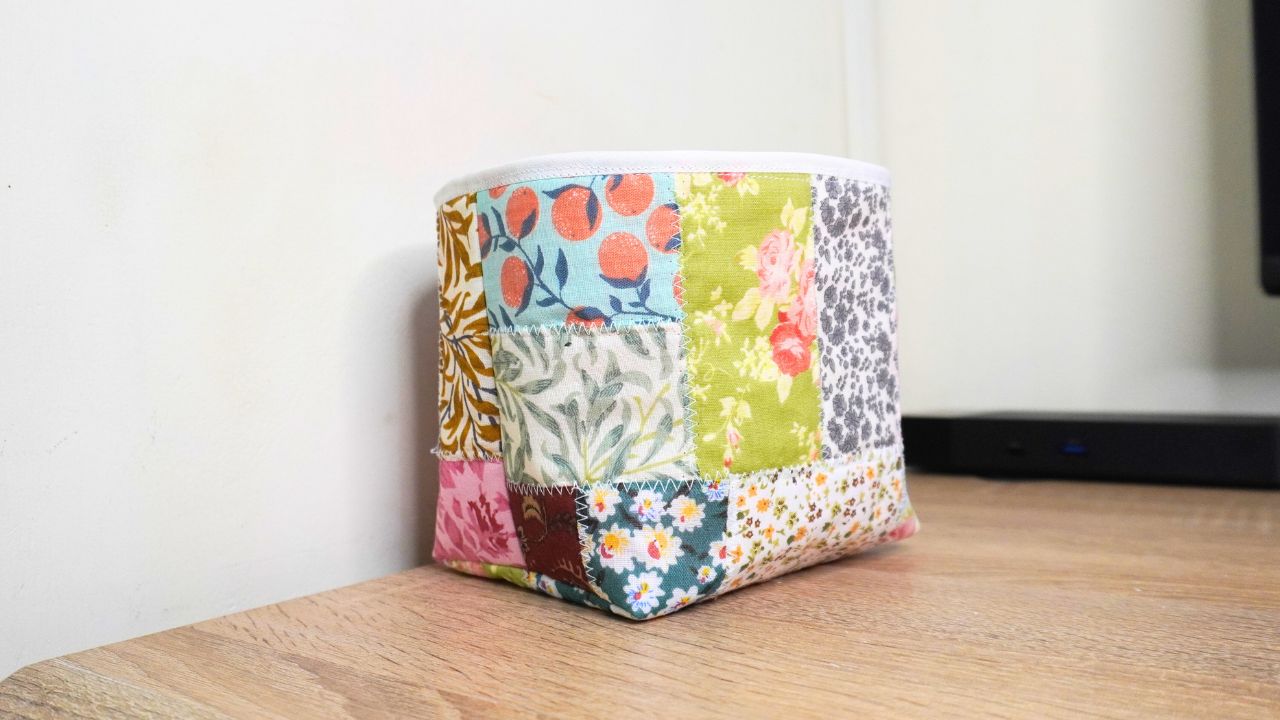
I recently had some leftover scrap fabric from a recent project and I thought what better way to use it than to make a patchwork basket from scratch? And would you believe it, this basket turned out so good!
It’s a simple and easy sewing project that anyone can make, even if you’re a complete beginner. It’s also a fun, creative, and cute sewing idea.
All you need to do is cut the scrap fabric into strips, attach it to the fabric batting using a zig-zag stitch, and then create the basket with this easy and simple pattern you’ll find in this guide.
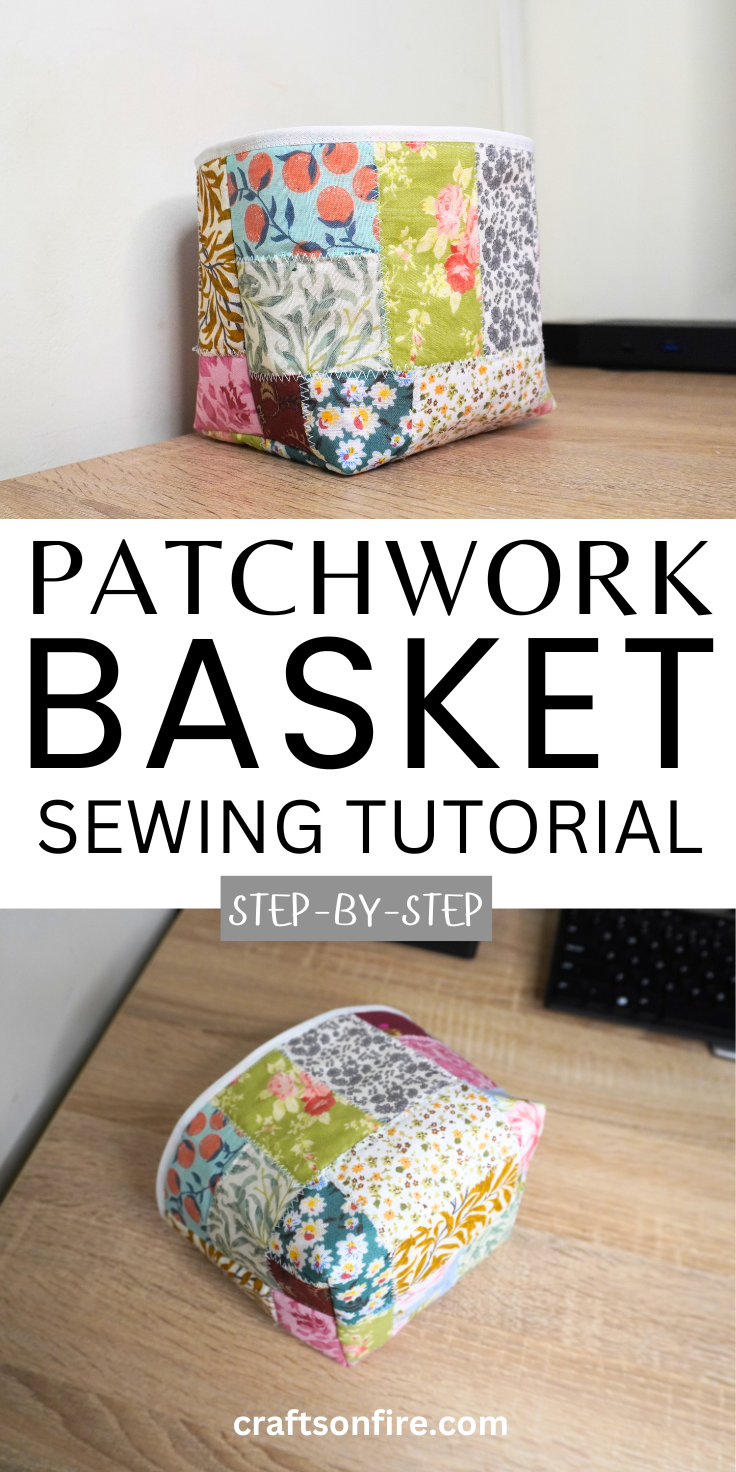
This patchwork basket is quite versatile. You can place it anywhere in your home and store several items – hand towels, sewing supplies, toys, or random items.
Anything goes!
With that said, check out the list of supplies you’ll need to get started.
Okay, let’s begin.
Table of Contents
Patchwork Basket Tutorial
Supplies
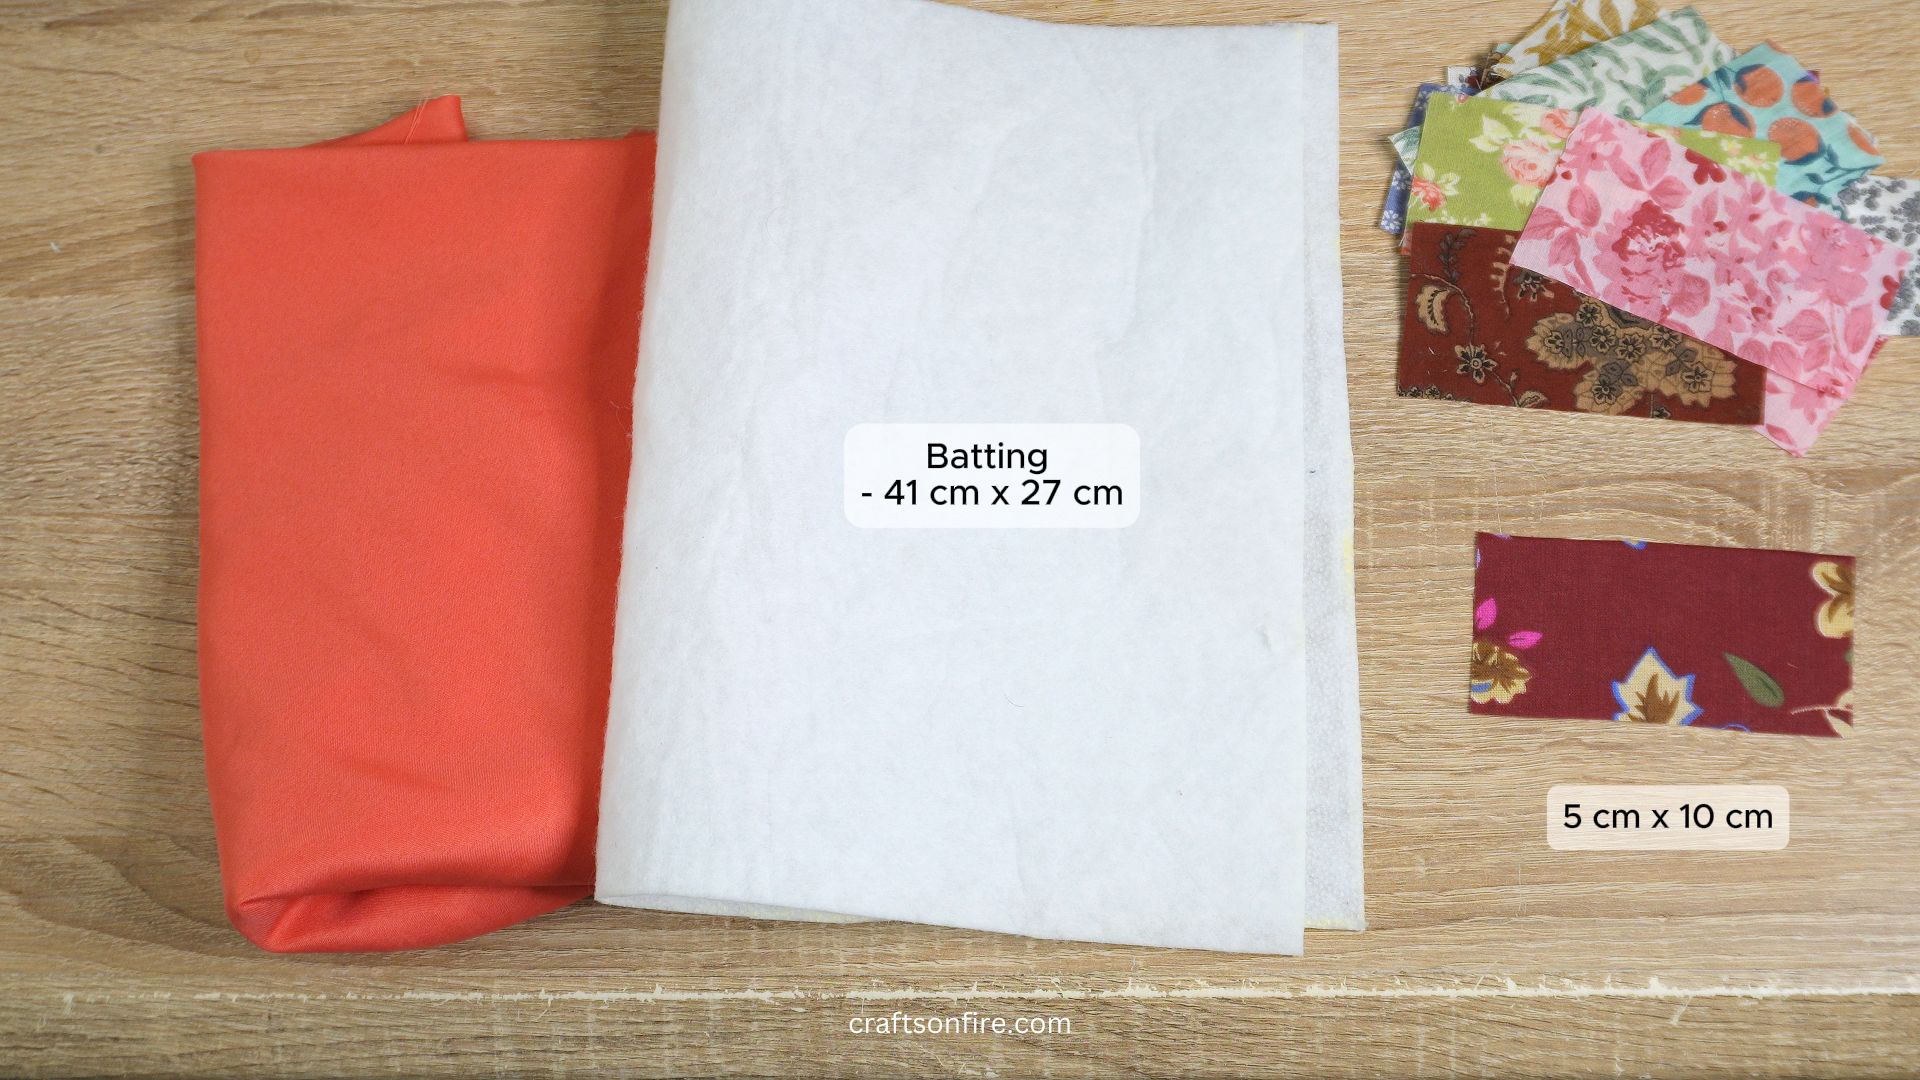
- Fabric Batting – 41 cm x 27 cm (16.14 inches x 10.62 inches)
- Fabric (Lining)
- 26 Strips (5 cm x 10 cm)
- White Bias Tape
- Sewing Machine
- Pins
- Scissors
- Ruler/Tape Measure
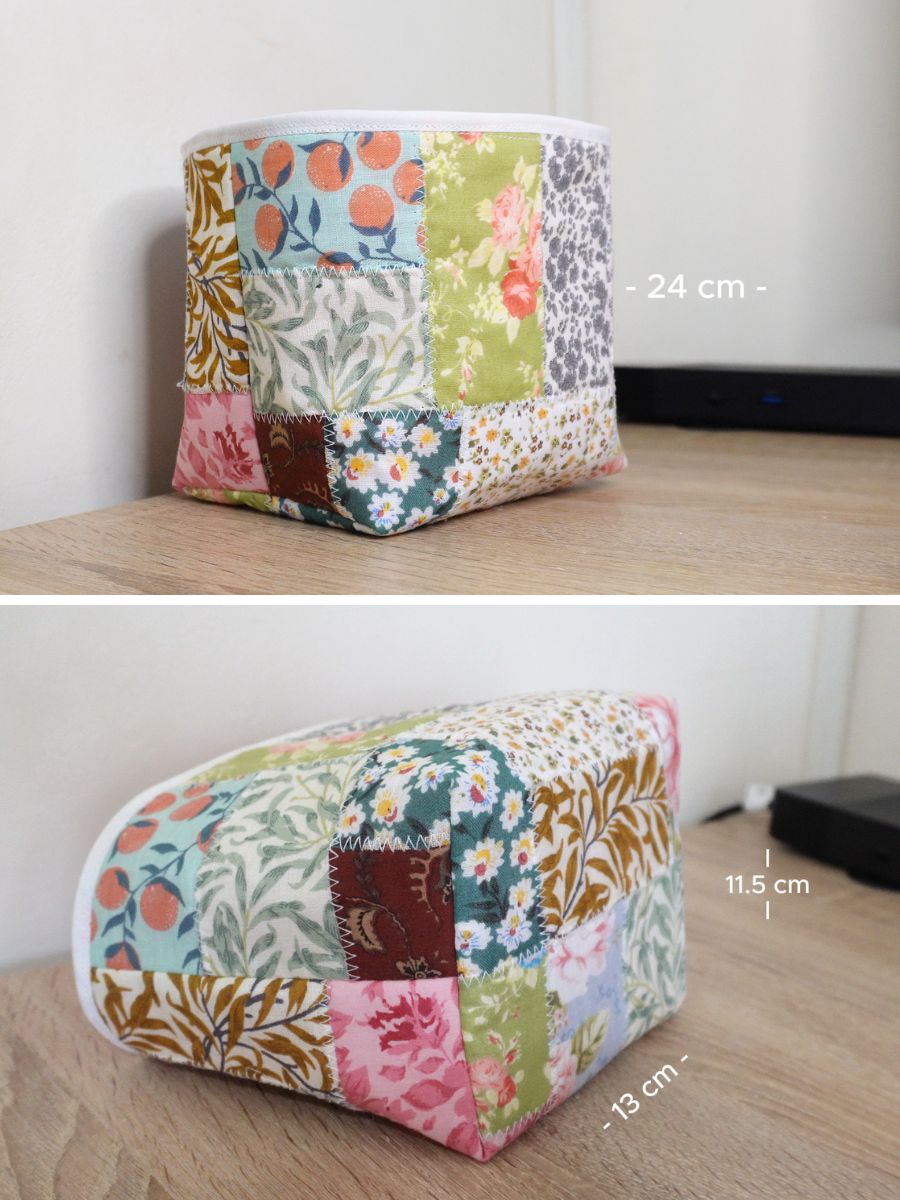
Measurements
Final measurements of basket – 24 cm x 11.5 cm x 13 cm (9.44 inches x 4.52 inches x 5.11 inches)
Instructions
Step 1
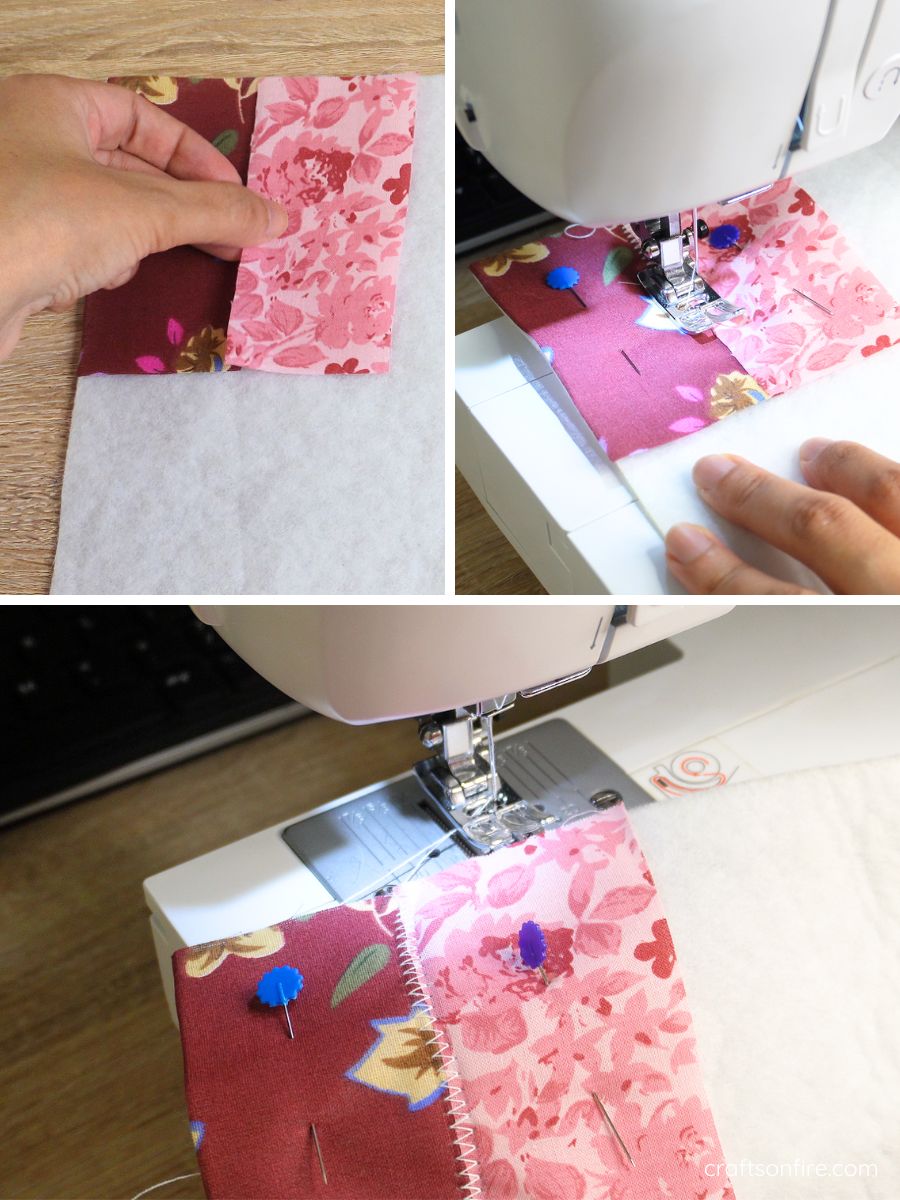
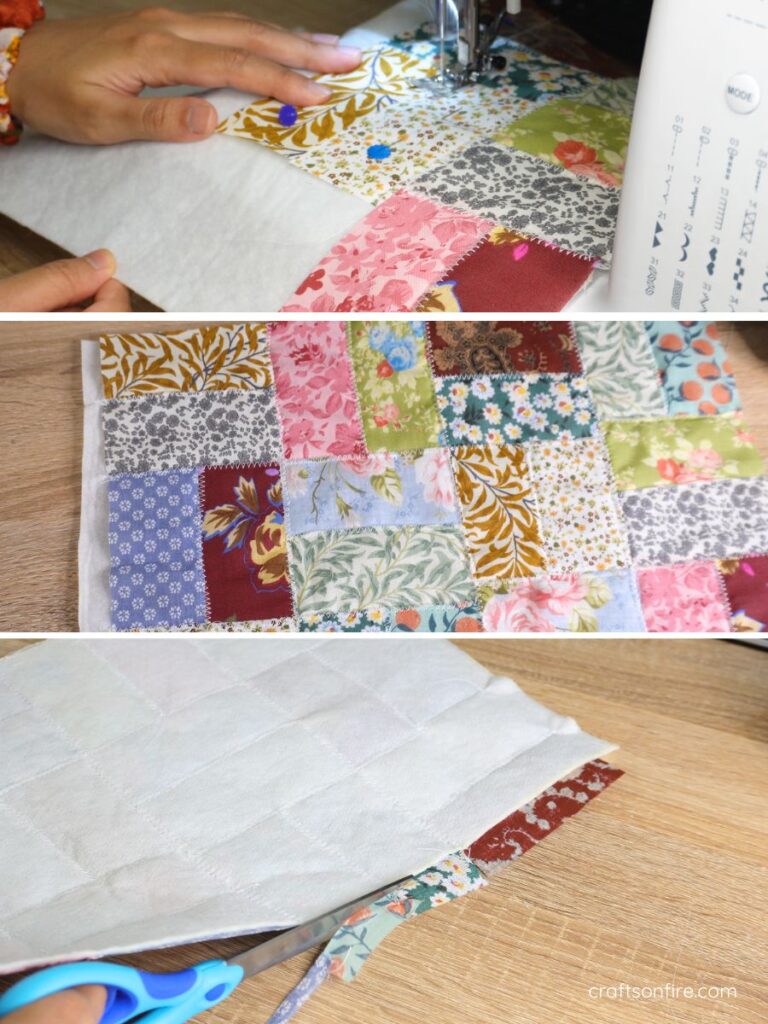
Start by placing two strips together vertically, lining them up side by side with a slight overlap, and pin them to the batting to secure them in place.
Next, head over to the sewing machine and use a zig-zag stitch to sew the two pieces together.
Step 2
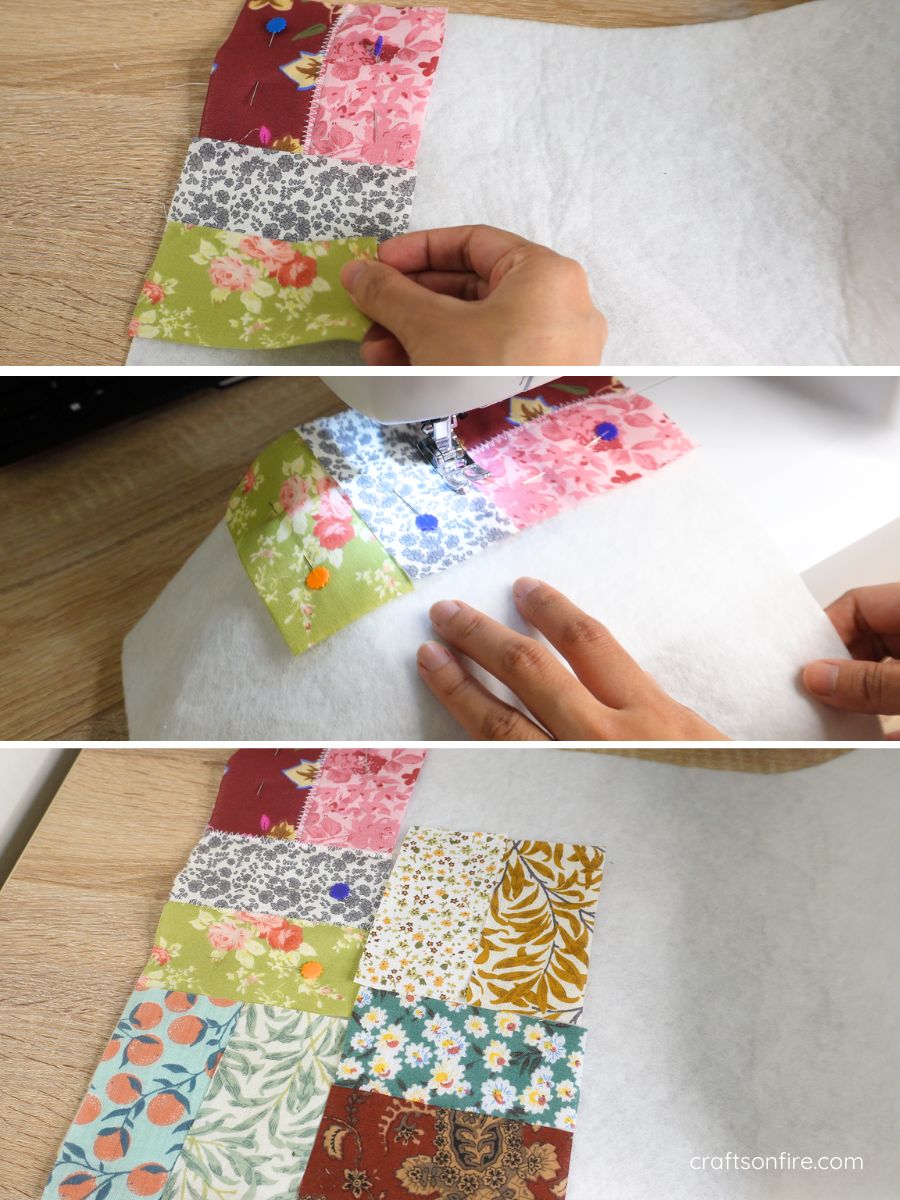
Grab another fabric strip and place it horizontally below the first two pieces. Add a second piece below that and pin it in place.
Head over to the sewing machine to stitch these pieces together and the one above that.
Continue following this pattern until the entire fabric batting is covered with the patchwork strips.
Step 3
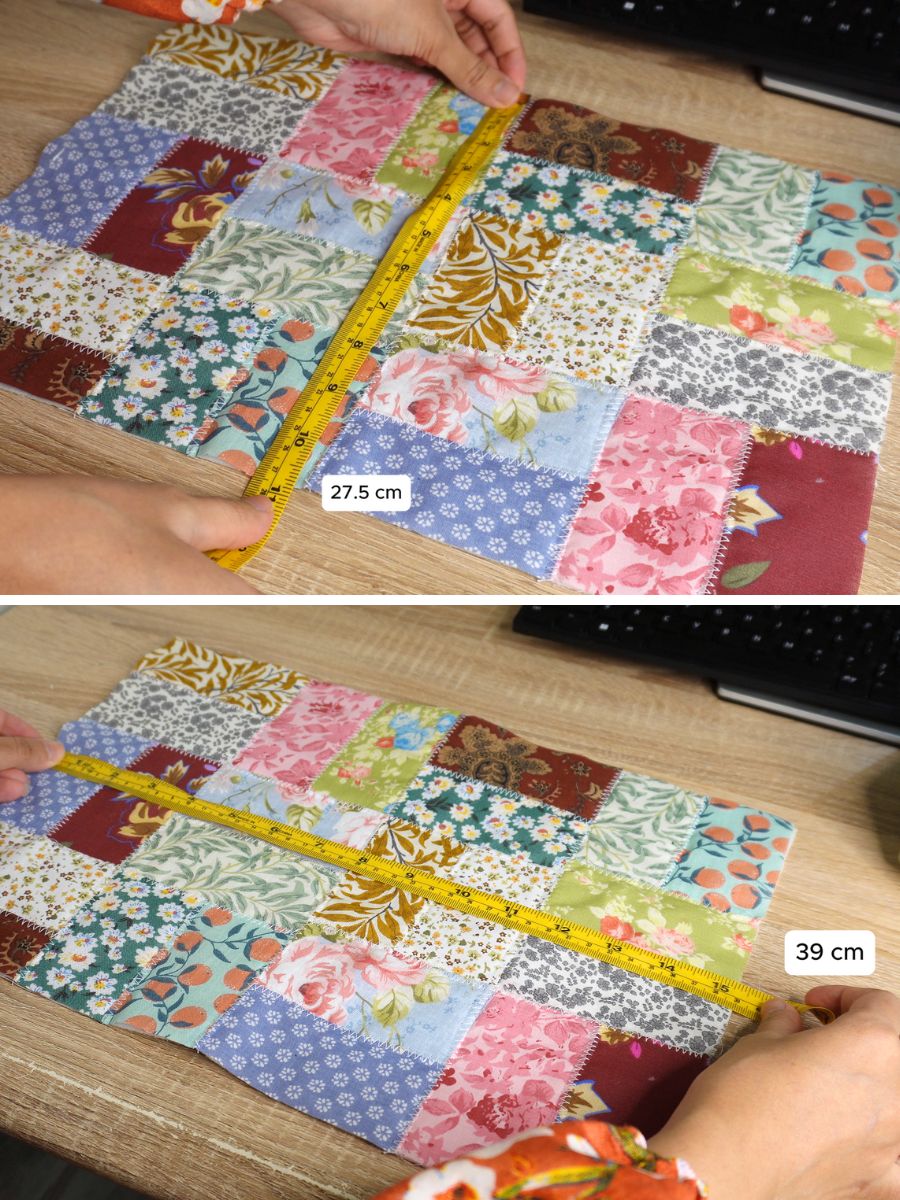
Once all your fabric pieces are stitched together, cut out the excess fabric from the sides.
The final piece should measure 27.5 cm x 39 cm (10.82 inches x 15.35 inches).
Step 4
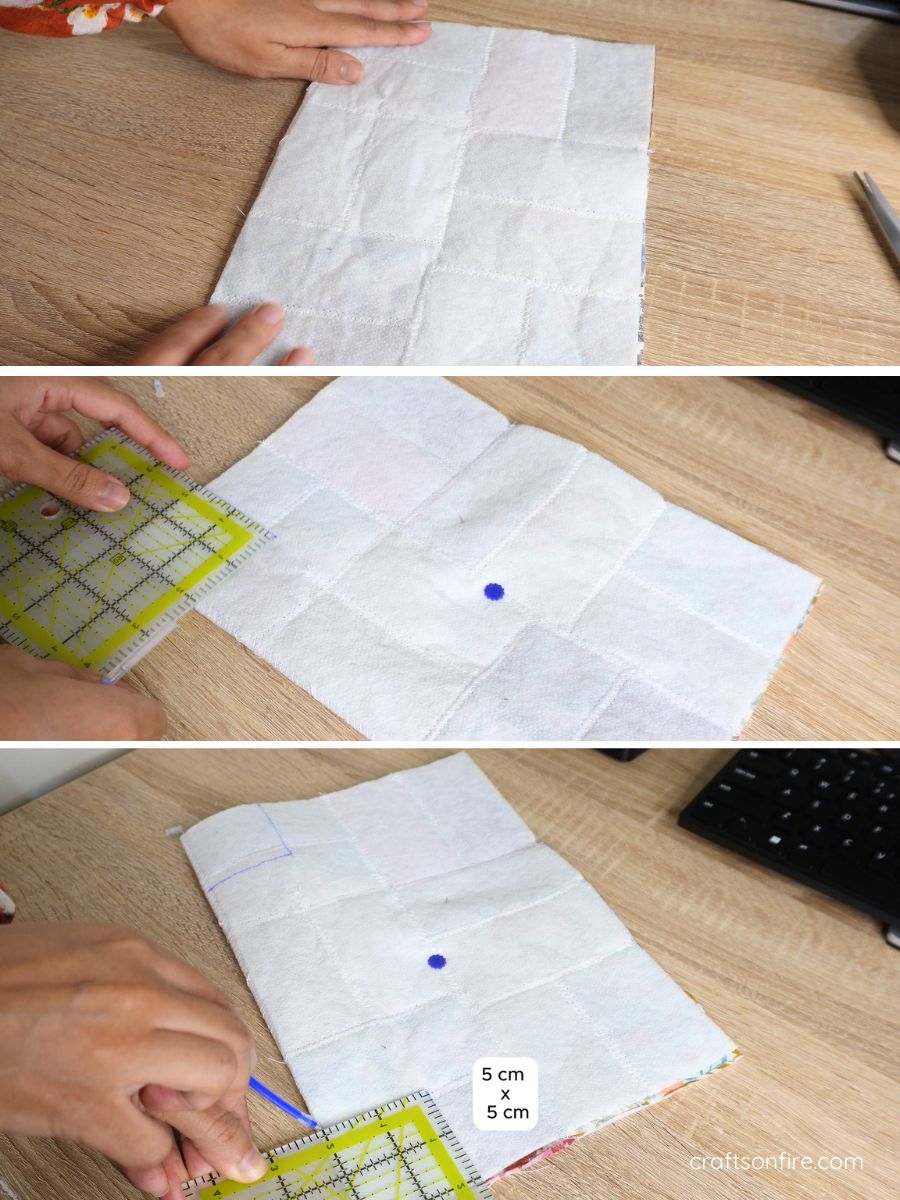
Fold the fabric in half and measure 5 cm x 5 cm on both ends. Mark these points with a fabric pencil, marker, or tailor’s chalk.
Step 5
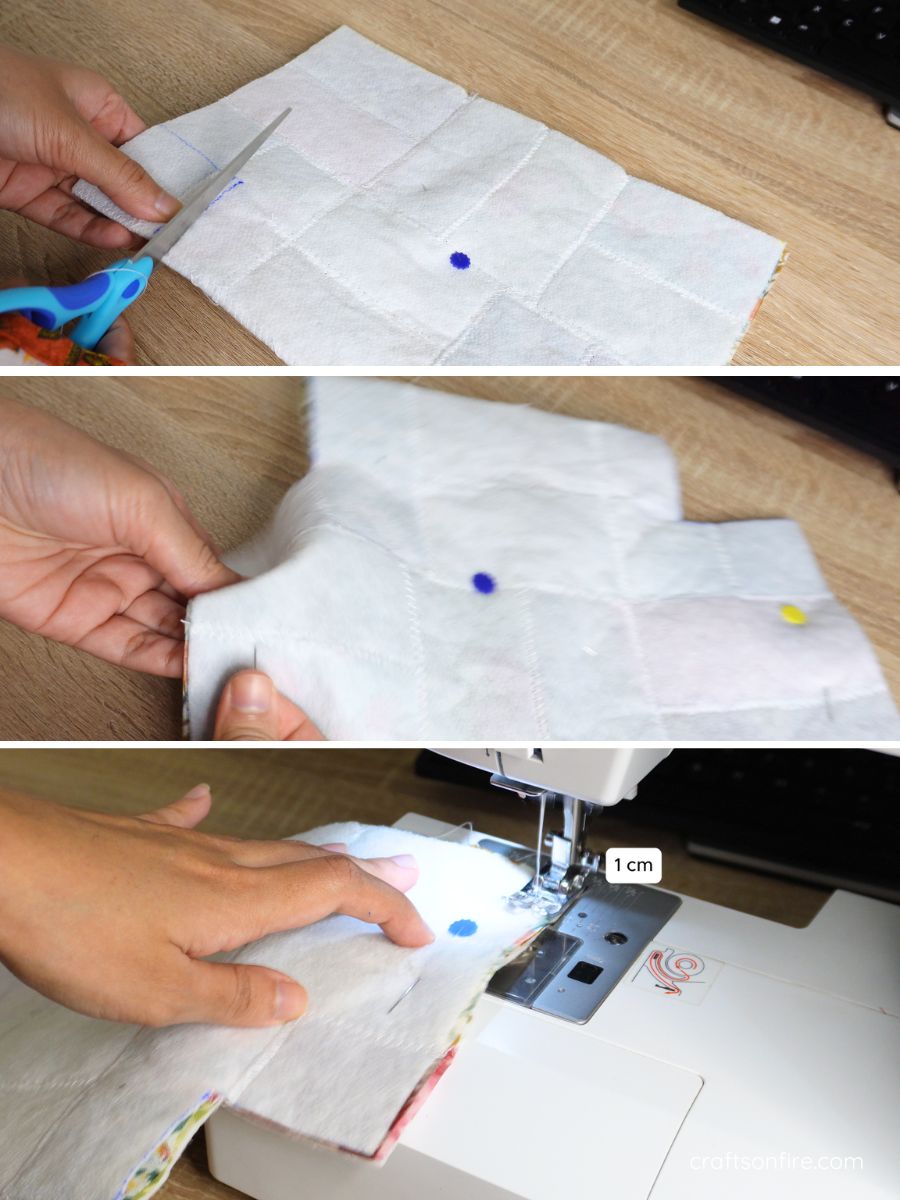
Cut the marked pieces and pin the sides. Then, head over to the machine to stitch both sides.
Step 6
Now it’s time to box the corners. Carefully open one corner and fold the piece together. Pin the fabric in place.
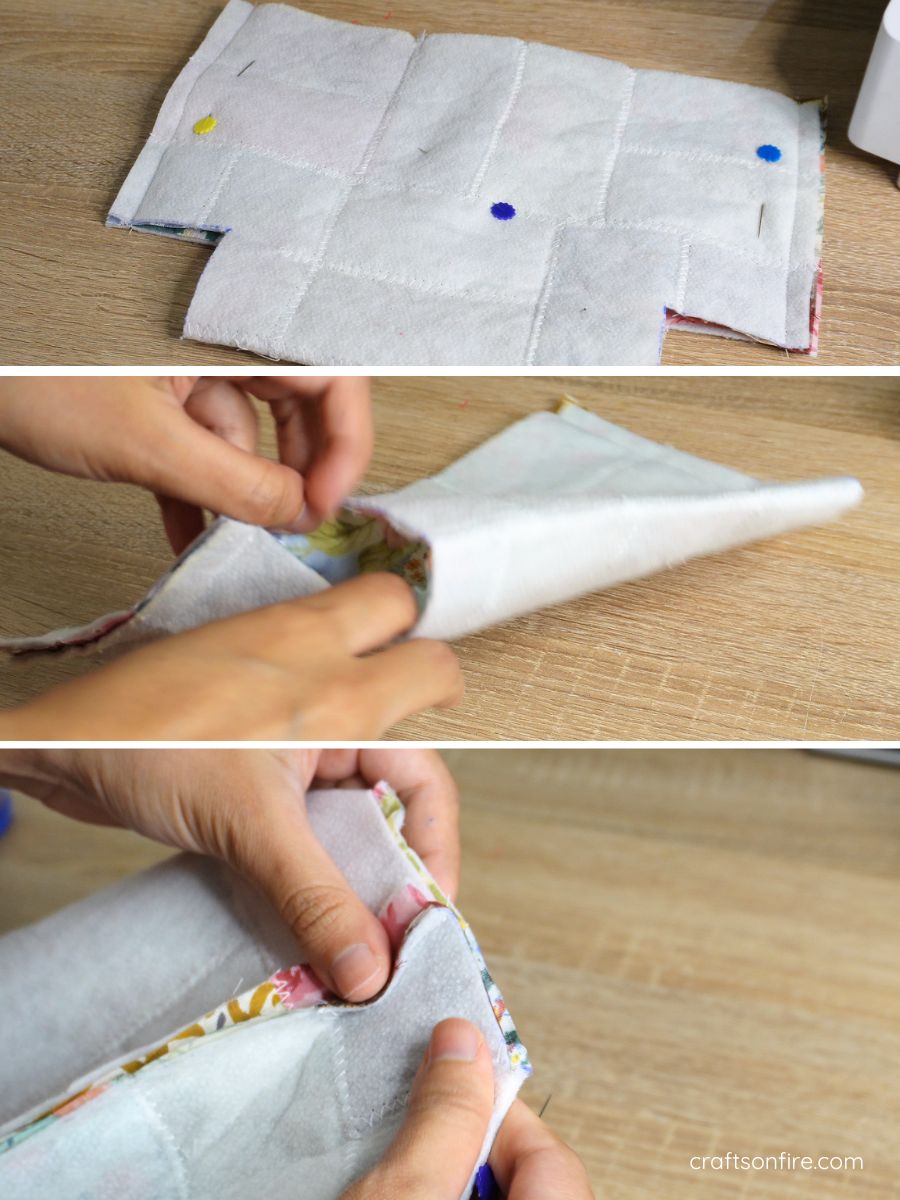
Repeat this process for the other side.
Then, stitch both sides leaving a 1 cm seam as shown above. You should now have a basket shape.
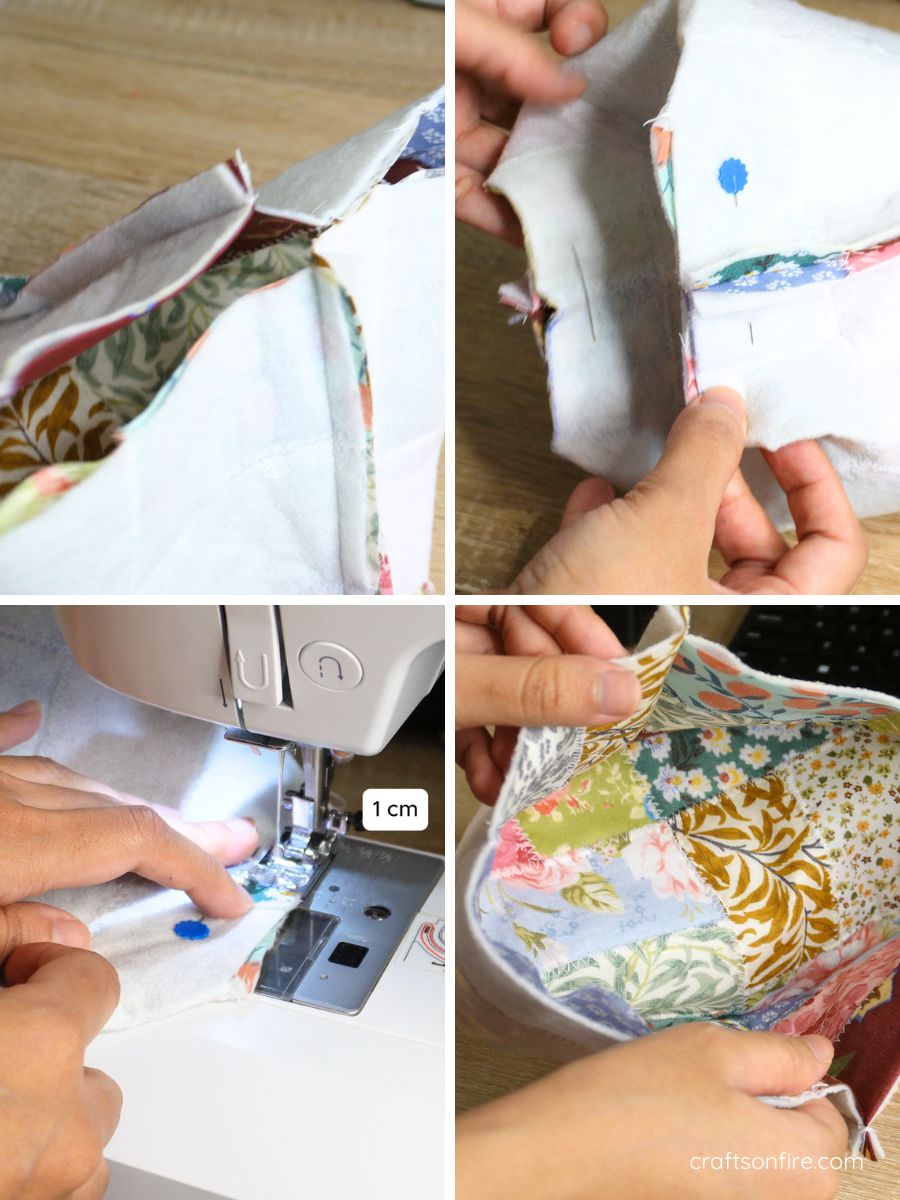
Step 7
Cut the lining fabric to match the patchwork piece, measuring 27.5 cm by 39 cm. Fold the fabric in half, then mark 5 cm by 5 cm squares on both sides.
Cut out the marked corners and pin both sides of the lining. Stitch along both sides using a straight stitch.
Once completed, proceed to box the corners of the lining and stitch them with a 1 cm seam allowance.
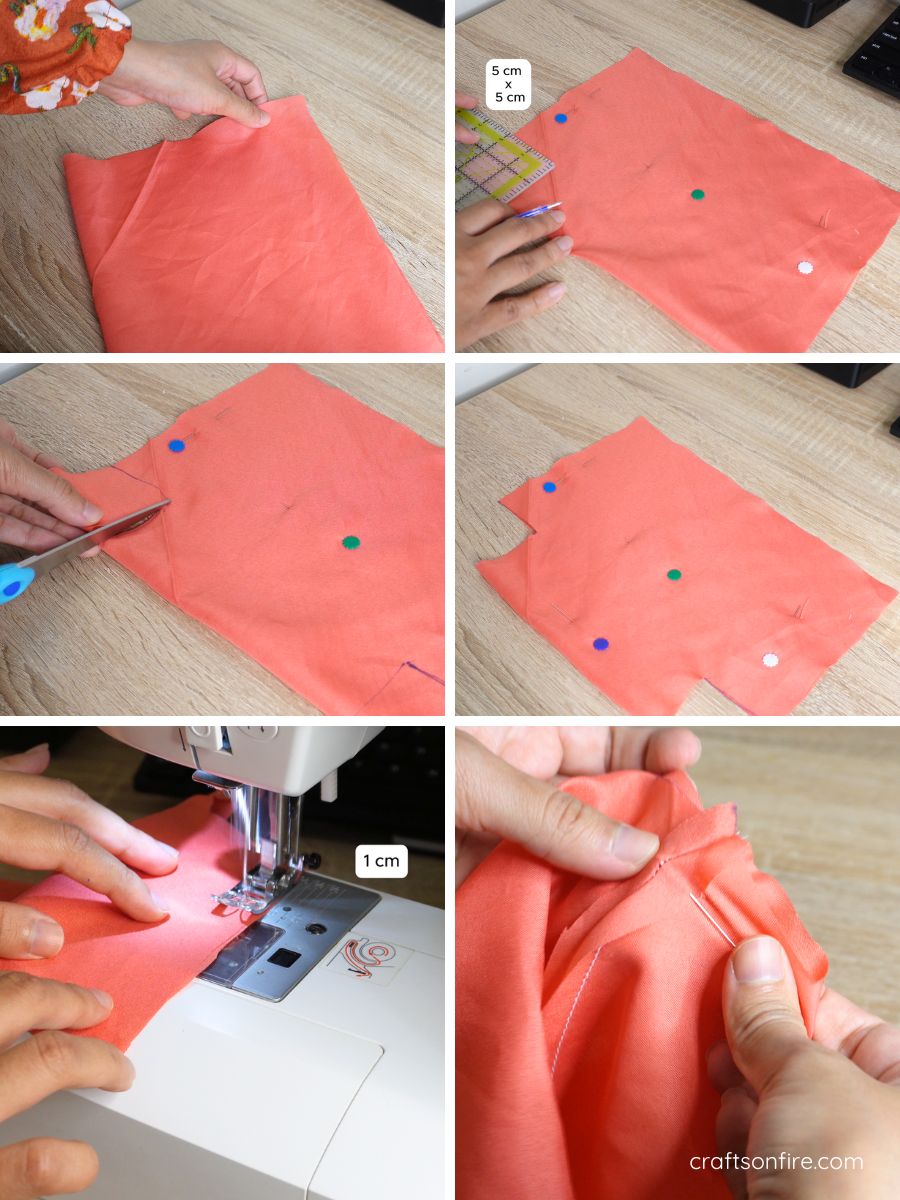
Trim the stitched corners and turn the fabric right side out.
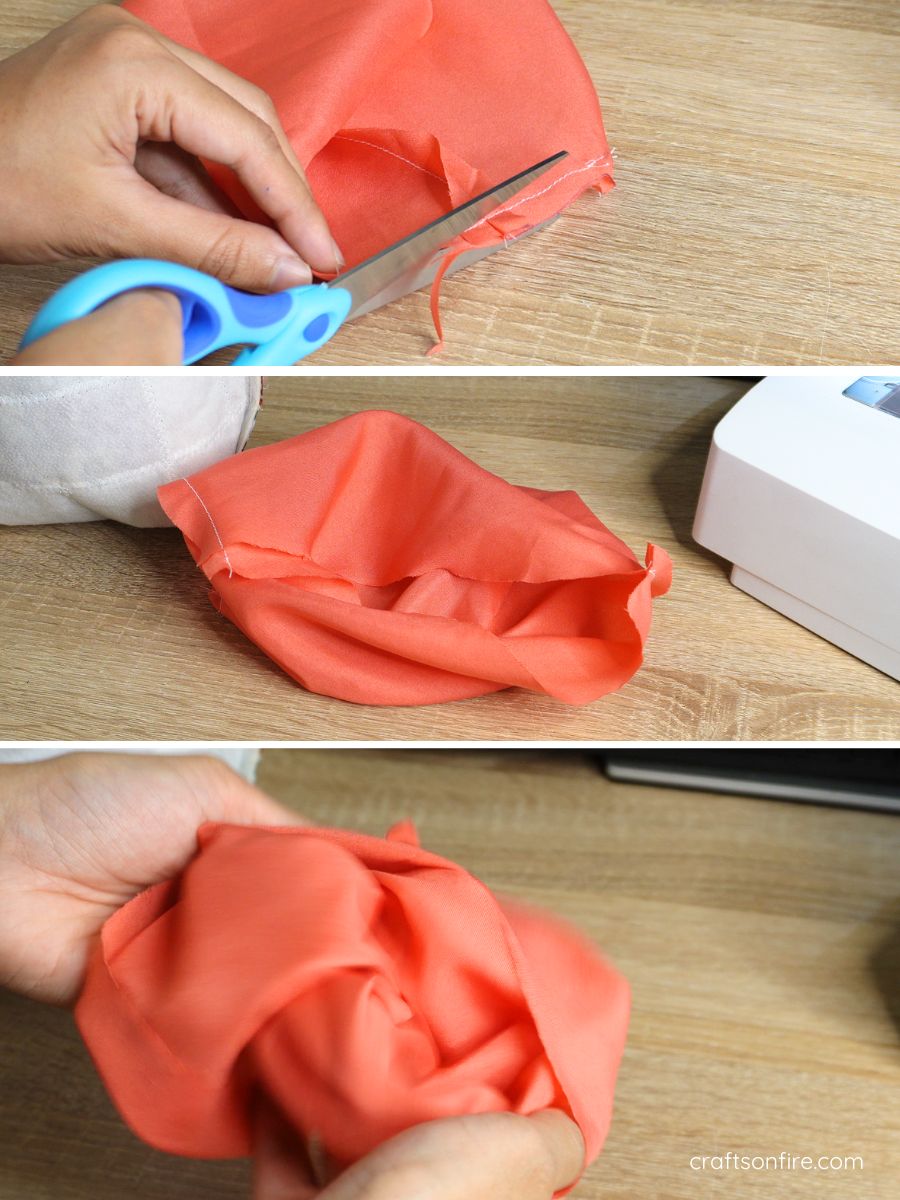
Step 8
Now, grab your patchwork fabric piece and place it inside the lining piece, ensuring the side seams match.
Head over to the machine and sew the two pieces together. Then, trim the excess fabric at the top.
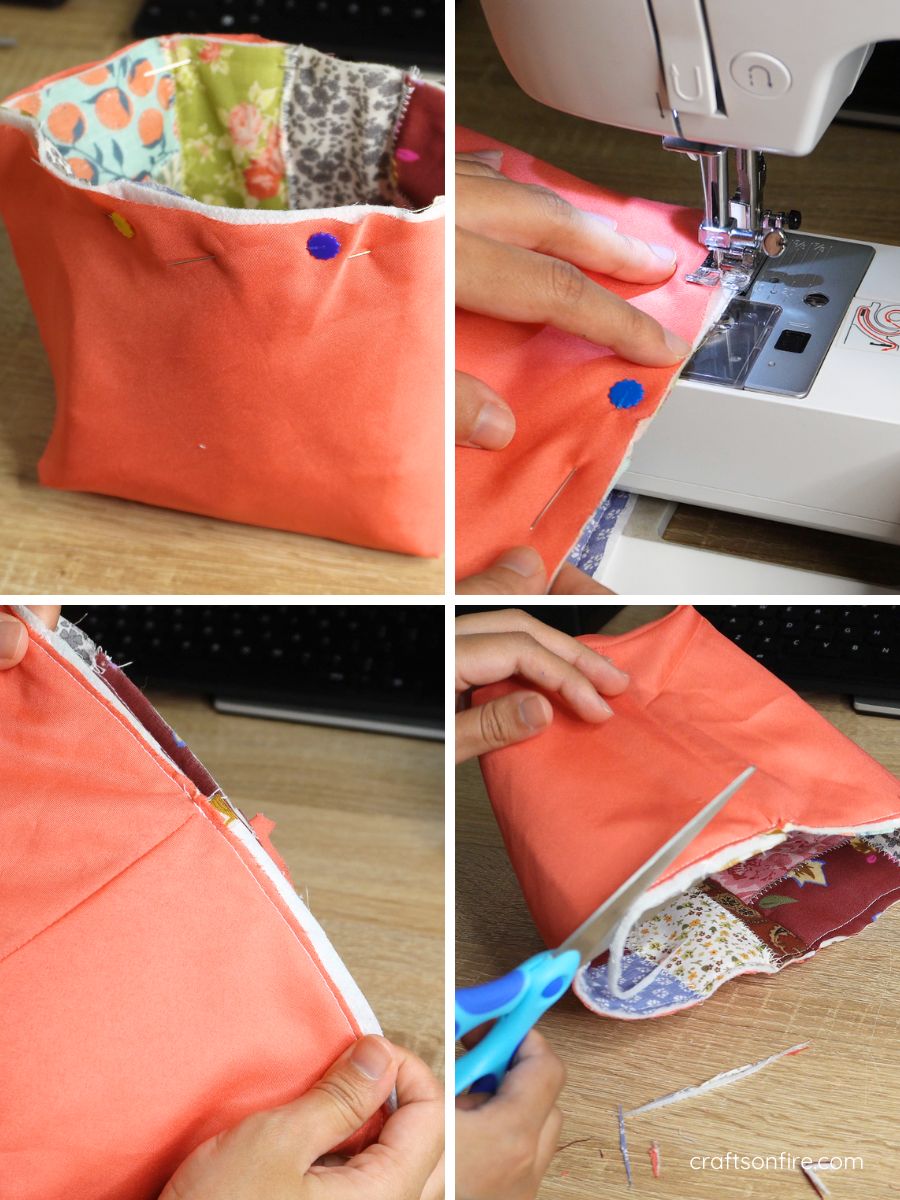
Alternatively, turn the patchwork piece and the lining piece to the right side. Place the lining piece inside the patchwork piece, ensuring the seams match. Pin the top sew both pieces together at the top and trim the excess fabric.
Step 9
Pull the patchwork piece out and turn the lining inside the basket. Open out the corners and set the fabric.
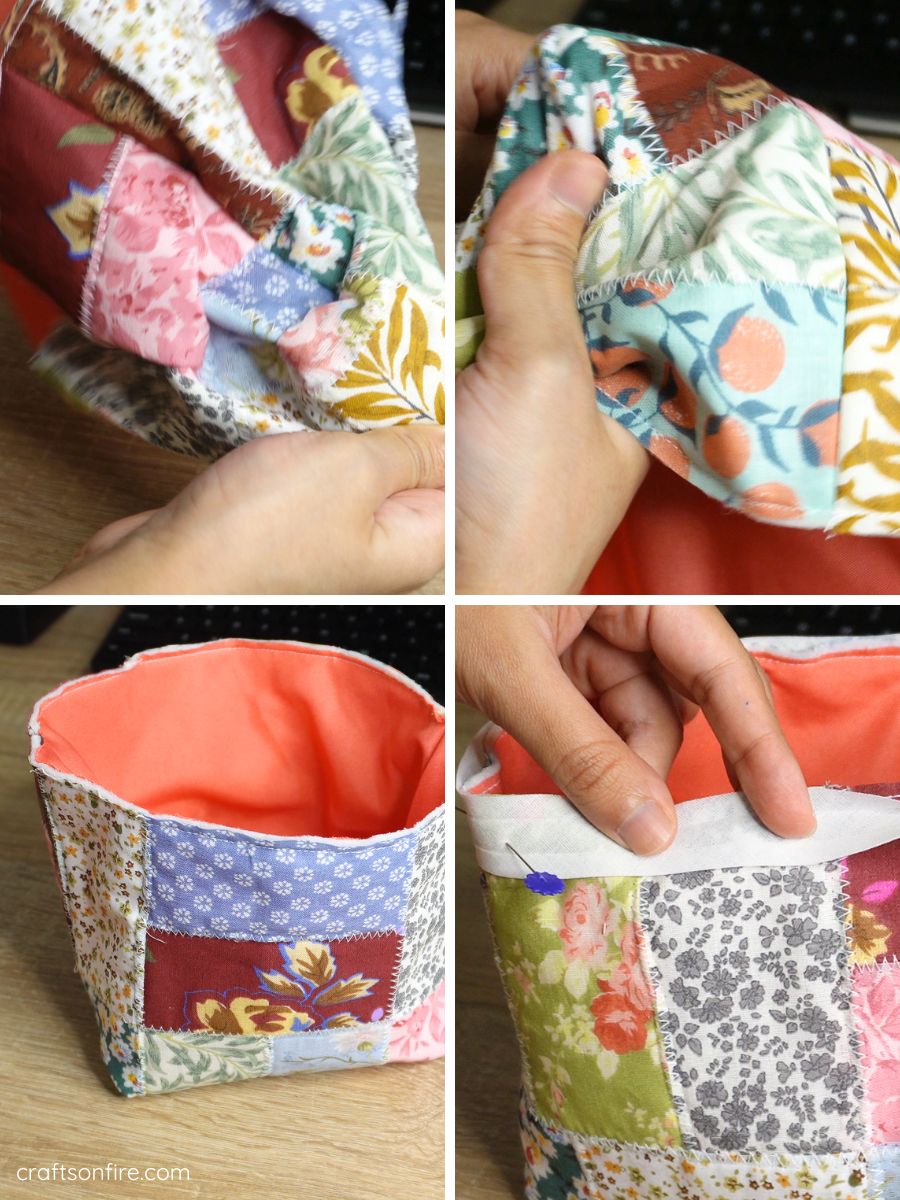
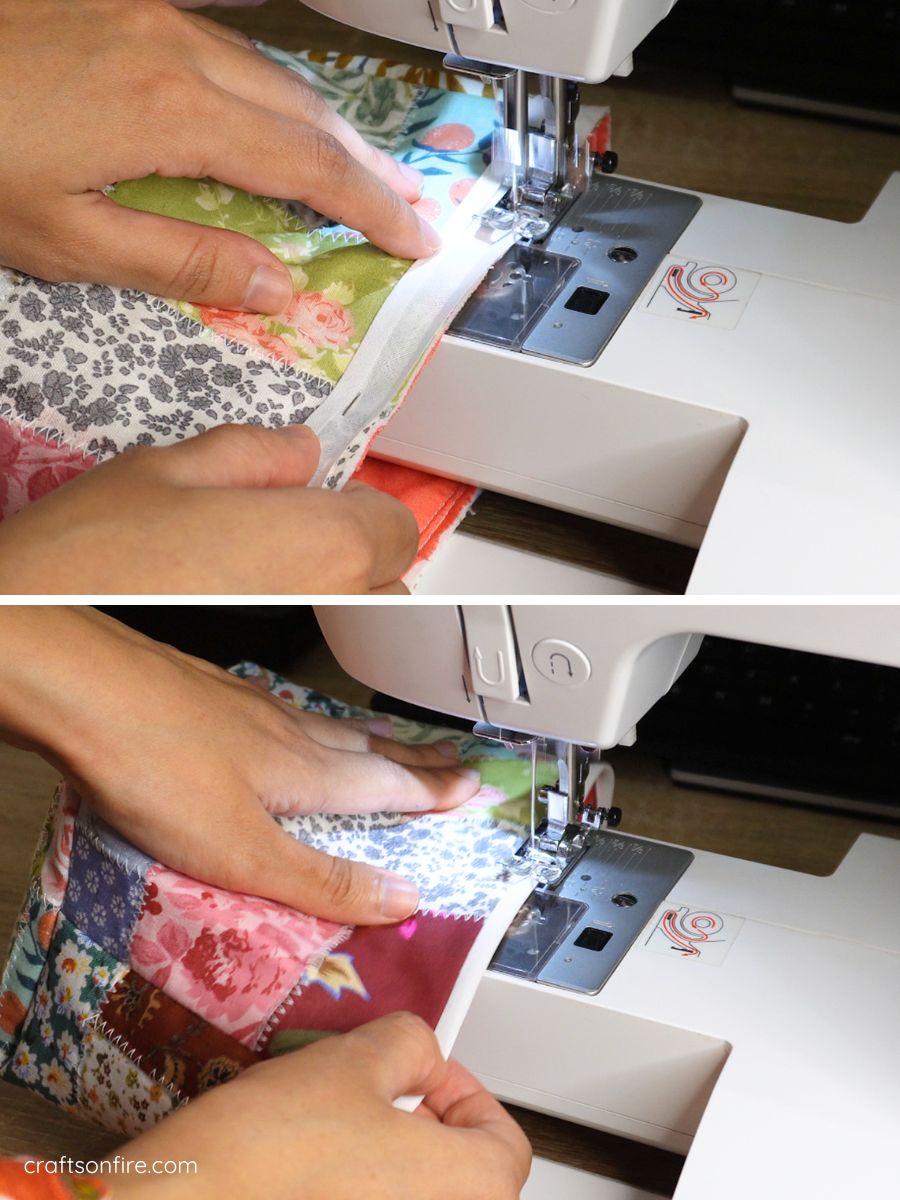
Finish the patchwork fabric basket by attaching white bias tape (or any color of your choice) to the top of the basket and sew.
Here’s what the final basket looks like:
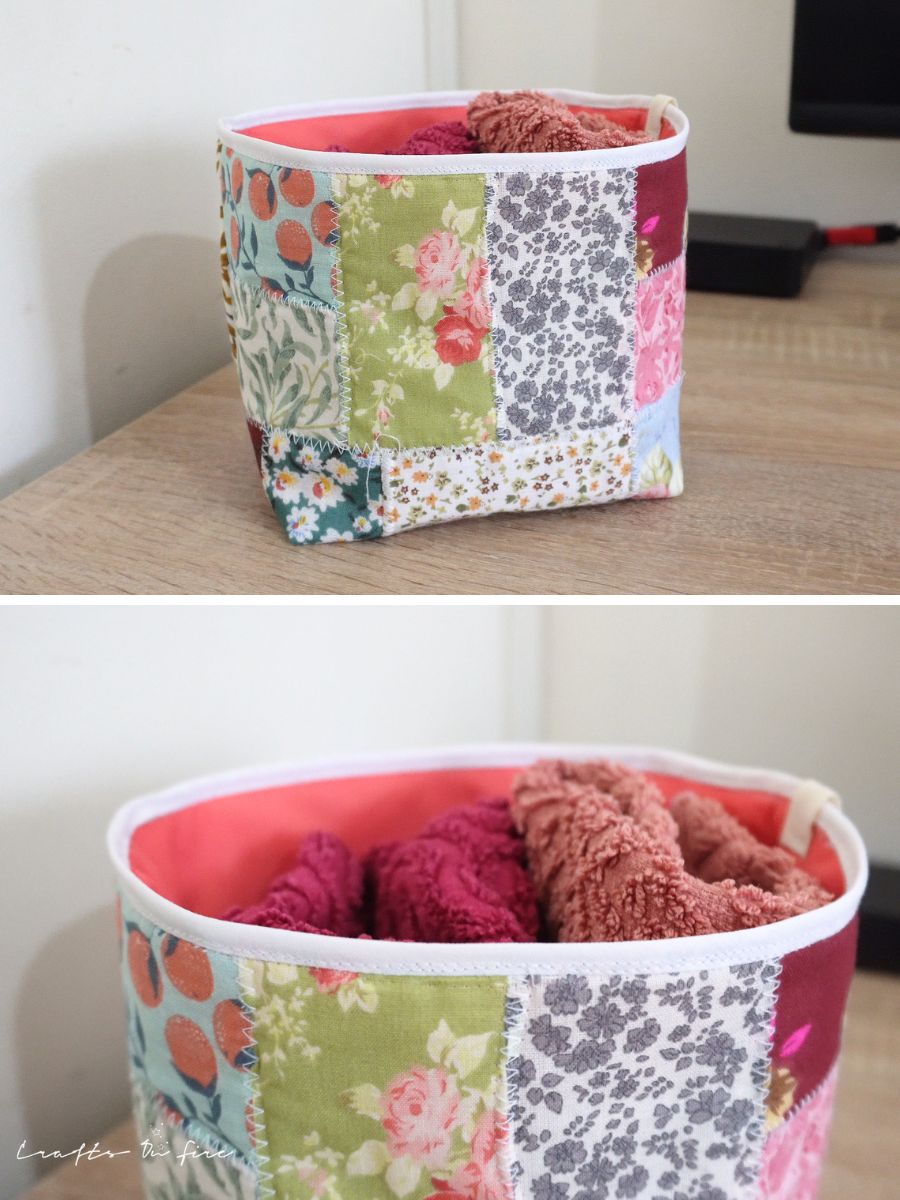
The patchwork piece turned out amazing, and I love how the zig-zag stitch adds a unique touch, making the basket look more creative and interesting.
I also added a small label to the top, which gives the basket a cute finishing touch.
I used this basket to store small hand towels, and it works perfectly for that purpose. However, as mentioned, these baskets can be used to store anything.
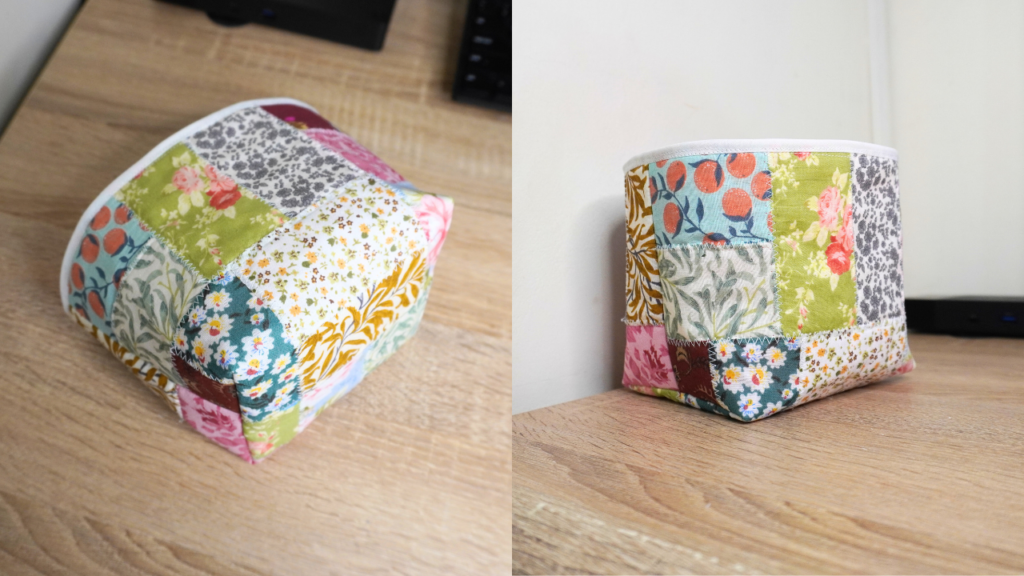
Overall, I had a lot of fun sewing this basket and can’t wait to make a few more to add to my collection.
I hope you enjoy sewing this patchwork basket just as much!
If you liked following this tutorial, here are a few more sewing projects you can try next:
Happy stitching!
