How To Make A Flower Sign From Cardboard And Clay
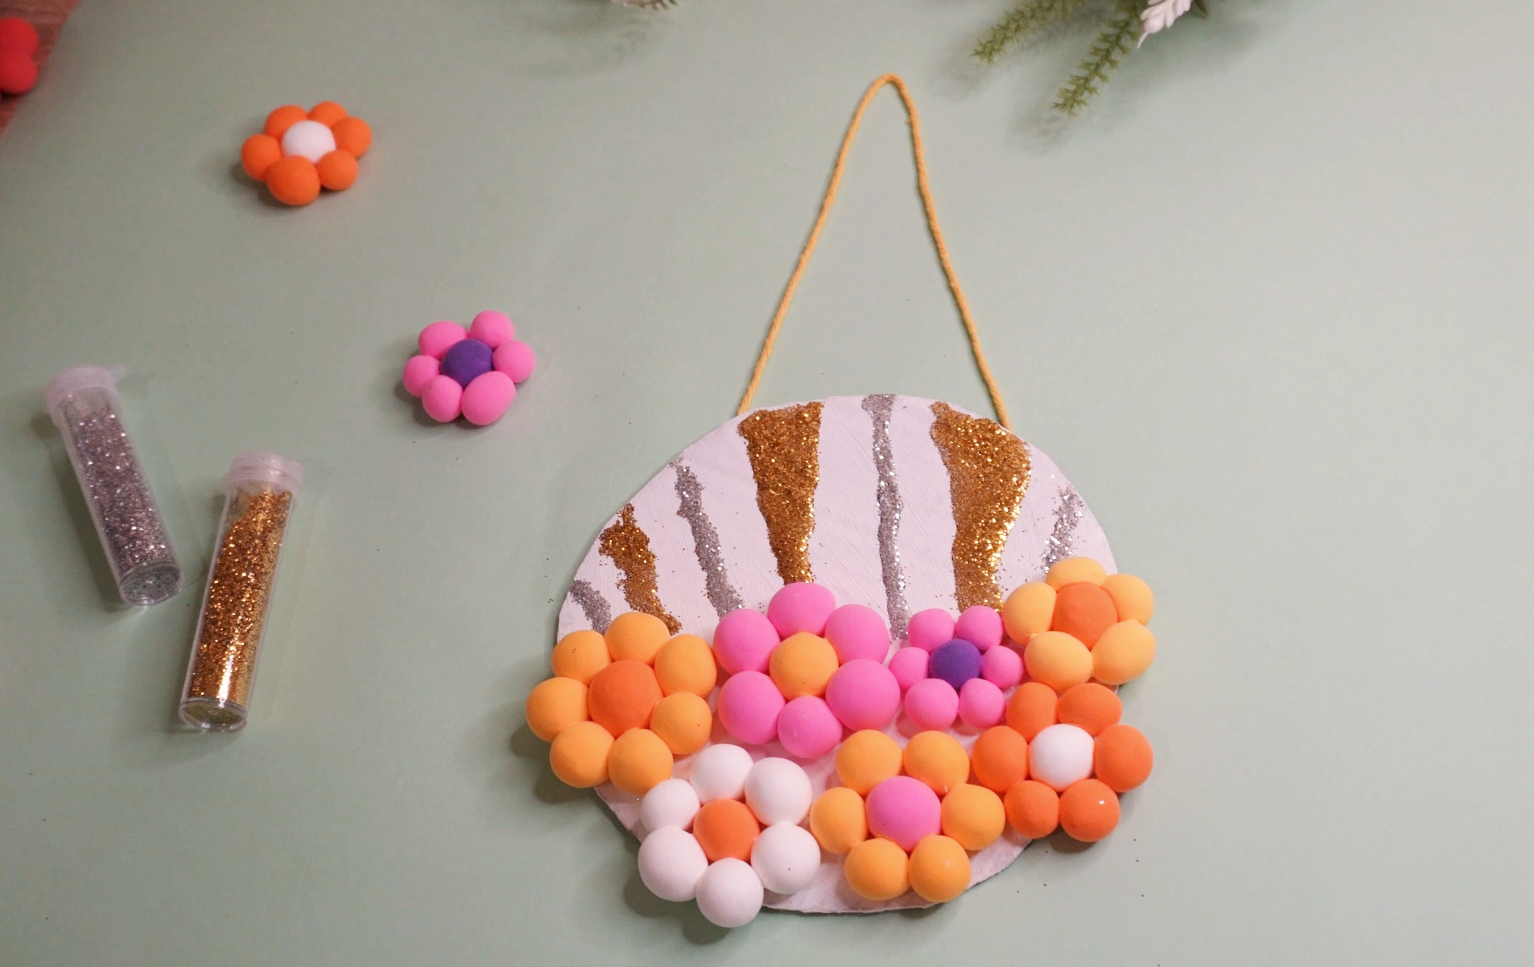
I love using ordinary, everyday materials to create something cute. That’s how I came up with this simple and easy flower sign made with cardboard, acrylic paint, and air-dried clay flowers.
I’ve also used gold and silver glitter to add a sparkly detail so that it stands out just a bit more.
This flower sign will easily add a charming detail to your space if you hang it on a wall, shelf, or door.
Small craft projects like this are a great way to explore your creative side while having fun.
With that said, I hope you can grab your supplies and join me in making this cute flower sign!
Let’s get right into it then:
DIY Cardboard Flower Sign
Supplies
- Cardboard
- Acrylic Paint
- Air Dry Clay (Light Pink + Yellow + Orange)
- Gold & Silver Glitter
- Glue
Instructions
For this tutorial, we’ll begin this project by creating the clay flowers. You’ll possibly need about 6-7 clay flowers depending on the size of the board and the flowers.
If you’d like a more creative layout, try making your clay flowers in different sizes.
Step 1: Roll a small piece of clay into a ball for the center of the flower. Then roll 6 more balls which will be used to create the petals. Place the light pink piece down on a clean board and join the remaining yellow pieces with the pink piece to create the flower.
Step 2: Follow this step to create the rest of the flowers and leave them to dry for at least 24 hours or until it’s no longer soft. (Note: Polymer clay flowers will need to be baked.)
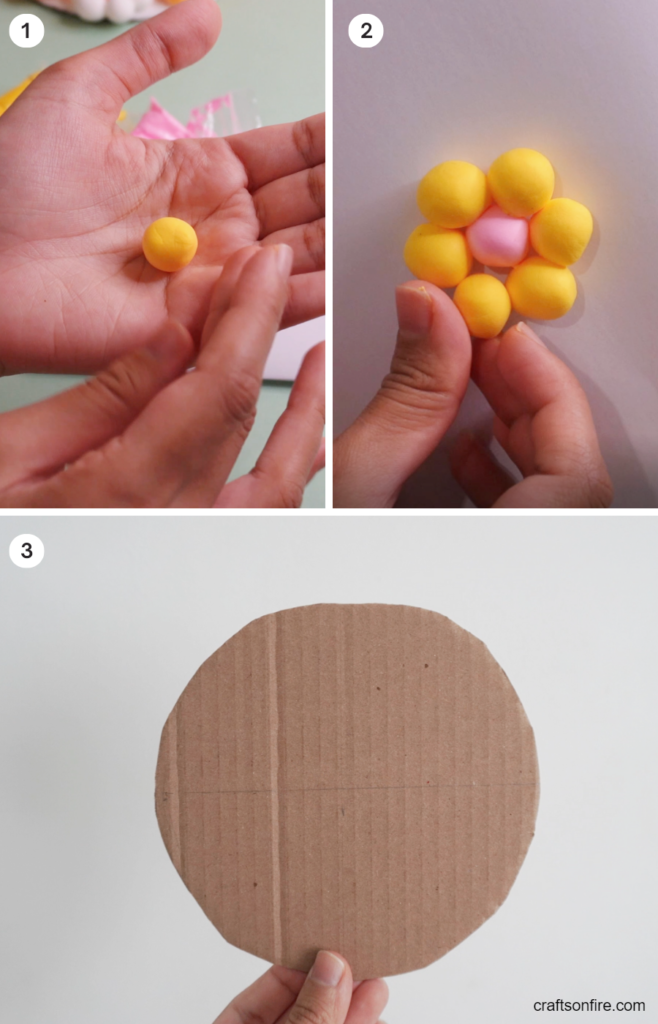
Step 3: Next, use an old cardboard box or any packaging you have lying around to cut a circle. Prime the board with a few layers of white acrylic paint and allow the paint to dry.
Now comes the enjoyable and exciting part which is putting the sign together.
Step 4: Begin by applying a generous amount of glue to the bottom half of the cardboard circle. Place the first flower on the left side of the board.
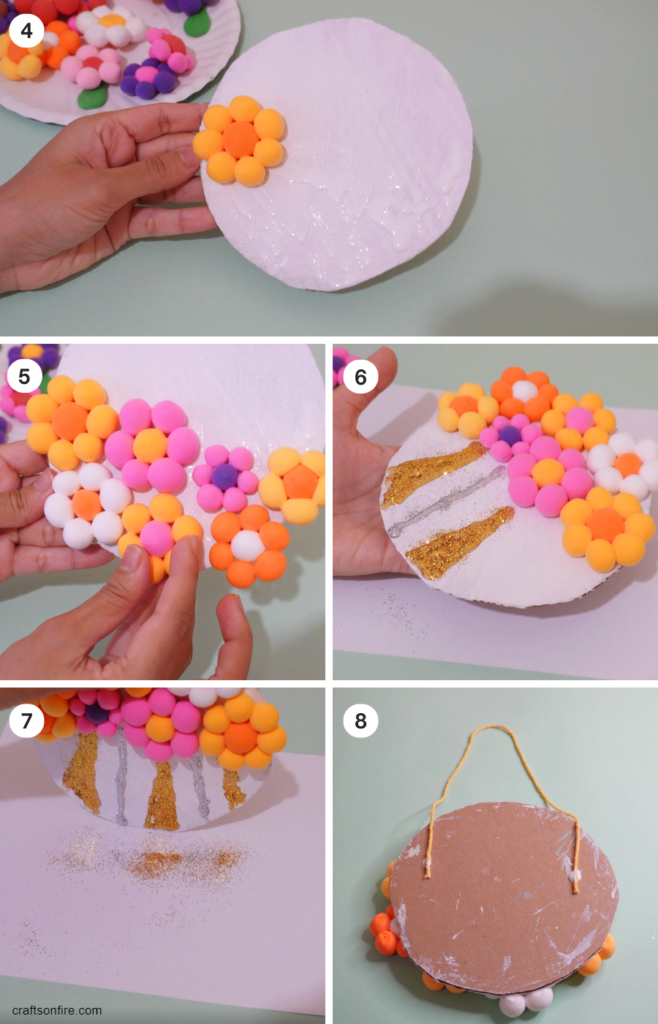
Step 5: Continue placing the flowers until the bottom half of the board can no longer fit any more flowers. Once all the pieces are on the board, you can move the flowers around until you’re happy with the arrangement provided that the glue is still wet.
Step 6: Use clear glue to apply a line of glue from the flower to the edge of the circle. Then, pour the gold glitter onto the glue. Continue doing this as you alternate between gold and silver glitter to create the pattern.
Allow the glitter and glue to dry. Once dried to the touch, grab the sign and gently dust off the remaining glitter onto a spare sheet of paper.
If there’s some stray glitter in between the lines, try using a cotton bud to clean up the edges for a neater finish.
Step 7: To complete this cardboard flower sign, turn the sign over. Then, cut a small piece of yarn or string, and glue the two ends to the back of the flower sign.
For extra support, you can use a piece of tape to ensure the string holds.
And you can now hang the sign up anywhere in your room or home.
Pretty easy, right?
Wrapping Up
The great thing about this tutorial is that you can switch it up a bit.
For example, you could change the gold and silver glitter for any other color (yellow/pink, blue/green, pink/silver) or you could glue the flowers at the top of the circle rather than towards the lower half.
Go ahead and see what works for you.
Also, if you feel like the back of the sign looks too untidy, simply give it a coat of white acrylic paint before you glue the string!
If you enjoyed following along, here are a few more fun DIY tutorials to try out next: