How To Sew A Bowl Cover (Step-By-Step)
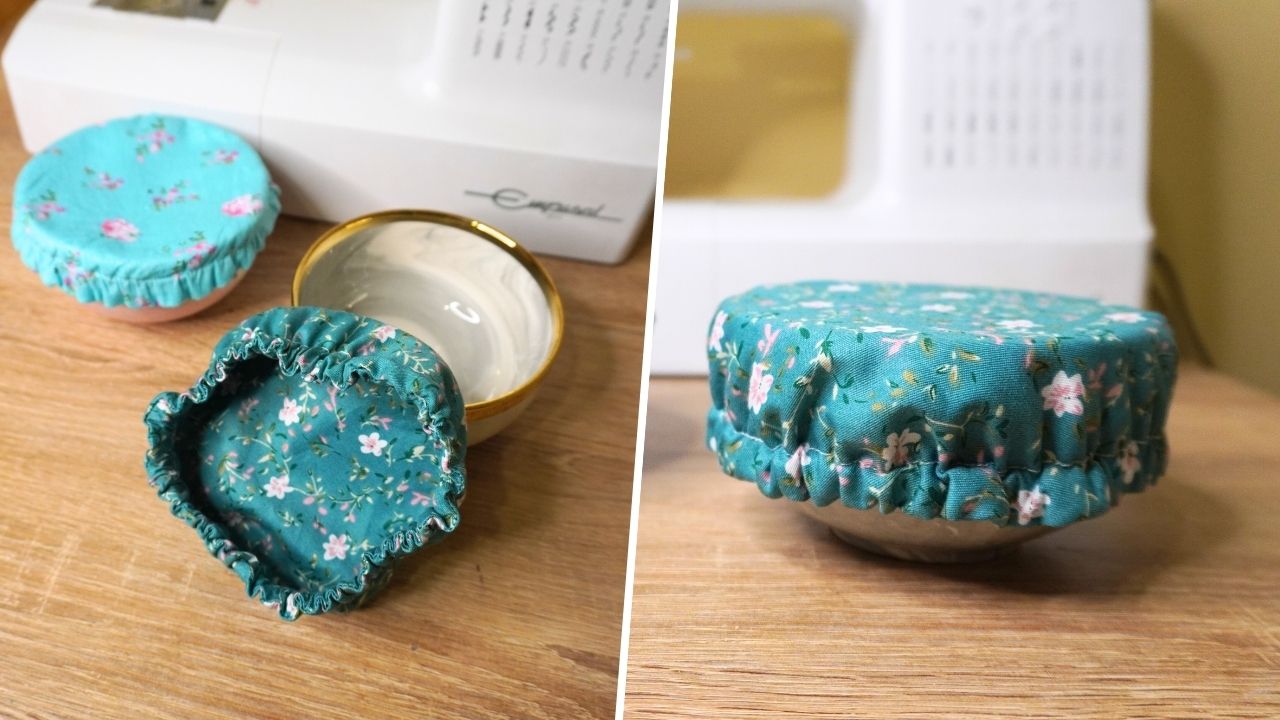
Ditch plastics in your kitchen and sew an eco-friendly and reusable fabric bowl cover in just 5 minutes or so! These floral patterned bowl covers are one of the best accessories to have in your kitchen.
Sewing these bowl covers is so easy.
You can sew this cover in minutes with just a small piece of fabric. There’s no waste here!
We’ll first cut two circles from the fabric, stitch them together, turn the fabric inside out, and then do a top stitch. Finally, we’ll thread the elastic through and hand-stitch the opening closed. Simple, right?
This bowl cover is also easily customizable. If you want a fun reversible bowl cover, switch things up by using a different fabric for the second piece. If you want a cool and fun handmade gift for family and friends, opt for a holiday-themed fabric instead.
For accurate sizing, use the exact bowl you want to cover as the measurement.
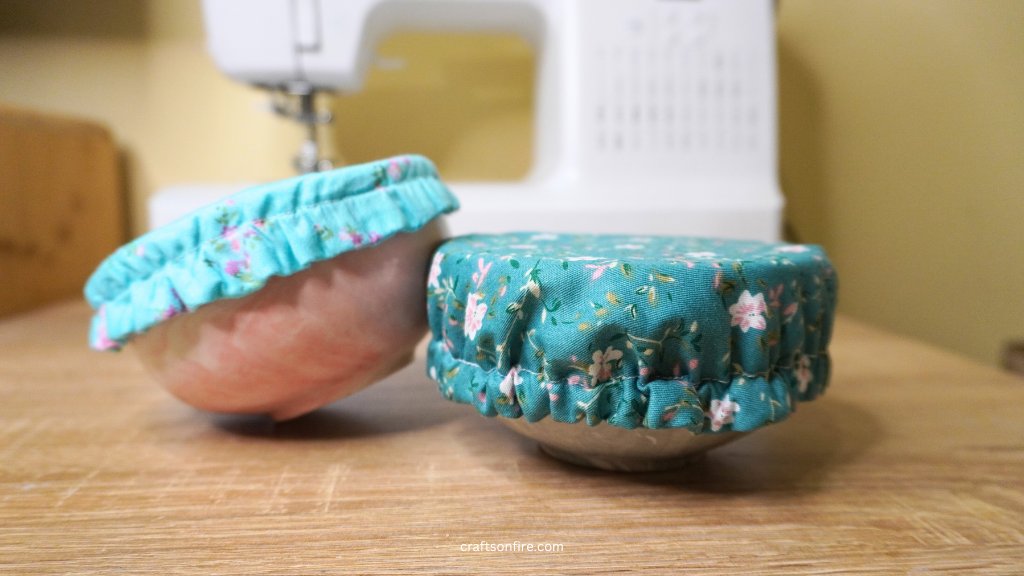
If you love simple and easy sewing projects, this bowl cover should be at the top of your to-do list.
Let’s get started.
Table of Contents
Bowl Cover Sewing Guide
Supplies
- Fabric
- Bowl
- Tape Measure
- Fabric Pencil/Tailors Chalk
- Sewing Machine
- Scissors & Pins
- Needle & Thread
Video Tutorial
Printable PDF:
If you’d like to get the ad-free version of this A4 Printable PDF for this tutorial, head over here to grab your copy!
Instructions
Fold Your Fabric
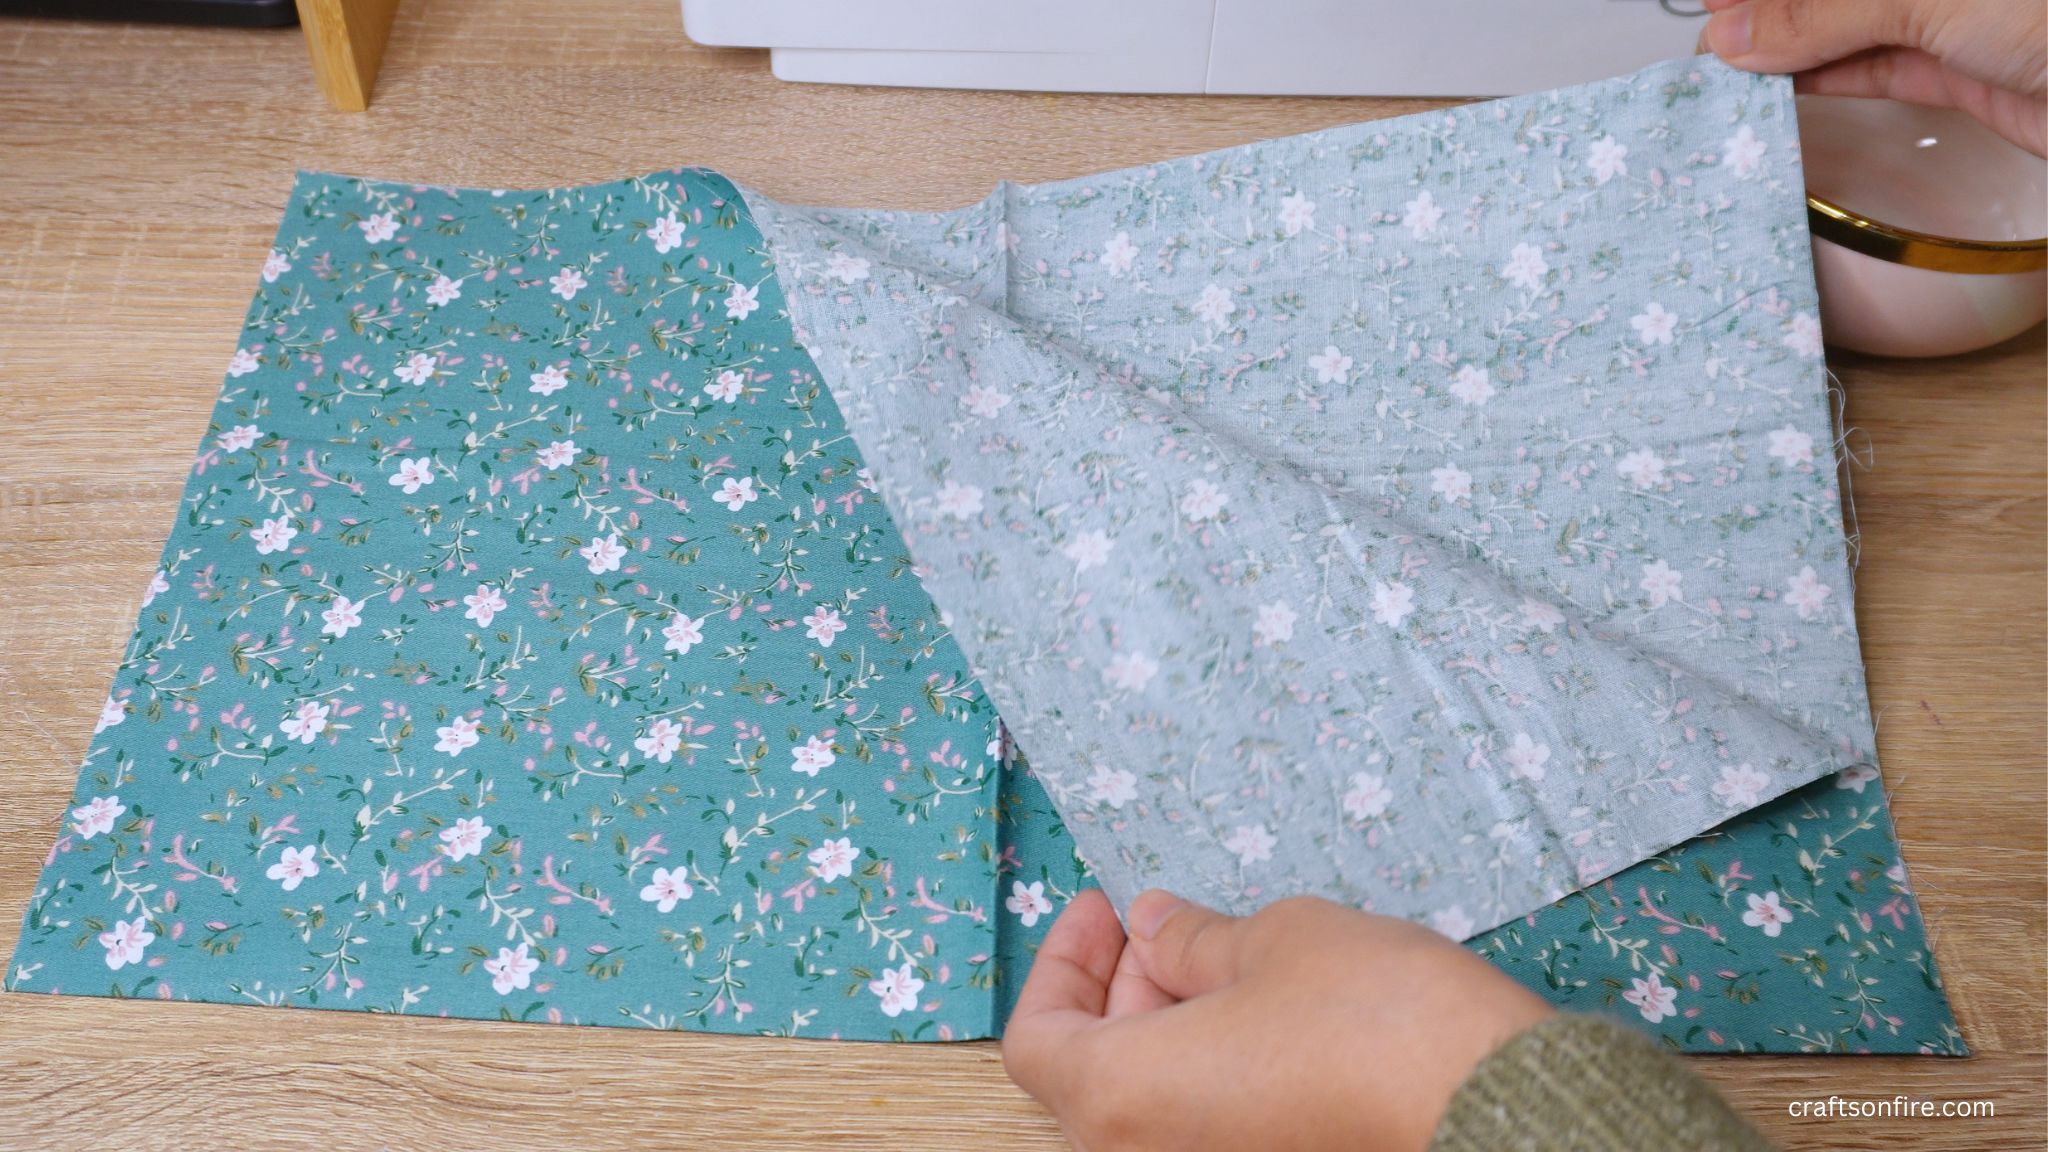
This bowl cover sewing pattern is simple and easy to follow. Begin by folding a piece of fabric in half. You should have 2 layers of fabric.
Measure & Draw Circle
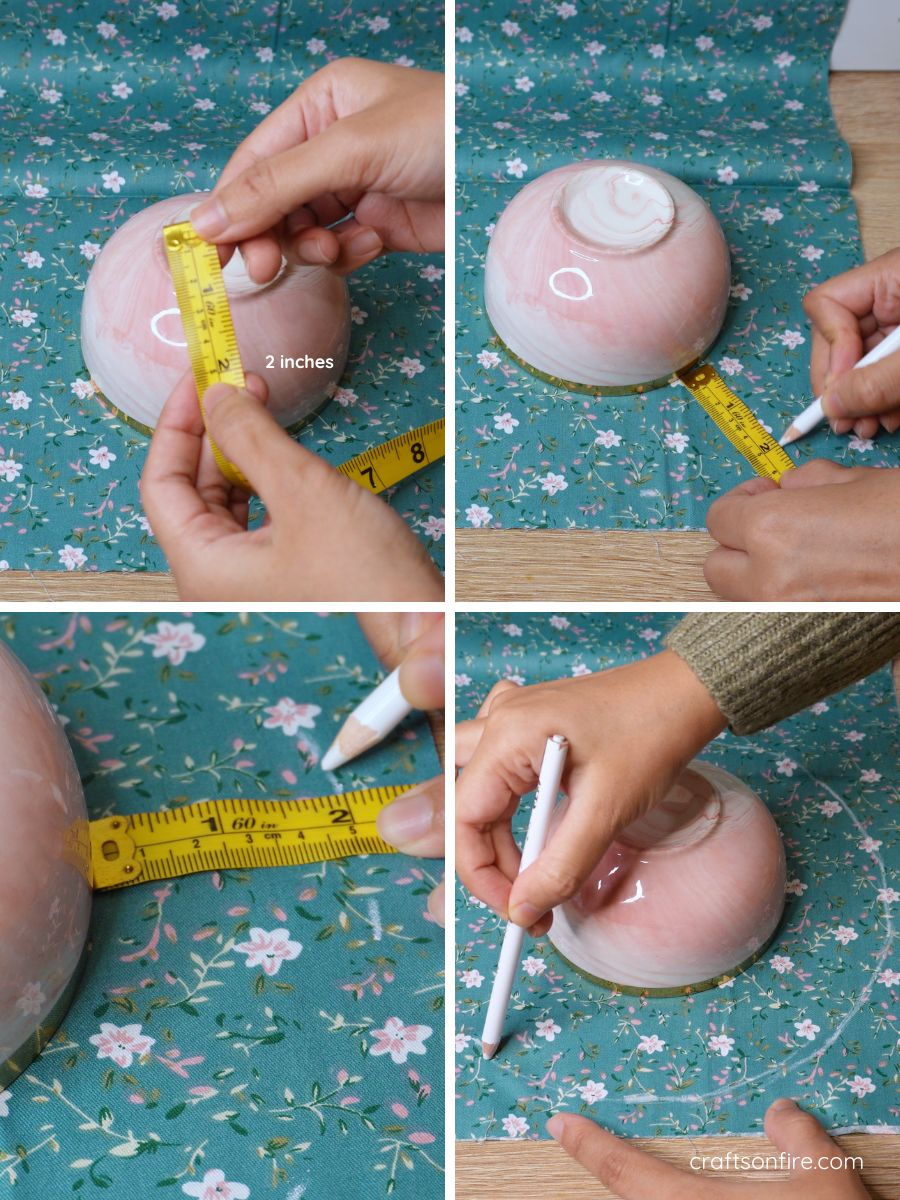
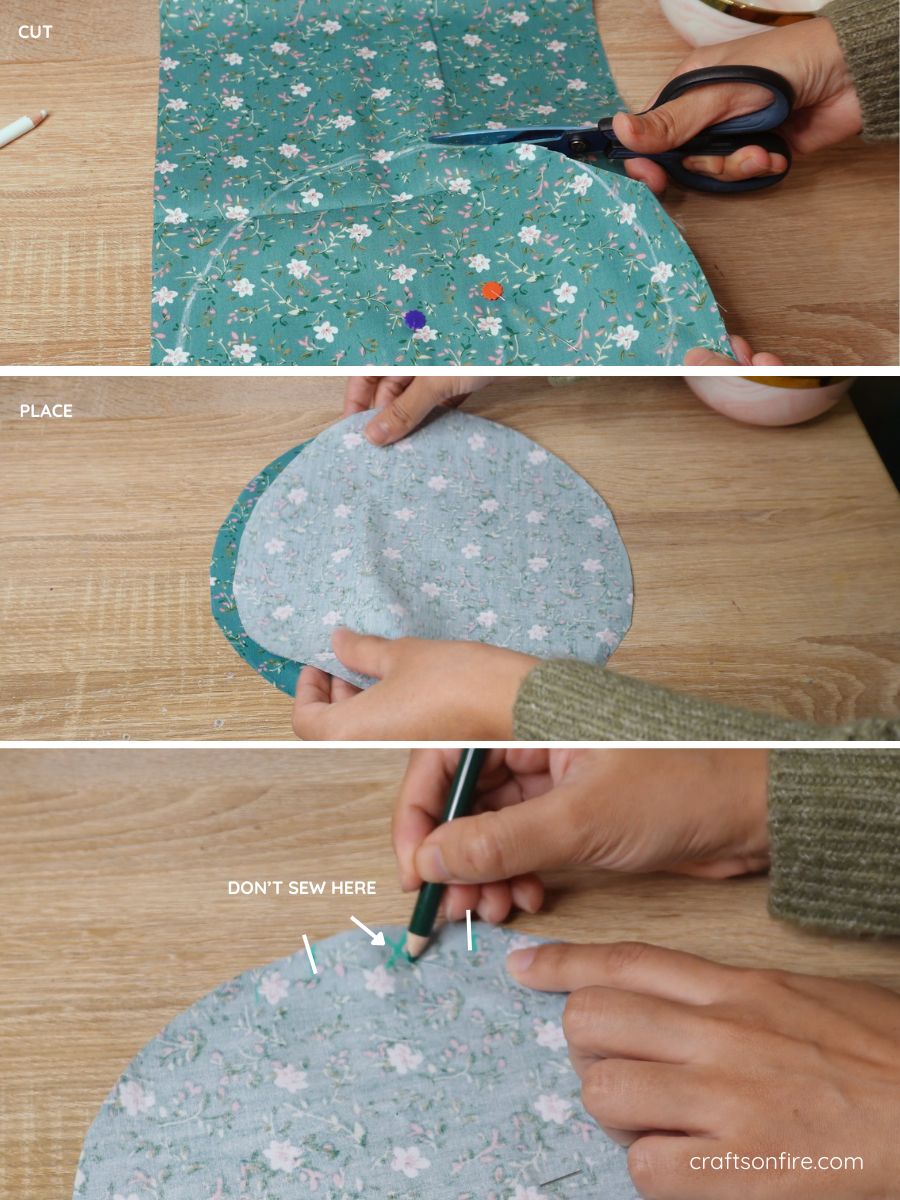
Turn your bowl over, place it down on the fabric, and measure 2 inches all around the bowl. Mark the points with the tailor’s chalk or a fabric pencil and then fill in the rest of the outline.
Cut The Fabric
Grab your scissors and cut the circle out. Then, place the two pieces of fabric together with the right sides facing in and pin the center.
Then use the pencil or chalk to mark out a small area for the opening (at least 5 cm) to indicate the point to begin and stop sewing.
Stitch The Fabric
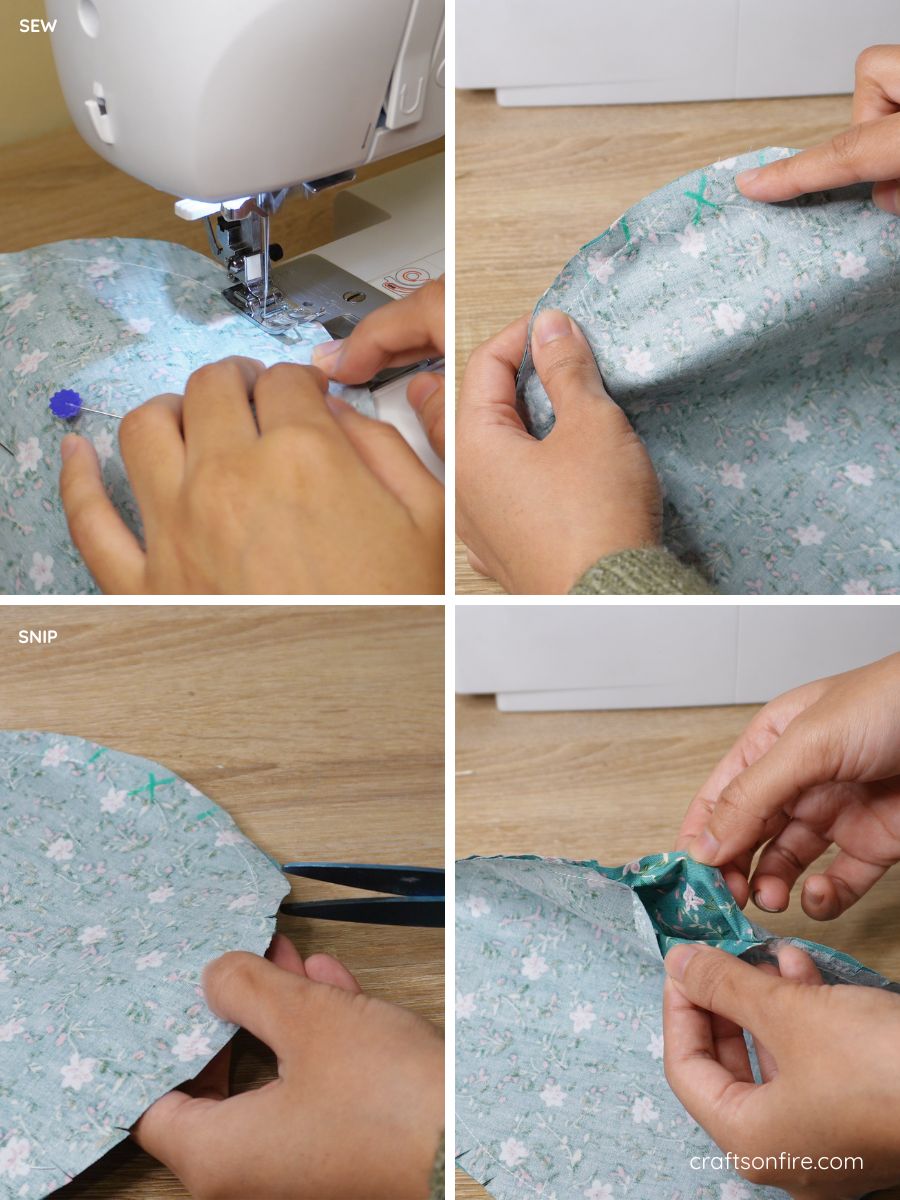
Now, it’s time to sew! Head over to the machine and begin stitching with a 1 cm seam allowance until you reach the other end of the marked point.
Remove the pin from the center of the fabric and make small snips all around the circle. Then, use the opening to pull the right side of the fabric through.
Turn Fabric Inside Out
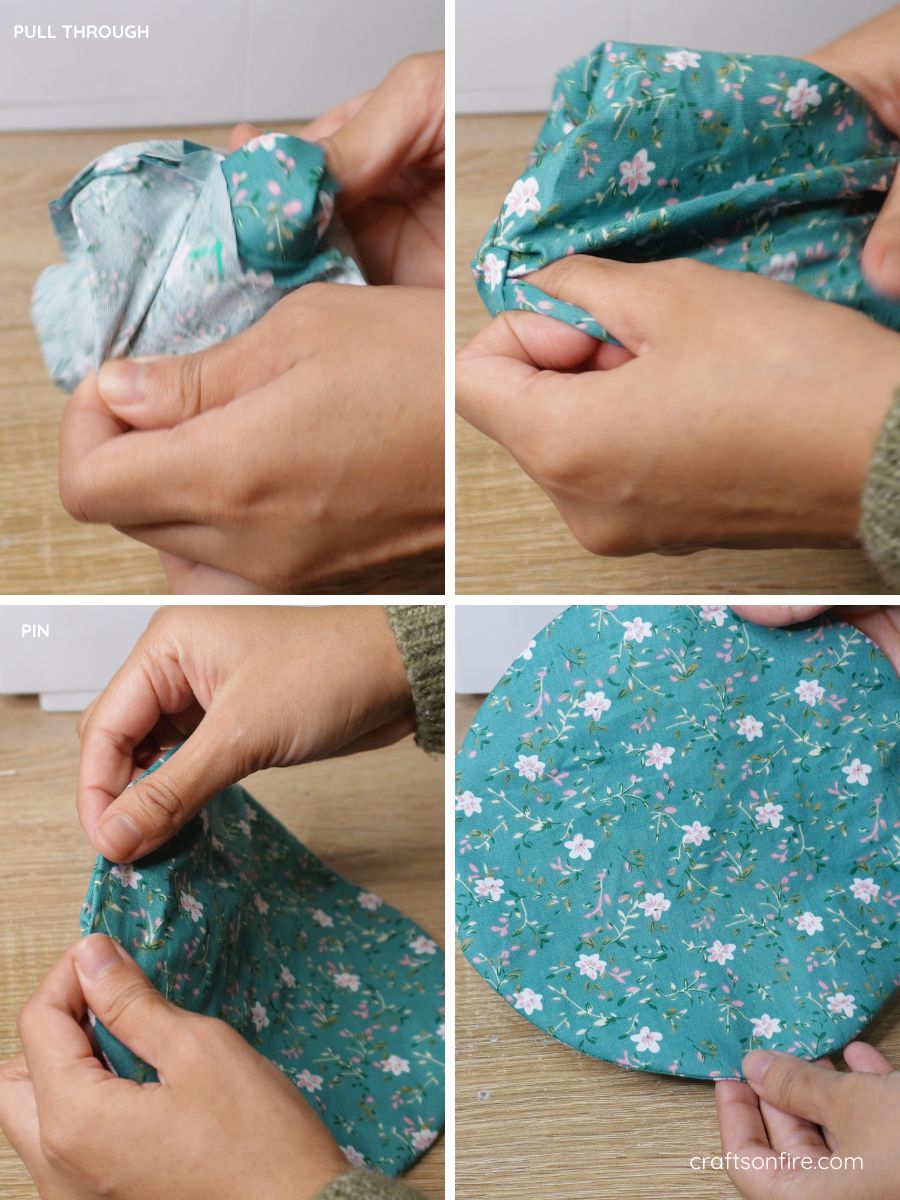
Place a pen or use your fingers to smooth the inside as this will create that nice rounded curve.
Carefully fold in the opening and use a pin to secure it.
To ensure the fabric looked neat, I gave it a light press with the iron to remove any creases.
Sew Top Stitch & Cut Elastic
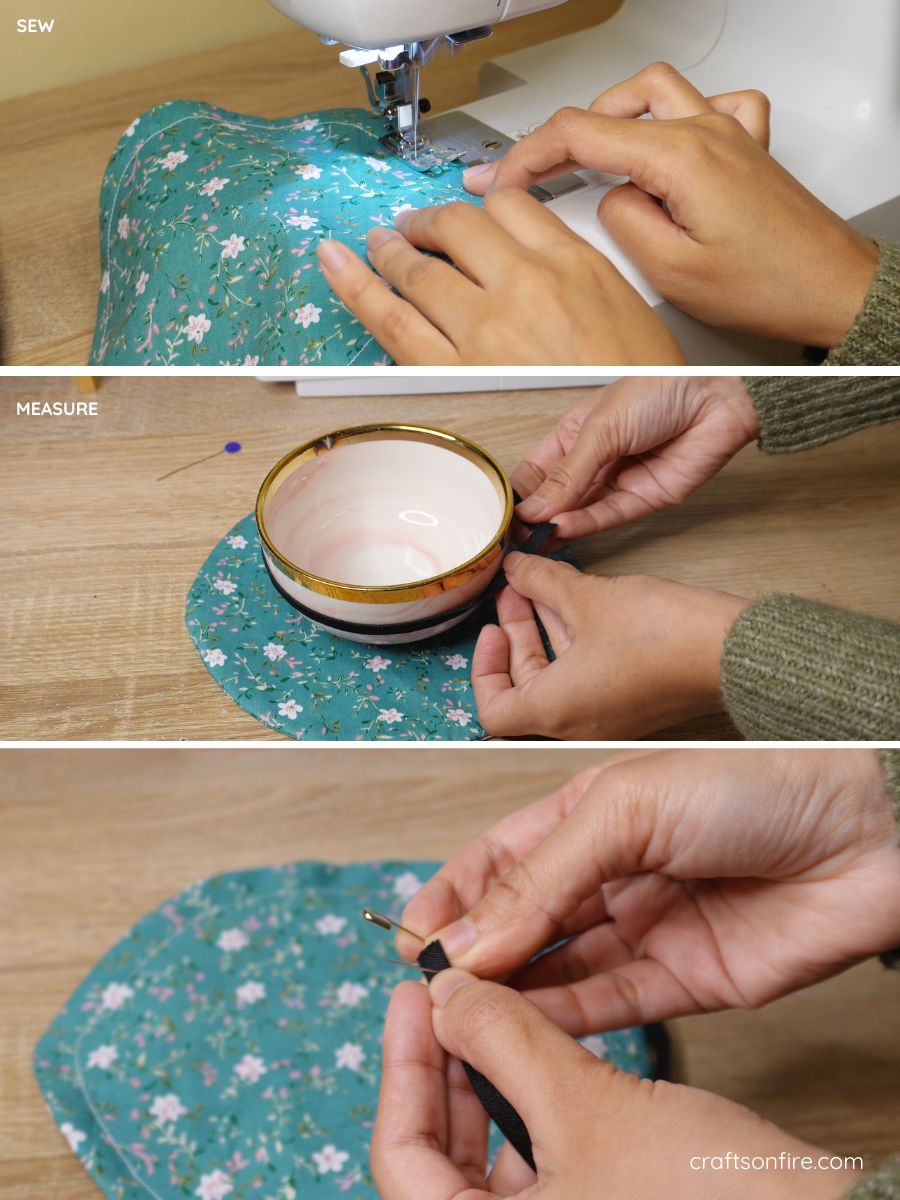
Head to the machine again and do a top stitch with a 1 cm allowance.
Then, grab your bowl and wrap the elastic around the middle of the bowl to gauge the length. This will help you determine how much elastic you’ll need for the bowl cover.
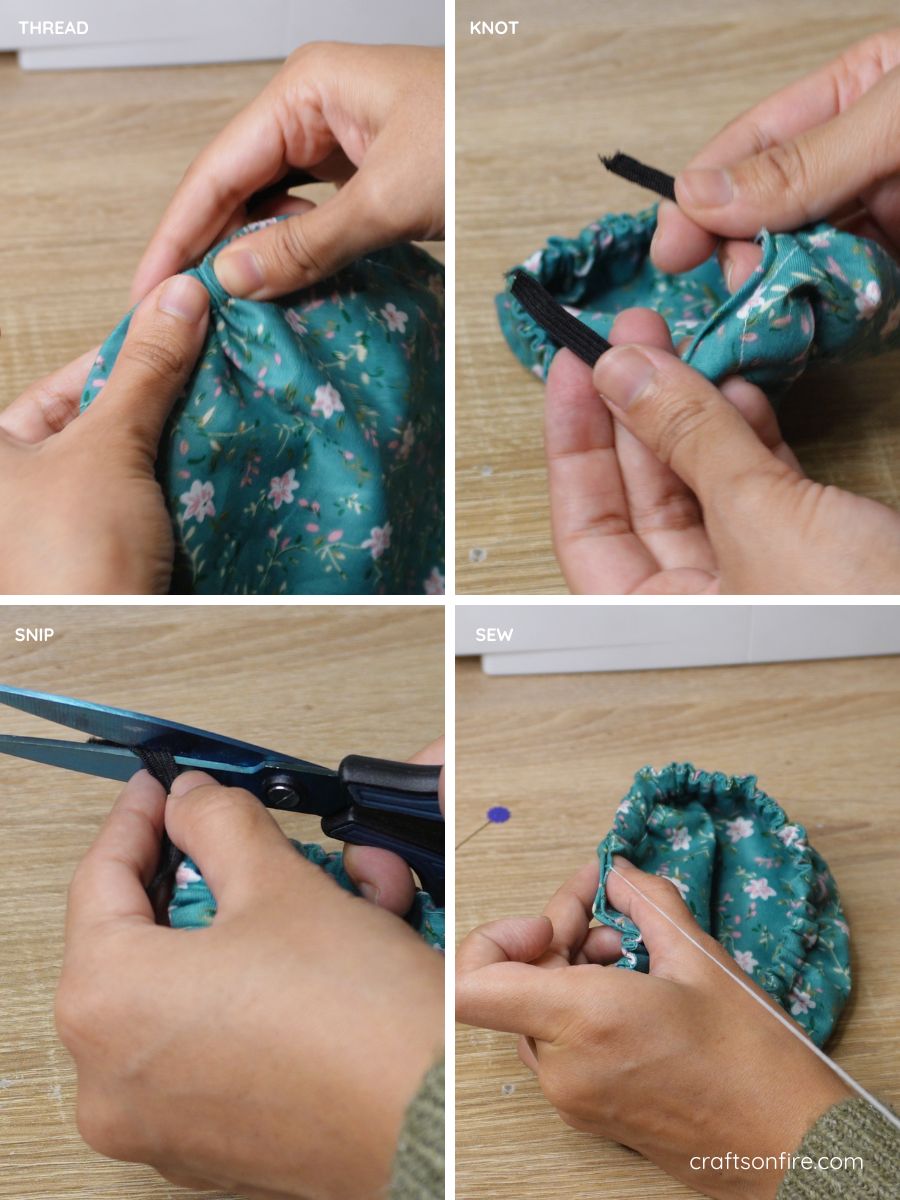
Cut the elastic and then thread a safety pin through the top of the elastic.
Thread Elastic & Hand Sew Opening
Using the opening of the bowl cover, thread the elastic through one end until it comes out through the other side. Then, knot the two elastic pieces and snip off the excess.
Carefully place the knotted piece back into the opening. Follow this up by using a needle and thread to sew the opening closed for a neater finish.
You could also use the sewing machine for this but it will leave a visible stitch line.
Finished Result
Once you’ve sewn the opening, you can now try it out. Grab your bowl and place the bowl cover over it!
Here’s how mine turned out:
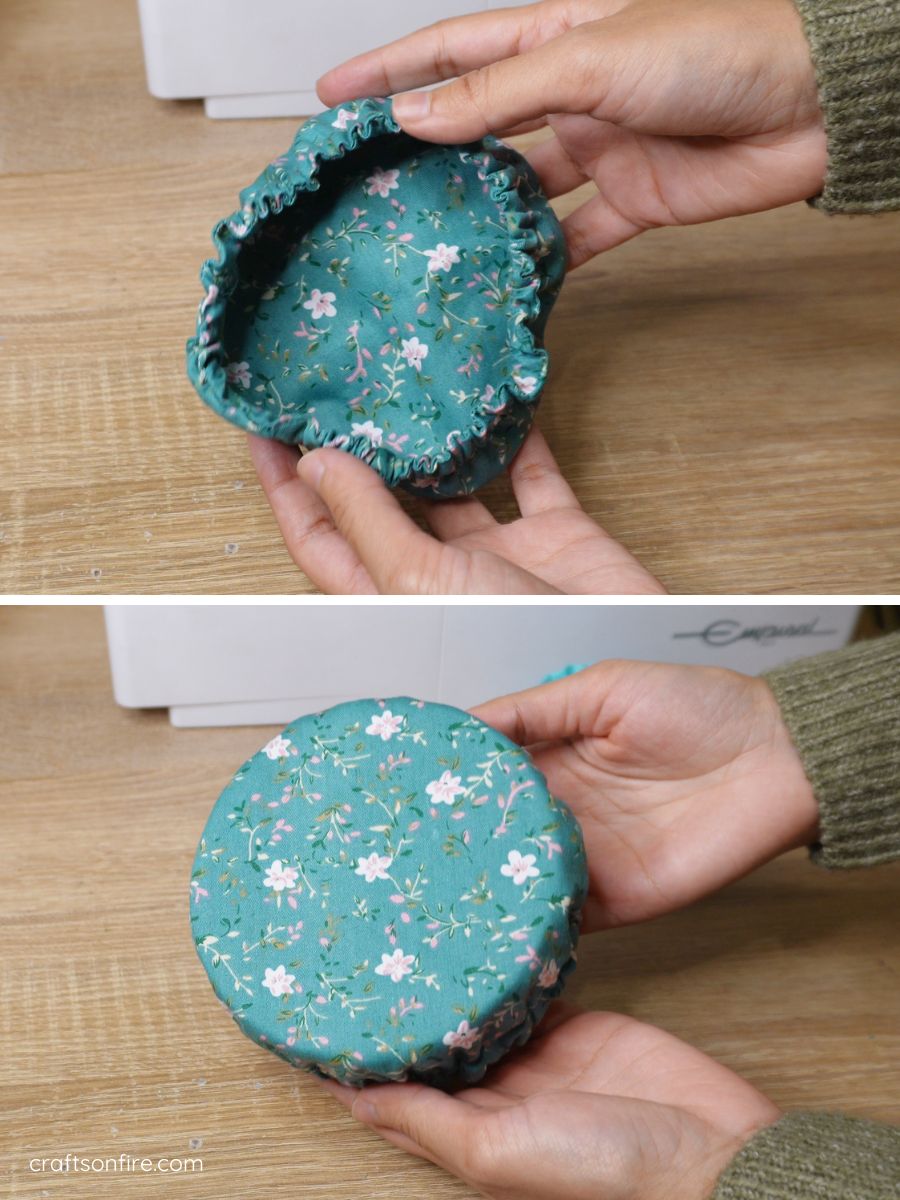
These bowl covers are so pretty and easy to sew! They fit small bowls perfectly but you can also use this bowl cover on a slightly bigger bowl. It will just be a snug fit.
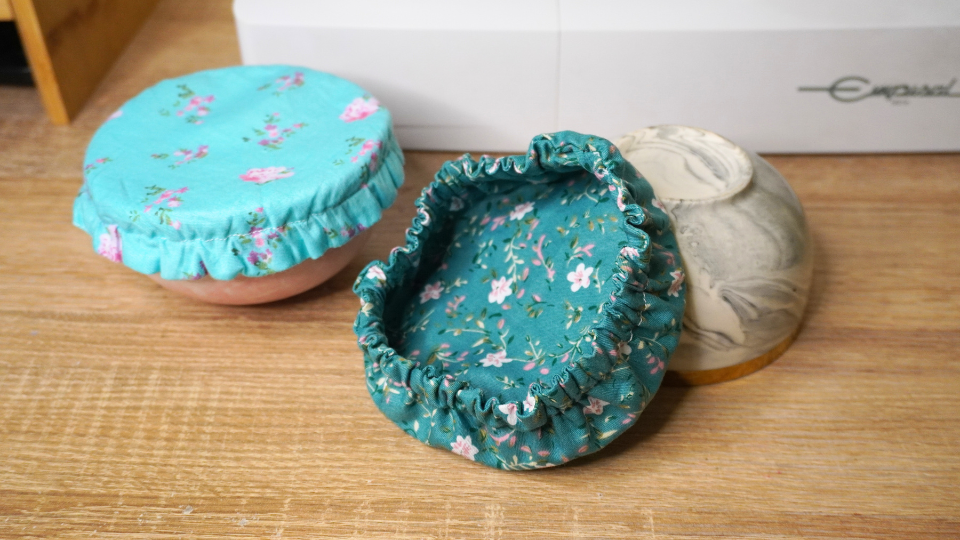
I did make a smaller version of this bowl cover by reducing the size (1.5 inches instead of 2 inches from the bowl) and it fits pretty well too.
However, I recommend sticking with a 2-inch allowance as this makes it easier to slide over the bowl.
FAQ
What are bowl covers used for?
Bowl covers are used to cover food and prevent spills. They are also useful for protecting food from flies, insects, or dust while it sits on a counter or in the fridge.
What fabric to use for bowl covers?
Cotton fabric works best for bowl covers due to its soft and absorbent qualities. This makes it easier to wash and dry as well. Muslin can also be another good alternative.
Do fabric bowl covers keep food fresh?
Bowl covers work well for covering food for a short period but I wouldn’t say it can keep food fresh for long. You’re probably better off with an air-tight jar or container instead.
Wrapping Up
I’m so glad I made these bowl covers. It’s way easier than using a saucer or plastic wrap to cover leftover food.
I honestly wanted to sew 10 more of these bowl covers, but that would have been way too many for what I needed. I guess this says a lot about how enjoyable sewing this bowl was!
Small kitchen items like this make a huge difference in the long run.
Speaking of kitchen items, I’ve also recently sewed pot holders, coasters, and bowl cozies. If you’d like to learn how to sew these projects as well, here’s a link to each tutorial:
How To Sew A Bowl Cozy (Easiest Method!)
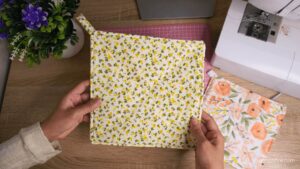
I do hope you found this tutorial on how to sew a bowl cover easy and simple to follow.
Please let me know how yours turned out in the comments below or tag me on Instagram or Pinterest (@craftsonfire)!
