How To Sew A Small Tote Bag For Beginners
If you’d like to sew a cute and easy tote bag to add to your bag collection, this tutorial is a must-try! This small tote is perfect for those days when you need a lightweight, stylish bag to carry your essentials—wallet, phone, sunglasses, and maybe a hand cream or more.
This tutorial is also beginner-friendly! If you’ve never sewn a bag before, this pattern is so easy to follow.
I’m confident that you’ll be able to sew this bag, no matter your skill level. You’ll quickly get the hang of it as you work through each step.”
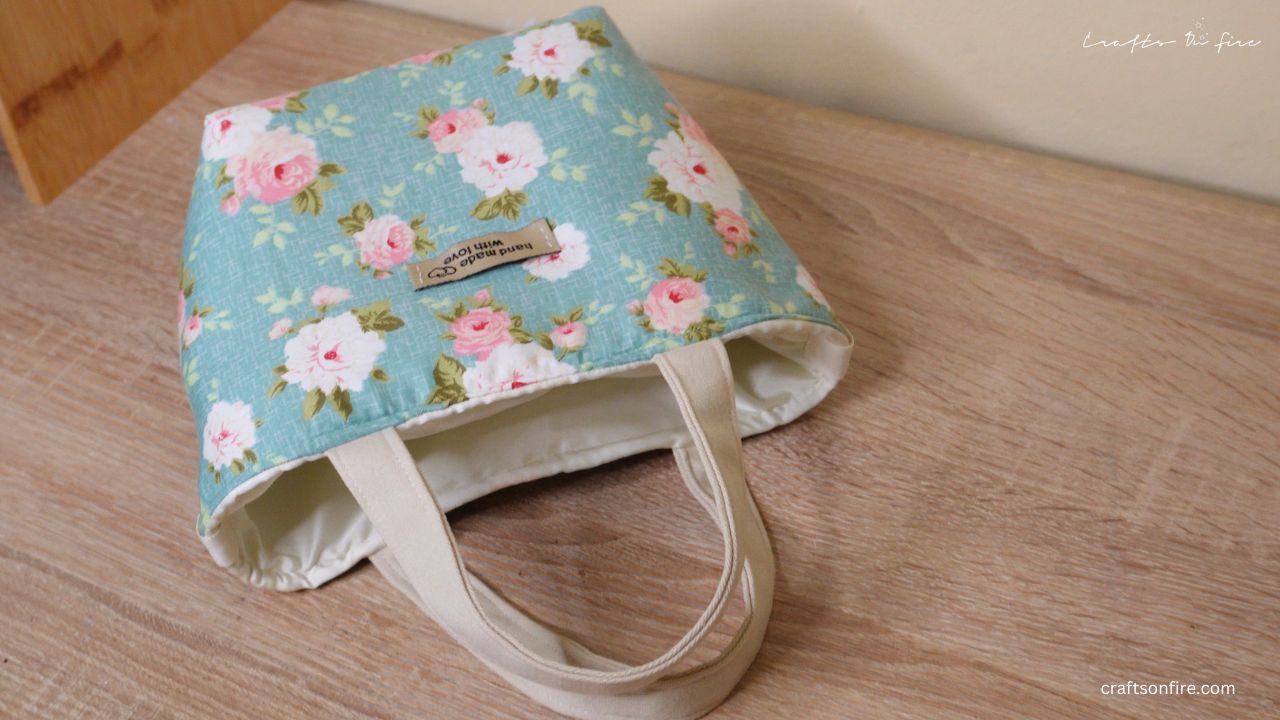
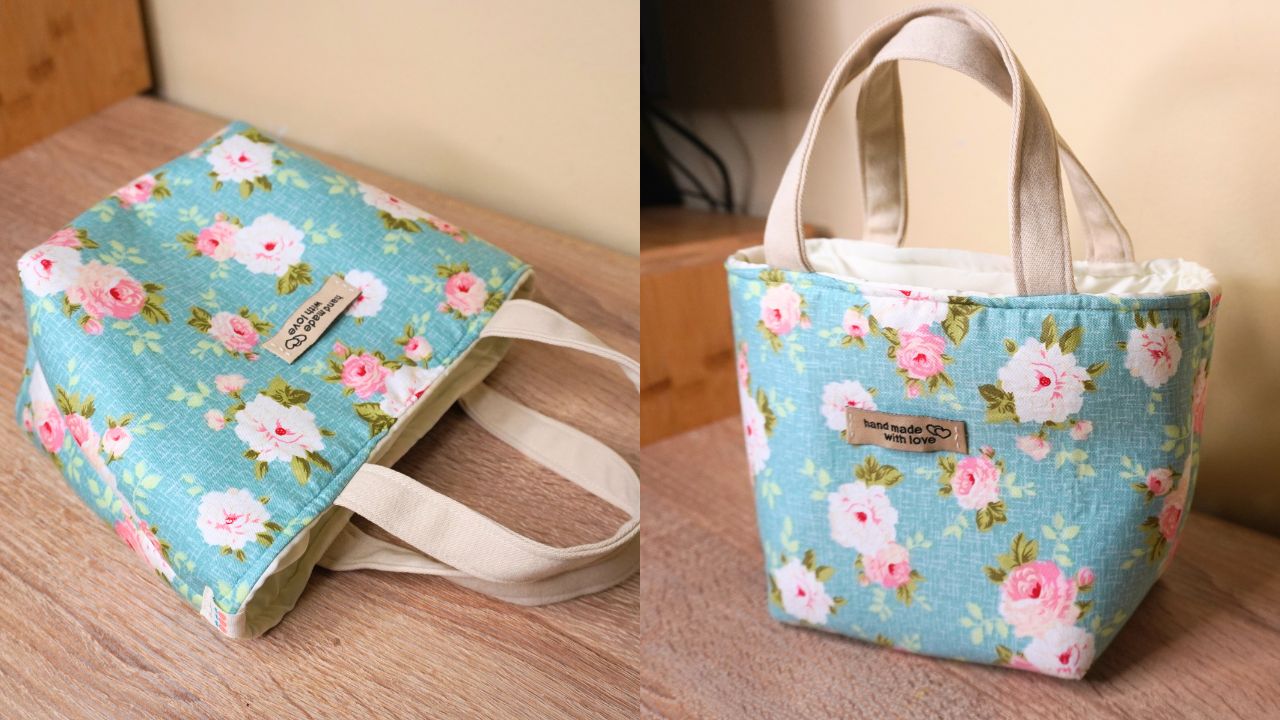
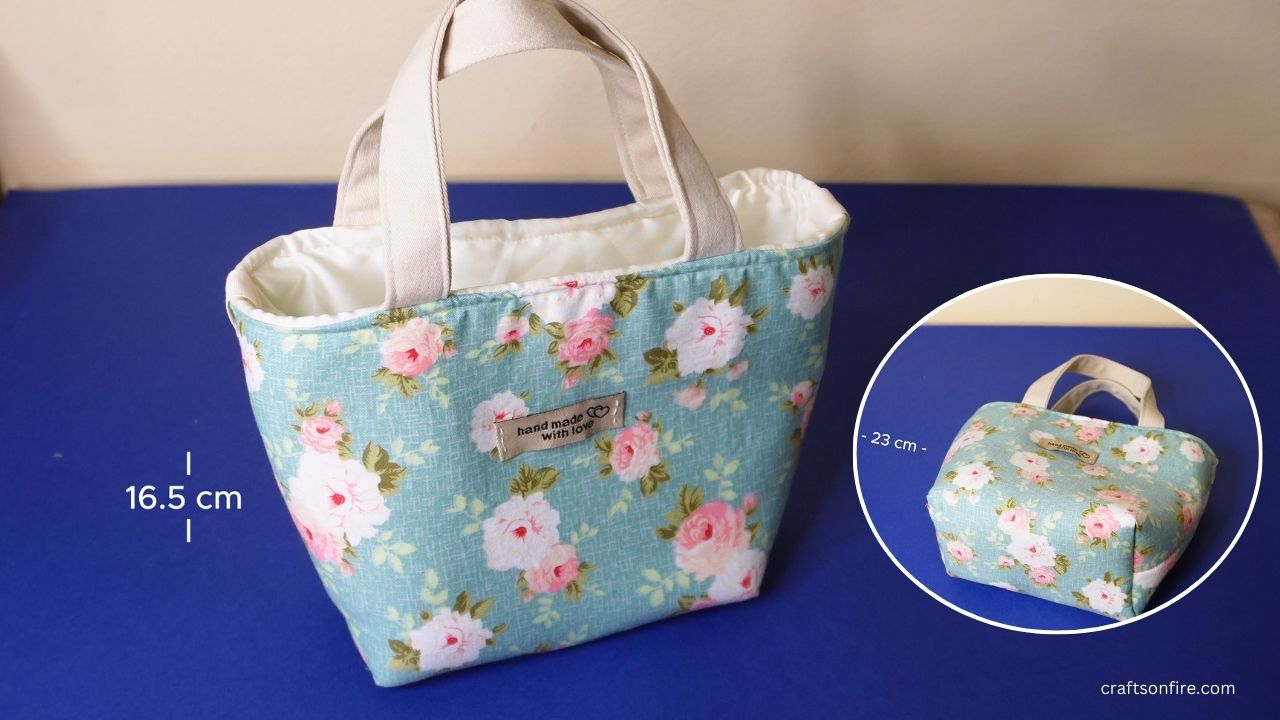
This tote bag features a beautiful floral outer fabric, a simple cream lining, and sturdy jean handles. I’ve also added a cute label on both sides for a little extra charm.
Feel free to add a label to the front of your bag as well if you want a more personalized finish!
Before you know it, you’ll have your very own small tote bag!
Once you’re ready, grab your sewing supplies, and let’s begin.
Tote Bag Tutorial
Supplies & Tools
To sew this small tote bag, here’s what you’ll need:
- Patterned Fabric – 21 cm x 27 cm (8.27″ x 10.63″)
- Lining – 21 cm x 27 cm (8.27″ x 10.63″)
- Fabric Batting
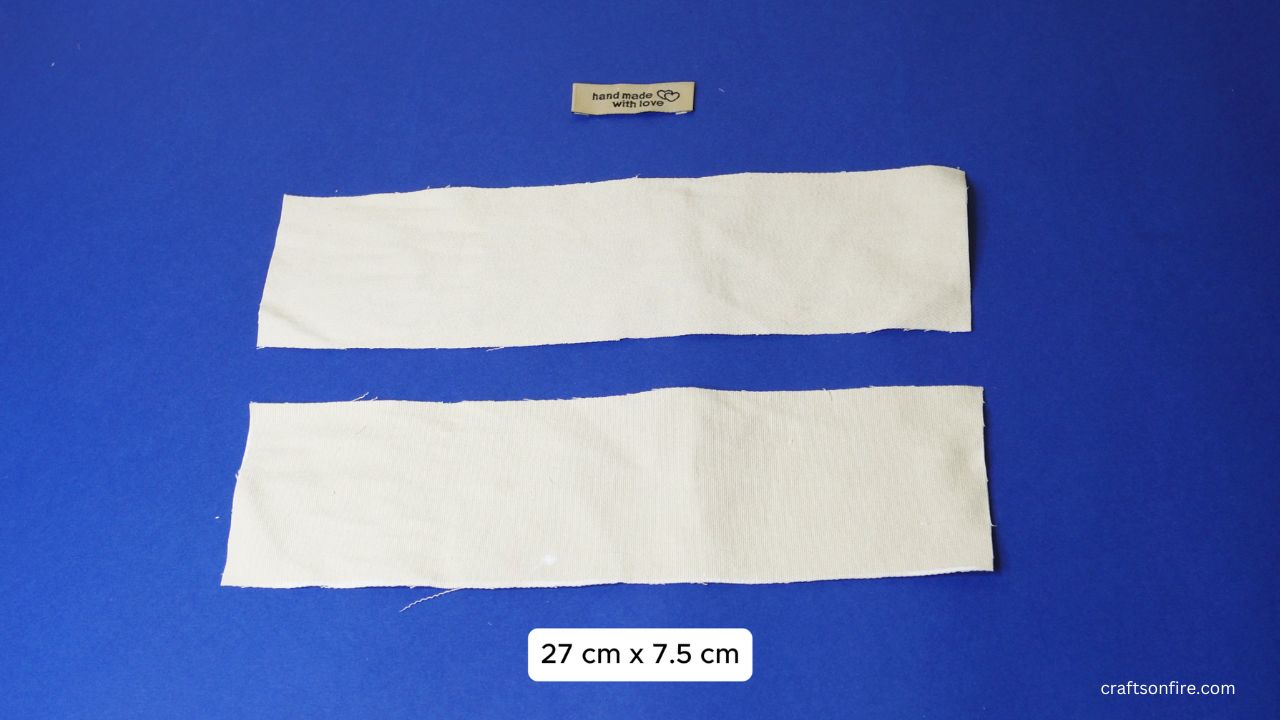
- Jeans Fabric (for bag handles) – 27 cm x 7.5 cm (10.63″ x 2.95″)
- Labels (optional)
- Sewing Machine
- Clips/Pins
- Tailor’s Chalk or Fabric Pencil
- Scissors
- Needle & Thread
Measurements

The patterned fabric, lining, and batting should each measure 21 cm x 27 cm (8.27 inches x 10.63 inches).
Additionally, you’ll need two strips of denim fabric for the handles, each measuring 27 cm x 7.5 cm (10.63 inches x 2.95 inches).
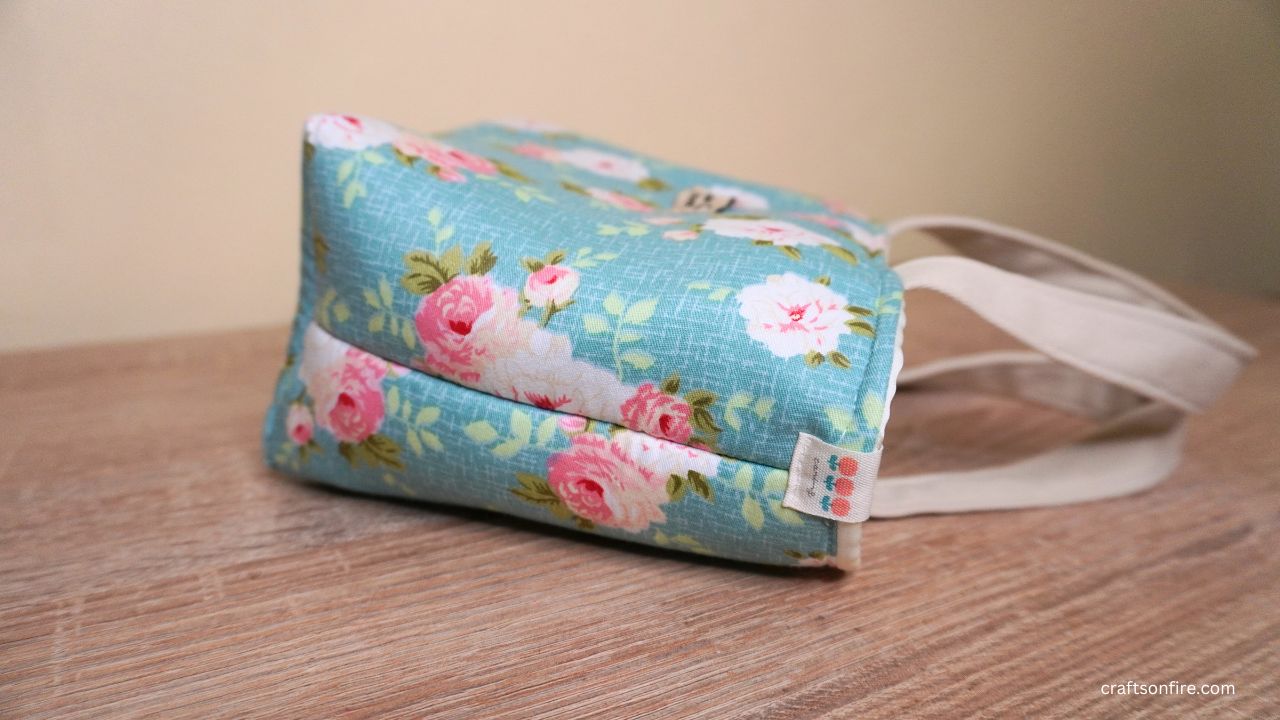
The finished bag will measure 23 cm x 16.5 cm x 15 cm (9.06 inches x 6.5 inches x 5.91 inches)
Once you have all your supplies ready, we can now start sewing.
Video Guide
Here’s a quick video guide to sewing this tote bag:
You can reference this guide if you’re stuck on a particular step or to double-check!
Instructions
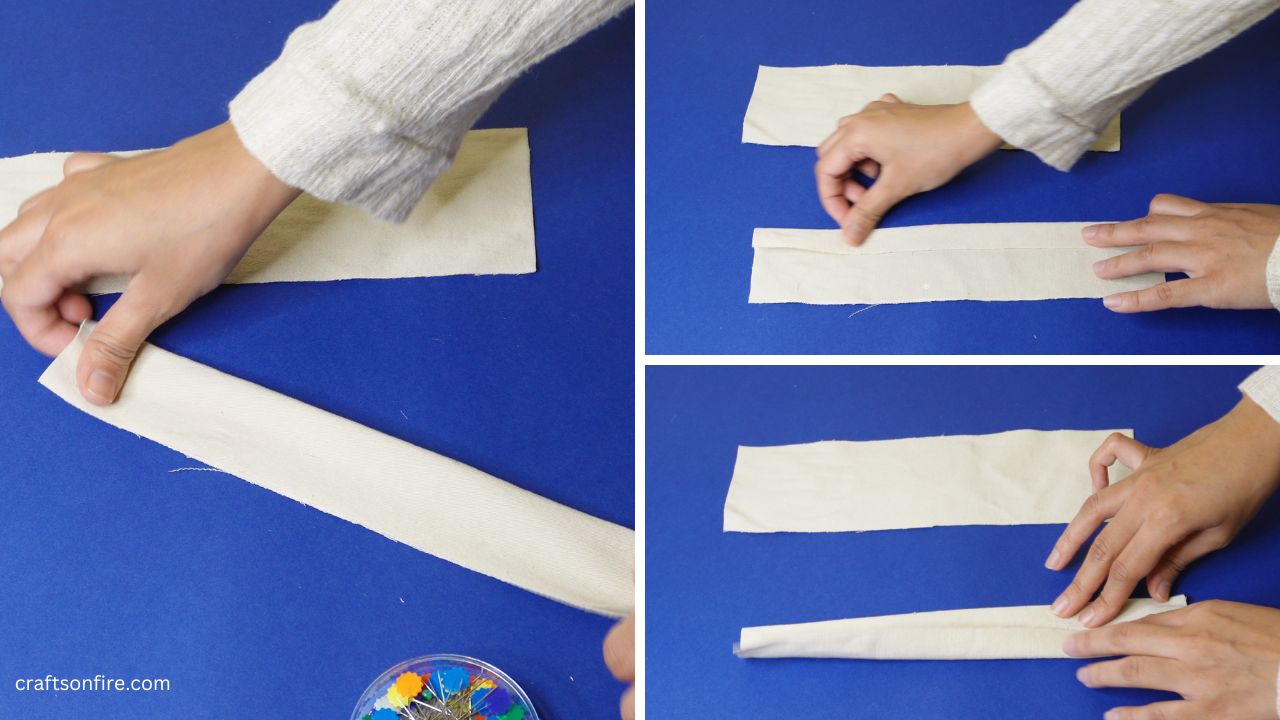
Step 1: Prepare the Handle Strips
Take one strip of denim fabric and fold it in half lengthwise. Mark the center point on both edges.
Fold one side of the strip towards the center, then fold the other side over to meet the center as well.
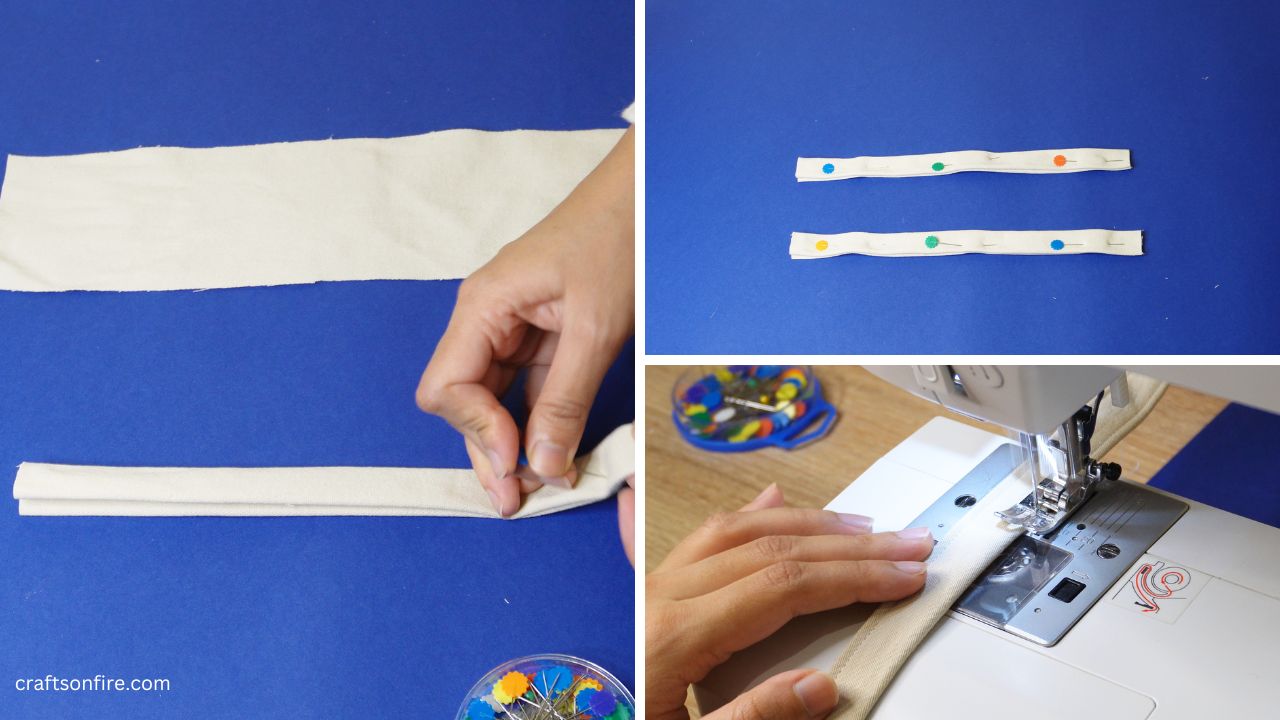
Step 2: Pin & Stitch The Strips
Fold the strip together once more and then pin the folded piece. Repeat this process with the second strip.
Then, stitch along both sides of each strip.
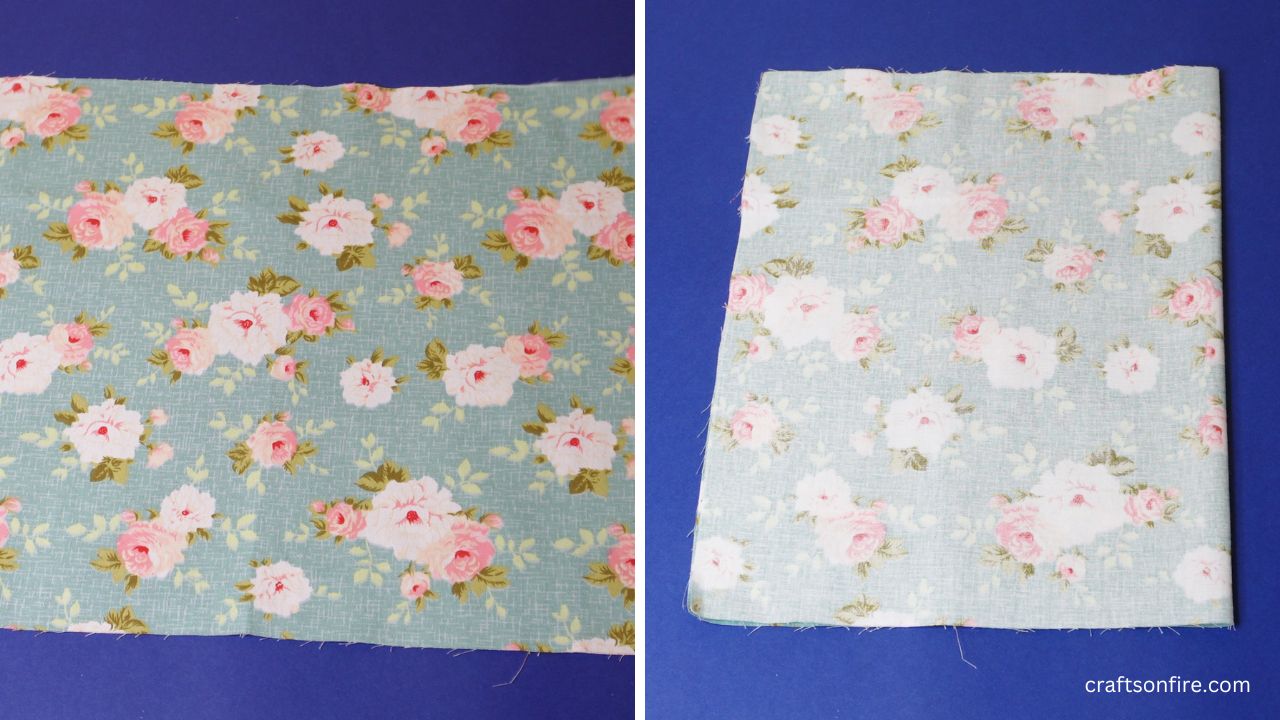
Step 3: fold the Outer Fabric
Fold the outer fabric (patterned piece) in half with the right sides facing inward.
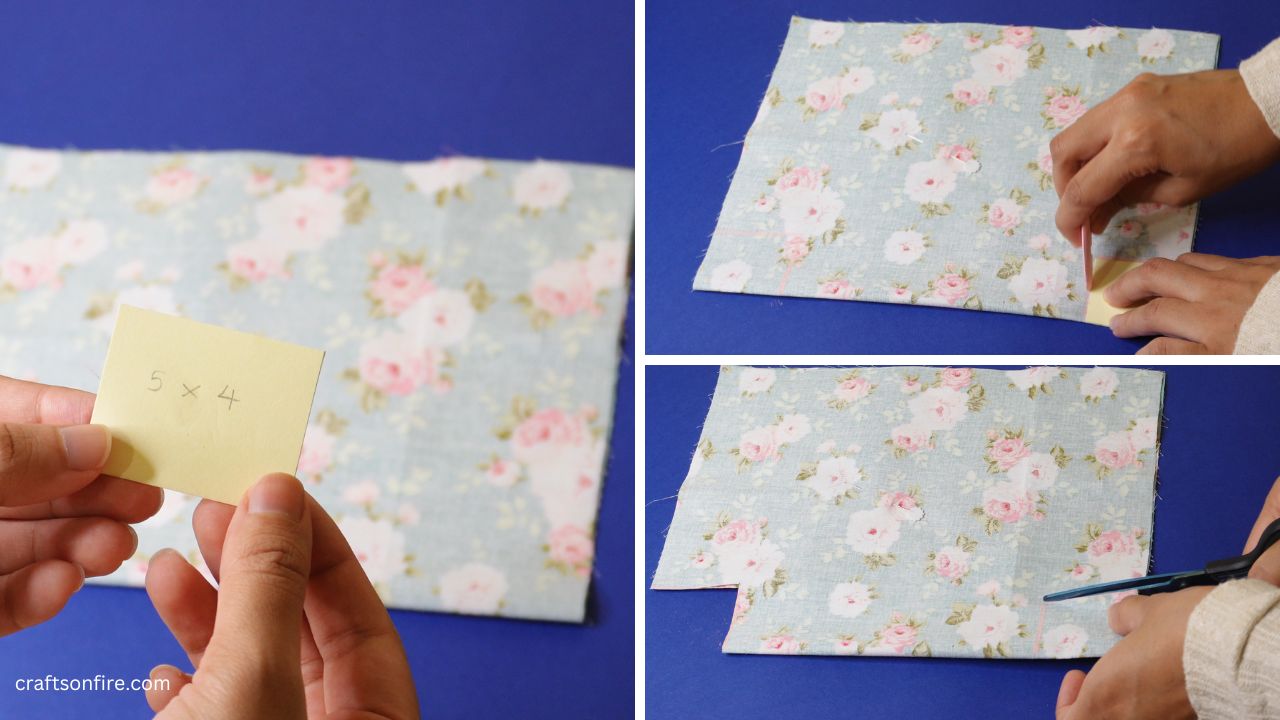
Step 4: Mark & Cut the Outer Fabric
Use the tailor’s chalk or a fabric pen to mark a 5 cm x 4 cm (1.97 inches x 1.57 inches) at the folded corners. Then, cut along the marked lines.
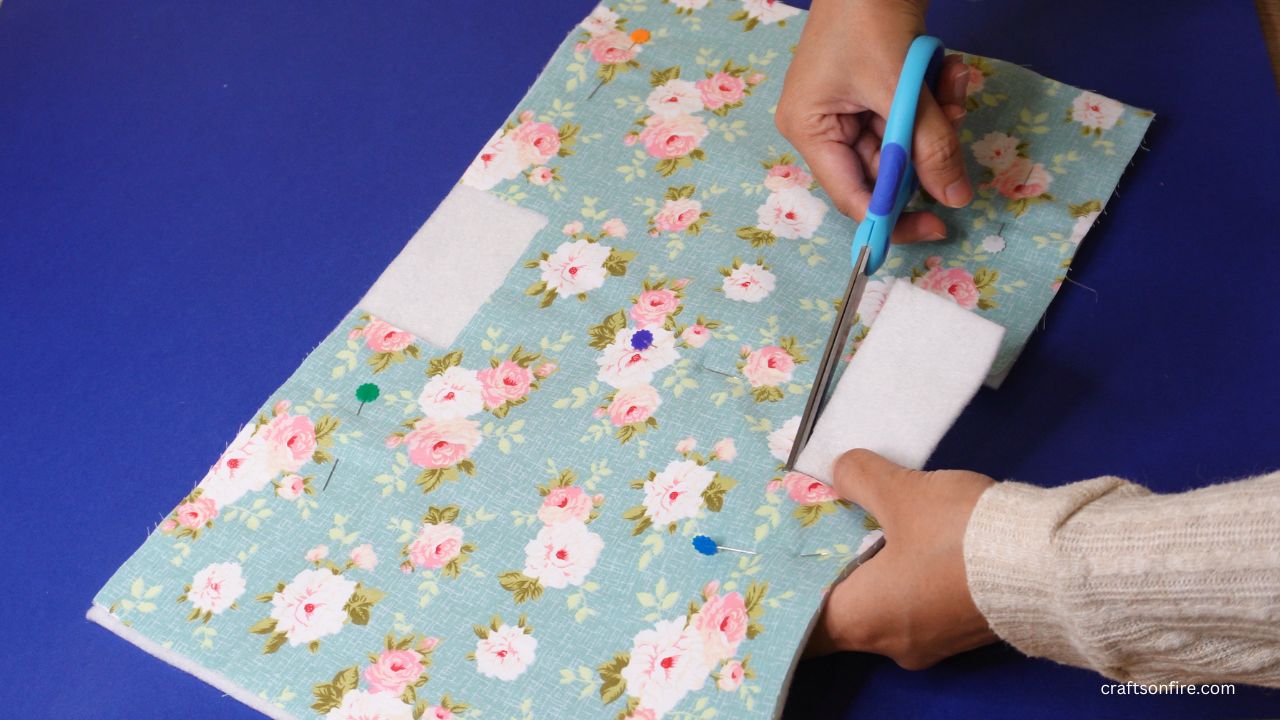
Step 5: Cut The Fabric Batting
Unfold the outer fabric and pin it onto the fabric batting.
Use this outer fabric piece as a template to cut out the same pattern for the fabric batting as shown below.
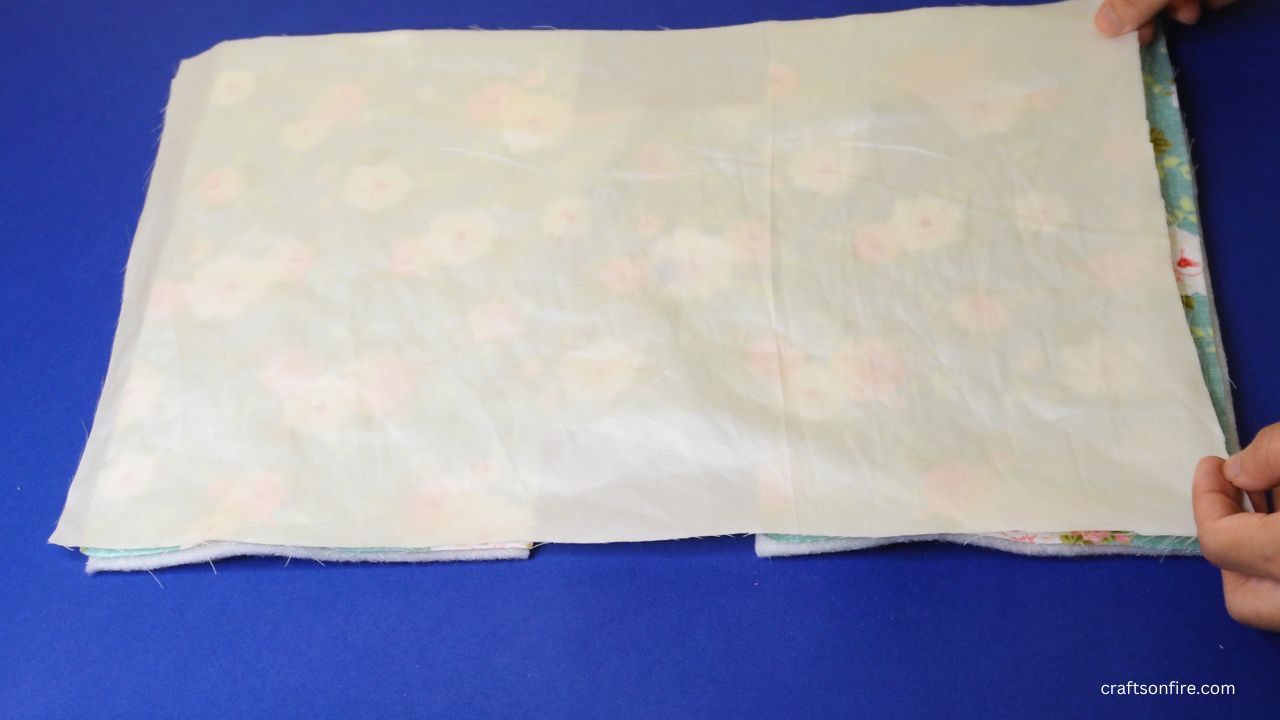
Step 6: Cut the Lining Fabric
Lay the lining piece on top or under the outer fabric and batting. Pin the pieces in place and cut the sides of the lining, following the same shape of the outer piece.
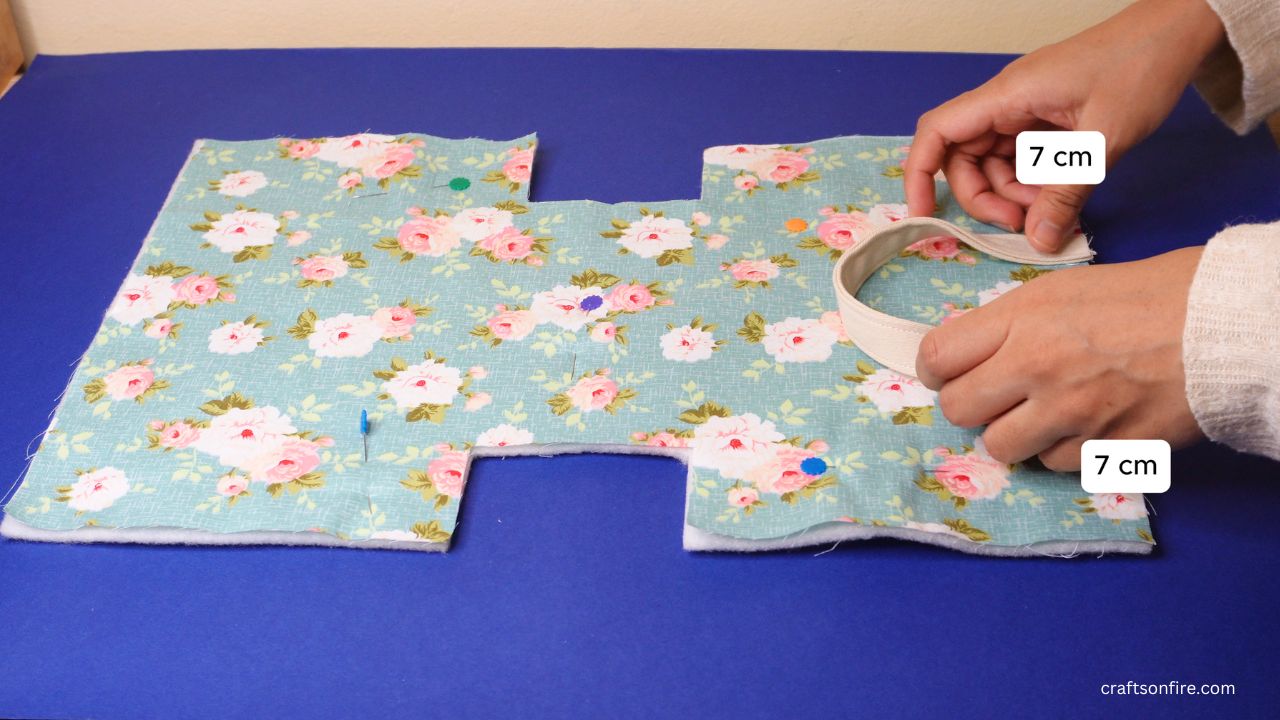
Step 7: Attach the Handles
Place the first strip piece (the bag handle) on one side of the outer piece with 7 cm on each side. Use a pin or sewing clip to secure it in place.
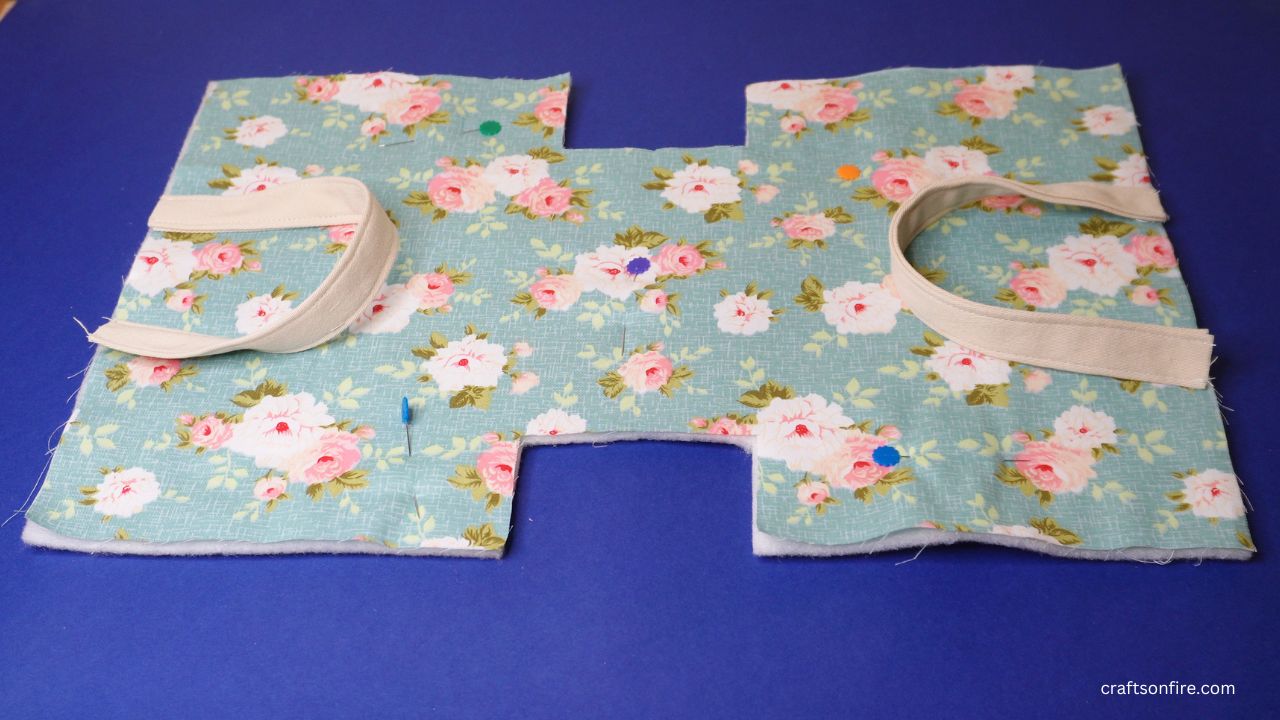
Step 8: Pin The Second Handle Strip
Repeat the previous step and pin the second strip on the other side.
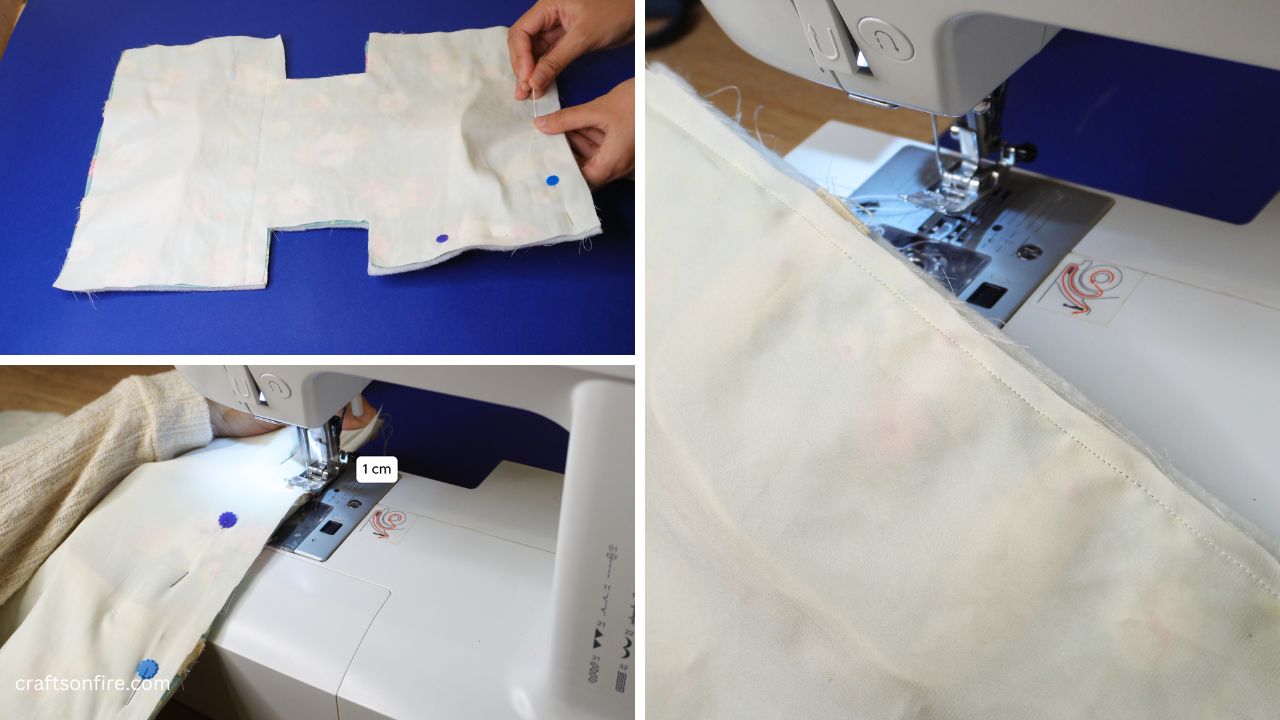
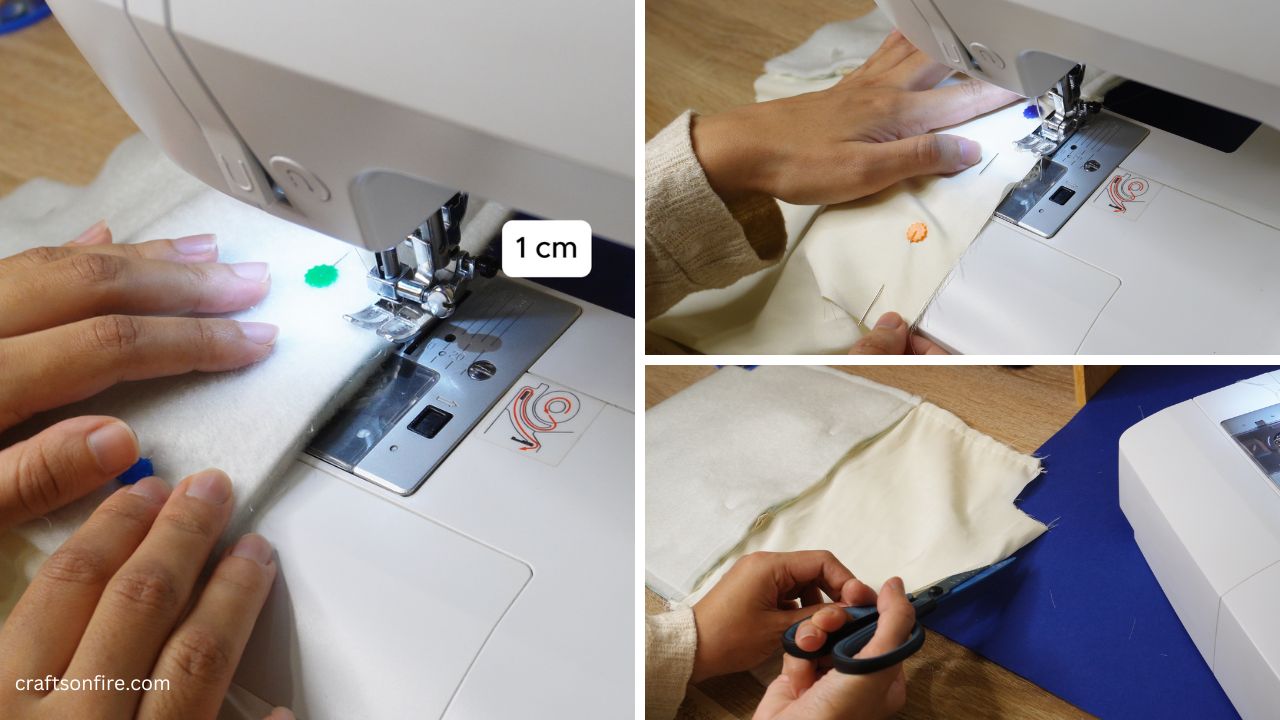
Step 9: Pin All Pieces Together & Sew
Place the lining piece on top of the outer piece (patterned piece) with the right sides facing inward and pin the sides.
Stitch the sides of the fabric using a 1 cm seam allowance.
Don’t forget to backstitch at the start and end of the seam.
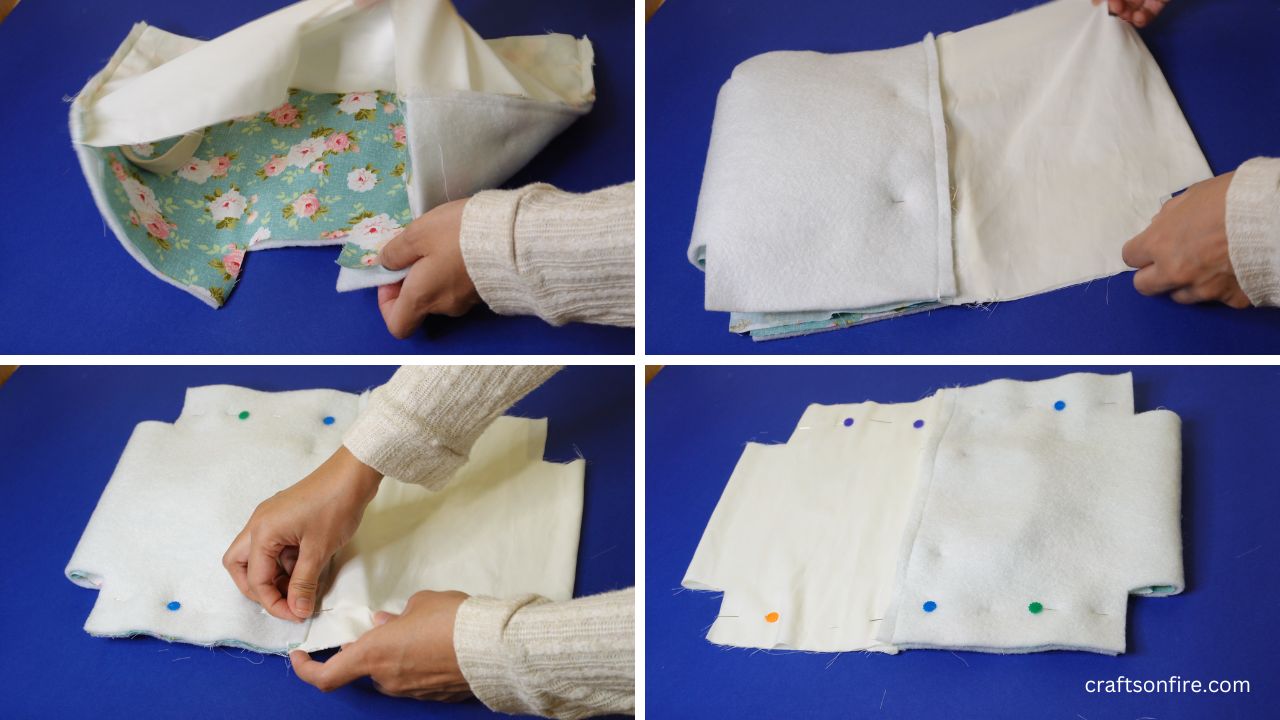
Step 10
With both sides stitched, open the fabric and fold the fabric so the outer pieces and lining pieces are aligned. Then, pin the two sides.
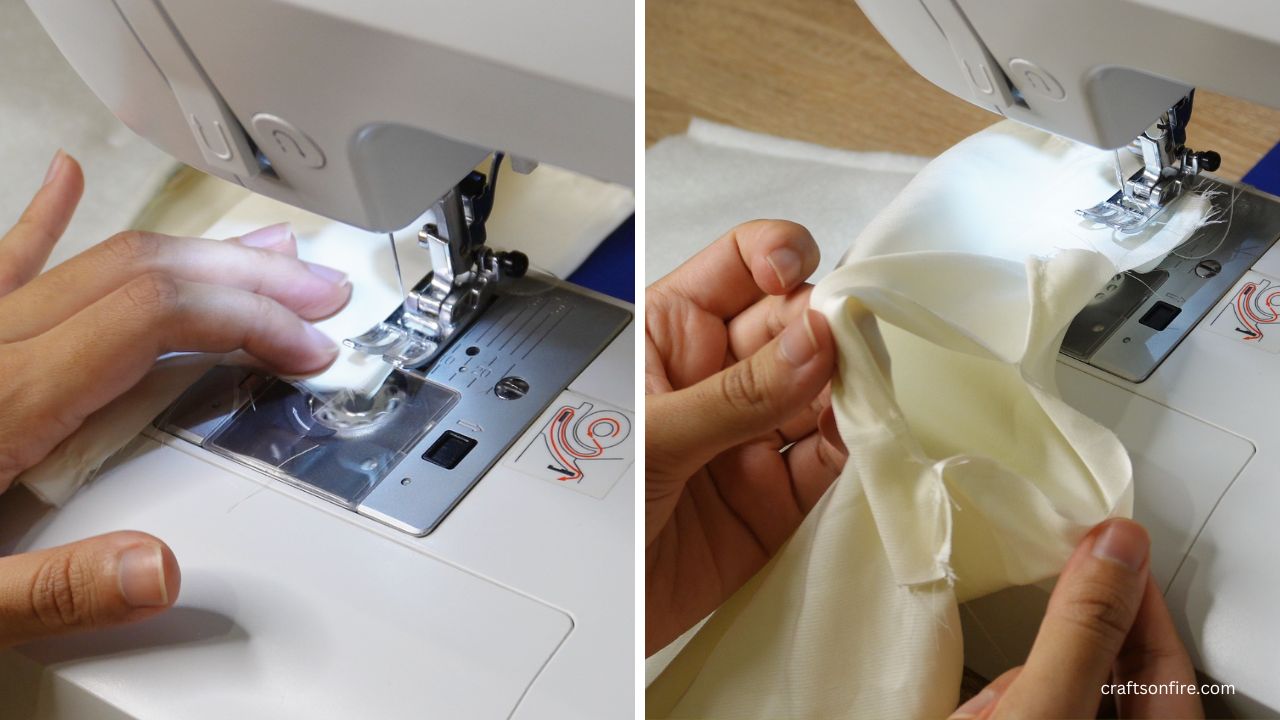
Step 11: Sew The Sides
Sew the sides of the bag using a 1 cm seam.
Once completed, slit the bottom of the lining piece. This will be the opening for turning the bag to the right side.
Step 12
Sew the two edges of the lining piece using a 1 cm seambut leave the middle unstitched.
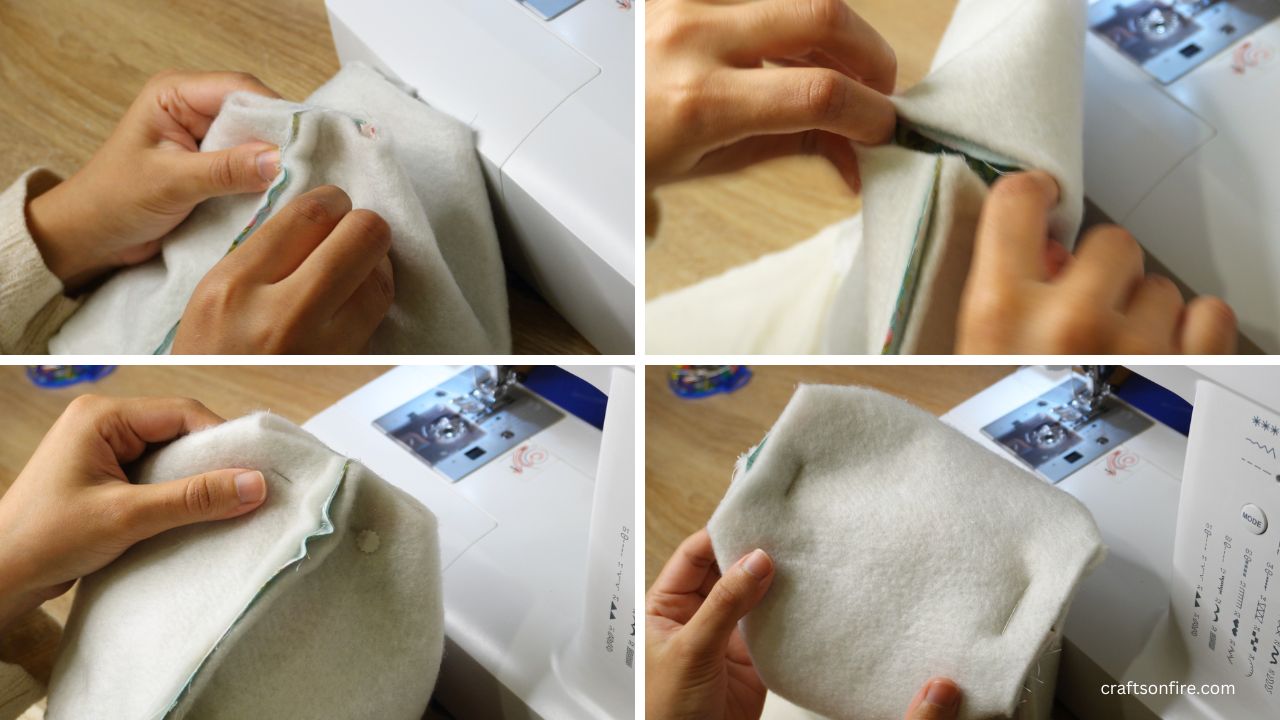
Step 13: Box the Corners
Next, we’ll box the corners.
Open one of the cutout pieces and fold the edges together. Use a pin to secure the piece.
Repeat this for the other cutout side. Once done, the bottom of your bag should look like this.
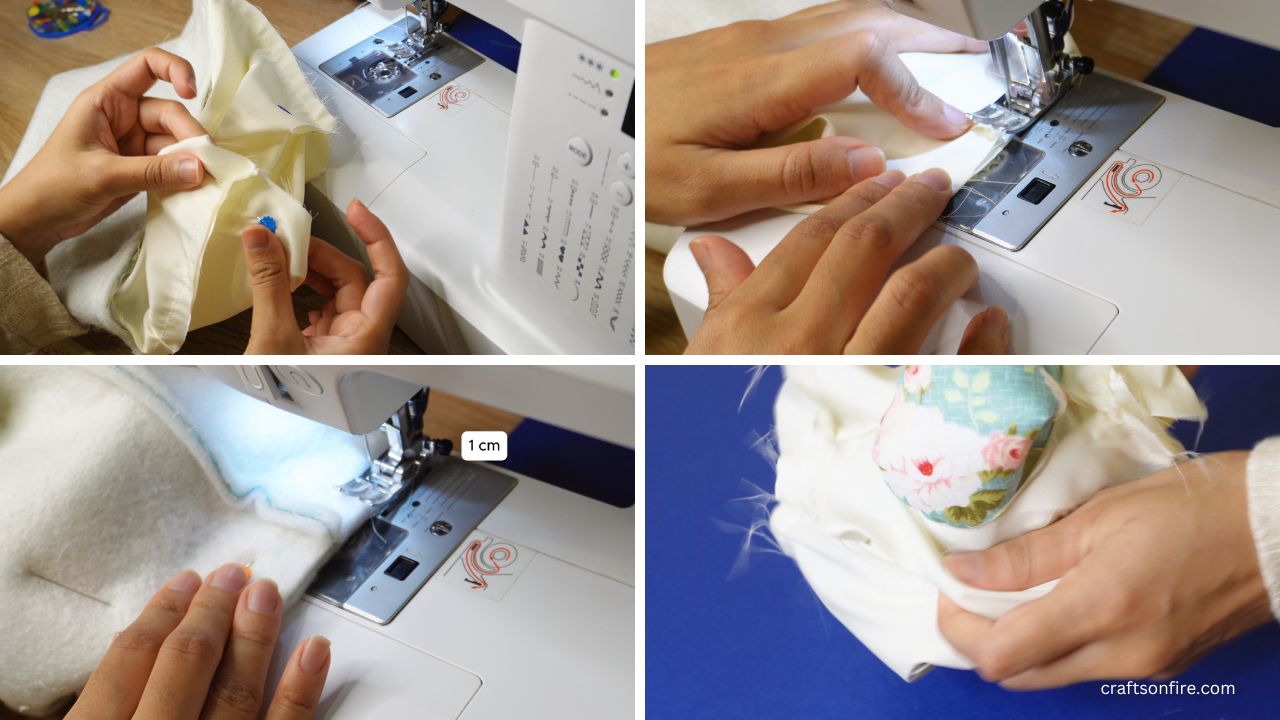
Step 14: Box The lining Cutouts
Repeat the previous step for the lining side. Then, stitch each cutout using a 1 cm seam.
Then turn the bag to the right side by pulling it through the opening in the lining.
Step 15
If you’ve used thick fabric batting, trim any excess fabric from the top seam before turning the bag out completely.
Gently open out the bag corners and smooth out the fabric.
Then, fold the raw edges of the lining’s opening inwards and stitch it closed.
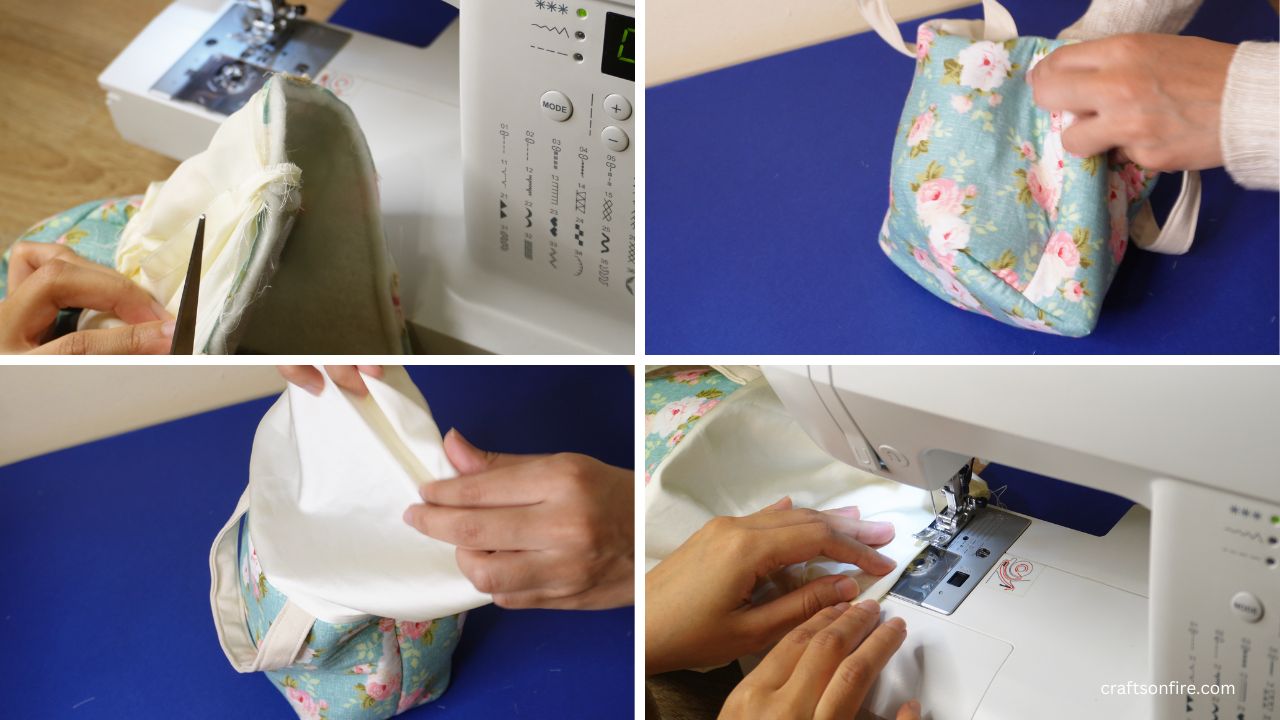
Step 16: Topstitch & Finishing Touches
Add a topstitch around the top edge of the bag and then finish off by attaching a label to the front and sides of the bag.

Final Result
And there you have it – your small tote bag is now complete!

This project is a bit easier to sew than most bags since there are no zips or closures involved. But if you prefer having a closure, you can always add one!
I hope you had fun following along with this tote bag tutorial! Sewing bags can feel tricky at first, but with a little patience, it’s totally worth it.
If you’re excited to keep sewing, here are some more step-by-step tutorials you can try next:
See you at the next one!