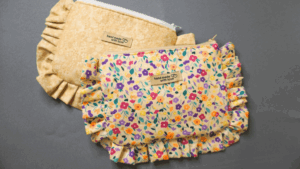
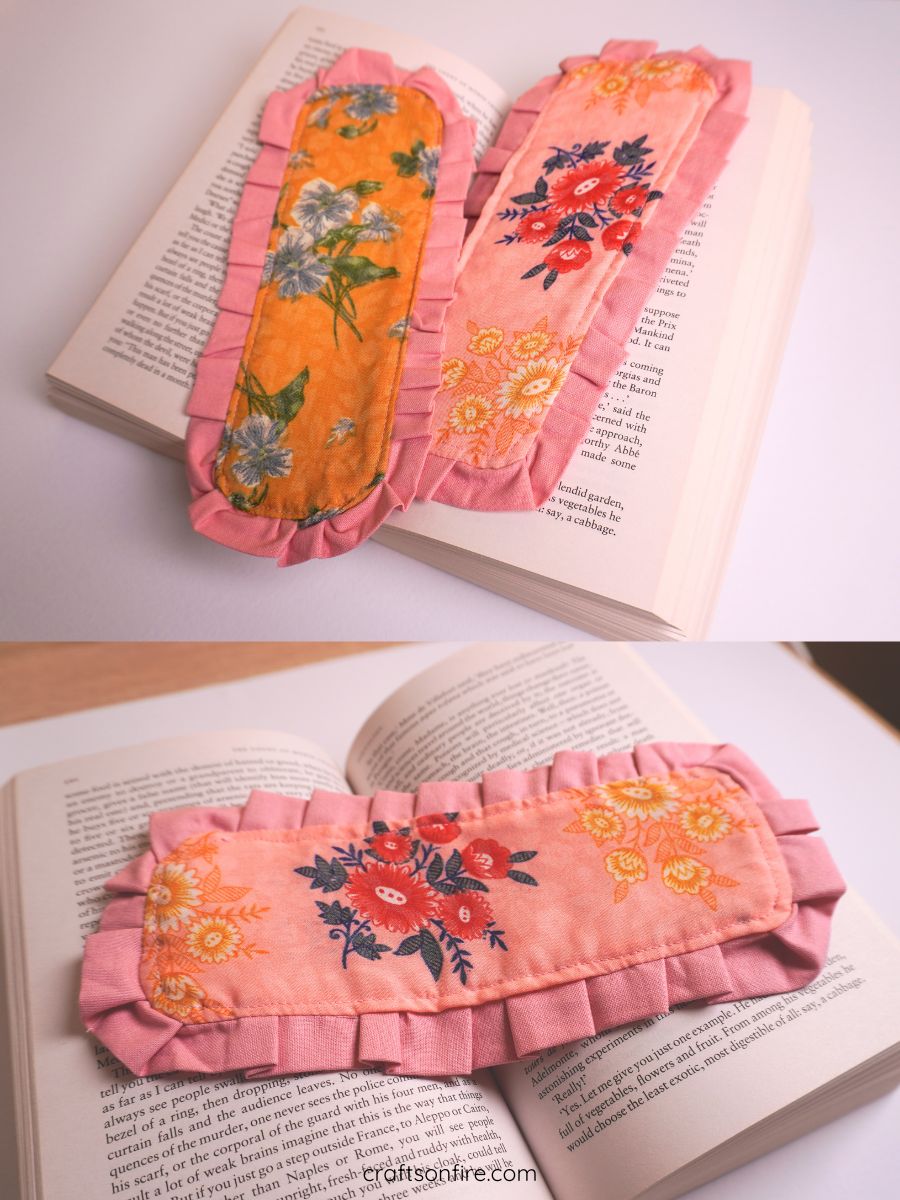
Handmade Ruffle Fabric Bookmarks in 15 Minutes (Sewing tutorial)

If you love sewing your own fabric bookmarks or maybe it’s your first time sewing, this ruffle fabric bookmark is definitely a cute and easy project you can try.
This short and easy sewing project adds a charming touch to your reading routine, and it’s both simple and fun to make.
I absolutely love how the ruffle edge peaks out from the top of a cute – it’s just so cute!
Sewing fabric bookmarks has become one of my favorite hobbies lately, and I’m always on the lookout for creative new bookmark designs to try.
I really enjoyed creating this one in particular, and I hope you like it as well!
All you need for this tutorial are a few pieces of fabric, and we can get started.
I’ll also show you the exact method I used to make this fabric bookmark.
I’ve included the video, step-by-step pictures, and written instructions that you can easily follow along with.
If this sounds good, let’s begin.
Ruffle Bookmark Guide
Supplies
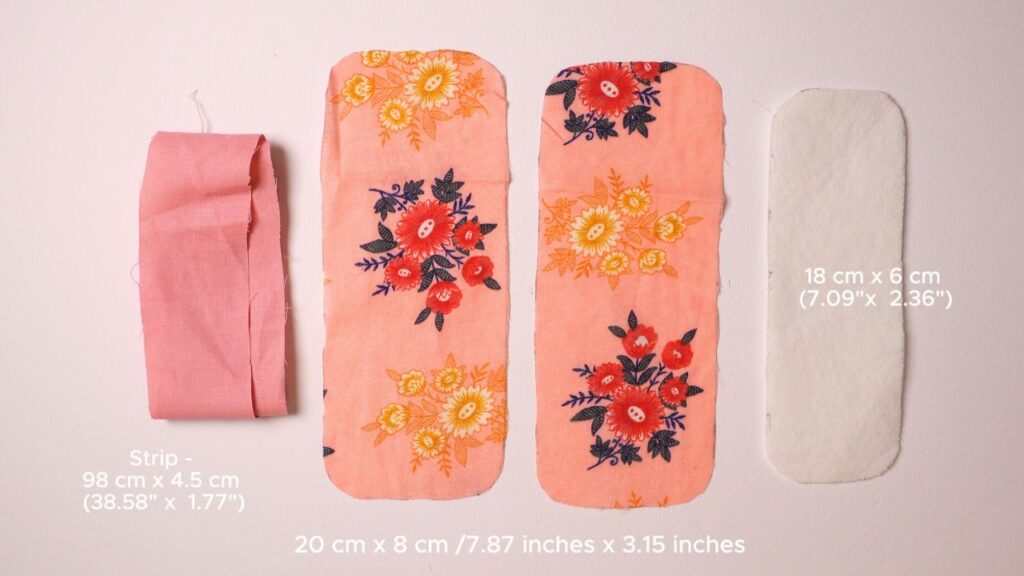
- Patterned fabric – 20 cm x 8 cm / 7.87″ x 3.15″ (2 Pieces)
- Fusible Interfacing/ Batting – 18 cm x 6 cm / 7.09″ x 2.36″ (1 Piece)
- Strip – 98 cm x 4.5 cm / 38.58″ x 1.77″
Finished Bookmark Size: 21 cm x 9 cm (8.27″ x 3.54″)
I also spent quite a bit of time creating a digital, printable version of this bookmark tutorial, with step-by-step instructions included under each picture.
Video Tutorial
Instructions
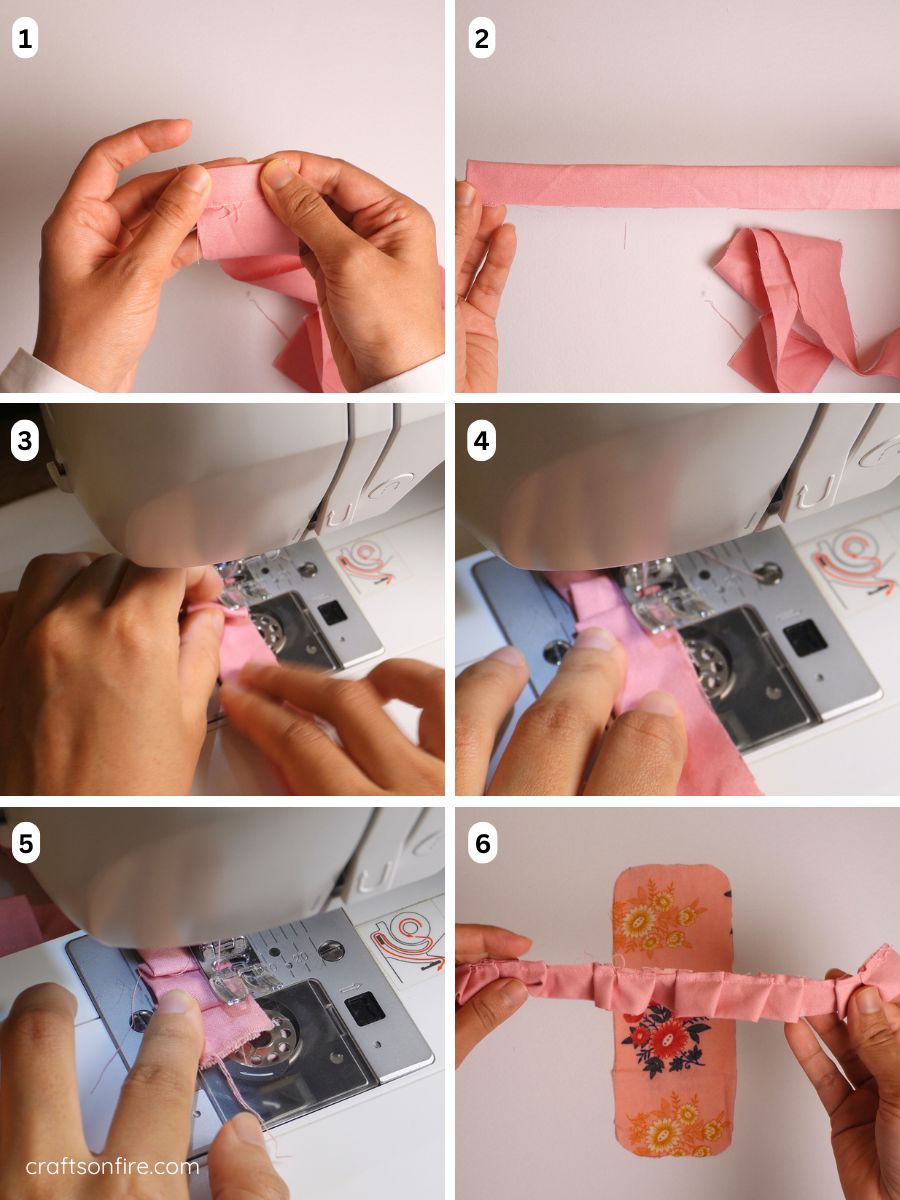
01. Begin by folding down the top edge of one end of the fabric strip.
02. Then, fold the entire strip in half lengthwise, as shown above.
03 – 04. Head over to the machine and begin sewing the strip. To create the ruffle effect, lift the presser foot, make a small fold, lower the foot, and sew.
05. You’ll want to keep repeating this pattern by folding and sewing until the entire strip is ruffled/gathered.
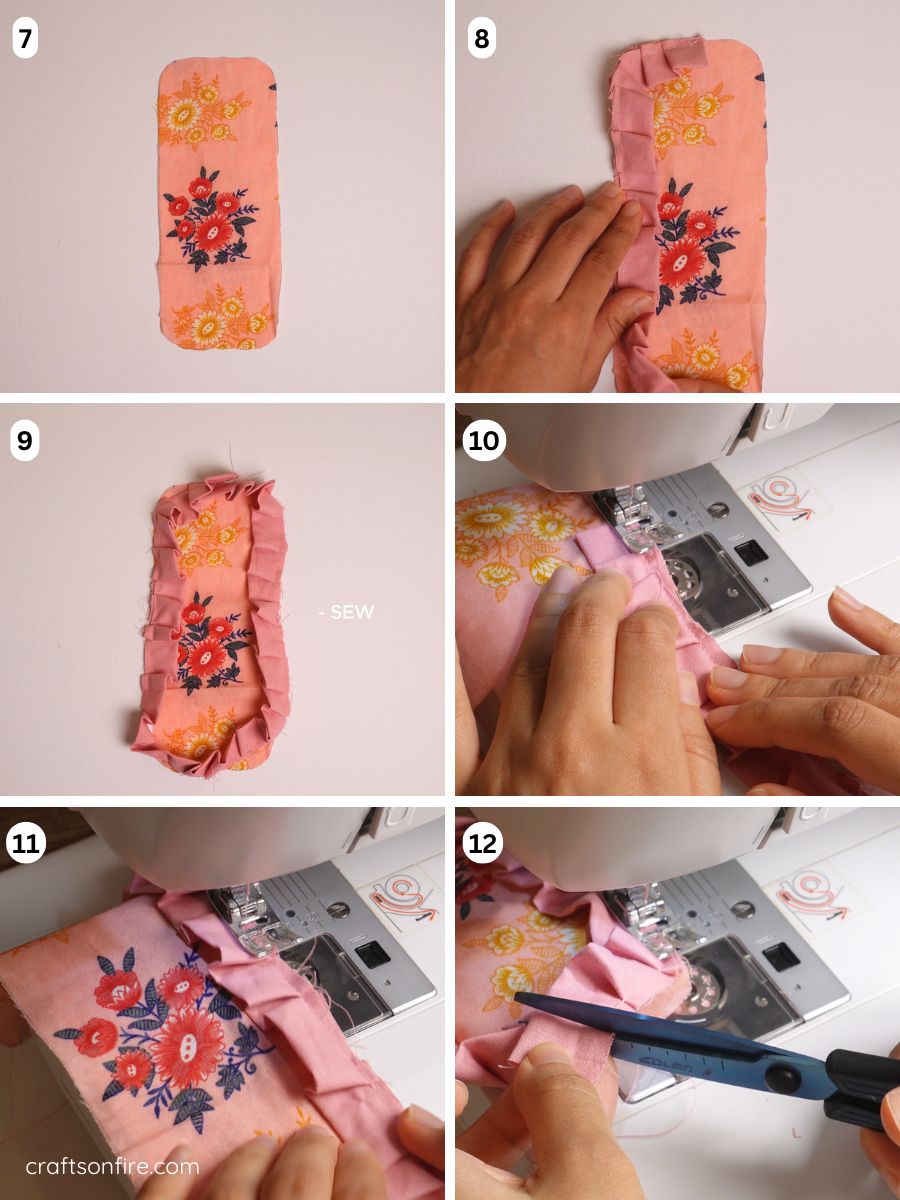
07 – 08. Now we’ll assemble the bookmark. Take your first patterned piece (right side up) and place the ruffle strip along the edge, with the ruffles facing inward.
09 – 11. Sew the ruffle strip to the edge of the fabric.
12. When you reach the end of the strip, trim off any extra length.
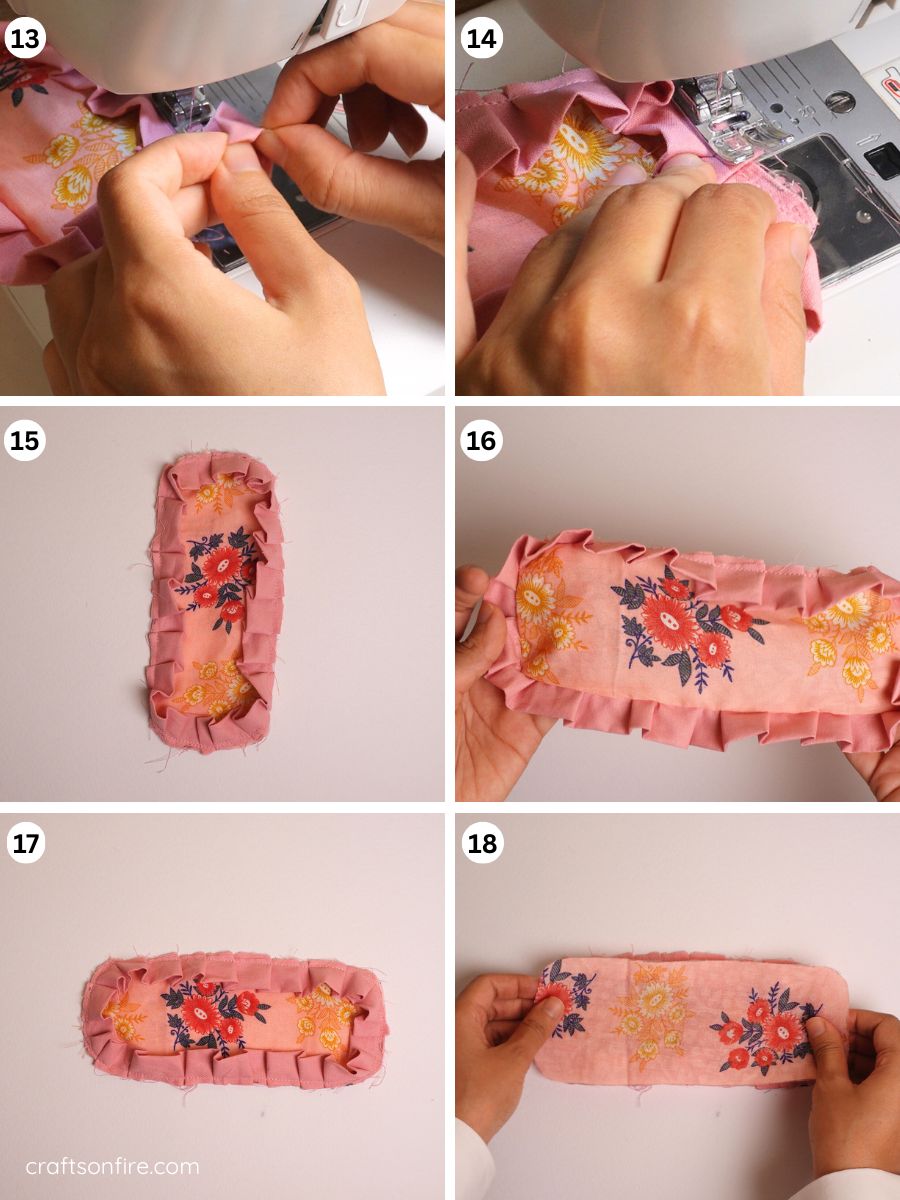
13. To finish the strip, fold the raw edge of the fabric inward, then lay it down, so it slightly overlaps the beginning of the ruffle strip.
14. Sew the end of the strip in place and backstitch to secure it.
15 – 17. This is how your piece should look so far.
18. Next, take the second fabric piece and place it on top of the ruffled piece, with right sides facing each in.
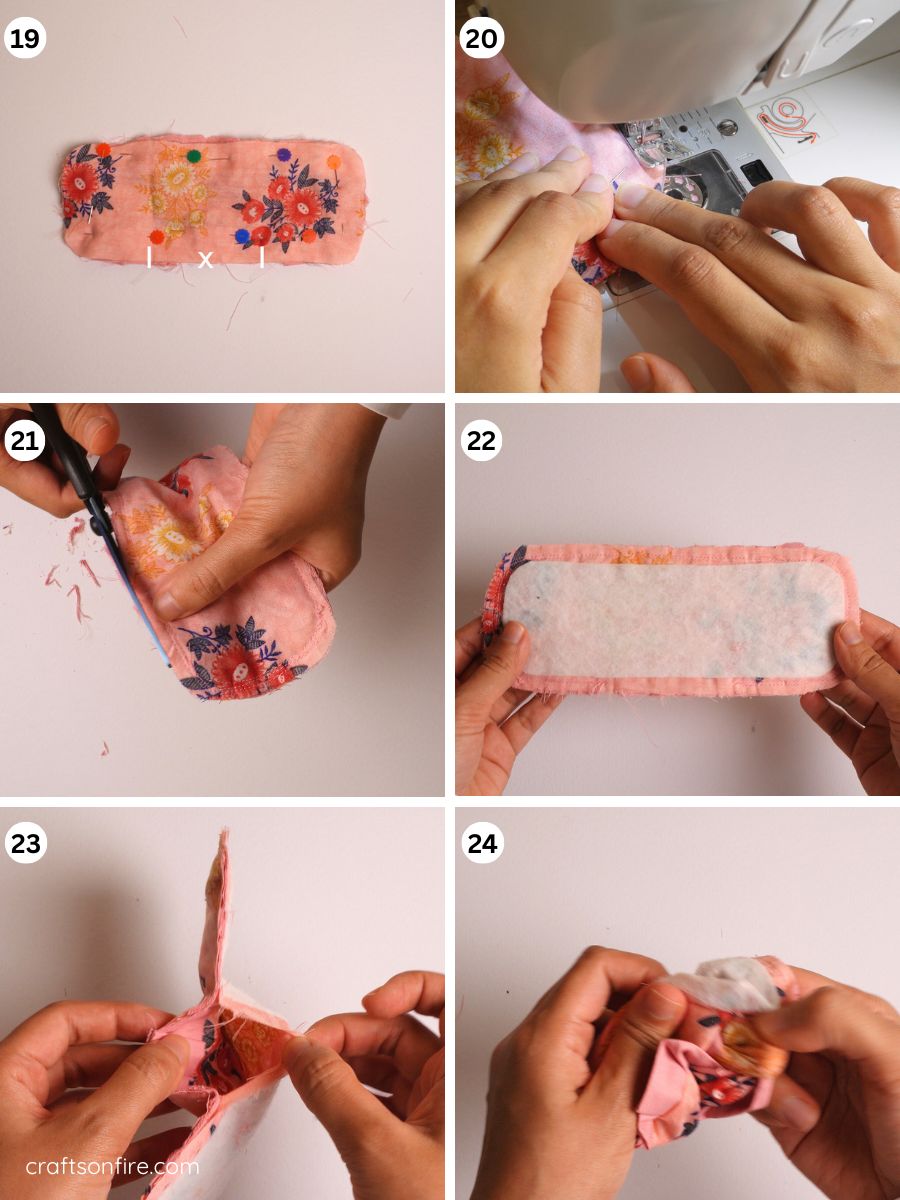
19. Sew the two pieces together, but leave a small opening on one side of the bookmark for turning out.
20. Don’t forget to backstitch at the start and end points of stitching. You can use either a 0.5 cm (0.20 inches) or a 1 cm (0.39 inches) seam allowance — whichever you prefer.
21. After sewing, trim any excess fabric from the sides.
22. Next, iron the batting or interfacing onto one side of the bookmark.
23 – 24. Turn the fabric right side out through the opening.

25 – 26. Use your finger to gently push out the corners and smooth the curves from the inside.
27. Fold the raw edges in at the opening and pin them in place. Then, iron the bookmark.
28. Finish it off by sewing a topstitch around the bookmark, and this will also close the opening.
Your bookmark is now complete.
If you want an ad-free copy of this tutorial, get the printable pdf guide over here.
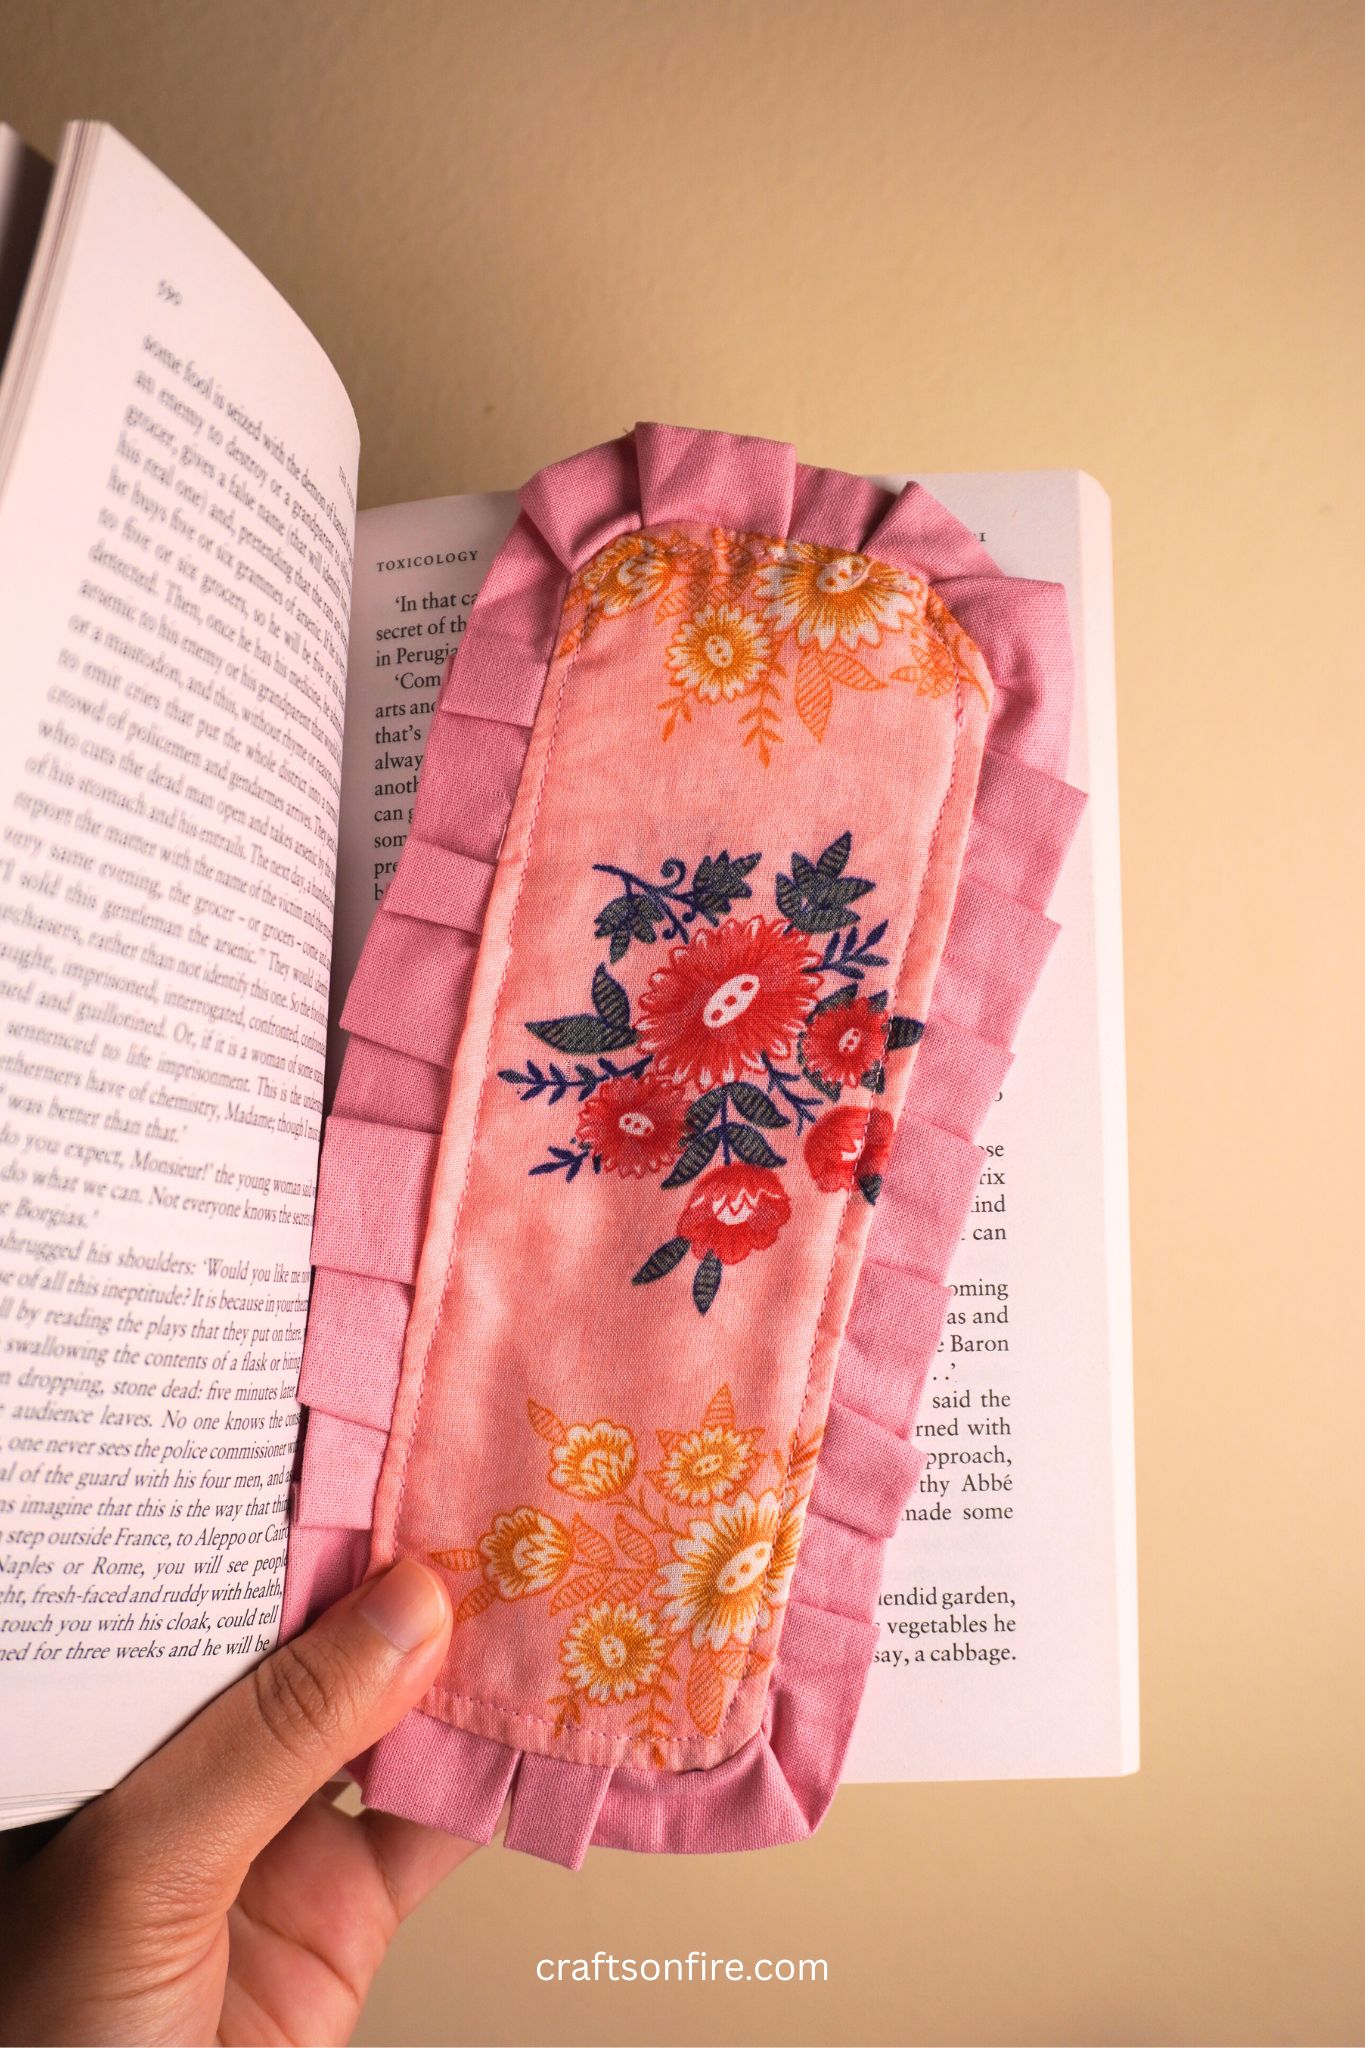
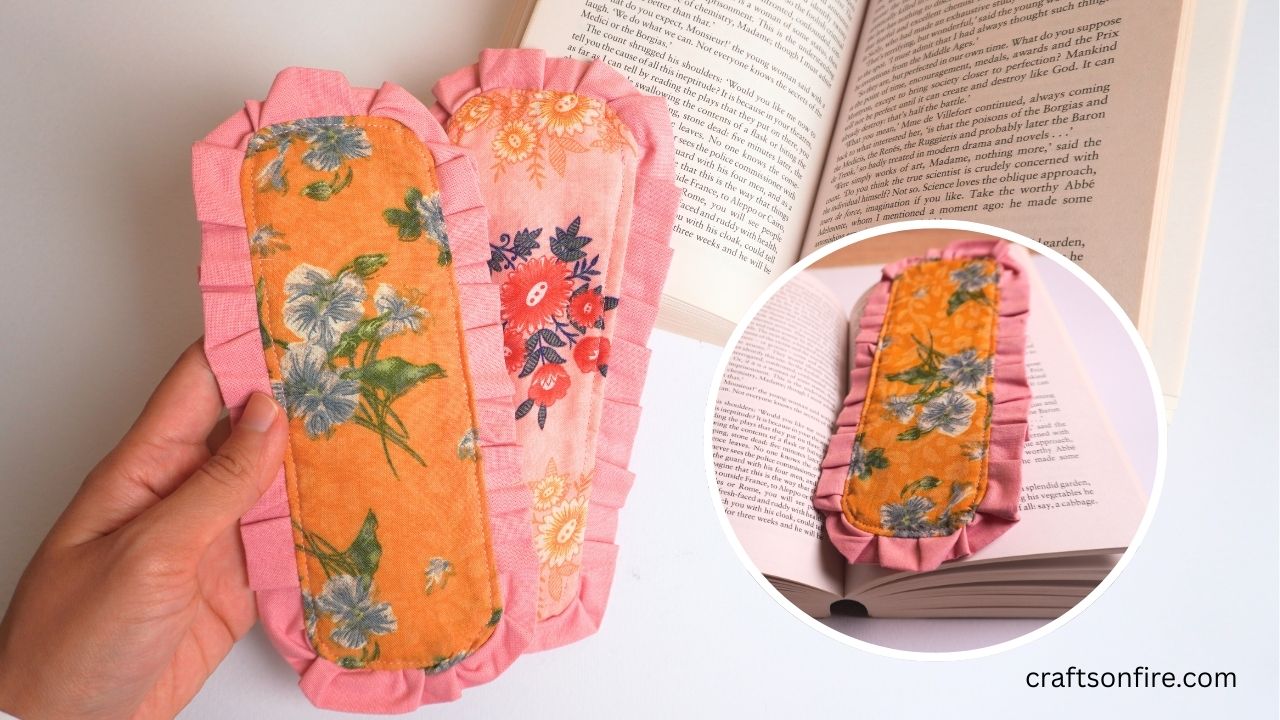
You can make this ruffled bookmark in any size, following the same pattern and process!
I also love that you can create different color combinations by using a different color for the ruffle strip.
If you don’t want to gather your ruffle strip, you can always sew a loose line down the strip and then pull the bobbin thread to create the ruffle effect. Either way works fine.
I hope you liked sewing this ruffle fabric bookmark.
If you tried this project, I’d love to hear how it turned out! Feel free to share in the comments or tag me on social media.
See you at the next sewing project!
More Sewing Tutorials
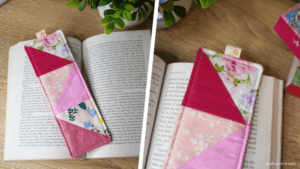
DIY Patchwork Bookmark Using Half Square Triangles