Strawberry Zipper Pouch: Step-By-Step Sewing Guide
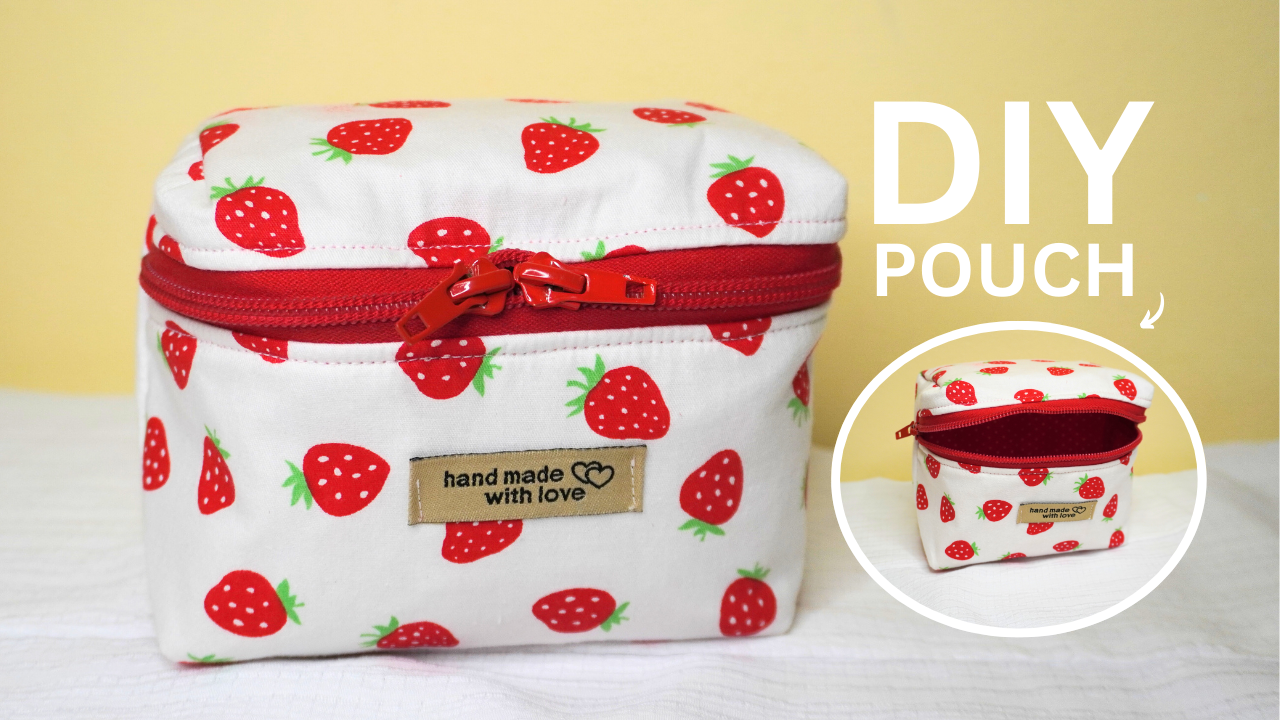
This strawberry-patterned zipper pouch is the perfect project to try next! It’s easy and fun to sew, even for beginners, and just the right size for storing makeup or small craft supplies.
With its cute strawberry design on the outside and red polka dot lining, this pouch makes a great gift for kids or friends.
If you’ve never sewn a zipper pouch before, don’t worry — my step-by-step guide will walk you through the entire process including everything you need to get started.
Plus, the pattern is basic enough to create this pouch in any size!
I’m sure you’re excited to get started.
Before you dive in, take a moment to read through this guide and familiarize yourself with the steps. This will make sewing a zipper pouch much easier, especially if this is your first time sewing a pouch.
With that said, grab your materials and sewing machine, and let’s begin!
Table of Contents
Zipper Pouch Tutorial
Supplies & Tools
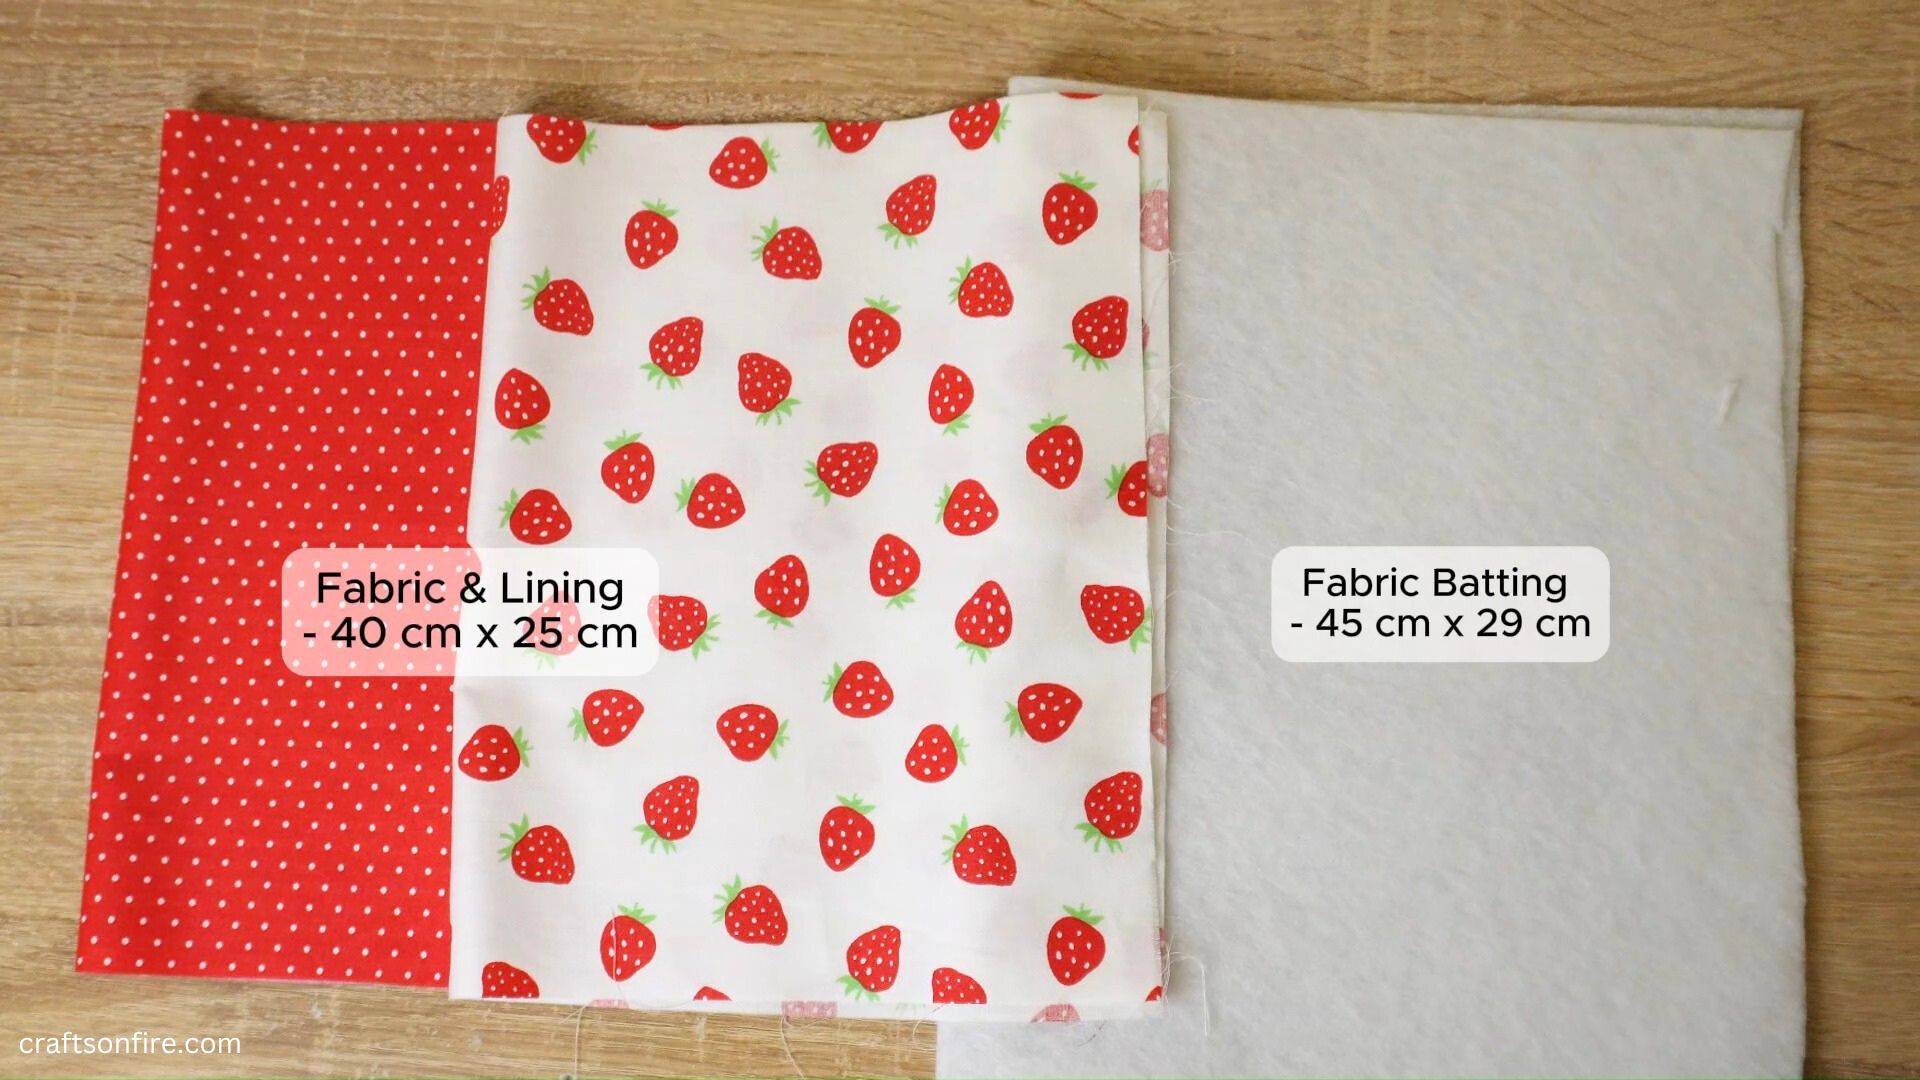
- Fabric – 40 cm x 25 cm (15.74 inches x 9.84 inches)
- Lining – 40 cm x 25 cm
- Fabric Batting/Fleece – 45 cm x 29 cm (17.71 inches x 11.41 inches)
- Zip – 30 cm (11.81 inches)
- Zipper Fasteners
- Bias Tape – 14 cm x 5 cm (2 pieces) & 3 cm x 14 cm (4 pieces)
- Sewing Machine
- Pins
- Fabric Marker/Tailor’s Chalk
- Scissors
Final Measurement of pouch: 12 cm x 17 cm x 9 cm
Video Tutorial
Instructions
Step 1
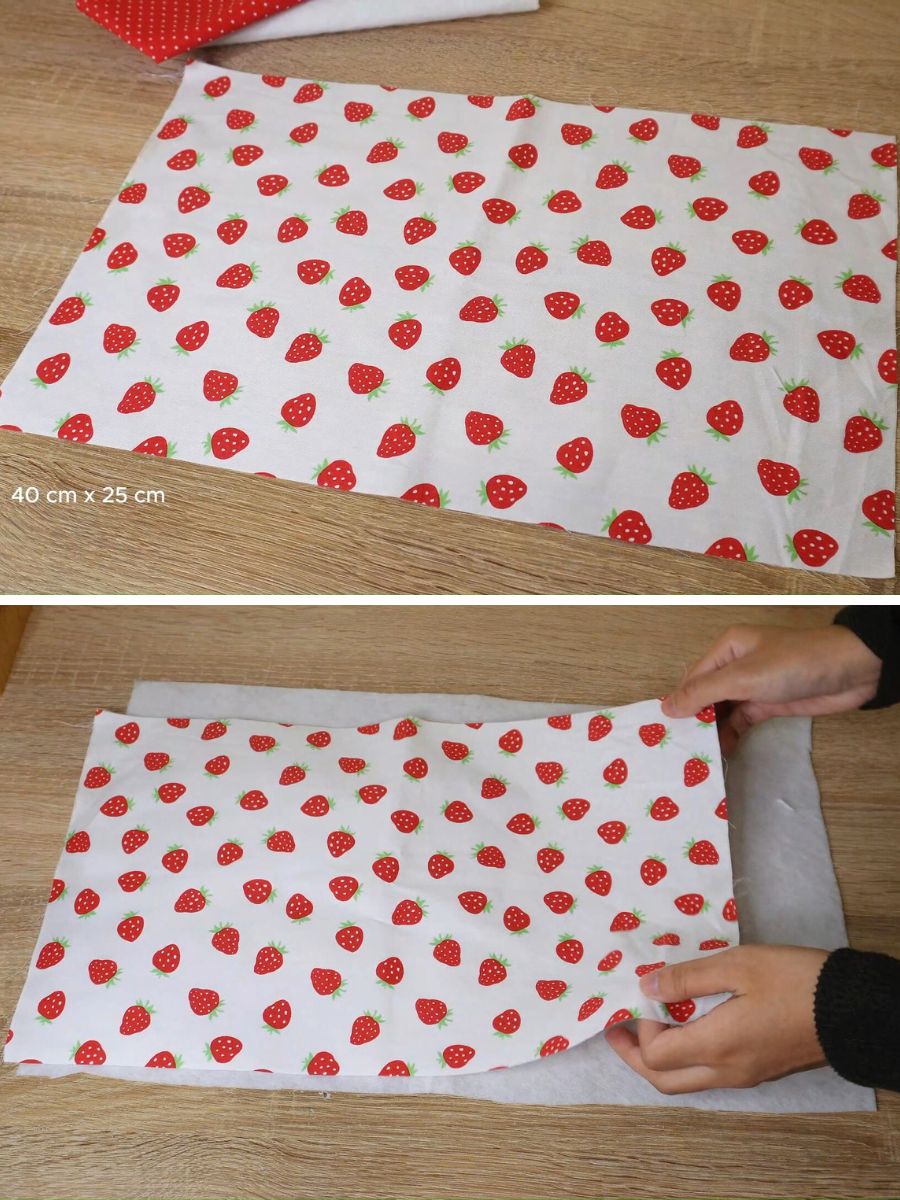
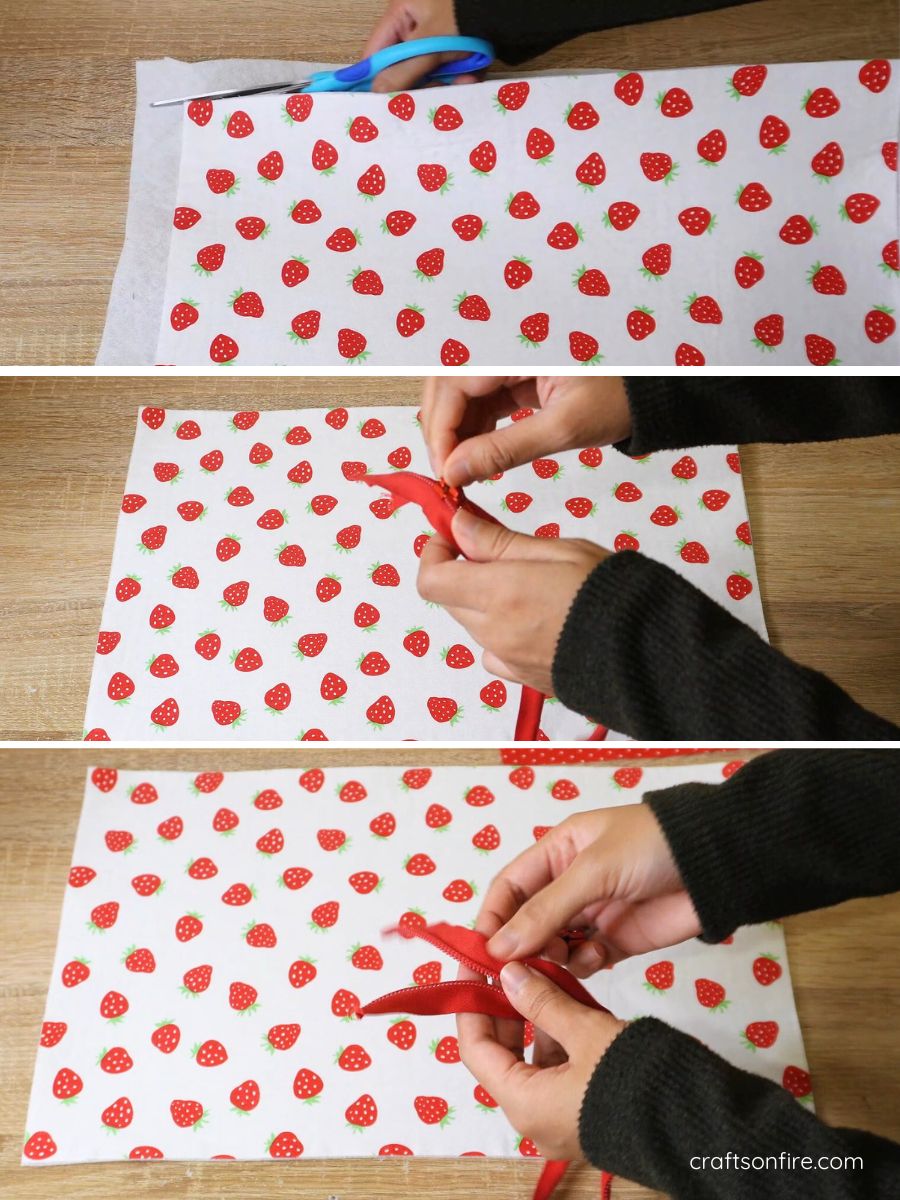
Begin by ironing the patterned fabric to the fabric batting.
Step 2
Cut the excess fabric to match the size of the patterned fabric. Then, grab the zip and remove the zipper fastener, separating the zip into two pieces.
Step 3
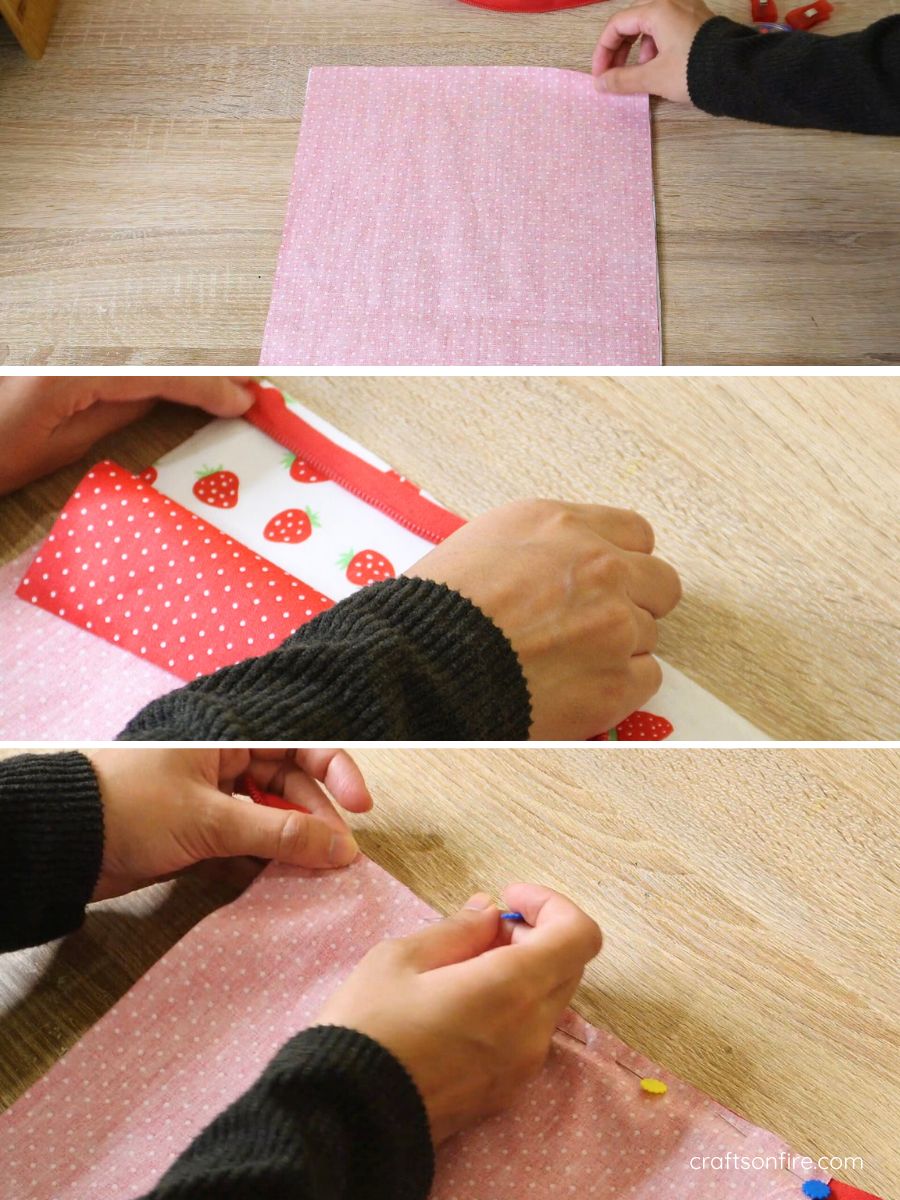
Next, pair the fabric batting, patterned fabric, zip, and lining together.
To do this, take the first zipper piece and place it on one side of the fabric. Then, grab the lining piece and place it on top of the fabric and zipper.
The right sides of the fabric should face inward.
Pin or clip all 4 layers together.
Step 4
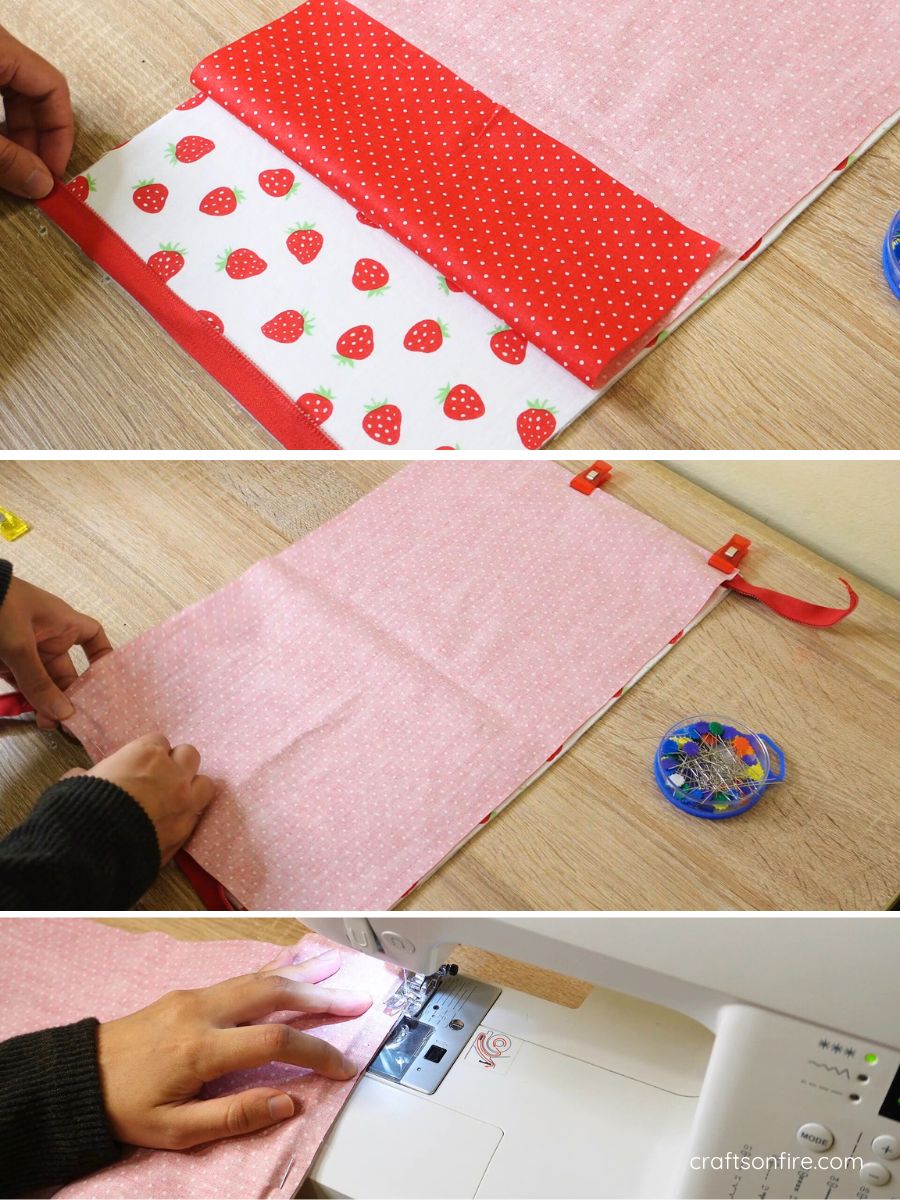
Repeat the previous step for the other side of the patterned fabric.
Then, head over to the sewing machine and stitch both ends.
Step 5
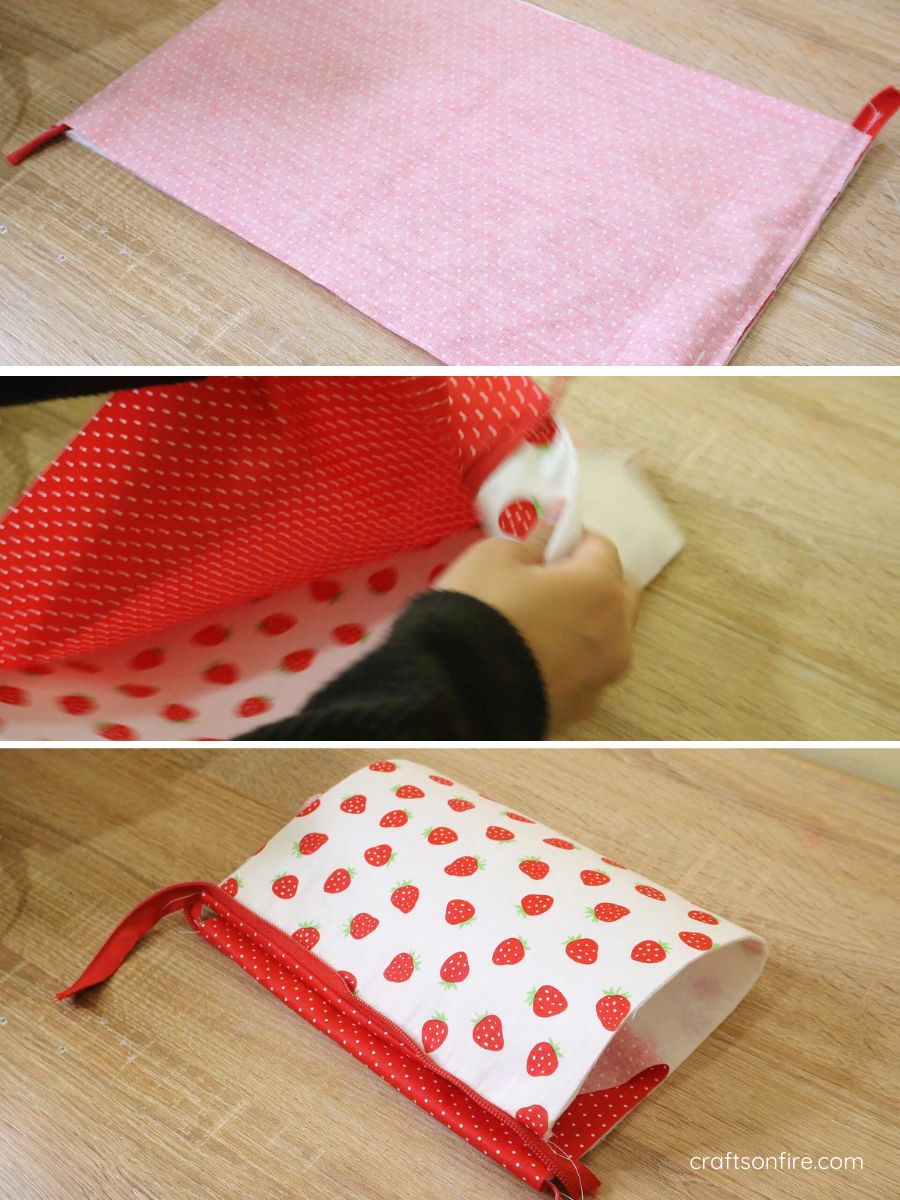
With both sides now sewn, carefully open the fabric through one side and fold it over to the right side (patterned fabric facing up).
Step 6
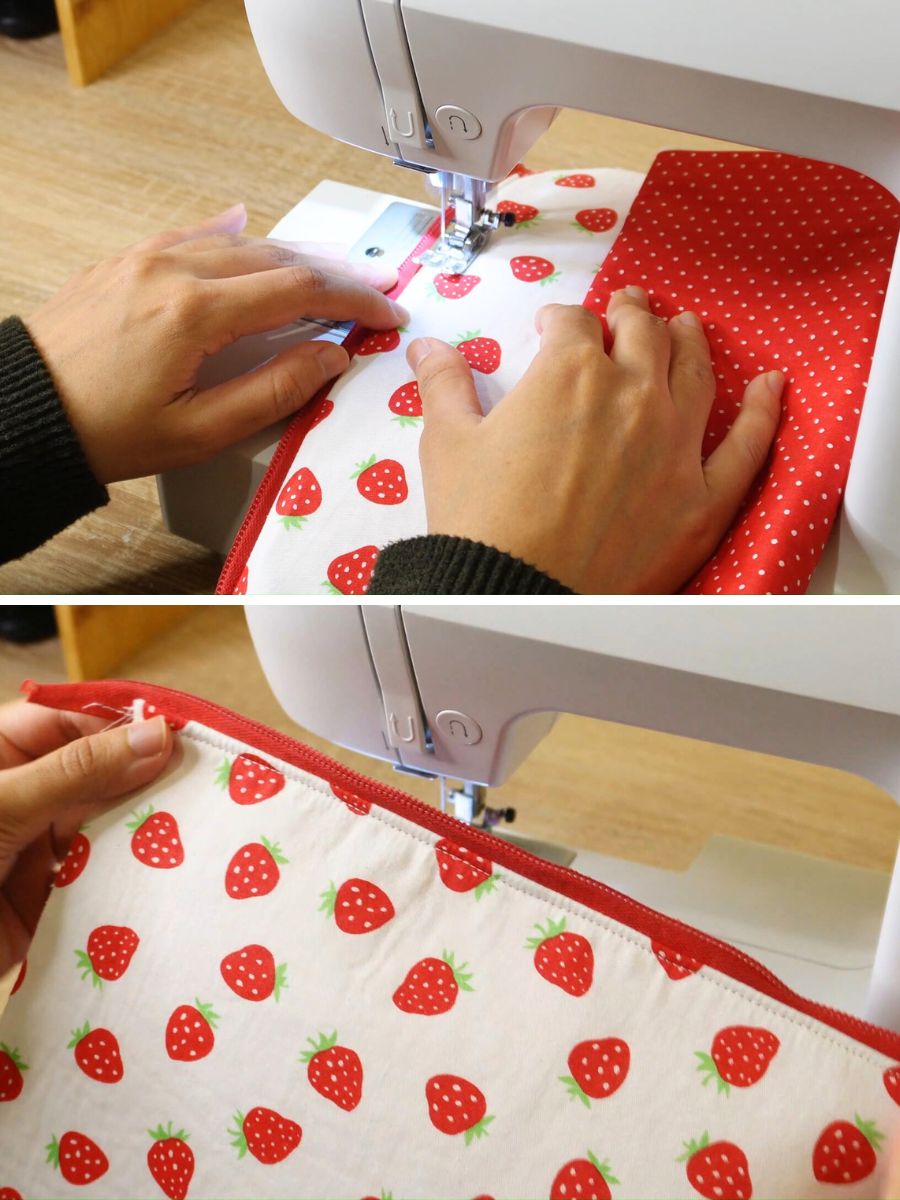
Head to the machine and add a top stitch to the zipper part on both sides. You can switch to a zipper foot if you have one.
Step 7
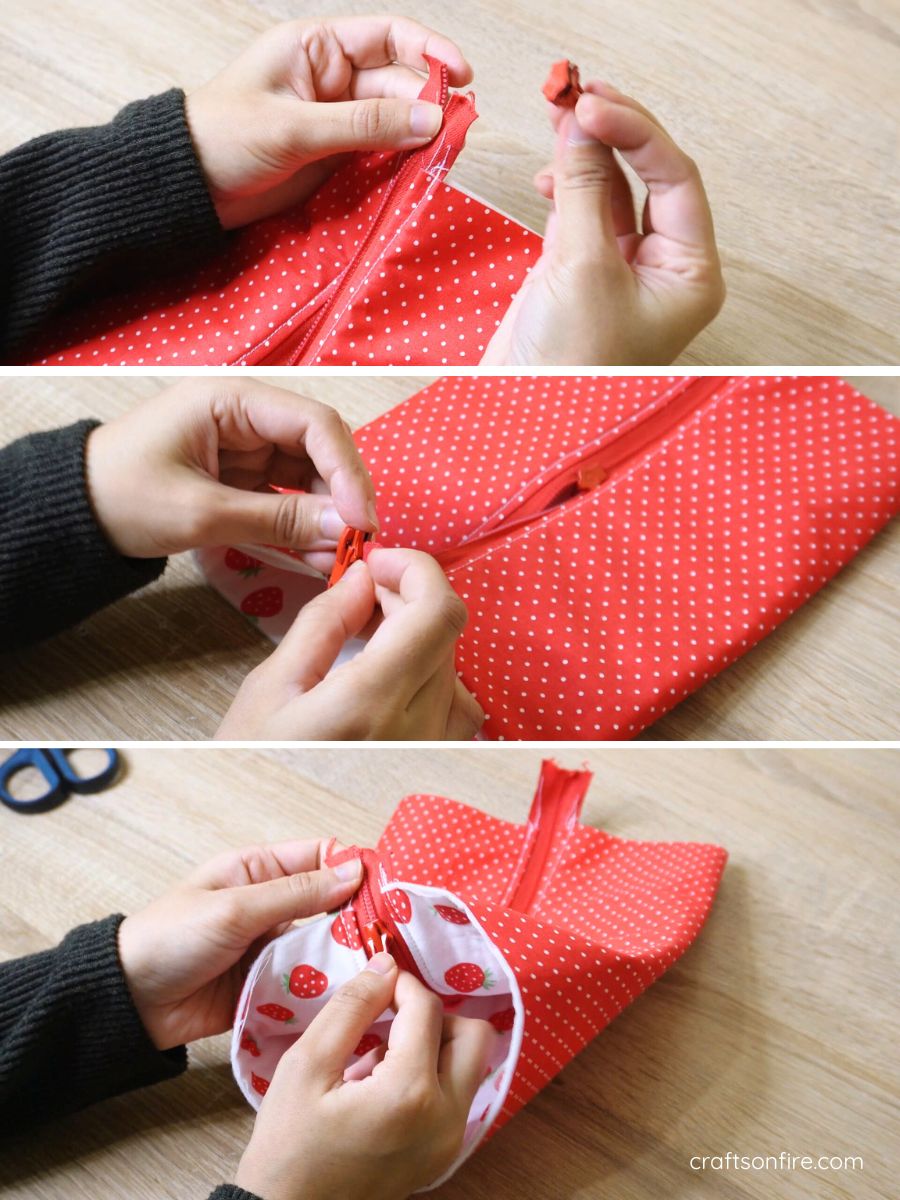
Turn the fabric over to the lining side and align the two zipper pieces together.
Next, thread a fastener through one side of the zipper, then add another fastener to the other side.
Both fasteners should be positioned in the middle.
Step 8
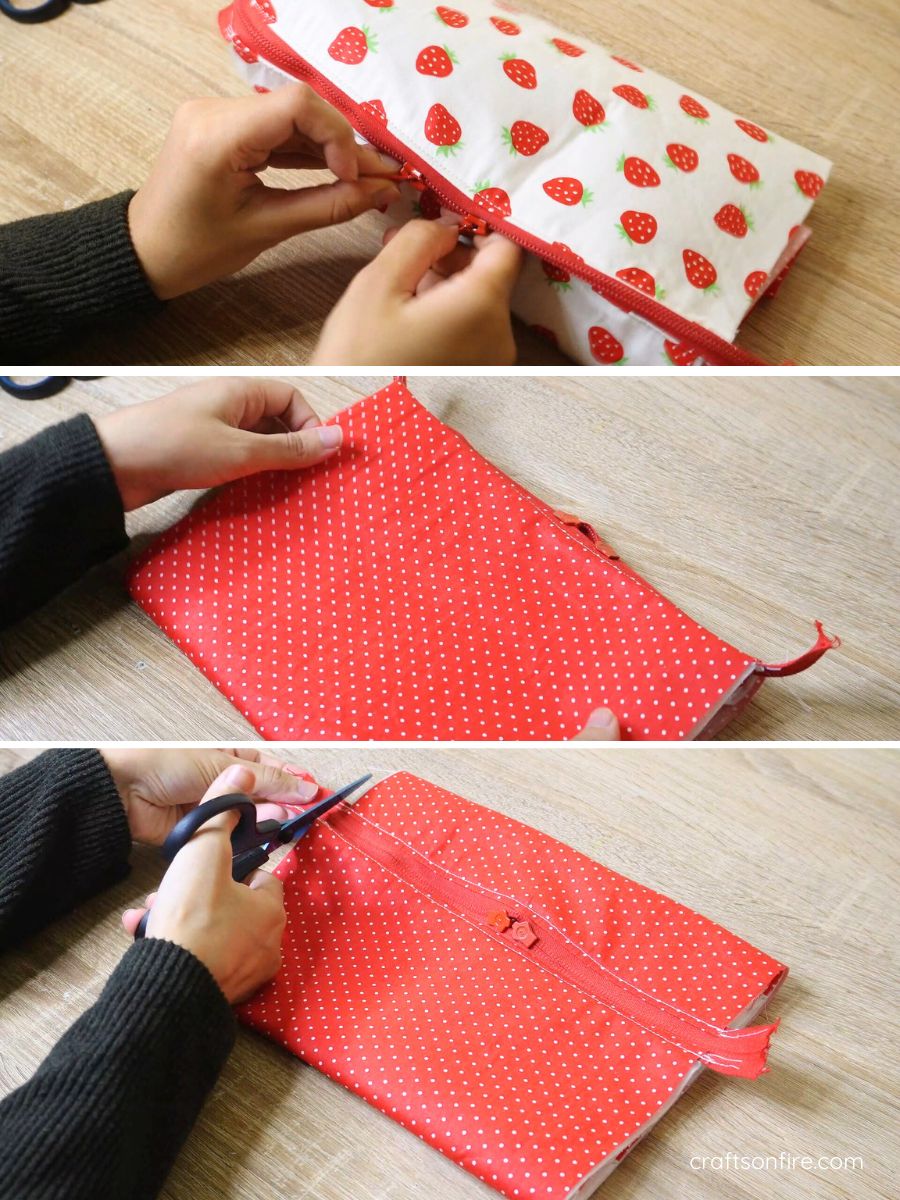
Leave the zipper open in the middle. Then, turn the bag over to the lining side, fold it, and cut off any excess on the sides.
Step 9
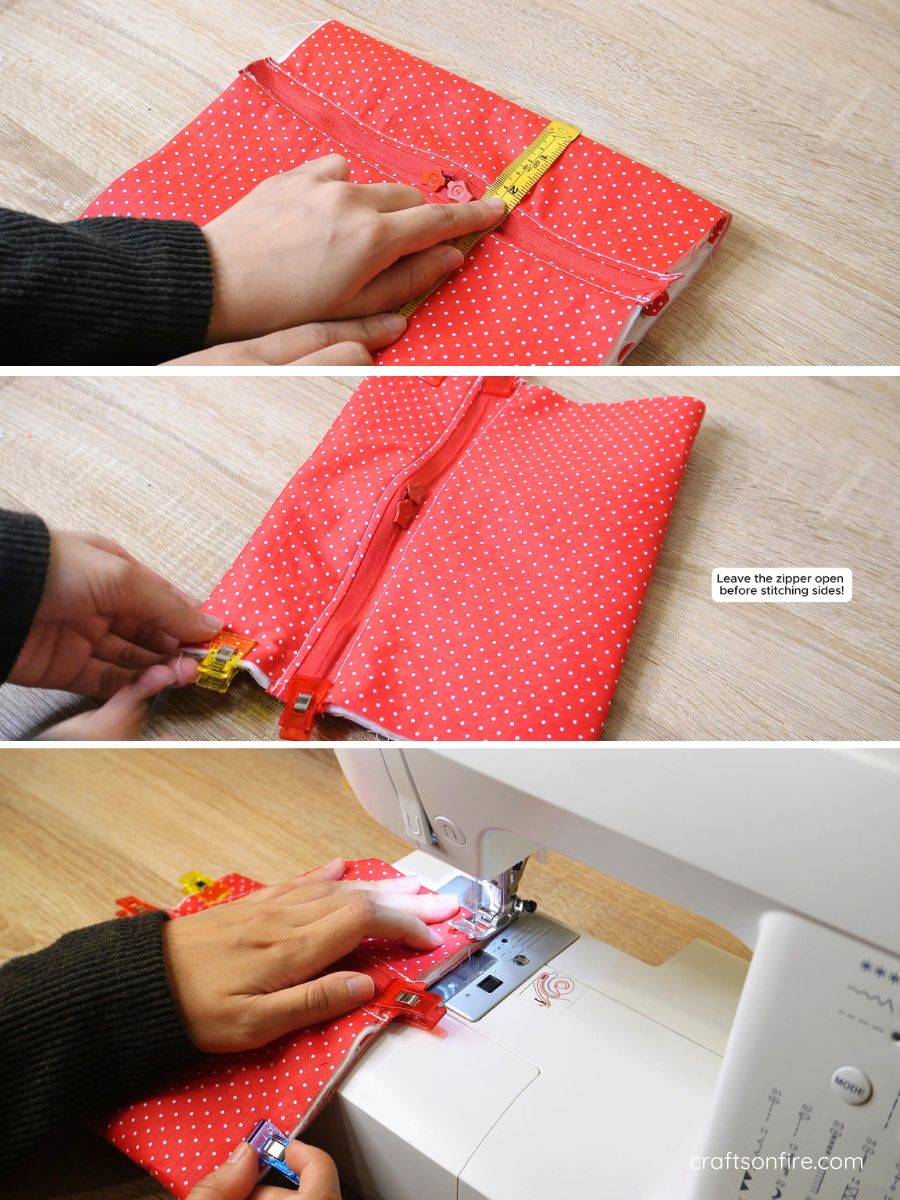
The top part of the bag should measure 2 inches. Grab some clips and peg the sides of the bag.
Before you move forward, ensure that the zipper is open in the middle!
Next, go to the sewing machine and stitch along the sides, using a 1 cm seam allowance.
Step 10
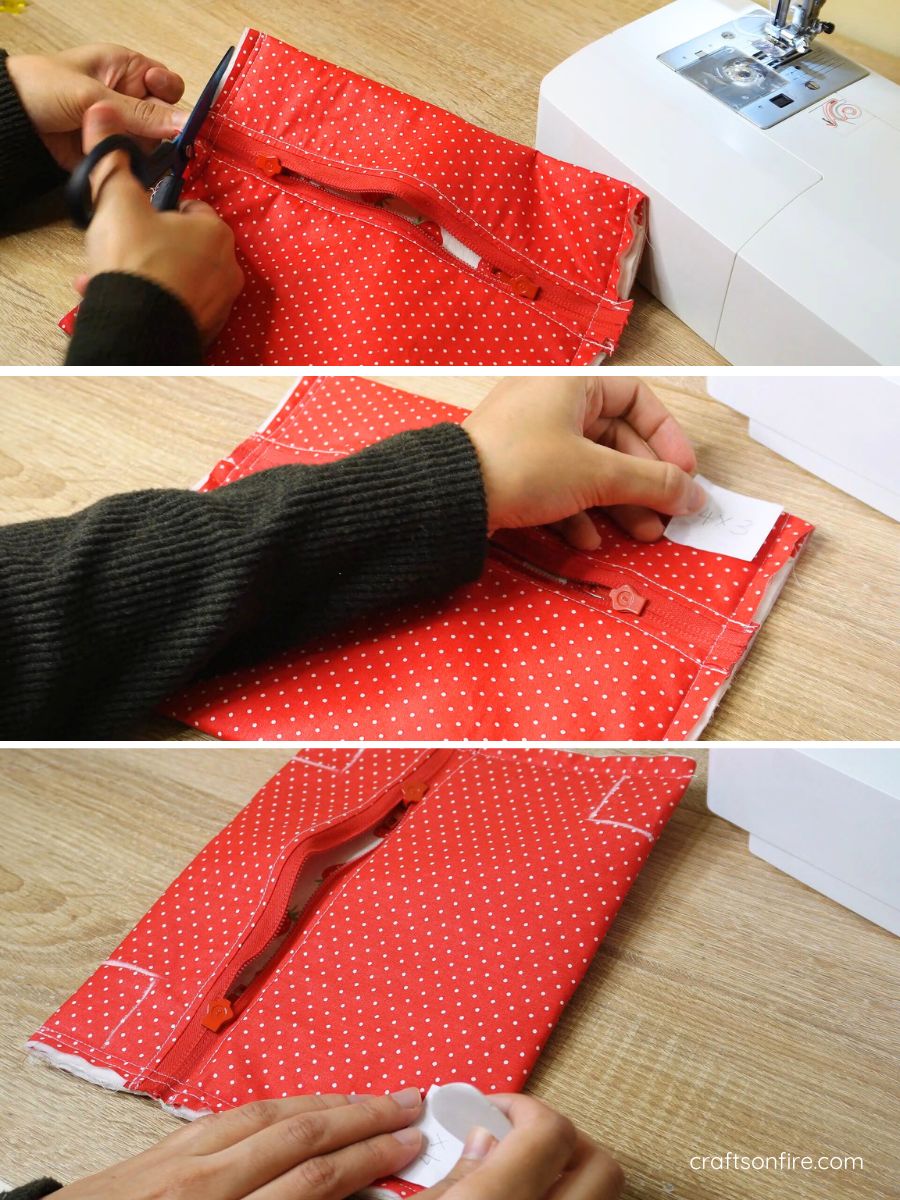
Trim any excess fabric to neaten up the sides. Then, use the tailor’s chalk or a fabric pen to mark a 4 cm x 3 cm rectangle on all four corners as shown below.
Step 11
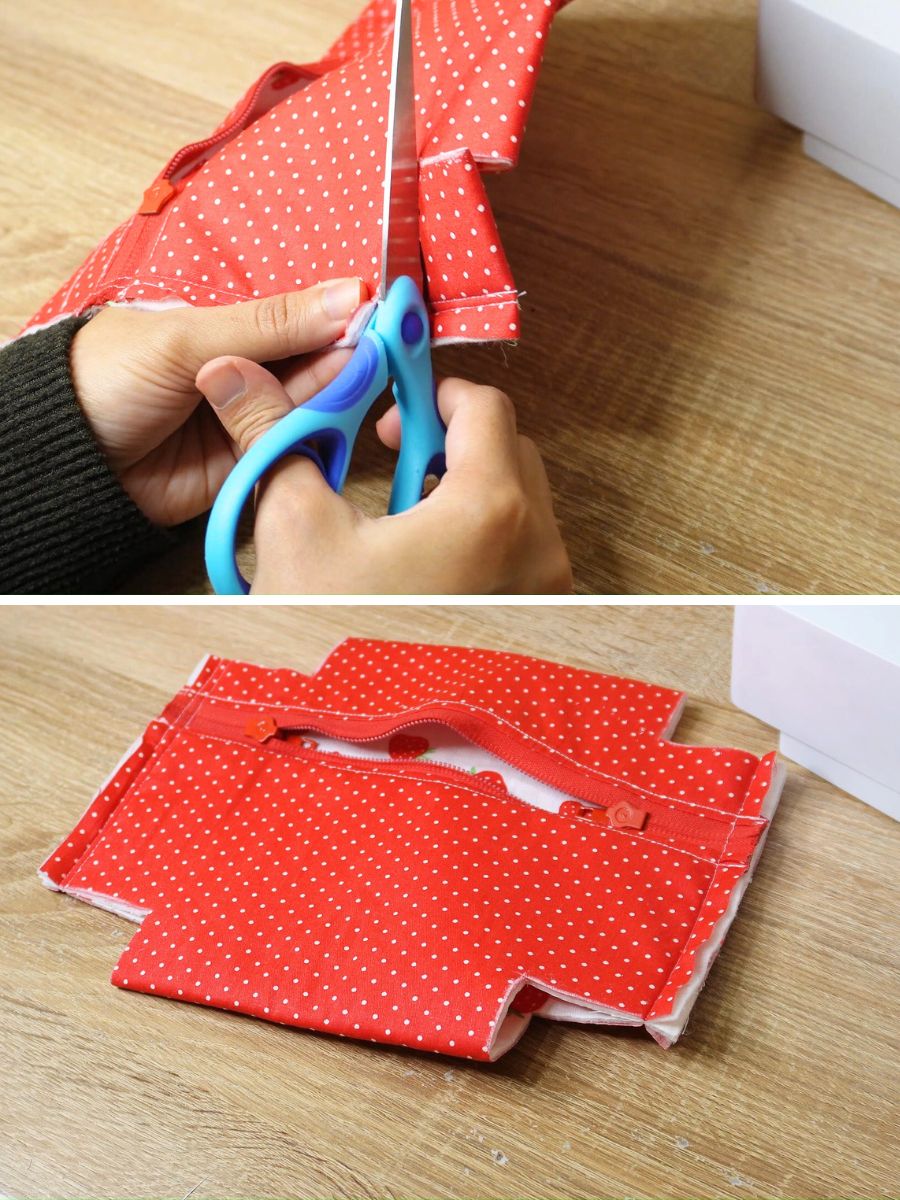
Cut out all four marked areas with a scissor.
Your bag should now look like this:
Step 12
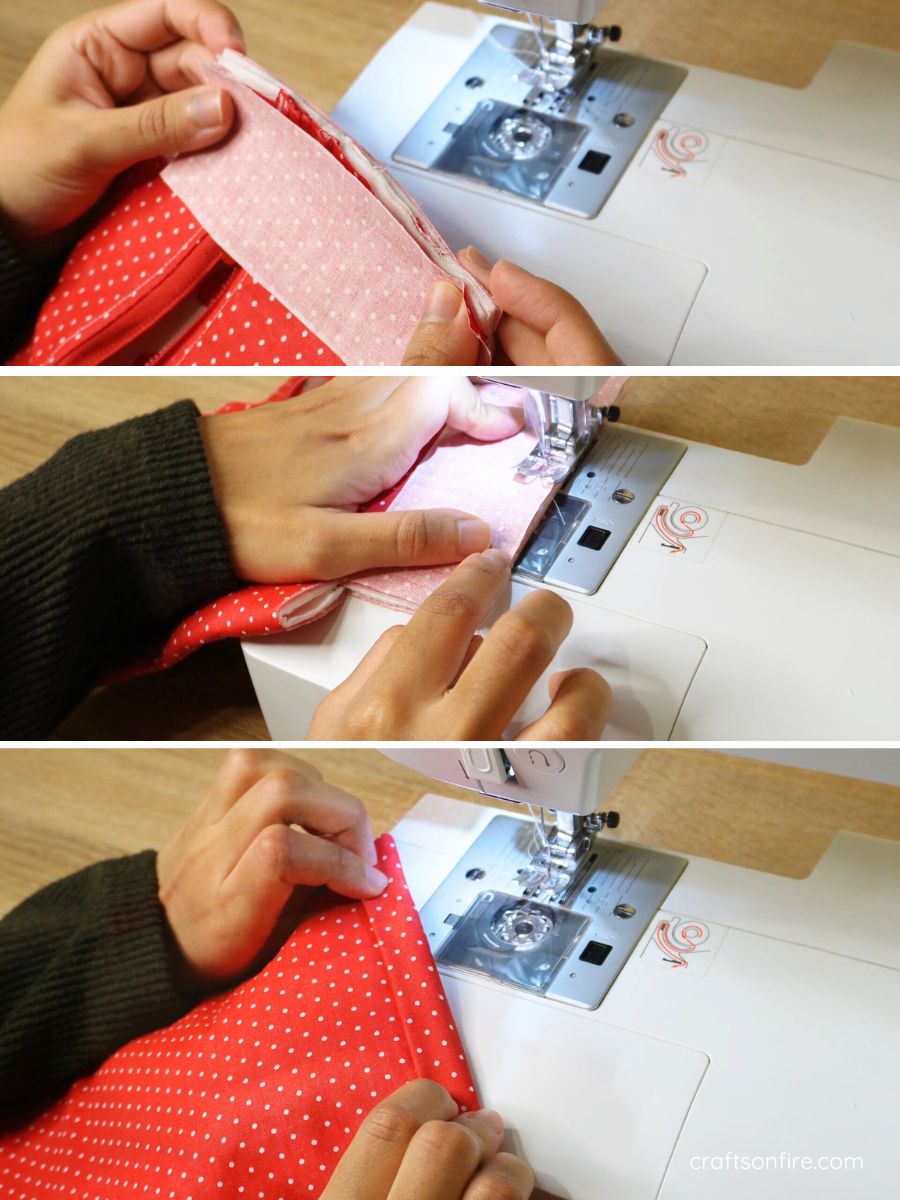
Cut 2 strips measuring 14 cm x 5 cm (5.51 inches x 1.96 inches) from the lining fabric to cover the sides of the bag. If you don’t have enough lining fabric, use a bias tape instead.
Next, go to the sewing machine and attach the strip/bias tape to the sides, using a 1 cm seam allowance with the right sides facing each other.
Fold the fabric over once, then fold it again, and stitch along the edge. Repeat this process for the other side.
Step 13
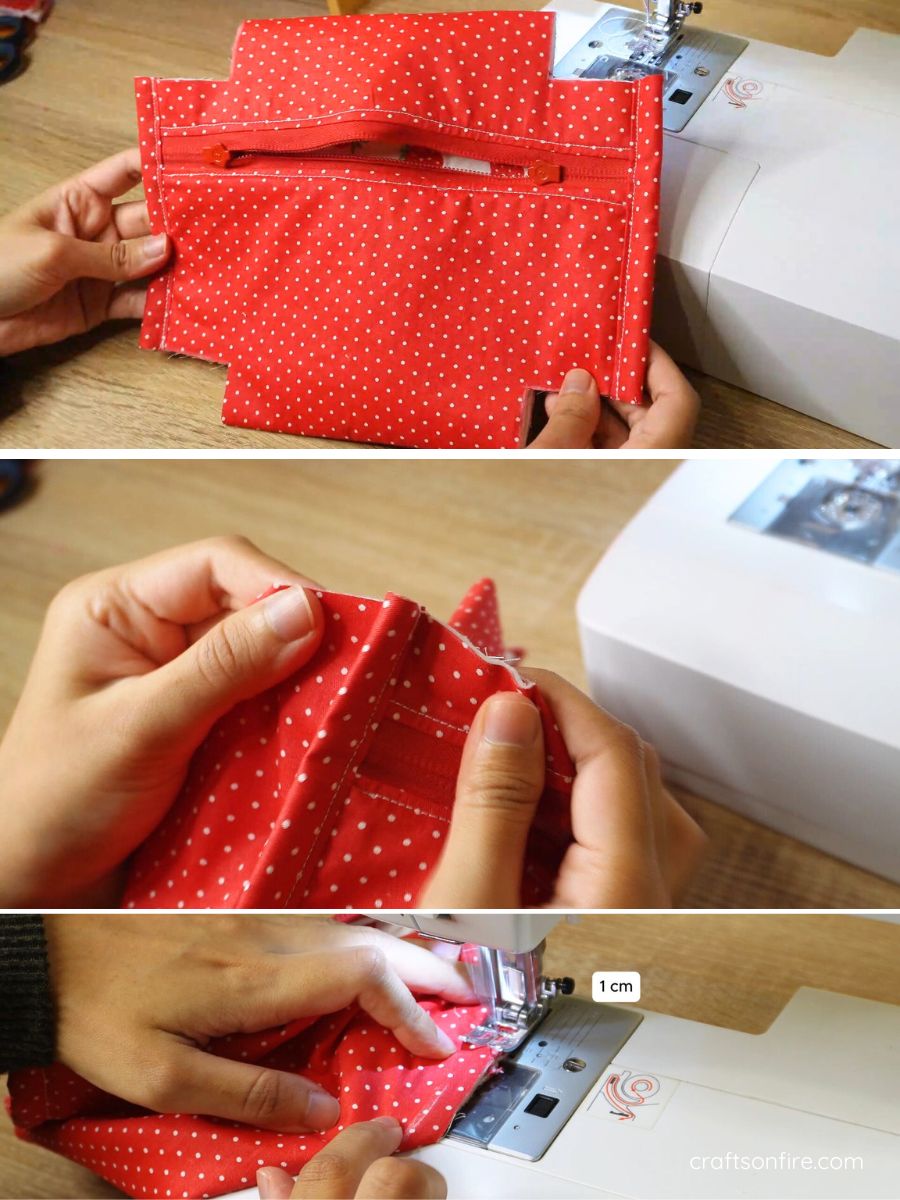
Once the sides are covered, box the corners. Take one corner of the pouch, open the cutout, and fold/pinch it together. We’ll now stitch the fabric.
If you find this confusing, check out this video tutorial above.
Head to the machine and stitch the fabric using a 1 cm seam. Repeat this for the remaining corners.
Step 14
Your bag is finally starting to take shape!
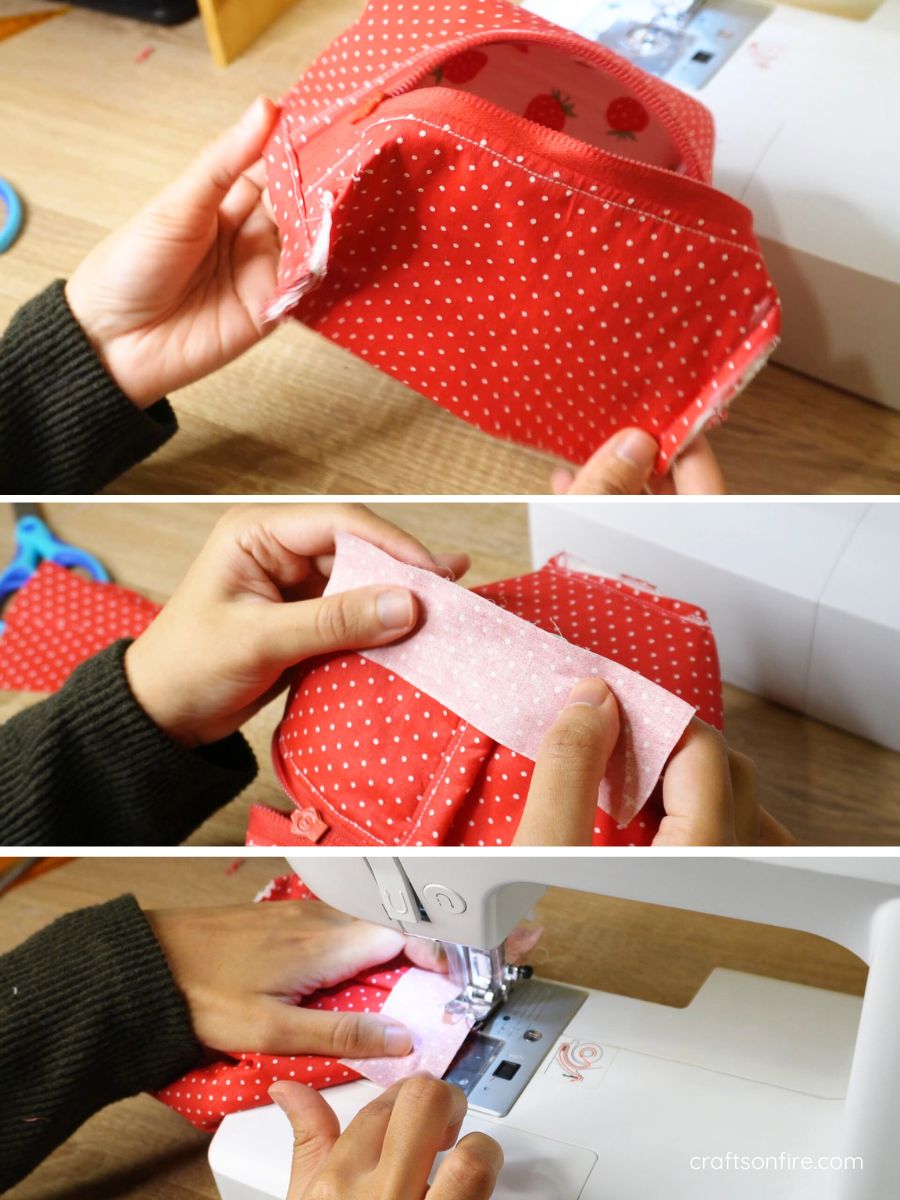
Now, it’s time to cover the edges. Cut four pieces measuring 3 cm x 14 cm (1.18 inches x 5.51 inches) of the lining fabric and stitch the strip to each of the boxed corners using the same method in step 12.
Step 15
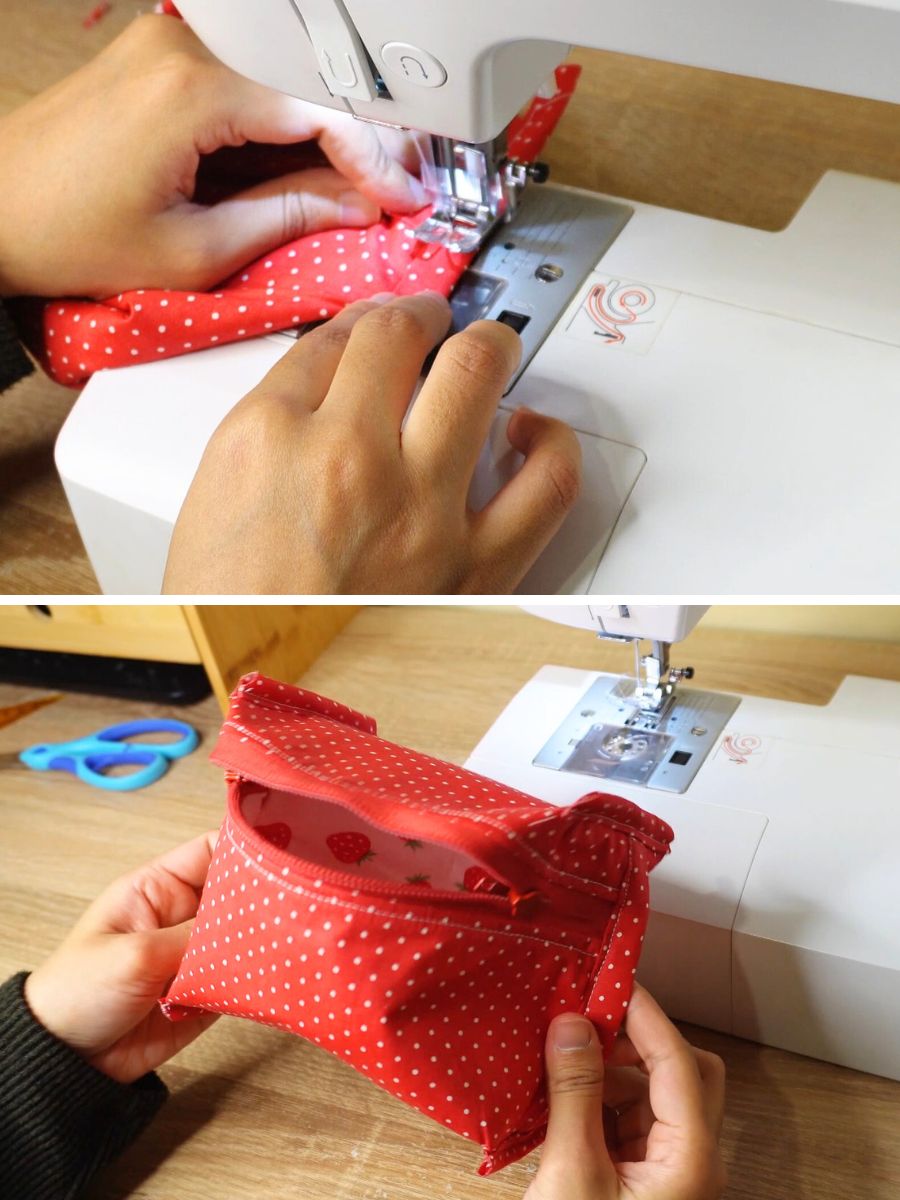
Fold the fabric over once more and stitch. Do this until all four sides are covered.
Step 16
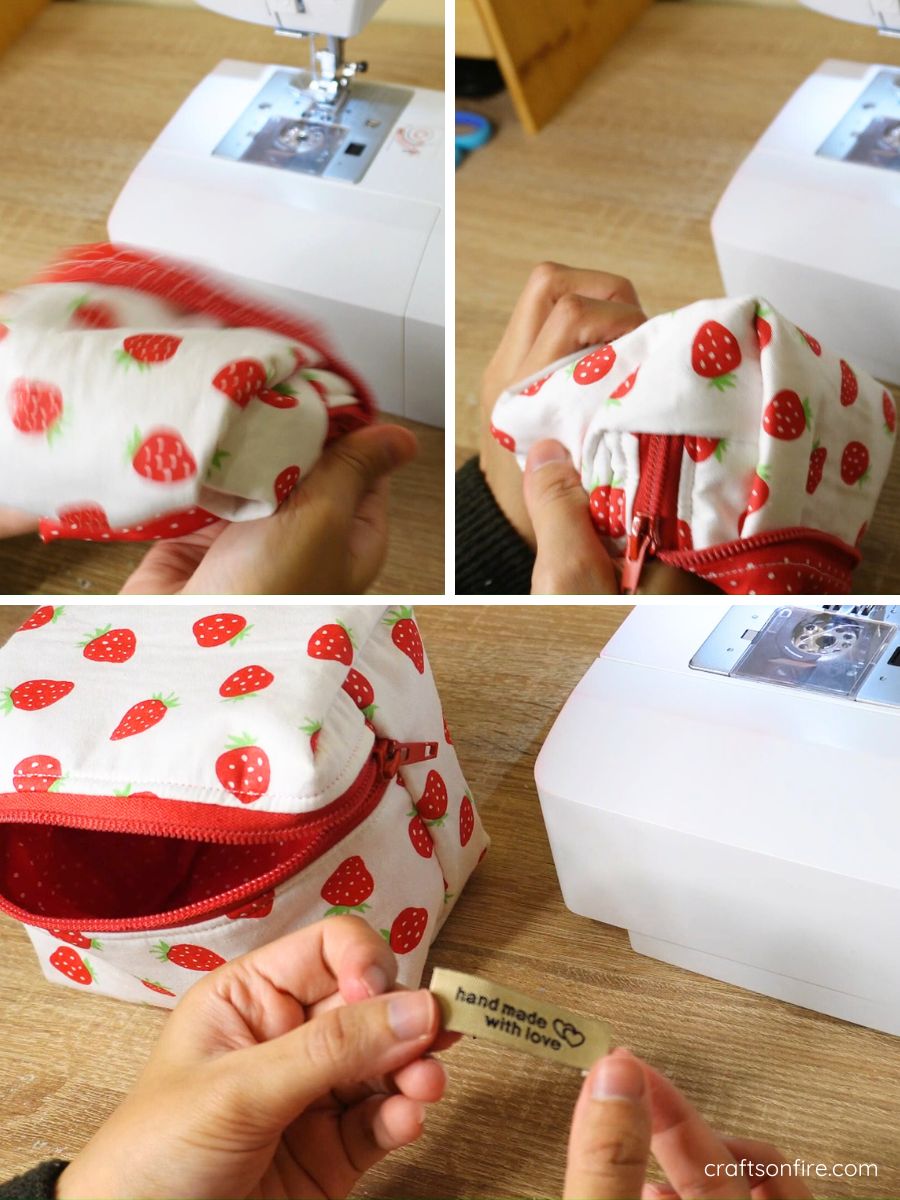
Use the zipper opening to turn the bag to the right side. Then, carefully open out all the corners and adjust the bag.
As a final step, hand-sew a cute label to the front of the pouch and you’re done!
Finished Pouch
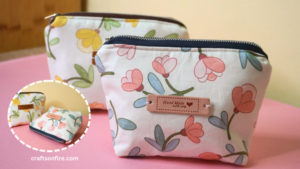
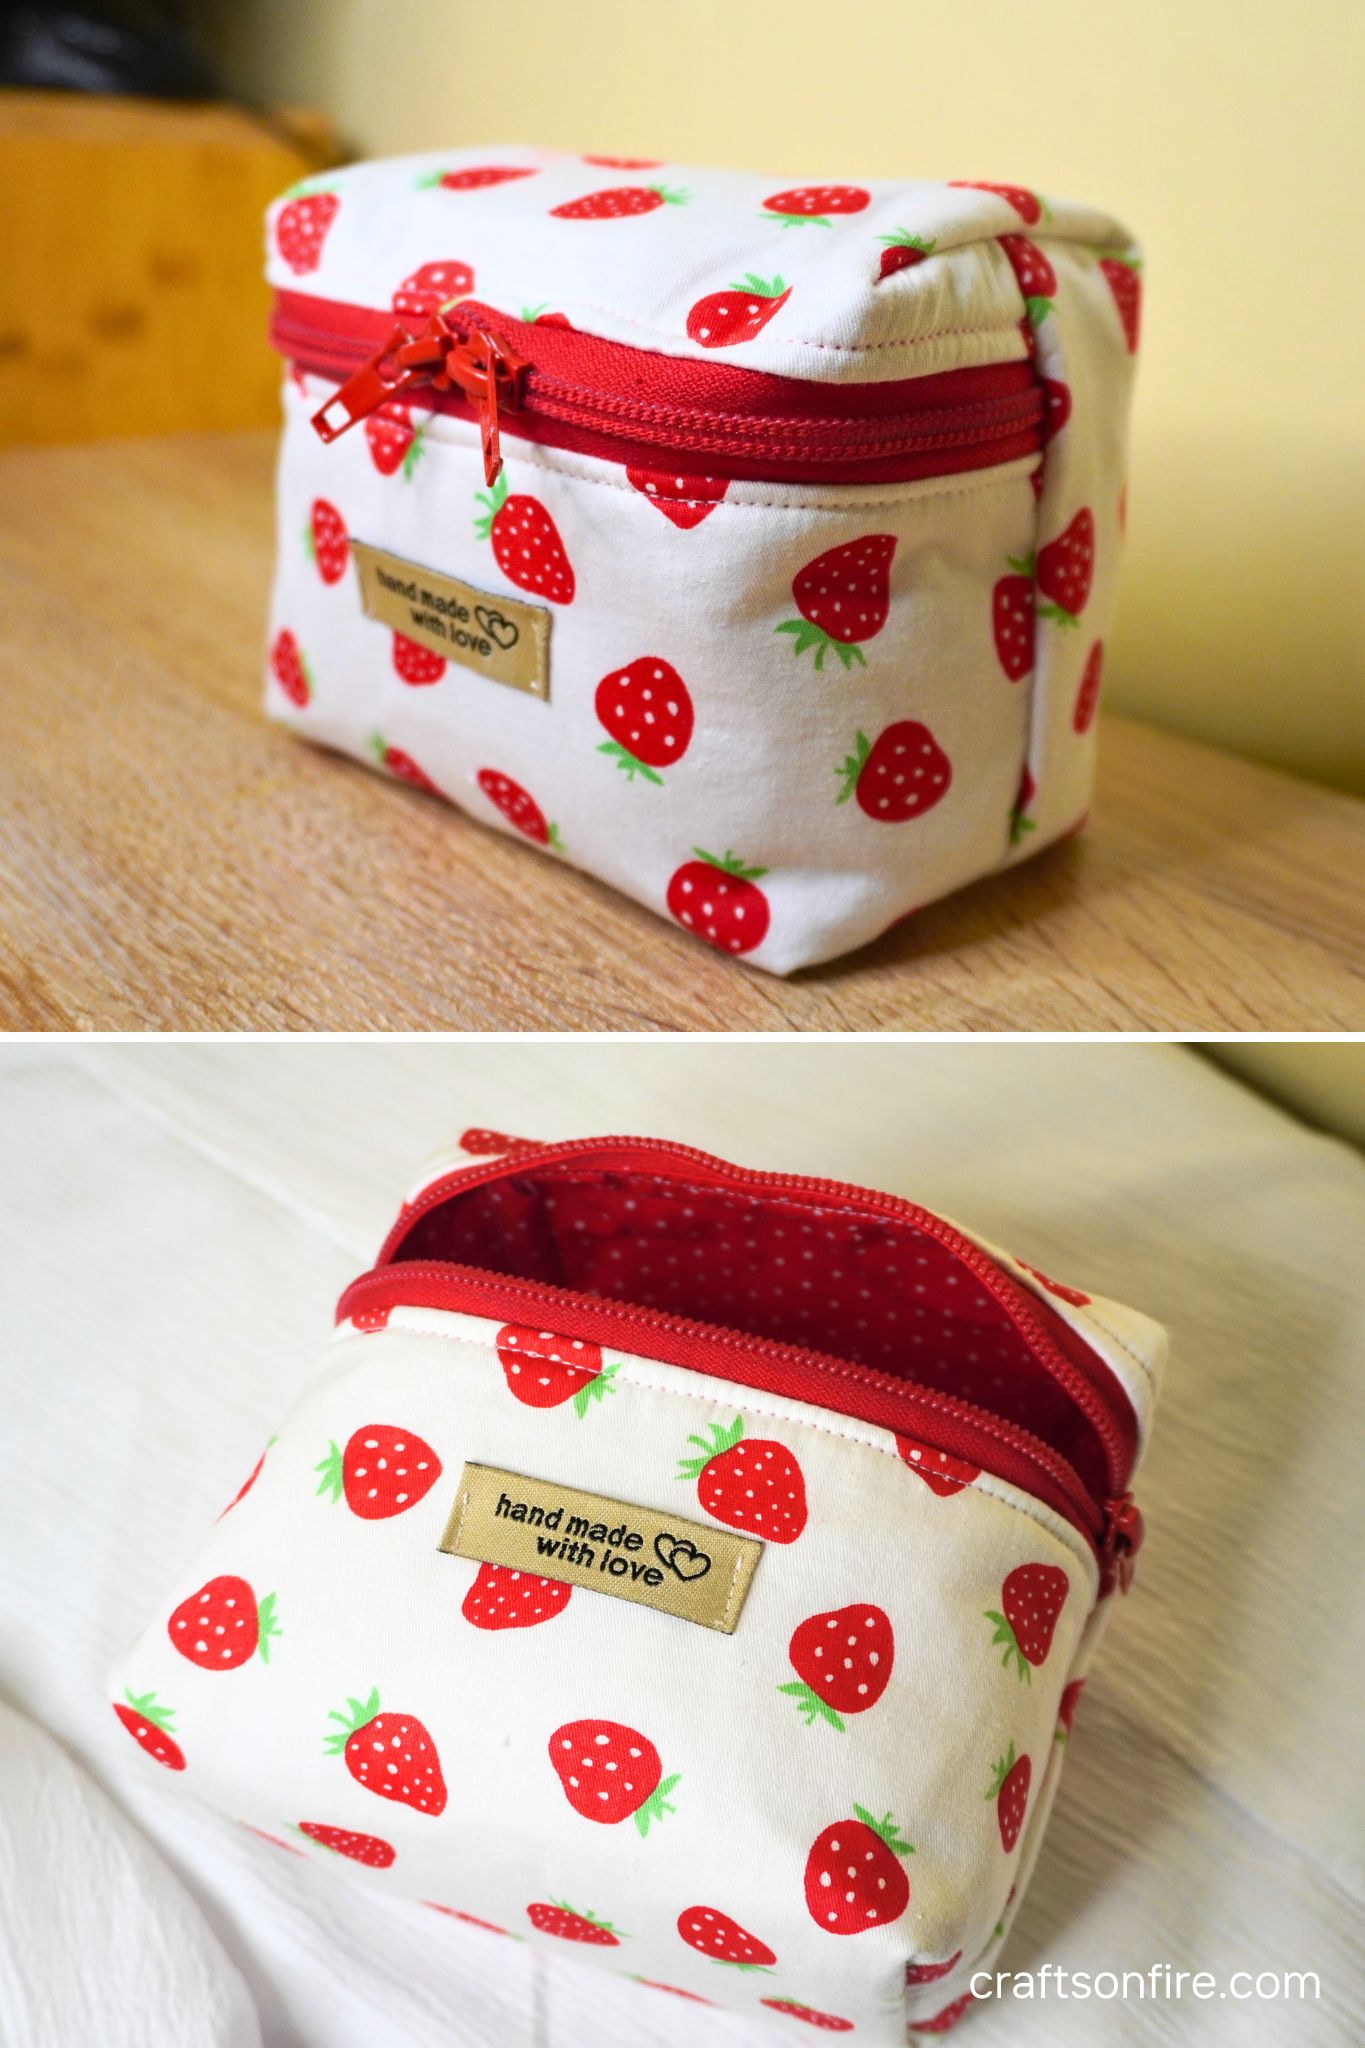
Here’s what the final pouch looks like:
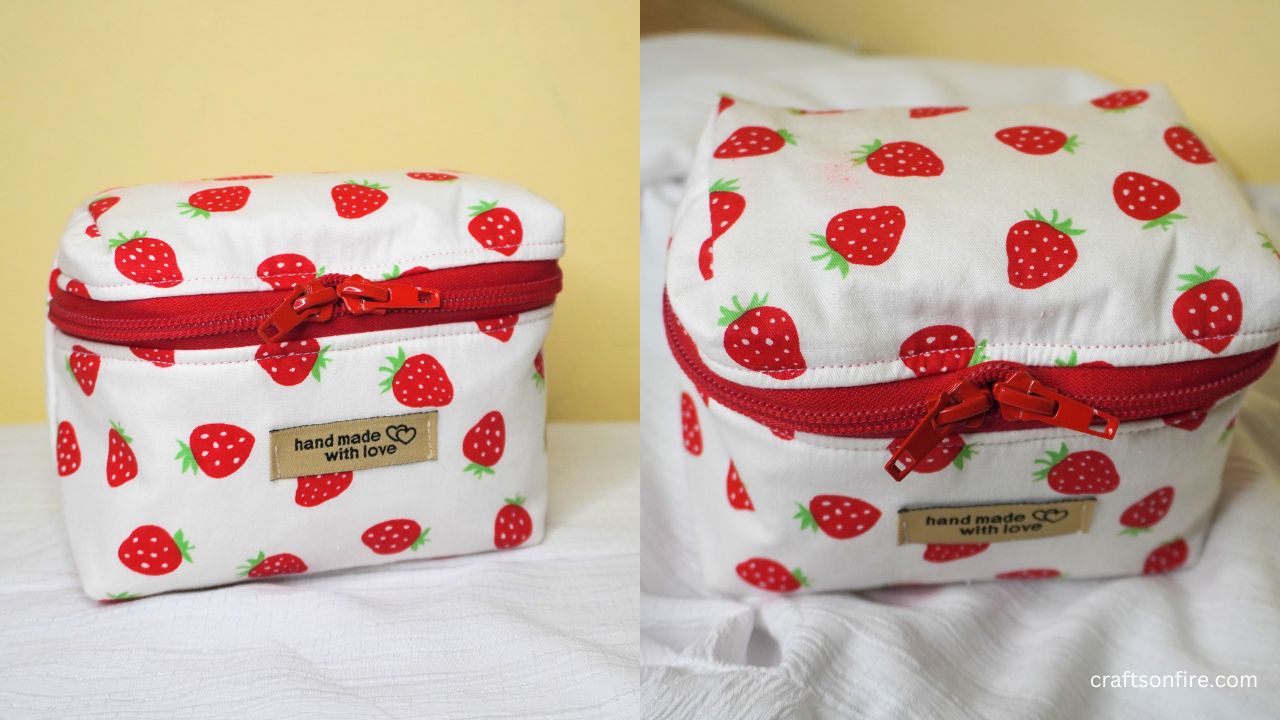
It’s cute, right?
I think the size is just perfect, especially if you’re looking for something small to carry around. It’s also great for storing cotton or other craft supplies — not just makeup!
I can definitely see myself making more pouches like this. The next one I want to try is a patchwork version but bigger. If you’d like to see the process, drop a note in the comments below!
I hope you enjoyed sewing this strawberry-patterned zipper pouch with me.
If you’d like to try my other sewing projects, here are some of my recent favorites I highly recommend:
