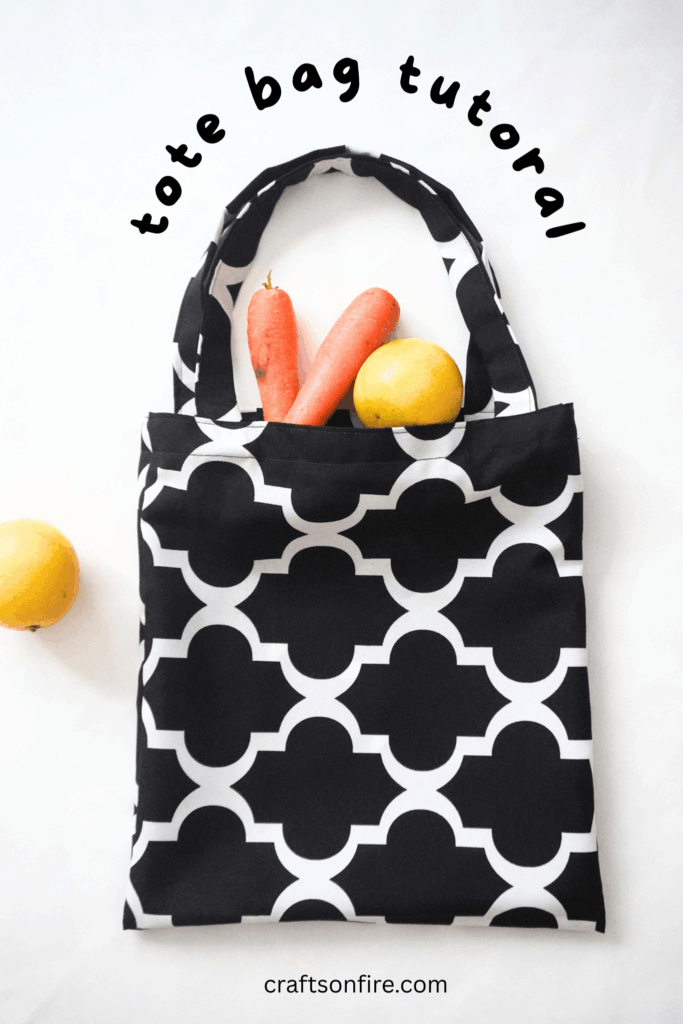
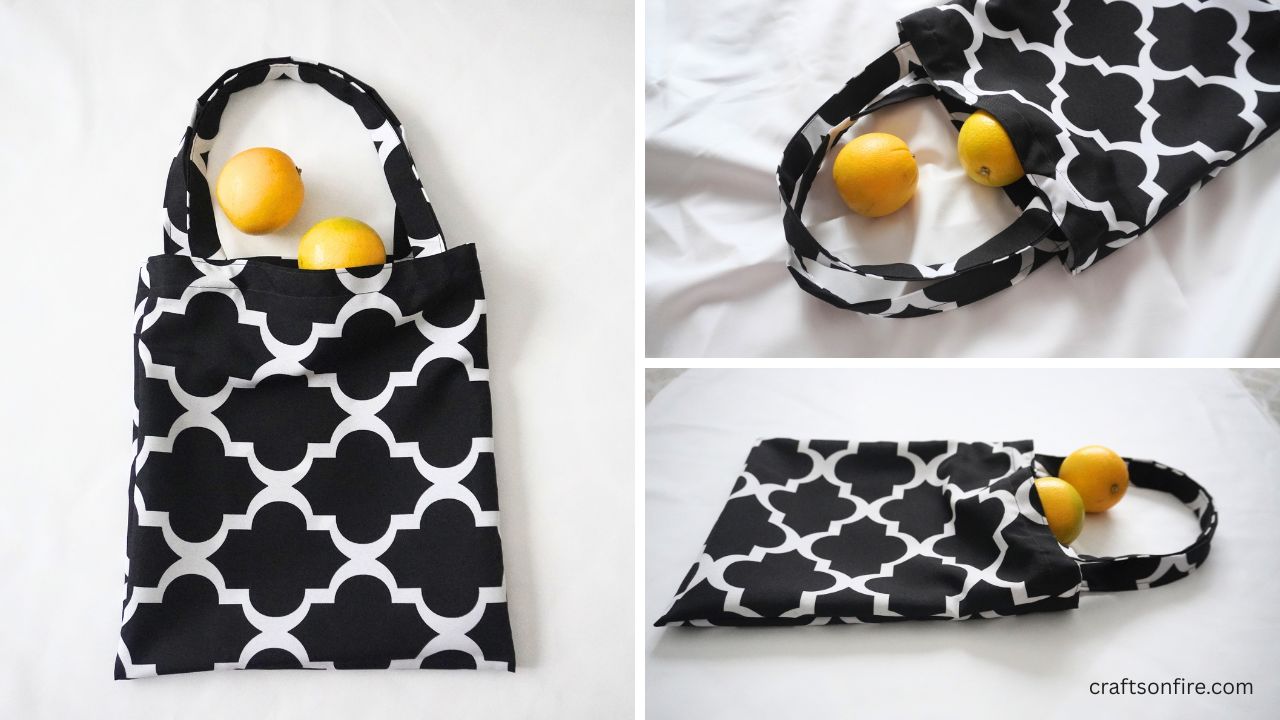
DIY Unlined Tote Bag Tutorial: Simple and Beginner-Friendly

Sewing a tote bag has never been this easy! If you’re looking for a quick, simple, and straightforward way to sew a tote bag in any shape and size, this step-by-step tutorial is all you need!
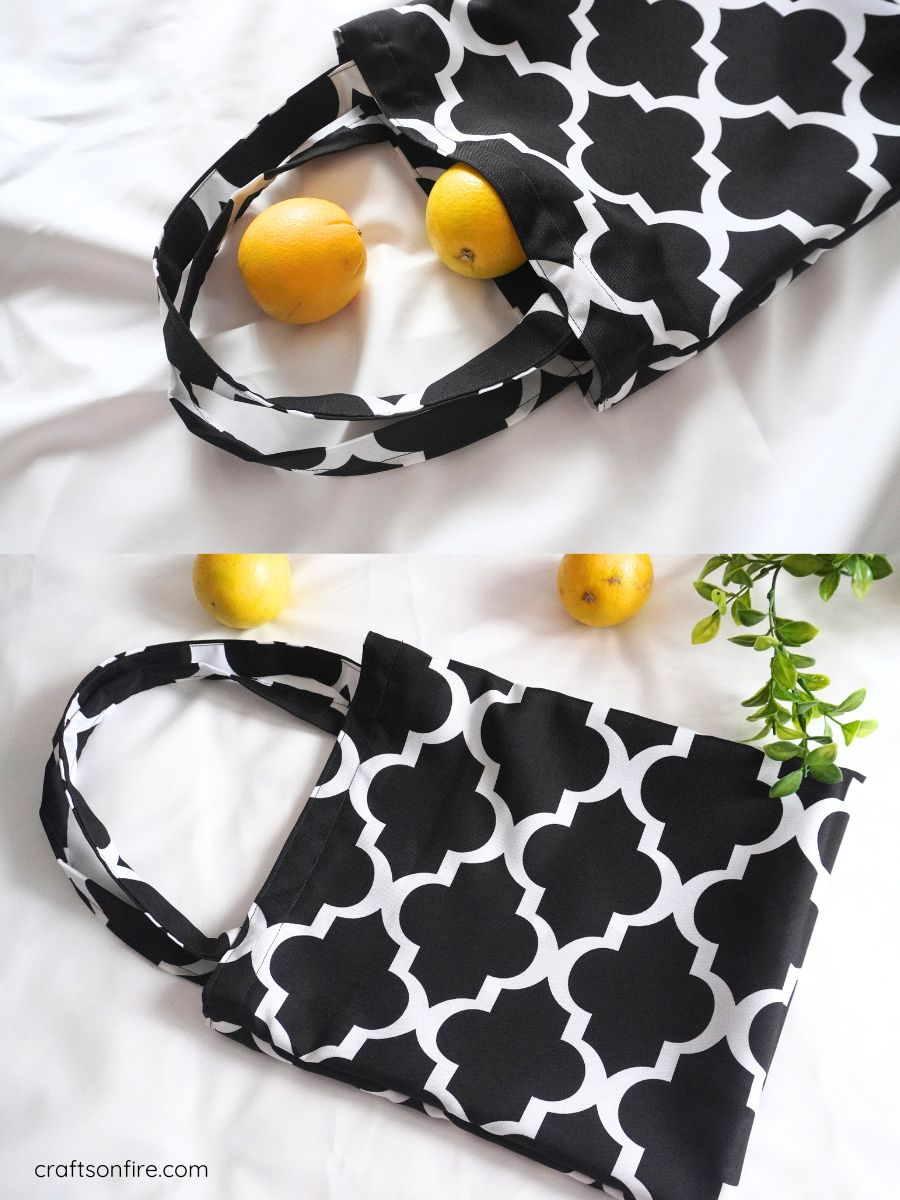
This unlined tote is the perfect grab-and-go option for carrying books, produce, or anything in between. Best of all? It comes together in just a few minutes, even if you’re a complete beginner.
You can use any material that suits your fancy. And since there’s no lining involved, this project is super fast and easy.
I hope you find these instructions easy and simple to follow.
It’s a wonderful tote bag to sew, and I’m sure you’ll love every minute of the process.
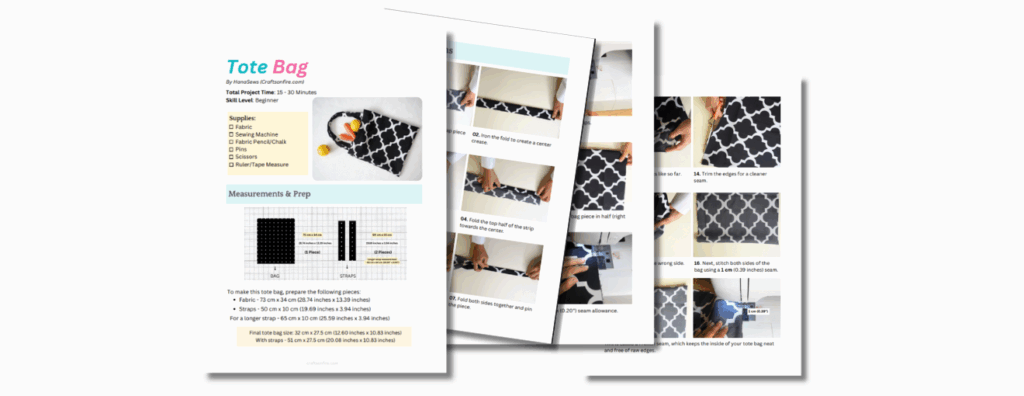
My tote bag measures 32 cm x 27.5 cm (12.60 inches x 10.83 inches) and with the straps, 51 cm x 27.5 cm (20.08 inches x 10.83 inches).
If you want a smaller or bigger bag, simply adjust the size of the fabric you’re going to use.
Let’s begin.
Table of Contents
How To Sew An Unlined Tote Bag
Measurements
To make this tote bag, you’ll need to prepare the following pieces:
- Linen or Cotton Fabric – 73 cm x 34 cm (28.74 inches x 13.39 inches)
- Strap Fabric – 50 cm x 10 cm (19.69 inches x 3.94 inches)
For a longer strap, I suggest using a 65 cm x 10 cm (25.59 inches x 3.94 inches) strip instead.
Before we begin, I do want to mention that I have created a more detailed Printable PDF instructional guide for making this tote bag.
If you hate ads and prefer to follow along with a clean, easy-to-read version of the instructions, feel free to grab your copy below!
You can find the full printable guide over here.
Video Tutorial
Instructions
Create The Straps
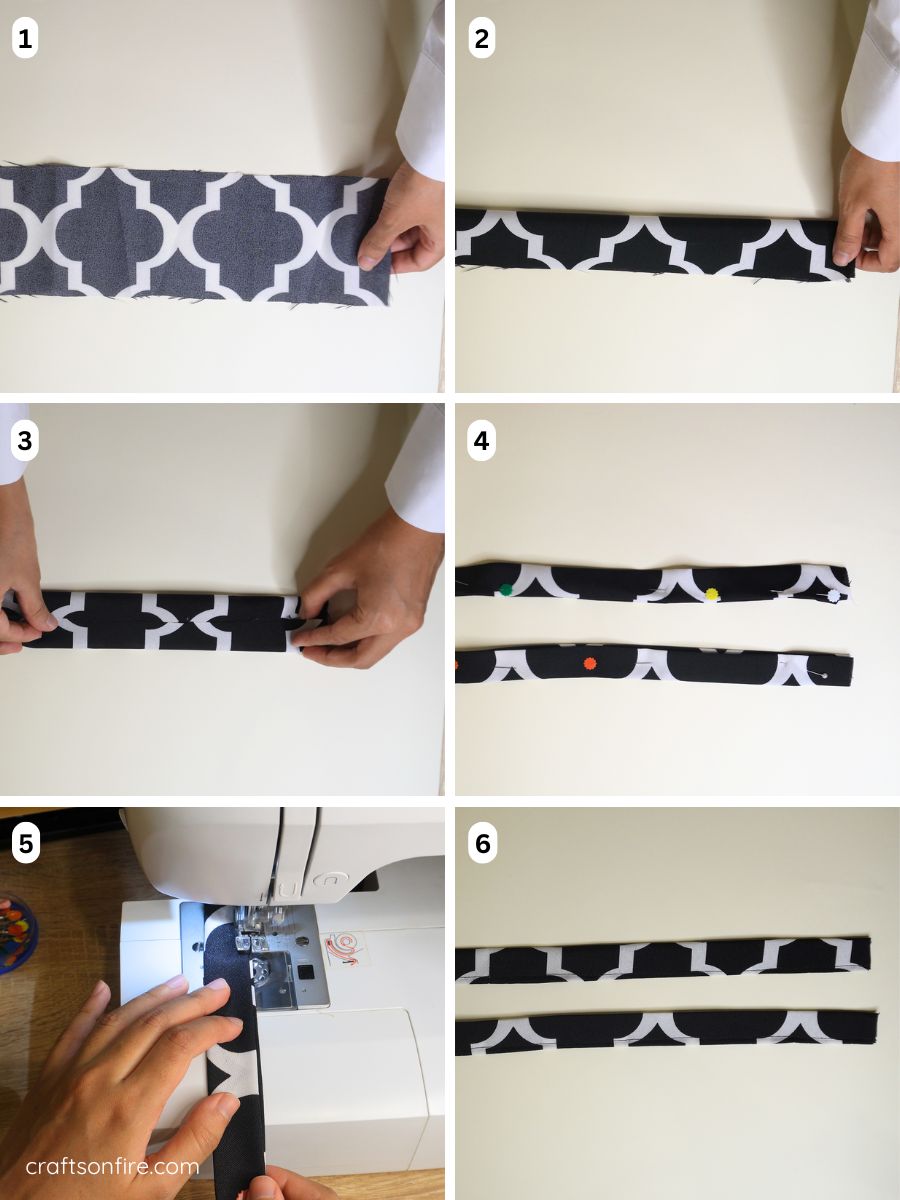
Step 01: We’ll begin by creating the tote bag straps. This will only take you a couple of minutes. Grab your first strip, and then we can begin.
Step 02: Fold the strip in half lengthwise and then iron the fold line to create a center crease.
Step 03: Open the strip and then fold the top half of the strip towards the center. Fold the other half towards the center.
Step 04: Fold both sides together and pin the piece. Do this for the entire length of the strip.
Step 05: Head over to the machine and sew the strip. You can sew both sides of the strip if you prefer.
Step 06: Repeat the previous steps for the second strap.
Both straps should now be complete! Set those aside and let’s move on to the next part of creating the tote bag.
Create The bag
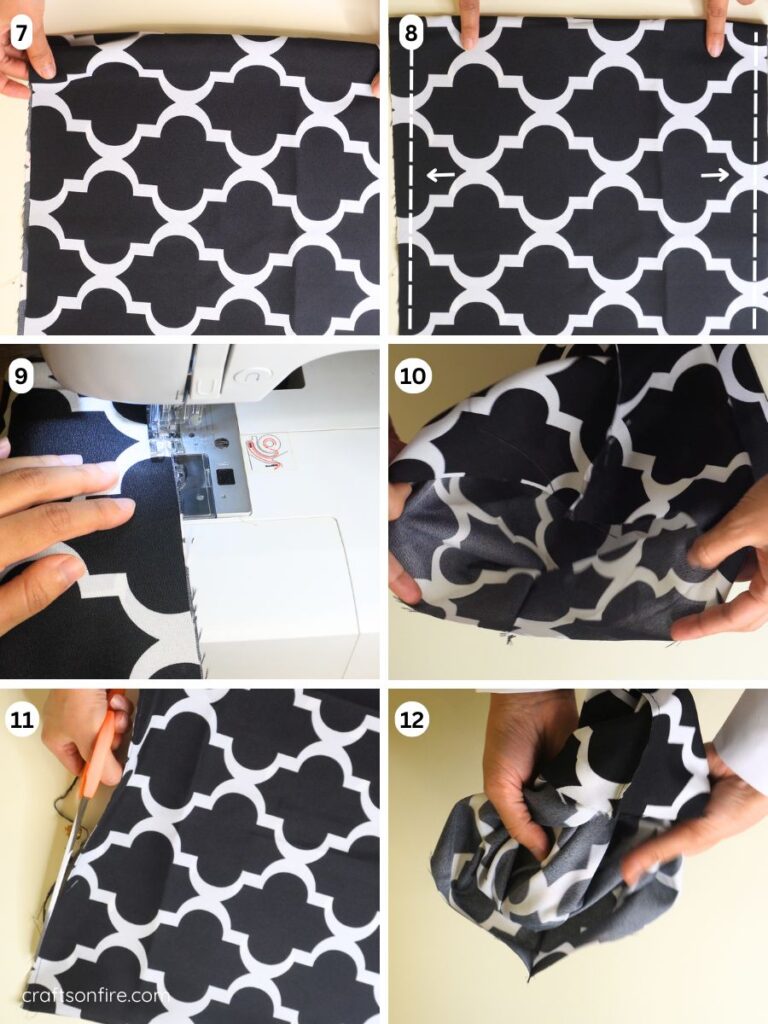
Step 07. Grab the bag fabric and fold the fabric in half with the right sides facing up.
Step 08 – 09. Sew both sides of the folded fabric using a 0.5 cm (0.20″) seam allowance.
Step 10. This is what it looks like so far.
Step 11. Next, go ahead and trim the edges. This will give you a cleaner seam.
Step 12. Turn the bag to the wrong side.
Sew The Inside of The Tote Bag
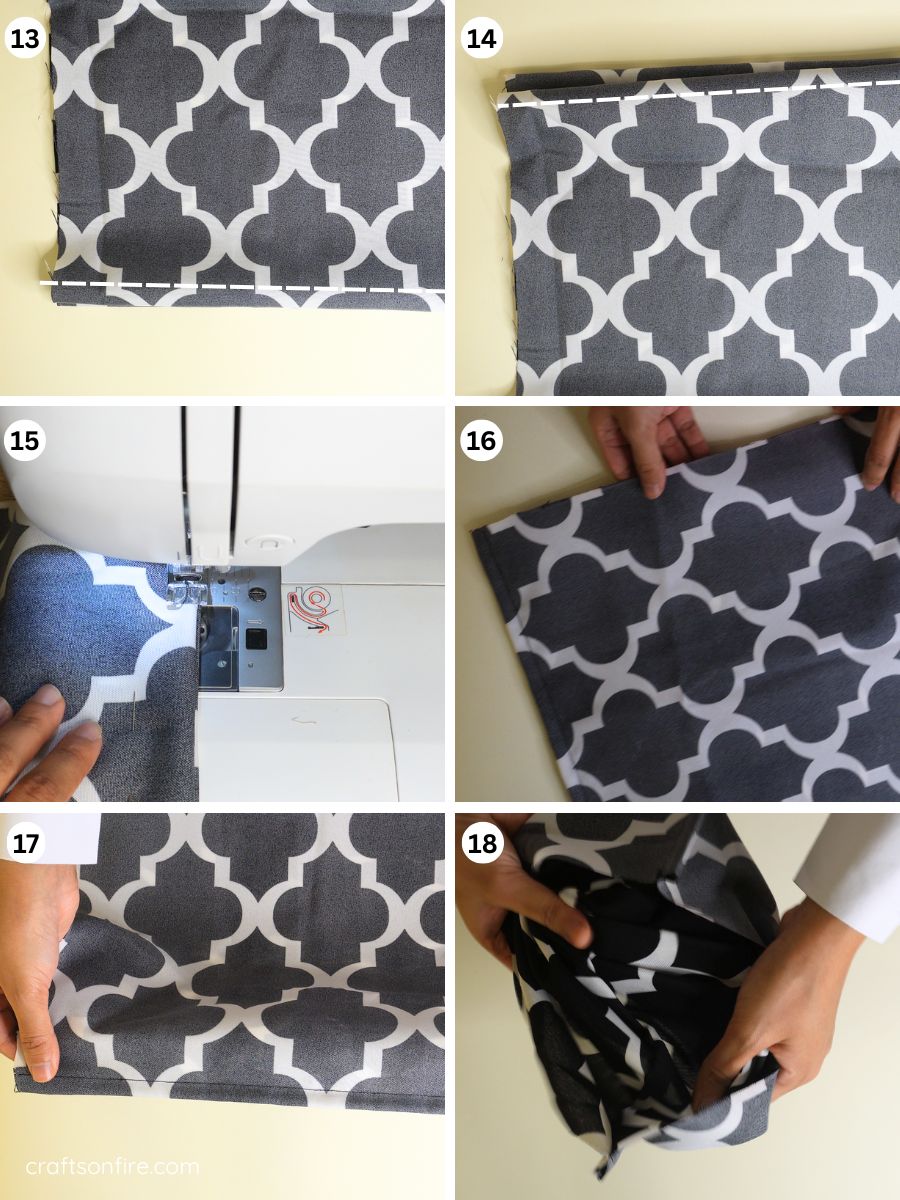
Step 13 – 15. Next, stitch both sides of the bag using a 1 cm (0.39 inches) seam.
This is called a French seam, which keeps the inside of your tote bag neat and free of raw edges.
Step 16 – 17. This is how the inner and outer sides look once sewn.
Step 18. You’ll want to now turn the bag inside out so that we can attach the straps you’ve sewn earlier.
Add The Straps

Step 19. This is what the inside and outside of the bag should look like. As you can see, the seams look pretty neat, which is perfect for an unlined tote bag.
Step 21. Now, measure 4 cm (1.57″) from the top of the bag and draw a horizontal line. Then, measure 3 cm (1.18″) below that and mark the fabric using a fabric pencil or chalk.
Step 22. Find the center point, then place the strap halfway between the two lines, 8 cm (3.15″) from each side, and pin it in place.
Step 23. Repeat the previous steps on the other side of the tote. Ensure that both the lines on the front and back of the tote bag match.
Step 24. Fold the top of the bag to the first marked line.
Pin & Sew The Straps

Step 25. Fold the top again to meet the second marked line.
Step 26. Pin the folded edge.
Step 27. Head to the machine and sew the folded edge and straps.
Step 28. Next, turn the bag right side out.
Step 29 – 30. Pull the straps out and position them at the top of the bag. Sew along the top edge, and you’re done!
As mentioned earlier, if you want the full printable tote bag guide, head over here to grab your copy now!
This tote bag pattern is so easy and simple to follow! It’s one of my favorite methods of sewing a tote bag – you don’t need any lining for this bag, which is perfect if you already have a thicker fabric to use.
What I love most about this tote is how versatile it is. Anyone can sew it, and it’s easy to customize to your liking. If you’re up for the task, you can sew tons of these tote bags and gift it to family and friends.
It will make a thoughtful and useful handmade gift.
You can also sew multiple of these bags in a day if you’re looking for a fun and special gift idea.
I’m also so excited to make different versions of these tote bags and share them with you soon!
Overall, this tote bag was such a fun and easy sewing project, and I hope you enjoyed this DIY unlined tote bag tutorial.
I’ll leave you to it now.
If you have any questions, feel free to drop them in the comments below, and if you’d like to see more quick and easy sewing projects for beginners, here’s what I have for you: