DIY Book Sleeve With Front Pocket (Sewing Guide)
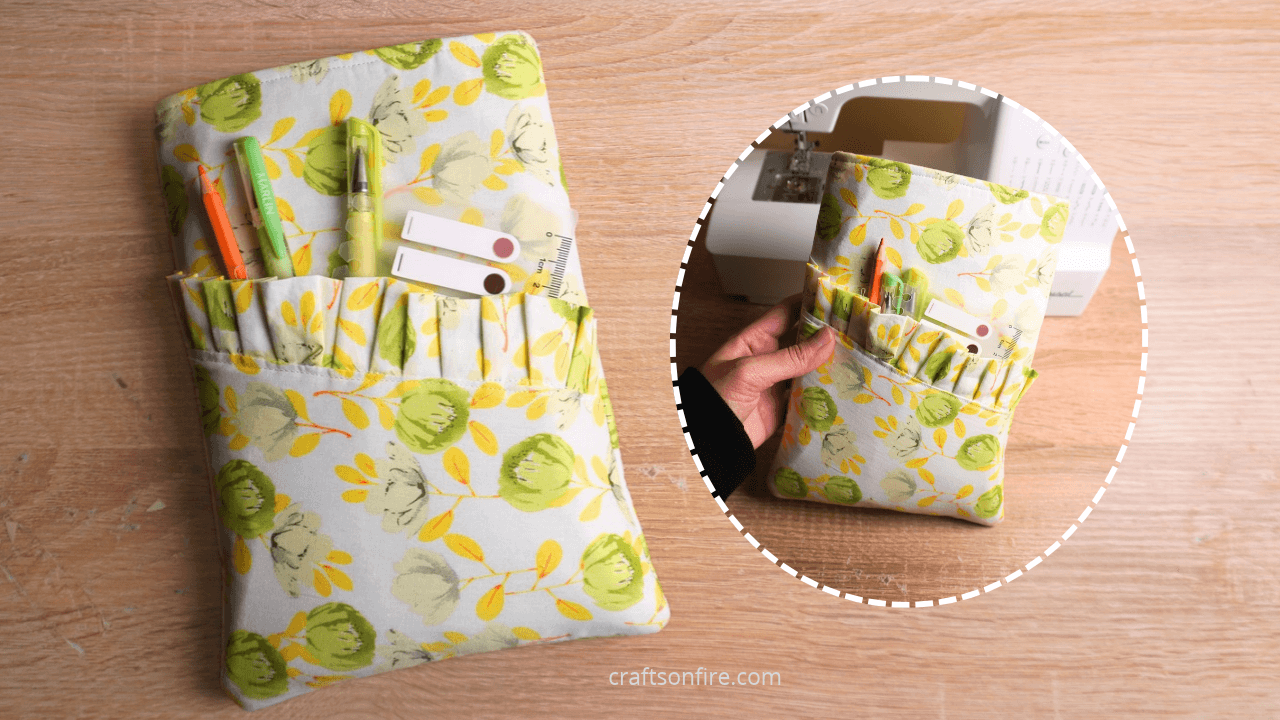
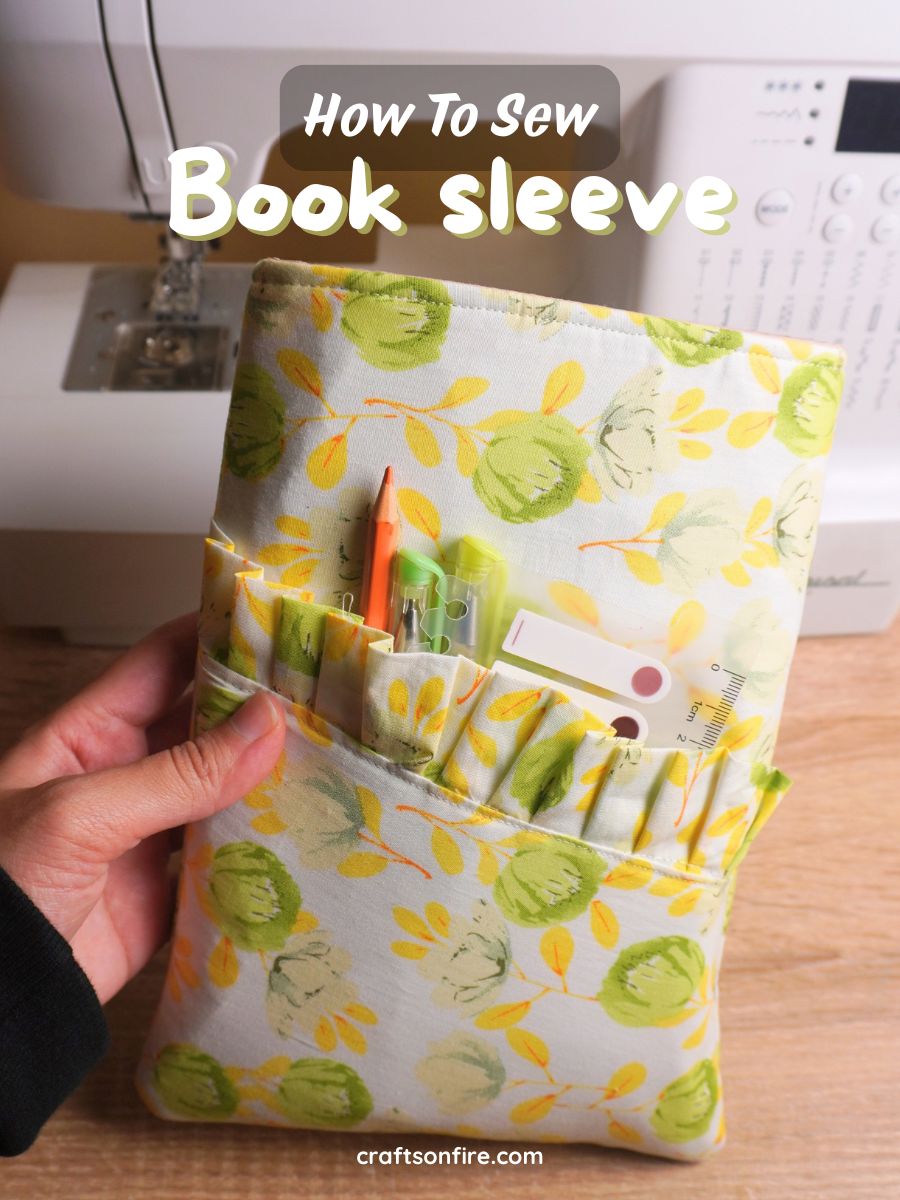
I’ve been on a roll lately making ruffle-themed pouches, and I wanted to bring that same cute aesthetic to a book sleeve! I also wanted to create something practical, with a front pocket where I could easily store a few of my favourite book-annotating supplies. So, I combined the two ideas and came up with this ruffled book sleeve.
I love how the slanted front pocket with that ruffle border add a little extra charm, and I have to say, this has quickly become one of my favourite sewing projects!
This book sleeve is easy to sew and a great project if you’re looking to build on your sewing skills while trying something a little different.
The overall construction is simple and this book sleeve pattern is super easy to recreate if you follow my step by step guide.
I’ve also included a printable pattern to make cutting your fabric easier, so you can get straight into sewing!
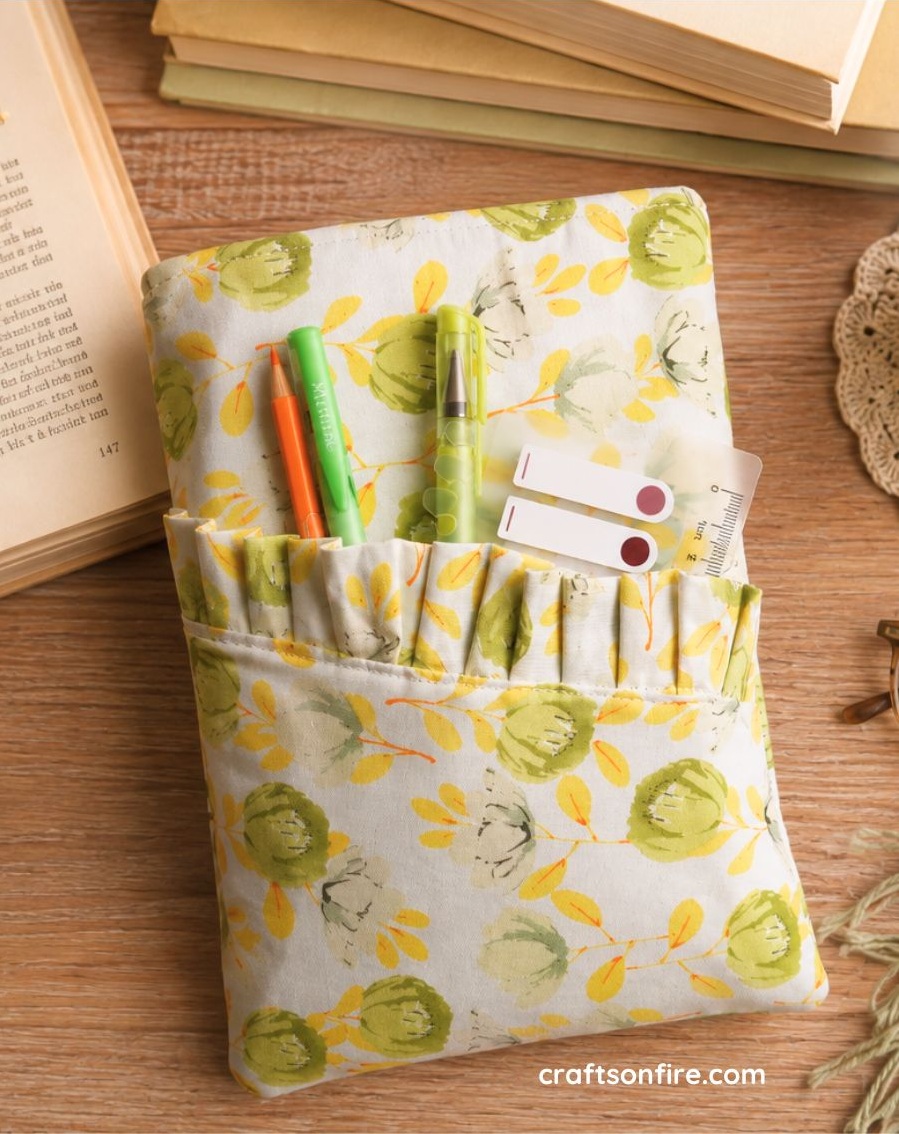
If you love sewing your own accessories and making your reading experience a little more special, this project is definitely for you.
Finished pouch size: 17.5 cm x 24 cm / 6.89″ X 9.44″
How To Sew A Book Sleeve With A Ruffle Pocket
Supplies
2 x Batting/Interfacing – 26 cm x 19 cm / 10.24″ x 7.48″
1 x Pocket Batting – 24 cm x 16.5 cm / 9.45″ x 6.50″
2 x Lining Fabric – 26 cm x 19 cm / 10.24″ x 7.48″
2 x Front & Back (Patterned) Fabric Piece – 26 cm x 19 cm / 10.24″ x 7.48″
2 x Pocket Fabric Piece – 24 cm x 16.5 cm / 9.45″ x 6.50″
1 x Ruffle Strip – 50-60 cm x 7 cm / 19.69″-23.62″ x 2.76″
PATTERN CUTTING PRINTABLE + PDF GUIDE:
You can grab my custom template/pattern, which I designed specifically for this project — USE THIS LINK! The PDF also includes a high-quality, ad-free version of the sewing guide, with clear, step-by-step instructions included beneath each photo to make the project easy to follow from start to finish.
Video Guide
Instructions
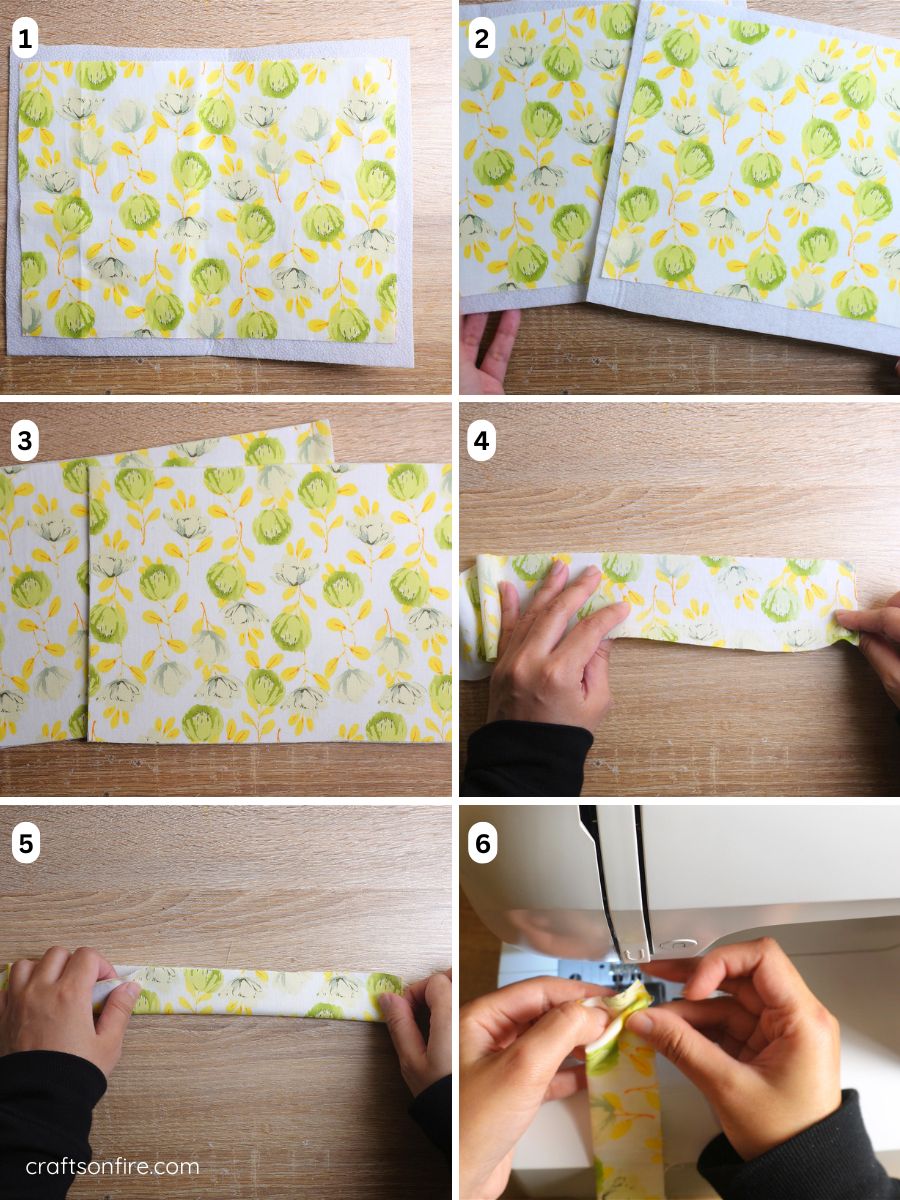
Step 1 – 2. Iron or sew the front and back fabric pieces to batting or interfacing pieces. You may quilt these pieces if you prefer.
Step 3. Remove any extra batting fabric from the sides and set it aside for now.
Step 4. Grab the ruffle strip.
Step 5 – 6. Fold the strip in half – the right side of the fabric must face you. Then, head over to the sewing machine to start ruffling. Note: You may also use a ruffle foot instead to create this ruffle strip.
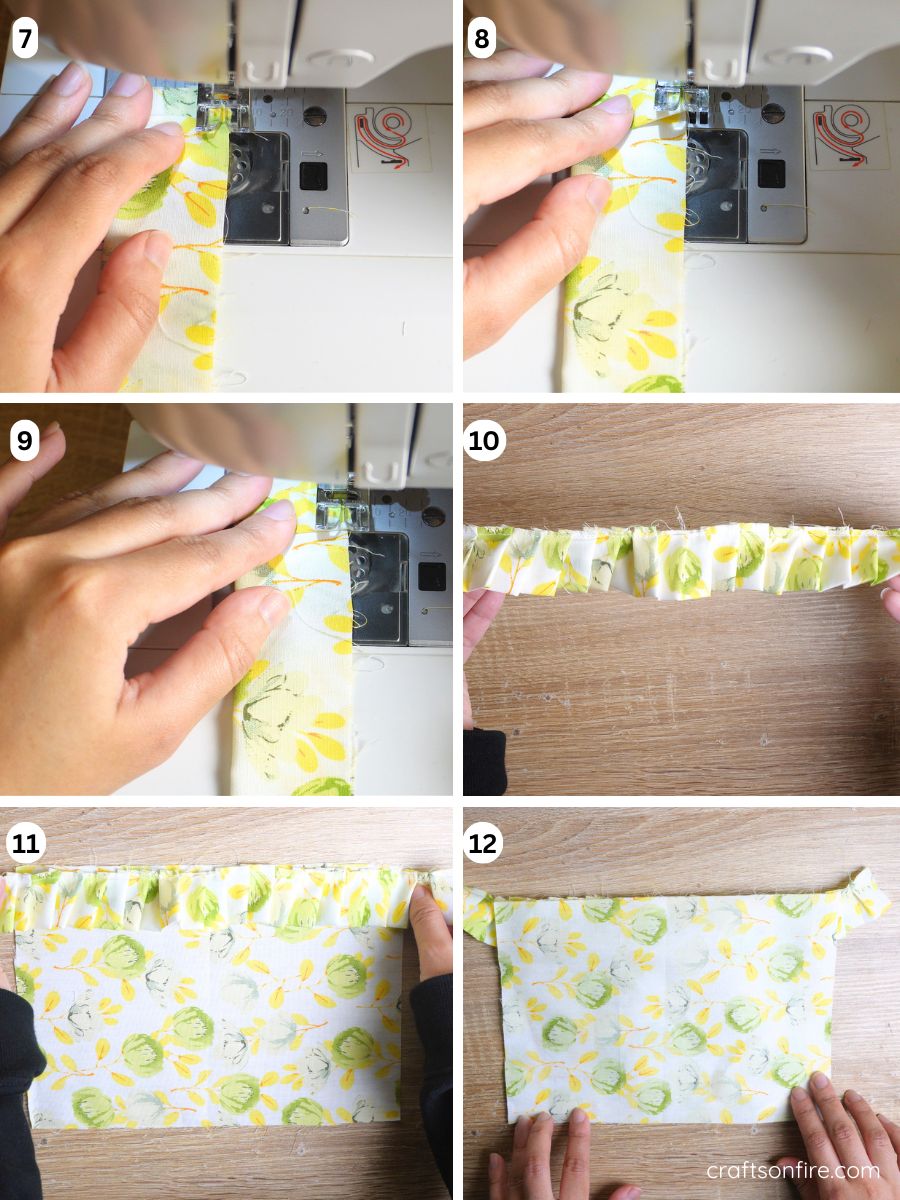
Step 7- 8. Fold a small section of the fabric and begin sewing.
Step 9. To create more ruffles, lift the sewing foot, fold the fabric again, place the sewing foot down, and then sew.
Step 10. Continue to lift, fold, and sew until your strip is fully gathered.
Step 11. Next, take the first pocket piece and place it right side up. Then, position the ruffle strip along the top edge, ensuring the folded edge is facing inward. Pin the ruffle strip to the fabric piece.
Step 12. Take your second piece of pocket fabric and lay it over with the right sides facing each other.
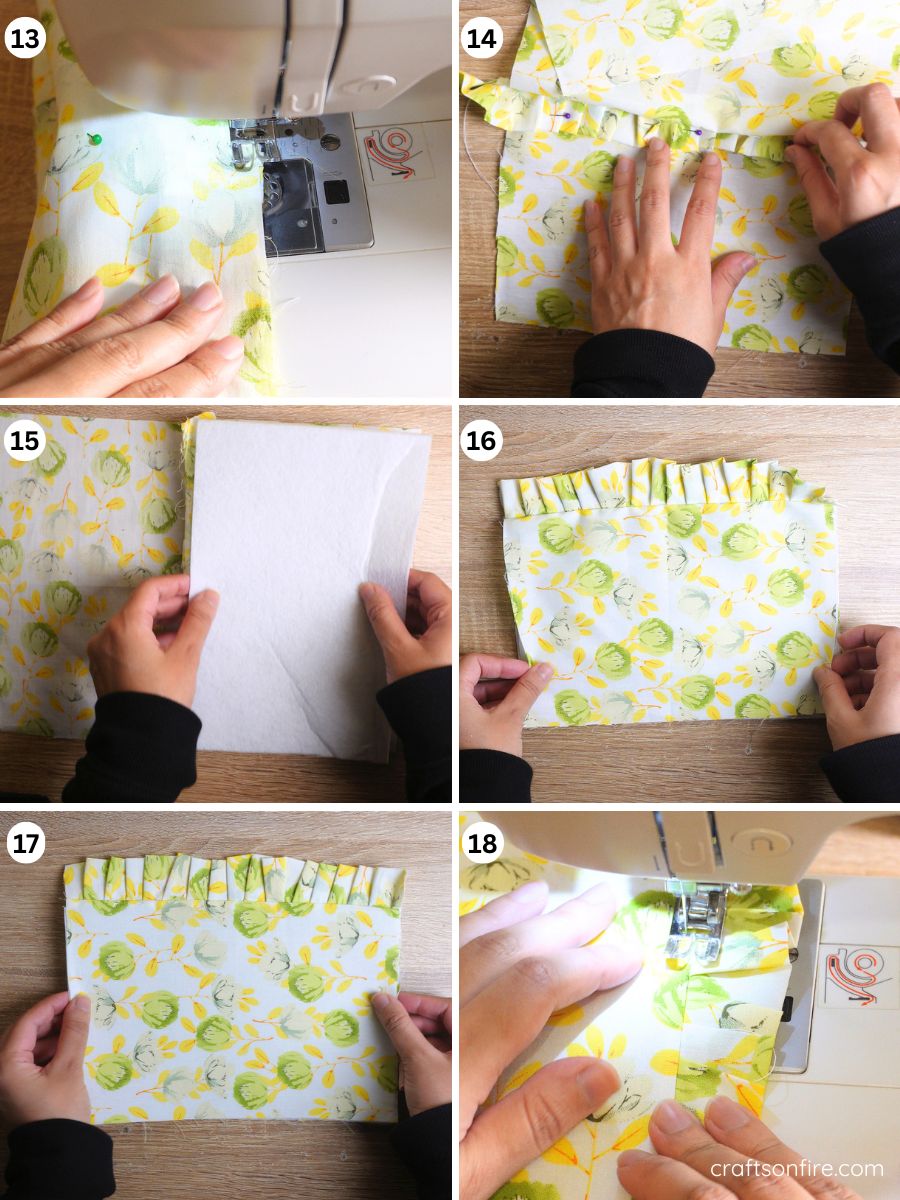
Step 13. Go to the machine and stitch the three pieces together using a small seam allowance.
Step 14. Open the stitched piece and place the pocket batting or interfacing on one side. Fold the other end over the batting.
Step 15 – 18. The right side of the patterned fabric should face you. Iron the pieces together, and then head to the sewing machine to add a topstitch.
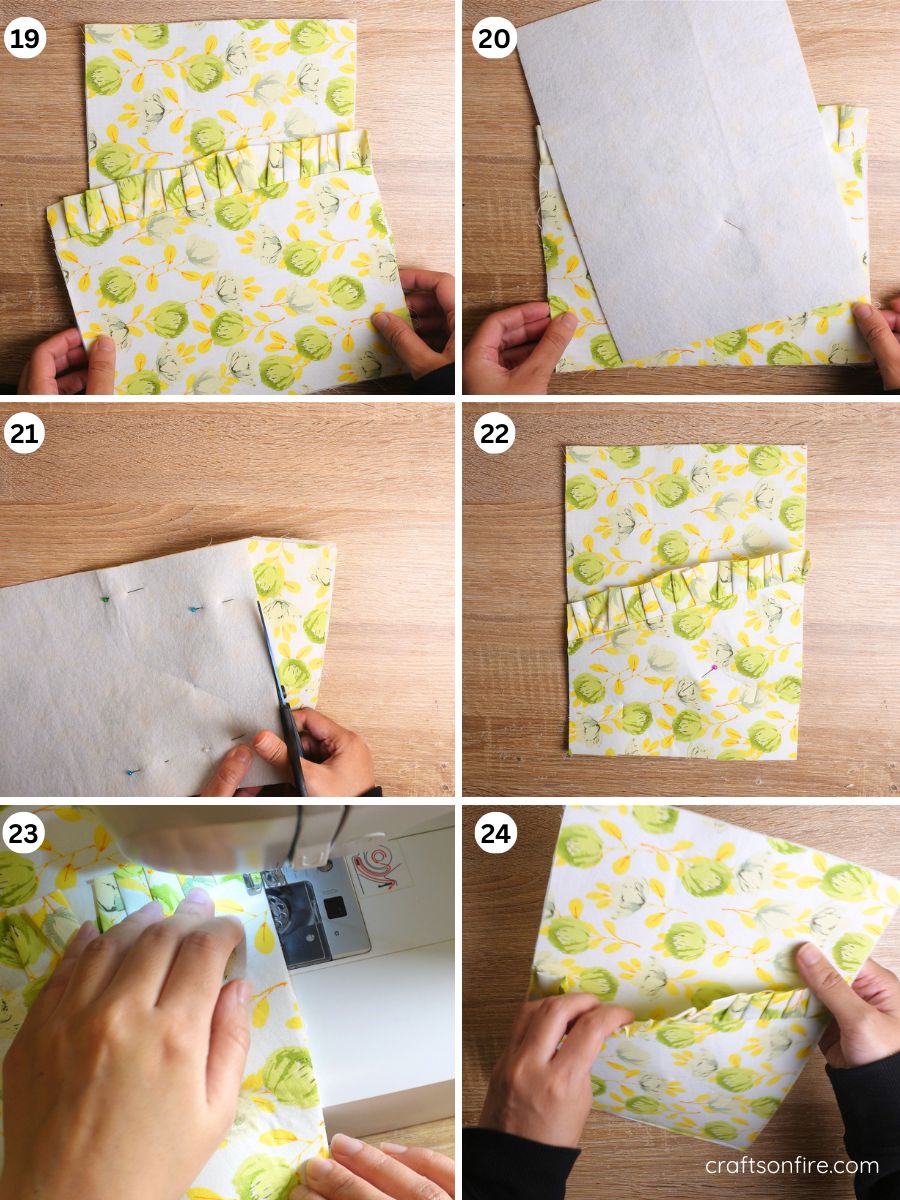
Step 19. To assemble the pocket, grab your front piece and lay the pocket piece over in an angle.
Step 20. Go ahead and pin the layers so they remain in place. Then, turn the piece over to the wrong side.
Step 21. Trim away the excess fabric from the sides of the pocket piece, as illustrated above.
Step 22 – 23. Head to the machine to stitch and secure the two layers together.
Step 24. Your front pocket piece is complete. You should now have both a front and back piece for your book sleeve.
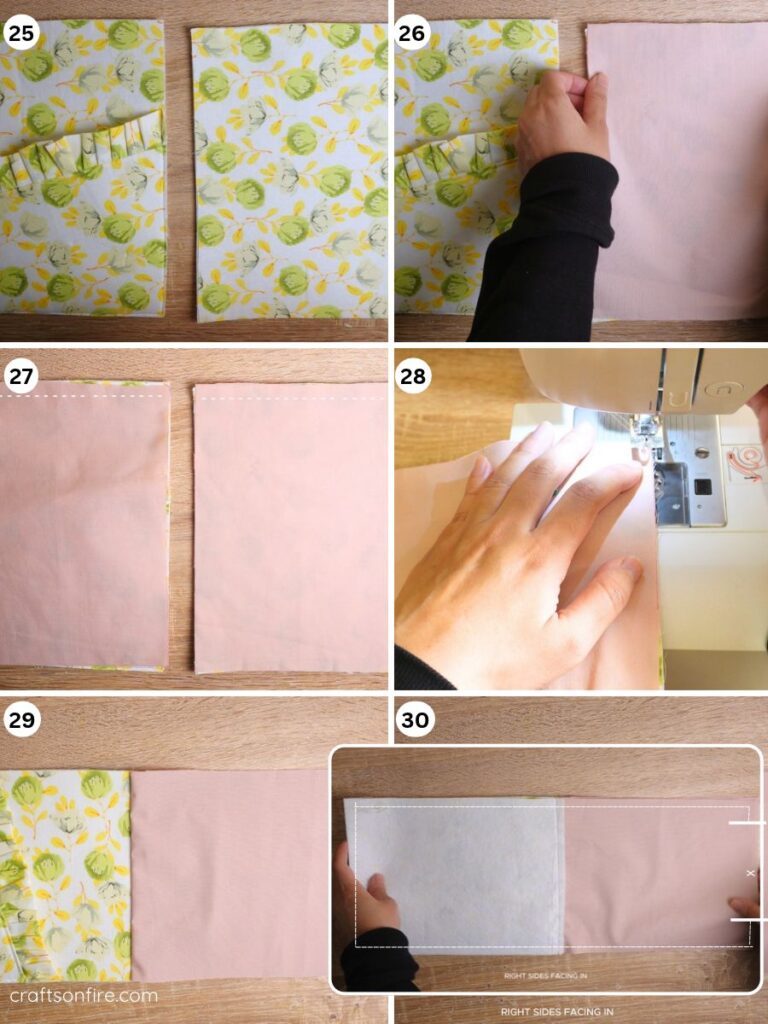
Step 25 – 26. Place your lining pieces over the back and front pieces, ensuring the right sides face in.
Step 27 – 28. Sew a 1 cm seam at the top of both pieces as shown.
Step 29. After stitching the lining to the front and back pieces, open them so the right sides are facing you.
Step 30. Pair the two pieces right sides together. Position the lining pieces together, as well as the front and back pieces.
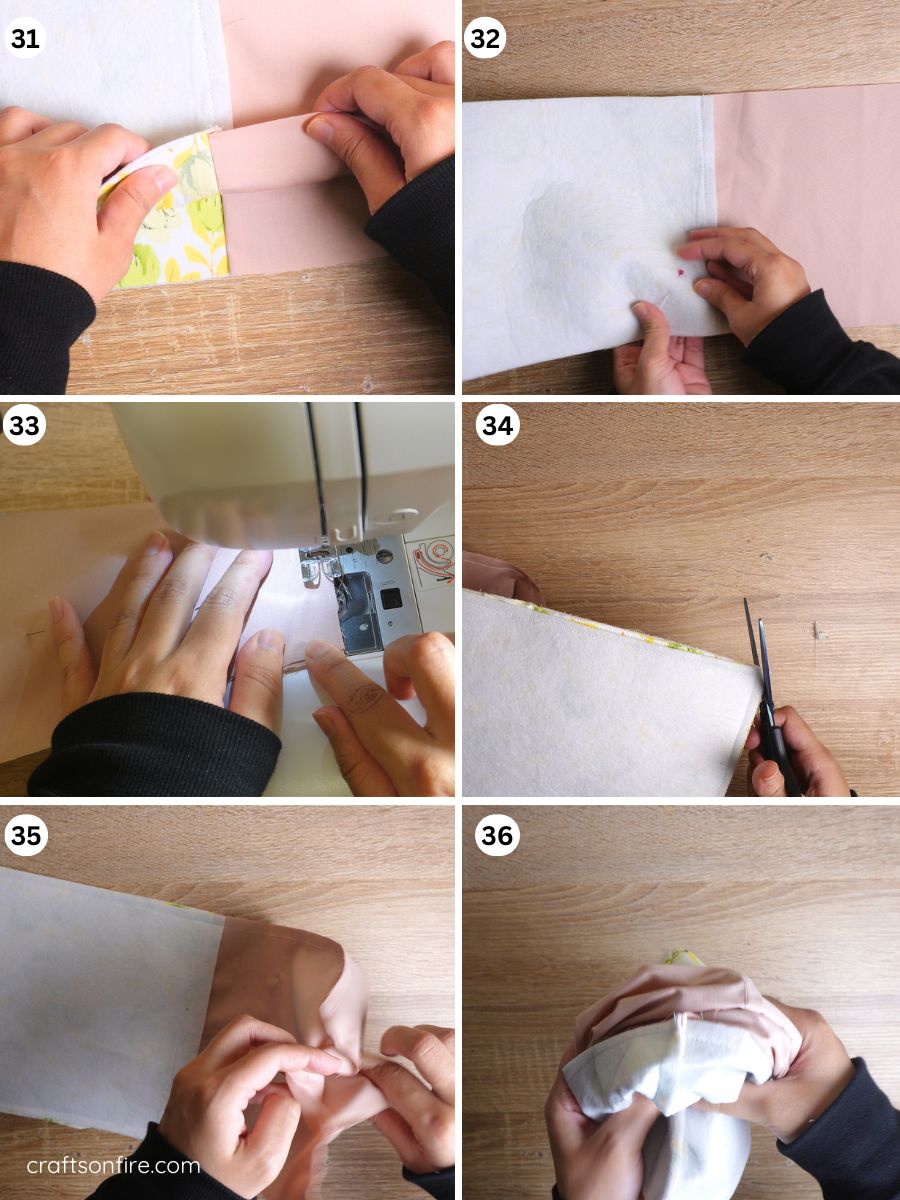
Step 31. Ensure that the middle seam lines match.
Step 32. Stitch the pieces together as outlined in step 30, leaving a 9 to 10 cm (3.54 to 4 inches) opening on the lining side to turn the piece right side out. Use a 1 cm (0.40″) seam allowance.
Step 33 – 35. Once your piece is sewn, trim the corners. Next, go to the unstitched section and open the fabric.
Step 36. Grab the batting side and fold it through the opening. Then, place your hand inside to open the corners.
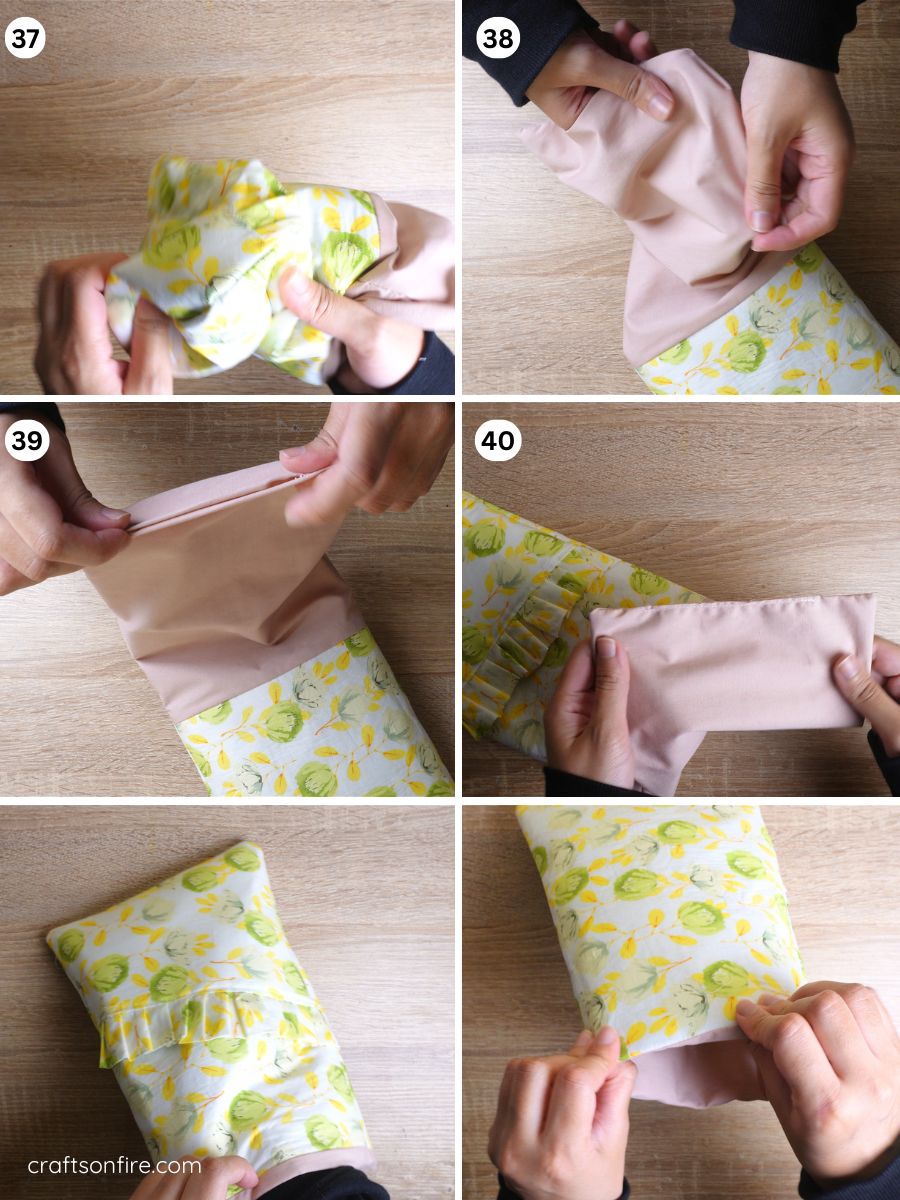
Step 38. Once the piece has been turned to the right side, open out the corners of the lining.
Step 39 – 40. Fold the raw edges of the opening in and sew it closed.
Take the lining piece and place it back inside the pouch. Adjust the inner fabric and iron the fabric so that it stays in place.
Remove the front part of your sewing machine and place the pouch. Then, sew a topstitch.
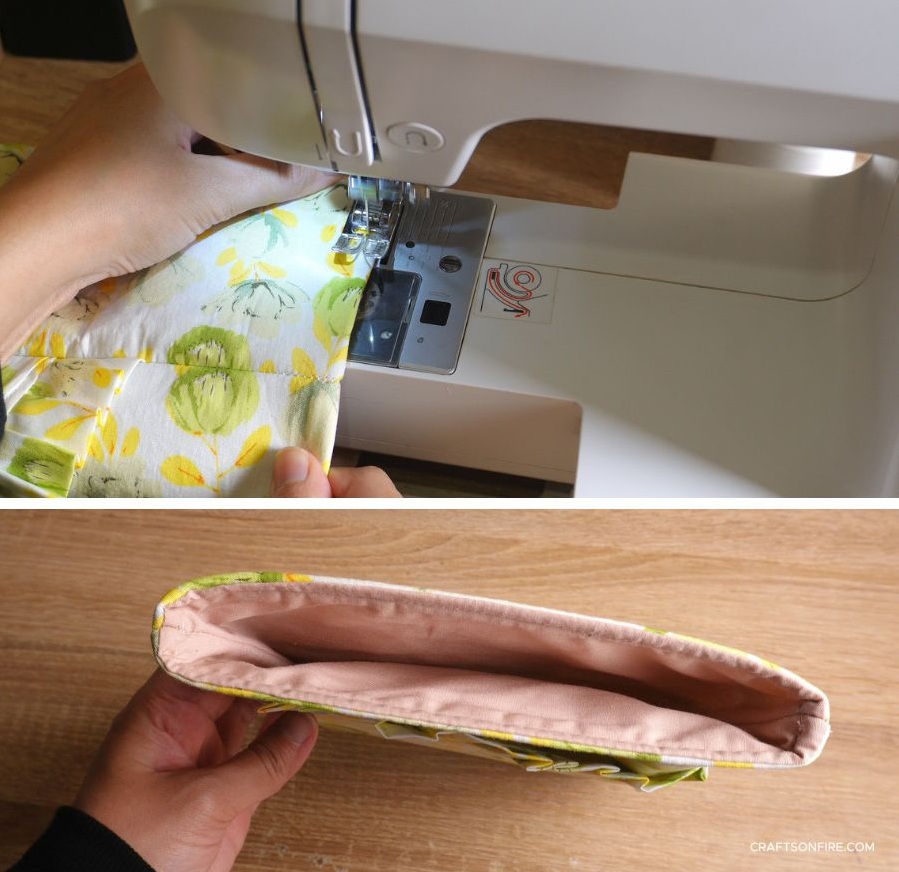
So, how did your book sleeve turn out? This one is ideal for your paperbacks, and there’s enough pocket space to store a few highlighters and sticky notes.
I do hope you found this book sleeve tutorial easy and quick to follow, but if you need further guidance, please don’t forget to watch the YouTube video guide!
If you want more easy sewing tutorials like this, you might want to check out my other book sleeve guides or ruffle pouches. They’re just as fun, cute, and easy to make!
Here are a few that I highly recommend sewing next: